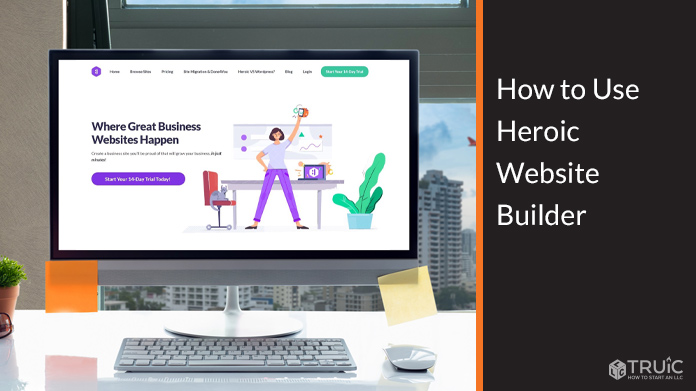
How To Use the Heroic Website Builder: A Beginner’s Guide
Heroic offers a simple, intuitive, website-building platform that enables users to create high-performance websites in minutes.
One of its biggest benefits is its simplicity. But, a better understanding of Heroic’s responsive visual editor and three setup options can help you streamline the process of building your site — especially if you intend to build it from scratch. This guide provides a detailed tutorial of the platform to help you get started.
Signing up With Heroic
Before you get started, you’ll need to create an account with Heroic. To do so, visit HeroicNow.com where you’ll see a call-to-action (CTA) button labeled “Start Your 14-Day Trial Today!” Click on that button to set up your account.

You’ll then reach a page where you must select the method you want to use to create your website. Your options include “Fastest!,” “Advanced,” and “Done4You.” To continue, choose your preferred option and click on the “Get Started!” button.

Build a Heroic Website Using “Fastest!” or “Done4You” Methods
If you choose the “Fastest!” option to create your website, you’ll reach a page with a variety of premade templates. The Heroic website builder sorts them into categories, including “Coach,” “Speaker,” “Author,” “Consultant,” “Health & Fitness,” and more. Each template includes a detailed description of its features. When you find the template you want to use, click on the “Start With This” button.
If you choose the “Done4You” option, the Heroic website builder will ask you 13 questions about your business. Your answers will then help the platform automatically match you with one of its premade templates.

Once you select the template you want to use to create your website (or complete the “Done4You” template-matching process), you’ll reach a page where you must enter your name and email address as well as create a password. When you finish, click on the “Create My Heroic Account Now!” button.

On the next page, you’ll need to select the plan you want to use when your free trial ends and provide your credit card information. But, you won’t incur a charge until your 14-day, free trial expires. Heroic only asks for this information now in an effort to avoid an interruption in your service.
Continue to the next page by clicking on the “Create My Heroic Account Now!” button.
Note: For more information on Heroic’s plan tiers, read our Heroic Review.
Build a Heroic Website Using “Advanced” Method
By walking through the “Advanced” setup method, this guide will give you an in-depth look at the Heroic website builder’s key tools and functionality.
Creating Pages in Heroic
After you select the “Advanced” method as your setup option and enter your account details, you’ll automatically reach Heroic’s responsive, visual editor. The page will appear as a blank canvas.
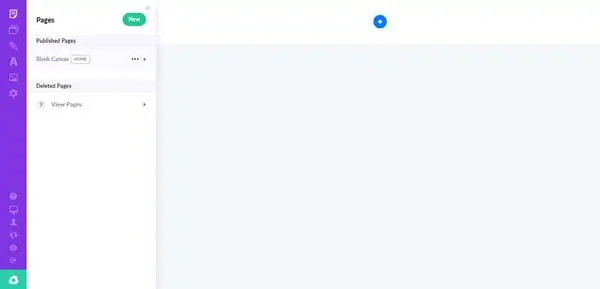
To create a page:
- Click on the “Pages” icon at the top of your visual editor’s left-hand menu to open the “Pages” menu.
- Click on the green “New” button in the upper-right corner of that menu.
- Select a category for your page from the available options: “Home,” “Products/Services,” “Blog/Podcast,” “Funnel,” “Misc,” and “Popup Modals.”
- Click on the “Start With Blank” button to continue creating your website from scratch.
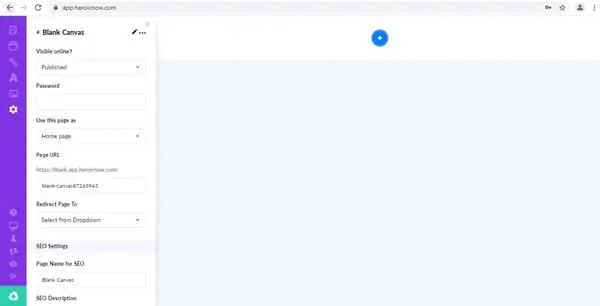
To edit page settings:
- Click on the “Pages” icon at the top of your visual editor’s left-hand menu to open the “Pages” menu.
- Hover over the page you wish to edit and click on the ellipses (“⋯”) icon next to that page’s name. Your editing options will include “Delete,” “Duplicate,” “Settings,” and “Unpublish Page.”
- Select the “Settings” option.
- Choose whether or not this page will be visible online.
- Choose whether or not to require a password to access this page.
- Choose the page’s use (e.g., if it’ll serve as a homepage, product page, or something else).
- Modify the page’s URL, if desired.
- Modify your page’s search engine optimization (SEO) settings, including its SEO title, meta description, and image.
Adding Sections
Every page of your Heroic website will feature sections, which you can break down further into rows and columns. You may then fill those rows and columns with content, including text, images, and CTA buttons. To add content to a page, you must first add a new section.
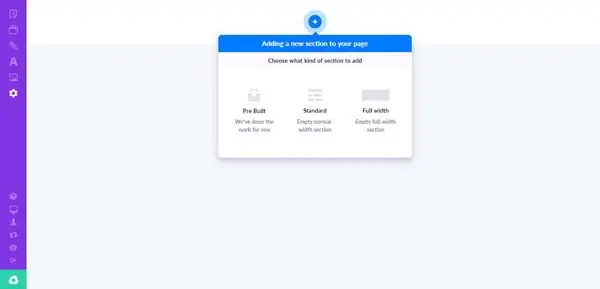
To add a section:
- Click on the blue plus sign (“+”) icon at the top of the blank page you wish to edit.
- Choose the type of section you want to add from the available options: “Pre Built,” “Standard” or “Full Width.”
- If you select the “Pre Built” option, you’ll arrive at a list of section templates from which you can choose. You can modify each of these templates, as needed.
- If you select either the “Standard” or the “Full Width” option, you’ll need to choose the number of columns you want in your section. As a best practice, use a single column for header sections.
Creating or Modifying Heroic Headers
Your homepage header is undoubtedly the most important section of your entire website. Nailing this section is crucial for engaging your site visitors and converting their visits into sales. To do this, you must begin by adding a few key elements.
Adding an Image
The right background image for your Heroic website can help you create an eye-catching, homepage header for your website. But, this image should align with your company’s branding.
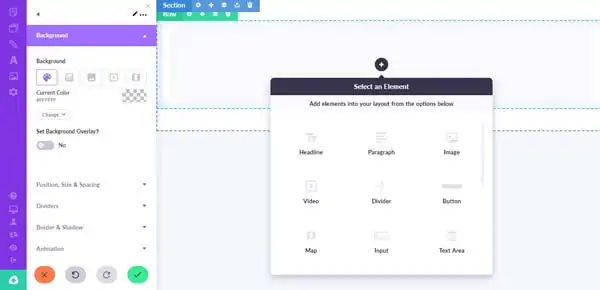
To add an image:
- Add a single-column section to your page or select a single-column section template from the “Pre Built” options.
- Hover over the new section and click on the plus sign (“+”) button to open the “Select an Element” pop-up window.
- Click on the “Image” icon.
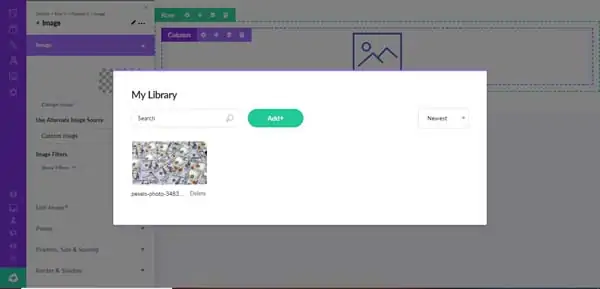
- To add your own image, click on the green “Add +” button and select a photo from your device.
- To use an image from the Heroic website builder’s image library, type a keyword into the search box to browse relevant options.
- Once you find an image that meets your needs, click on the “Download” button to add the image to your section.
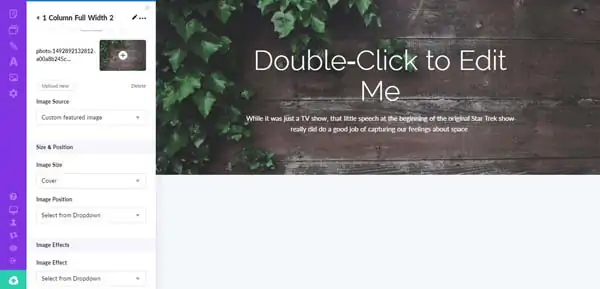
To edit image settings:
- Click on the image you wish to modify to open an editing menu on the left side of your visual editor screen.
- Adjust the image’s size and position, as desired.
- Choose your preferred image effects, such as adding a sepia or black-and-white filter or even a blurred effect.
- Choose your desired image overlay. This includes adding a color overlay to your image or a gradient.
- Click on the green “Checkmark” button at the bottom of the menu to proceed.
Adding Text
Text enables you to communicate valuable information about your business as well as your brand messages to site visitors.
To add text:
- Hover over your header section and click on the plus sign (“+”) button to open the “Select an Element” pop-up window.
- Click on the “Headline” icon to add headline text or the “Paragraph” icon to add subhead text.
- Fill the text box that then appears with content related to your business.
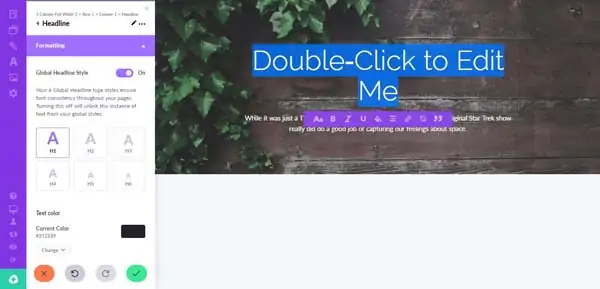
To edit text settings:
- Highlight the text you wish to edit. A menu will then appear on the left side of your visual editor screen along with an editing toolbar right below the highlighted text.
- Use the toolbar below the text to edit the text’s font size, color, alignment, and style (e.g., italicized, underlined, and/or bolded) as well as to add quotation marks or a hyperlink.
- Use the menu on the left side of your screen to modify your global headline style as well as the headline text color.
- Click on the green “Checkmark” button to continue.
Make sure your font and branding matching your business website. Check out our Best Website Fonts guide to learn more.
Adding Other Heroic Features
From buttons to social media icons, the addition of other key elements to your business website can help you make the most of your online presence.
Adding Buttons
Buttons are how your site visitors convert their interest into action. Draw their attention with an eye-catching design and compelling text to increase your conversion rates.
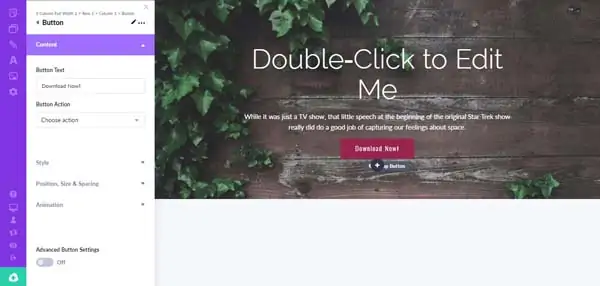
To add a button:
- Hover over the section you want to modify and click on the plus sign (“+”) button to open the “Select an Element” pop-up window.
- Click on the “Button” icon. A “Download Now” button will automatically appear in your section along with a “Button” menu on the left side of your visual editor’s screen.
- Use that menu to adjust the button settings. For example, you can:
- Change the button’s text.
- Make the button navigate to a page or URL, open a pop-up window, or call a number.
- Adjust the button’s size under the “Style” section.
- Change the button’s position (e.g., left, center, or right) under the “Position, Size & Spacing” section.
- Click on the green “Checkmark” button to save your changes.
Adding Social Media Icons
Adding social media icons to your website makes it easier for your visitors to find and engage with your business’s social media content.
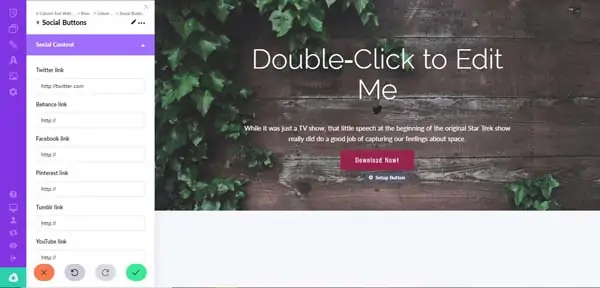
To add social media icons:
- Hover over the section you want to modify and click on the plus sign (“+”) button to open the “Select an Element” pop-up window.
- Click on the “Social” icon. A menu will then appear with a list of social media platforms to which you can link your site.
- Enter the URL(s) of your business’s social media account(s).
- Click on the green “Checkmark” button when done.
Adding Site Navigation
A clear, concise navigation menu will help your site visitors easily find what they seek.
To add a navigation menu:
- Hover over the header section of your website’s homepage and click on the plus sign (“+”) button to open the “Select an Element” pop-up window.
- Click on the “Navigation” icon to add a navigation menu to this section.
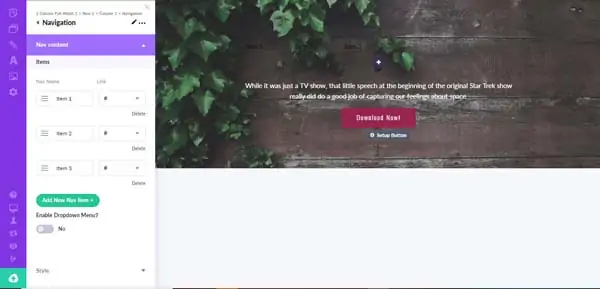
To edit site navigation:
- Click on your site navigation menu to open the “Navigation” menu on the left side of your visual editor screen.
- Use this menu to edit the name for each navigation item.
- Next, edit the link for each navigation item (e.g., another page on your site or any URL of your choosing).
- Click on the “Add New Nav Item +” button to add a new navigation item.
- Adjust the toggle for the “Enable Dropdown Menu?” option if you want to add a drop-down menu.
- Click on the green “Checkmark” button to save your changes.
Adding Pop-up Windows
Pop-up windows can help you immediately catch your visitors’ attention, such as by alerting them to discounts or directing them to another page on your site.
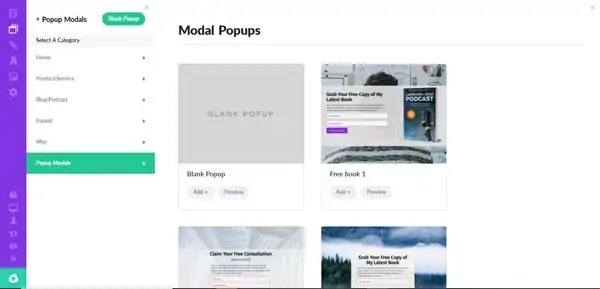
To add a pop-up window:
- Click on the “Pop-up” icon near the top of your visual editor’s left-hand menu to open the “Popup Modals” menu.
- Click on the green “Blank Popup” button.
- Scroll through the available pop-up window templates until you find one that meets your needs.
- Click on the “Add +” button beneath the pop-up window template you want to use. (After adding it to your site, you can edit its text, image, and button to suit your needs.)
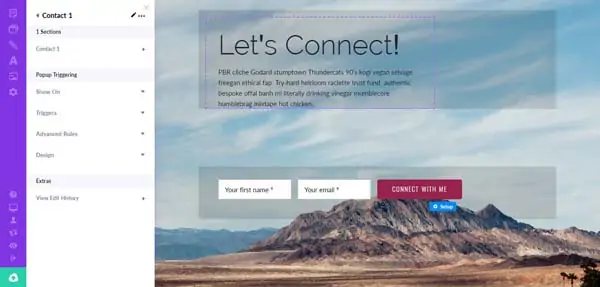
To edit a pop-up window’s settings:
- Click on the “Pop-up” icon near the top of your visual editor’s left-hand menu to open the “Popup Modals” menu.
- Click on the pop-up window you wish to edit. A menu will then appear on the left side of your visual editor screen.
- Under this menu’s “Popup Triggering” section, choose the page on which your pop-up window will appear.
- Next, choose the triggers (e.g., at page load, when visitors scroll down the page, or when visitors scroll to or click on a specific element).
- Include advanced rules, if desired, by adjusting the toggles next to each rule and editing the settings (e.g., you can set the “Show After X Page Views” rule to as little as one or as many as 1,000 views).
- Modify the pop-up window’s design features, if desired, such as the color of its CTA button.
Adding a Blog
A blog can not only help you connect with your target audience, but also increase engagement with site visitors.
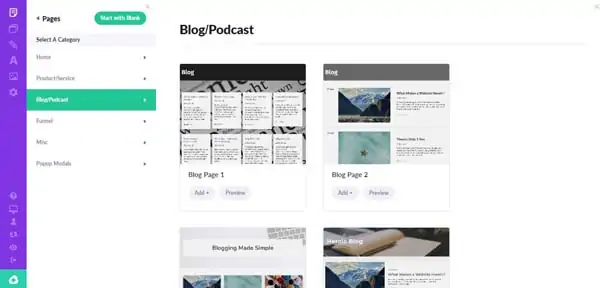
To add a blog:
- Click on the “Pages” icon at the top of your visual editor’s left-hand menu to open the “Pages” menu.
- Click on the green “New” button in that menu.
- Select “Blog/Podcast” from the list of page categories.
- Review the available blog templates and choose one that suits your needs.
- Click on the “Add +” button beneath your chosen blog template to add the blog to your page.
To add a blog post:
- Click on the “Pencil” icon in your visual editor’s left-hand menu to open the “Unpublished Posts” menu.
- Click on the green “New” button at the top of this menu.
- Enter a title for your blog post.
- Create a permalink for your blog post.
- Fill the text box with your blog post content.
- Edit the format of your blog post’s text (e.g., you can select normal or heading levels one to five).
- Adjust the font settings, including the text’s style (e.g., bolded or Italicized) and alignment.
- Add images to your blog post by clicking on the “Image” icon, and then selecting your featured image by clicking on the “Change Image” link in the menu that appears on the right side of your screen.
- Select the blog post’s status and publication date.
- When done, scroll down and click on the green “Save” button.

Adding Heroic Integrations
The addition of a few extra tools to your website can help improve the overall user experience (UX) and create a dialogue with your customers. You can find these tools in the “Site Settings” portion of the Heroic visual editor.
Adding Email With Mailchimp
Integrating your website with the Mailchimp marketing platform can help you to more easily convert site visitors’ interest into sales. To do this, you’ll need a Mailchimp account and your Mailchimp application programming interface (API) key.
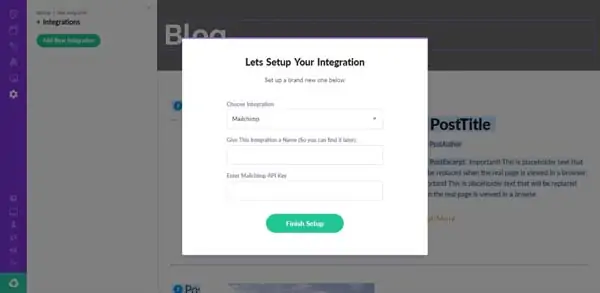
To add email with Mailchimp:
- Click on the “Site Settings” icon in your visual editor’s left-hand menu to open the “New Integration” menu.
- Click on the “Integrations” option.
- Click on the “Add New Integration” button.
- Select “Mailchimp” from the available options in the “Choose Integration” drop-down menu.
- Enter a name for your integration so you can easily find it later.
- Enter your Mailchimp API key.
- Click on the “Finish Setup” button to continue.
You also may add email integrations with Infusionsoft (now Keap), AWeber, and Mad Mimi following the above steps.
Adding Billing With Stripe
Integrating your website with the Stripe payment platform can allow you to easily accept payments online. To do this, you’ll need a Stripe account and your Stripe private key.
To add billing with Stripe:
- Click on the “Site Settings” icon in your visual editor’s left-hand menu to open the “New Integration” menu.
- Click on the “Stripe Billing” option.
- Click on the “Add New Stripe Billing” button.
- Enter your private key and click on the “Check Private Key” button to continue.
- Click on the green “Checkmark” button at the bottom of the “New Integration” menu after confirmation of your Stripe account.
Once you set up billing with Stripe, the option to accept Stripe payments will appear in your button action settings.
Publish and Test Your Heroic Website
After you finish updating your new website with text, images, and other information relevant to your business, it's time to publish and test the site. Initially, Heroic assigns all of its users a subdomain that includes “HeroicNow” in the URL.
Start by testing your website on your assigned subdomain so you can ensure it looks and functions as expected before it goes live on your business’s domain. If something’s not right, return to your visual editor to make the needed adjustments.
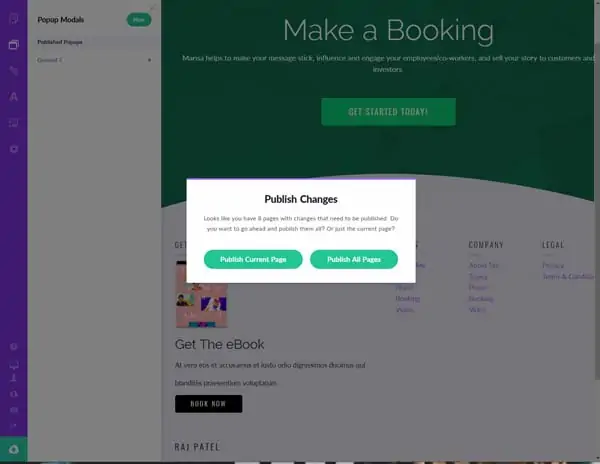
Publishing to a Subdomain
To publish your Heroic website, click on the green “Upload” icon in the lower-left corner of your screen (it looks like a cloud with a plus sign). You’ll then need to decide if you want to publish all of the pages on your site or just your current page. Click on the “Publish All Pages” button.
If you’re satisfied with your website, you can proceed. If you dislike any elements of your site’s appearance or functionality once published to your subdomain, return to the Heroic visual editor to make any necessary changes before you proceed.
Testing Your Heroic Website
After you publish your site to your subdomain, return to the visual editor and look for the “Computer” icon in the lower-left corner. Hover over this icon to open more options that’ll enable you to edit your website for mobile devices and tablets. Toggle through each to preview how your website will appear on different devices.
If you need to make any changes to your site so it appears correctly on mobile devices, do so now before you publish it to your business’s domain.
Publishing to a Domain
Congratulations! You successfully built a functional website using Heroic’s simple, website-building software. It’s now time to find a permanent domain for your website.
Note: Need help choosing a domain for your business? Check out our Domain Name Generator.
While it’s easiest to use a domain from Heroic, you also can connect to a domain you purchase from another domain host.
Publishing to an Existing Domain on Heroic
If you already purchased a domain from Heroic, you may connect your new website to your existing domain.
To use a domain you already own:
- Click on the “Settings” icon in your visual editor.
- Select the “Site Settings” option in the menu that then appears.
- Click on the “Custom Domain” button.
- Enter your domain name and click on the “Connect Domain” button.
- Follow the prompts to connect your domain to your site.
Purchasing a Domain from Heroic
If you don’t already have a domain, you can easily purchase one from Heroic.
To purchase a domain from Heroic:
- Click on the “Settings” icon in your visual editor.
- Select the “Site Settings” option in the menu that then appears.
- Click on the “Custom Domain” button.
- Click on the “Get One Here” button to navigate to a page where you may select a domain.
- Choose your domain and complete your purchase.
Final Thoughts
Hopefully, this guide proved helpful as you built your Heroic website. To learn more, check out our Heroic Review, these beautiful Heroic website examples, or these related articles: