Best AeroPress Wave Recipes for Your Coffee Shop
Manual brew methods represent an essential addition to any coffee shop menu, making the recipes used to produce these special beverages increasingly important. This guide to the best AeroPress Wave recipes can help you decide which one is right for your coffee shop.
Recommended: Read our full, in-depth How to Start a Coffee Shop Business guides, inspired by coffee professionals, they will help make your coffee dreams real, from sourcing beans to hiring baristas, choosing the best POS system, forming an actual company, and everything in between.

What’s an AeroPress Coffee Maker?
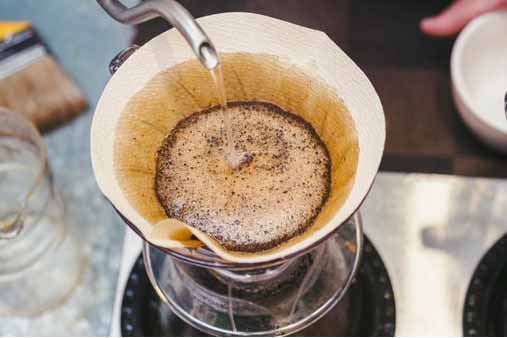
While its manufacturer — Aerobie, Inc. — started selling sports toys in 1984, it didn’t invent the AeroPress coffee maker until 2005. After a few years of product promotion, the AeroPress coffee maker took off and now represents one of the most popular manual brew methods. It uses a combination of pressure and immersion. It’s also one of the fastest manual brew methods, producing a delicious cup of coffee in just one to three minutes.
Why Use an Aeropress?
The AeroPress manual brew method not only has the ability to decrease acidity and bitterness but also promises an easy cleanup after producing a flavorful cup of coffee. Once you finish brewing your beverage, you just push out and discard the used coffee grounds and filter. This simple cleanup process is key to keeping a cafe running efficiently and maintaining a clean appearance. In addition, this manual brew method is one of the most efficient with brew times typically taking less than three minutes.
Popular AeroPress Recipes
Producing high-quality coffee starts with your chosen brew method. Yet, how you extract the coffee inside an AeroPress coffee maker also impacts your ability to create a full-bodied, clean cup of coffee that showcases your product as well as your skills to coffee connoisseurs.
Read on for some general tips to follow when using an AeroPress coffee maker as well as four popular AeroPress recipes to try with your coffee.
General Recommendations
- Shake the AeroPress coffee maker to even out the coffee grounds after adding them to the brew chamber.
- Unlike the standard 200 degrees Fahrenheit used in most manual brew methods, 175 degrees Fahrenheit is the optimal water temperature for AeroPress coffee makers.
- Try using this manual brew method for cold brew beverages by adding one minute to the brew time.
Equipment Needed
- AeroPress coffee maker
- AeroPress filters
- AeroPress coffee funnel
- Coffee grinder
- Coffee beans
- Timer
- Digital scale
- Kettle
Stumptown Coffee Roasters Recipe
- Coffee: 17 grams
- Water: 220 grams
- Grind: As fine as table salt
- Time: Under two minutes
Brewing Steps:
- Place a filter into the AeroPress cap and twist it onto the brew chamber.
- Preheat the AeroPress brew chamber and rinse the filter, discarding any excess water.
- Press the tare button on your digital scale, measure out 17 grams of ground coffee, and add it to the AeroPress brew chamber.
- Fill the AeroPress brew chamber with hot water to line number four or until you reach a weight of 220 grams. Spin the chamber to ensure even saturation.
- Stir the water and coffee mixture.
- Place the AeroPress plunger in the brew chamber to create an airtight seal above your coffee mixture, but don’t press down. Instead, set a timer for one minute and 15 seconds.
- When the timer goes off, remove the plunger and stir before plunging the coffee slowly.
This simple recipe, which typically yields between seven and eight ounces of coffee, makes it a winner in a cafe setting. The goal when using an AeroPress coffee maker is to achieve a fast, but effective manual brew method — and Stumptown’s recipe definitely honors that intention. Moreover, it produces a super clean cup of coffee.
Heart Coffee Roasters Recipe
- Coffee: 18 grams
- Water: 270 grams
- Grind: Finer than grounds used for filtered, drip coffee
- Time: About three minutes
Brewing Steps:
- Place a filter into the AeroPress cap and twist it onto the brew chamber.
- Preheat the AeroPress brew chamber and rinse the filter, discarding any excess water.
- Press the tare button on your digital scale, measure out 18 grams of ground coffee, and add it to the AeroPress brew chamber.
- Fill the AeroPress brew chamber with 270 grams of hot water that’s rested for about a minute after reaching the boiling point.
- Stir the water and coffee mixture.
- Place the AeroPress plunger in the top of the brew chamber to create an airtight seal above your coffee mixture, but don’t press down.
- Set a timer for 50 seconds and let the coffee steep.
- When the timer goes off, remove the plunger and stir.
- Place the plunger back on top of the brew chamber, set your timer for another minute and 45 seconds, and allow the coffee mixture to continue steeping.
- When the timer goes off for the second time, remove the plunger and stir for five seconds.
- Replace the plunger and push down slowly for 20 seconds.
While similar to the Stumptown version, this recipe includes an additional stir that breaks up the extraction time. This additional step promotes an even extraction, which contributes to a more balanced cup of coffee that maintains the clean taste and mouthfeel of the Stumptown recipe.
Blue Bottle Coffee Recipe
- Coffee: 15 grams
- Water: 200 grams
- Grind: Slightly finer than sea salt
- Time: About three minutes
Brewing Steps:
- Rinse a filter with hot water, place it into the AeroPress cap, and set it aside.
- Press the tare button on your digital scale, measure out 15 grams of ground coffee, and add it to the AeroPress brew chamber.
- Pour twice as much water as the coffee into the brew chamber (about 30 grams) and tamp it down gently to ensure full saturation. Let this mixture sit for 30 seconds.
- Use the remainder of your water (about 170 grams) to fill the brew chamber and let the mixture sit for another minute.
- Stir the mixture 10 times.
- Place the AeroPress cap with the filter on top of the brew chamber to create an airtight seal, and then carefully flip it over and begin pressing down.
- Once the coffee makes a “hissing” sound, it’s fully extracted.
Inverting an AeroPress coffee maker ensures the coffee and water make contact during the entire brew time — a technique known as “full contact.” This recipe uses that technique as well as a tamp method to promote even extraction. The time the coffee grounds spend immersed in water in this recipe is short, which helps boost cafe efficiency while generally producing a great cup of coffee. However, this shorter steep time also causes the flavor profile to taper off sooner than expected.
Counter Culture Coffee Recipe
- Coffee: 18 grams
- Water: 200 grams
- Grind: Medium-fine
- Time: About 2.5 minutes
Brewing Steps:
- Place the AeroPress plunger in the brew chamber to create an airtight seal.
- Set it on a flat surface in an inverted position so the plunger is on the bottom.
- Press the tare button on your digital scale, measure out 18 grams of ground coffee, and add it to the AeroPress brew chamber.
- Pour 100 grams of hot water into the brew chamber — filling it about halfway — and then stir the mixture.
- Add the remaining 100 grams of hot water and set a timer for one minute and 45 seconds.
- When the timer goes off, stir the mixture again. Then, twist the AeroPress cap — with a filter placed inside — onto the brew chamber.
- Let the coffee mixture steep for another 15 seconds before carefully flipping the AeroPress chamber onto a cup and slowly pressing the plunger.
Another inverted recipe with longer immersion time, the Counter Culture version makes a great option for cafes looking for a hassle-free, inverted recipe to use during daily operations. With its simple steps, this recipe produces a balanced cup of coffee without bitterness that nicely accents the coffee’s tasting notes.
Troubleshooting Your Recipe
As you experiment with different AeroPress recipes for your coffee shop, these tips can help you overcome some common issues:
- You should feel a small amount of resistance when plunging the coffee. If you don’t feel any resistance, then you’ve ground the coffee too coarsely and it won’t extract properly. If, on the other hand, you find it difficult to plunge the coffee, then you’ve ground the coffee too finely.
- Remember to test your water temperature. While many manual brew recipes require water that’s just off the boiling point at about 200 degrees Fahrenheit, the optimal water temperature for AeroPress coffee makers is 175 degrees Fahrenheit. Adjusting the water temperature may help you produce your desired flavor profile.
- Try different levels of pressure when pushing the AeroPress plunger to see what changes you can taste in the resulting cup of coffee.
Conclusion
The AeroPress coffee maker provides an efficient, easy-to-use manual brew method that creates an incredibly clean, sweet cup of coffee without any unwanted acidity or bitterness. Test a few of these recipes with your coffee until you achieve your desired result because every coffee is different. Be sure to also ask your coffee supplier about its recommended recipe for AeroPress coffee makers.