How To Add Google Analytics To WordPress: A Beginner’s Guide
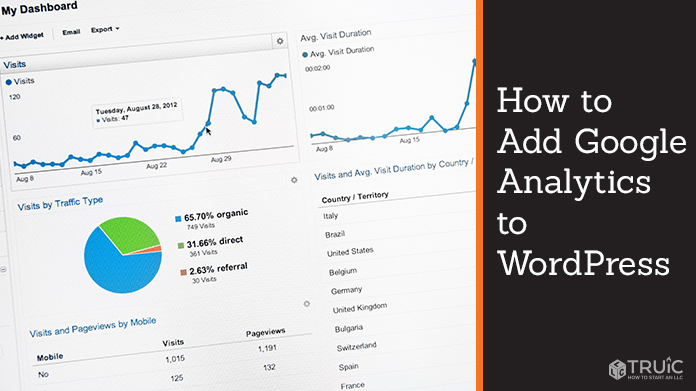
Do you want to better understand who visits your WordPress website and how they interact with its content? Google Analytics can provide this essential information for free. Join millions of Google Analytics users and start learning more about your audience.
This article will highlight the importance of Google Analytics, show you how to add Google analytics to WordPress and create a Google Analytics account. By following this step-by-step guide, you can start tracking your website traffic via Google Analytics within an hour.
New to search engine optimization? Check out our SEO Basics guide to learn more.
Why Is Google Analytics Important?
After you build a website for your business, you must then focus on driving visitors to that site. Google Analytics can provide the tools you need to learn who visits your website, how they find it, and how they interact with its content.
With this information, you can then improve your site’s content and overall user experience. In addition, you can use this data to discover what you must do to increase visitors and conversions. All businesses with a WordPress website also should have a linked Google Analytics account.
Need help with hosting your WordPress website? We recommend using GoDaddy to get your site up and running.
Step 1: Create a Google Analytics Account
Before you can add Google Analytics to your WordPress website, you must create a Google Analytics account.
To create a Google Analytics account:
- Visit the Google Analytics website.
- Sign in with your Gmail email address if you have one or create one if you don’t.
- Click on the “Start Measuring” button.

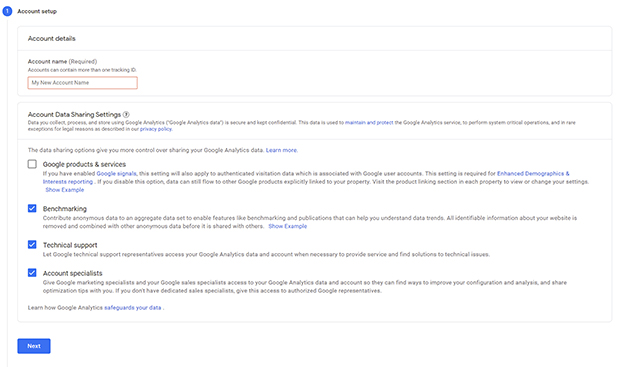
- In the “Account name” field, enter an account name (usually just the name of your business).
- Decide what data you want to share with Google, and then click on the “Next” button.
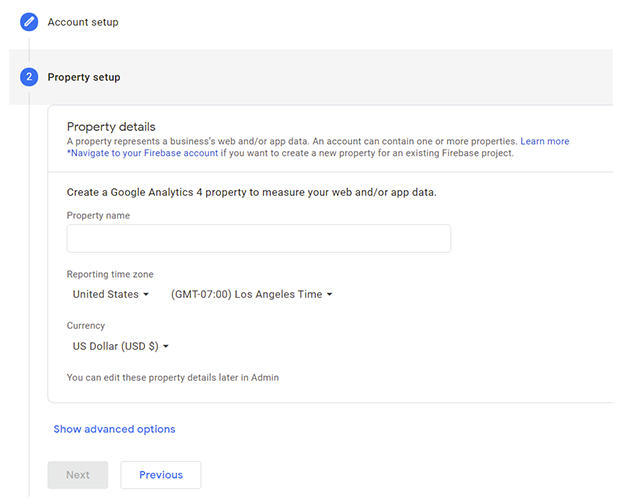
- You’ll then arrive on a “Property details” screen. Your property name is the name of your website (often the same name as your business). In the “Property name” field, enter your property name, and then select your time zone and local currency.
- Click the “Show advanced options” link.
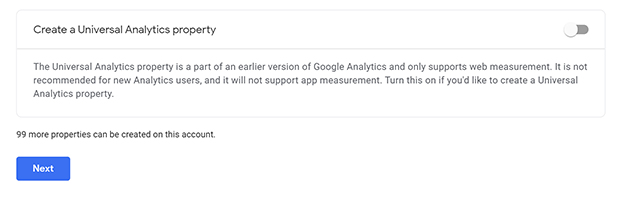
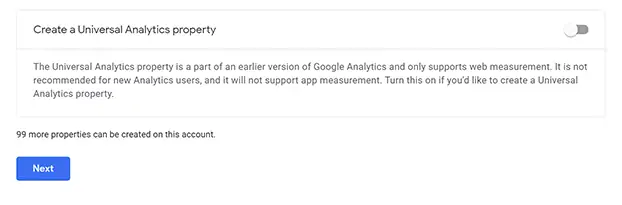
- Under “Create a Universal Analytics property,” switch the toggle to the “on” position.
- Click on the “Next” button.
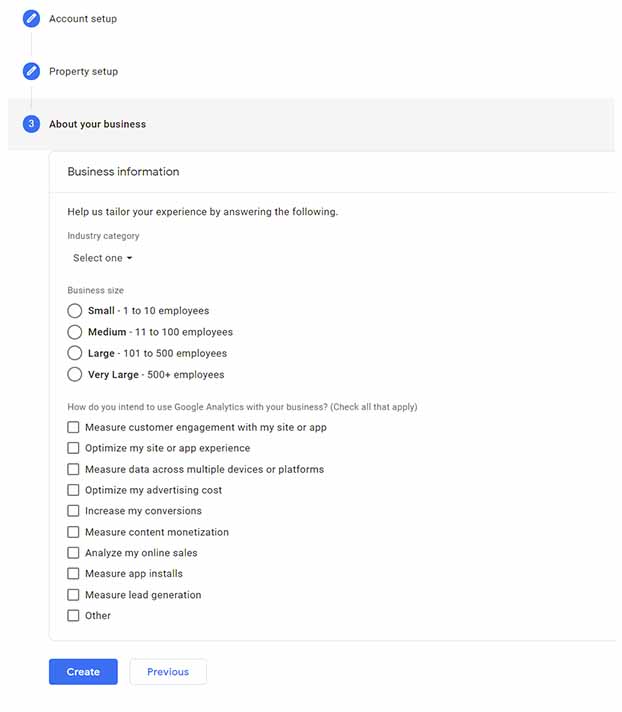
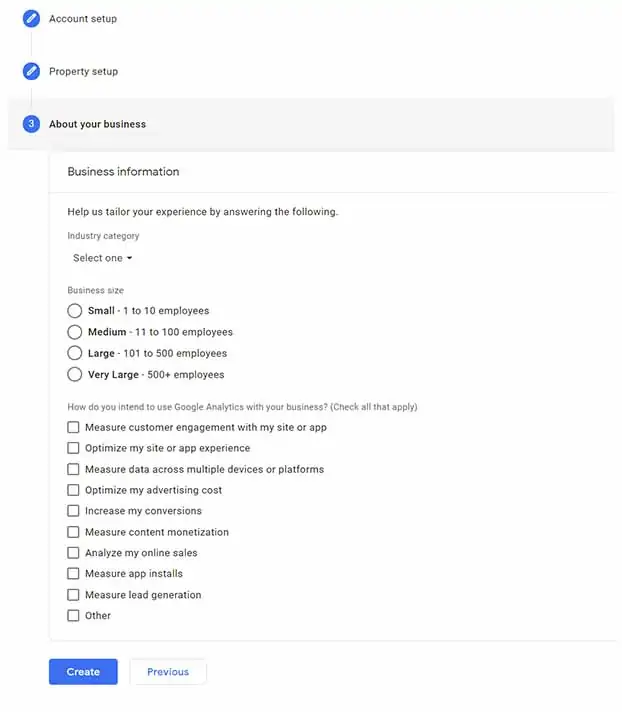
- You’ll then arrive on a “Business information” screen. Select your “Industry category” and “Business size.” Also check the appropriate boxes under “How do you intend to use Google Analytics with your business?”
- Click on the “Create” button.
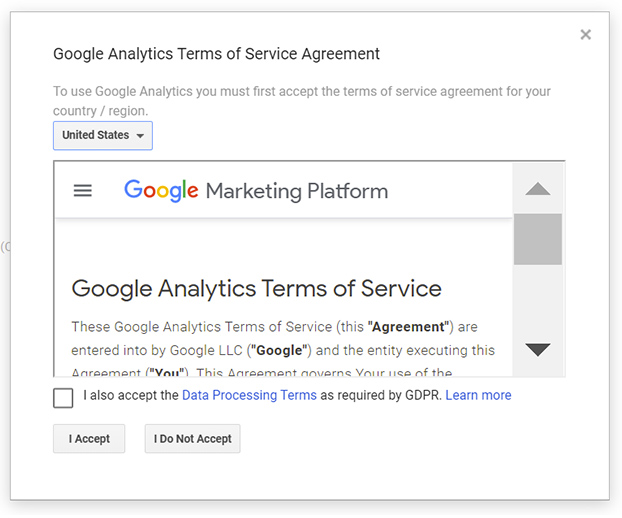
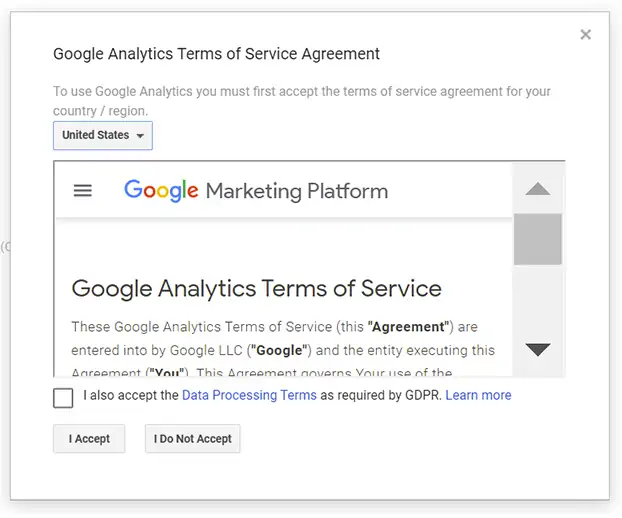
- Check the box to indicate you agree to Google’s Terms of Service and Data Processing Terms, and then click on the “I Accept” button.
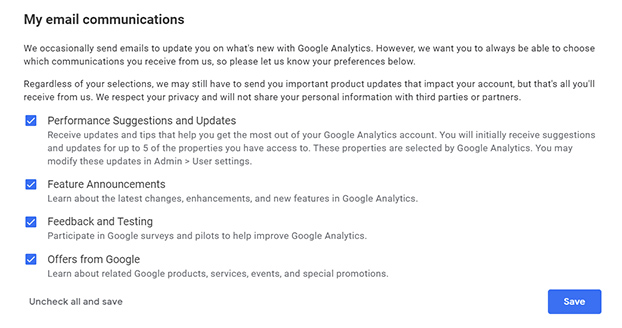
- Decide what email you want to receive regarding Google Analytics, check the appropriate boxes, and then click the “Save” button.
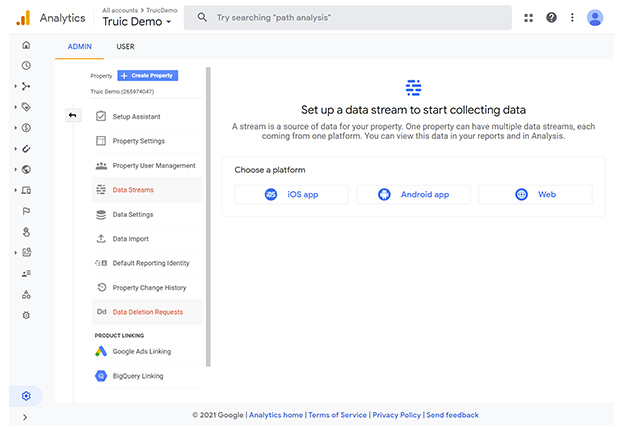
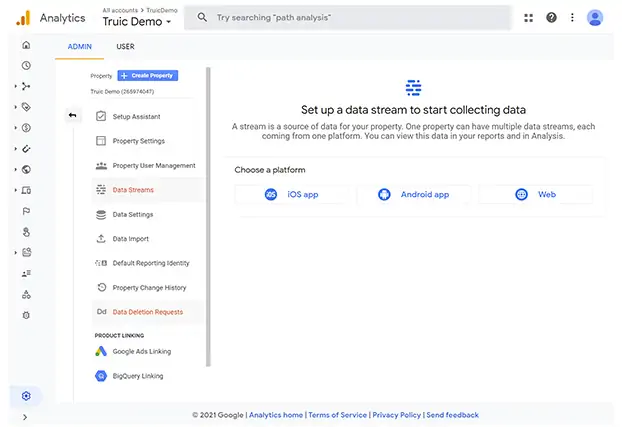
- Under “Set up a data stream to start collecting data,” click on the “Web” button.
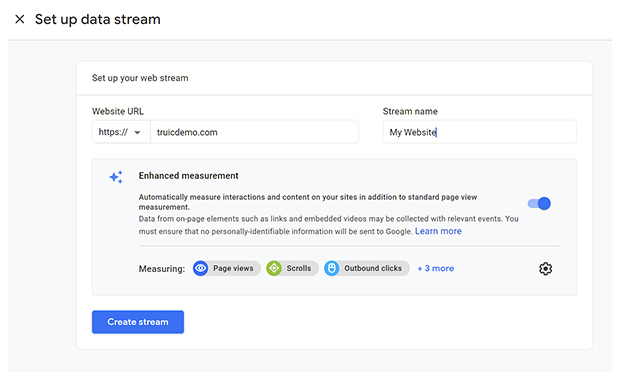
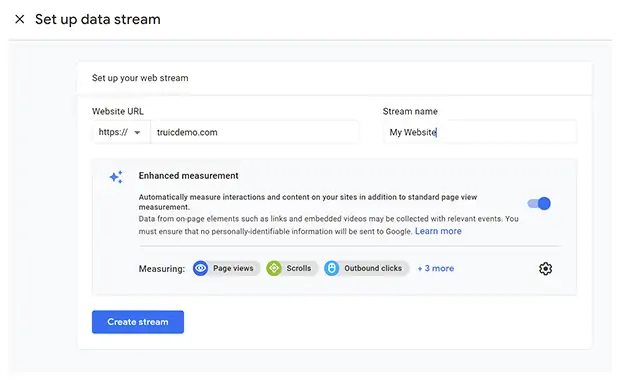
- Under “Website URL,” enter your website’s address. Under “Stream name,” enter the name of your website. Finally, determine if you want to activate Google’s enhanced measurement tools, and then click on the “Create stream” button.
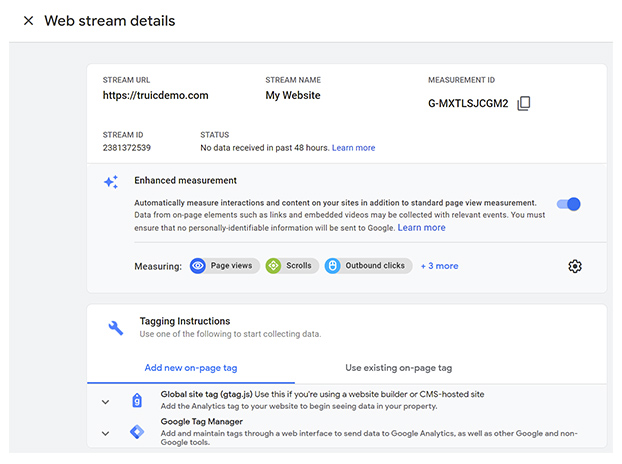
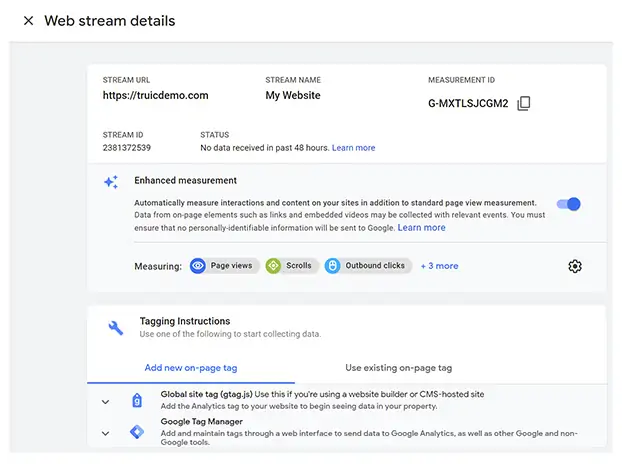
- When you see the below screen, you’ll know you successfully created a Google Analytics account.


Step 2 (Option A): Connect Google Analytics With a Third-Party Plugin
The easiest way to connect your Google Analytics account to your WordPress website involves installing a third-party plugin. A variety of plugins can help you accomplish this, but two of the most popular include the MonsterInsights and Insert Headers and Footers plugins.
To Connect Your Google Analytics Account Via the MonsterInsights Plugin:
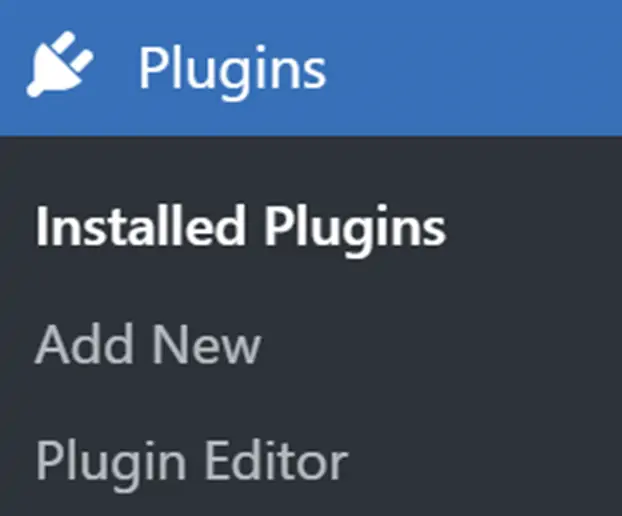
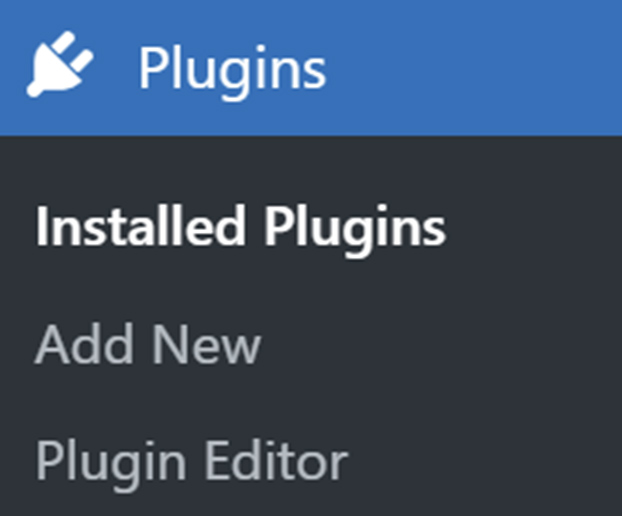
- Select “Plugins” and then “Add New” from the WordPress dashboard.

- Type “MonsterInsights” into the search box.
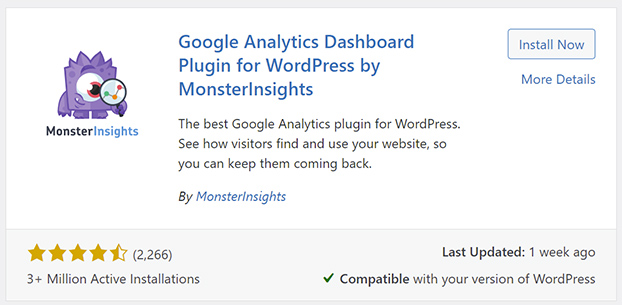
- When the above screen appears, click on the “Install Now” button.
- Then, click on the “Activate” button.
- On the next screen, click on the “Launch the Wizard!” button.
- Select the category that best describes your website, and then click on the “Save and Continue” button.

- The below screen will then appear. Click the “Connect MonsterInsights” button.

- Enter the email address you used to create your Google Analytics account, and then click on the “Next” button.
- Enter the password associated with the above email address, and then click on the “Next” button.
- On the security screen that follows, click on the “Allow” button.

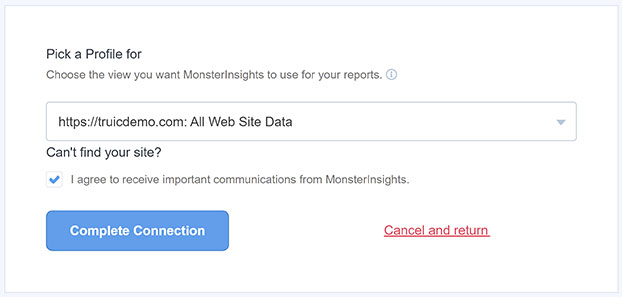
- Verify that the next screen correctly lists your website’s name, and then click on the “Complete Connection” button.
- On the next two screens, click on the “Save and Continue” button.
- When asked if you want to install WPForms, click the “Skip This Step” link.
- Finally, click on the “Finish Setup & Exit Wizard” button.


To Connect Your Google Analytics Account Via the Insert Headers and Footers Plugin:
- Select “Plugins” and then “Add New” from the WordPress dashboard.

- Type “Insert Headers and Footers” into the search box.
- When the screen below appears, click on the “Install Now” button.
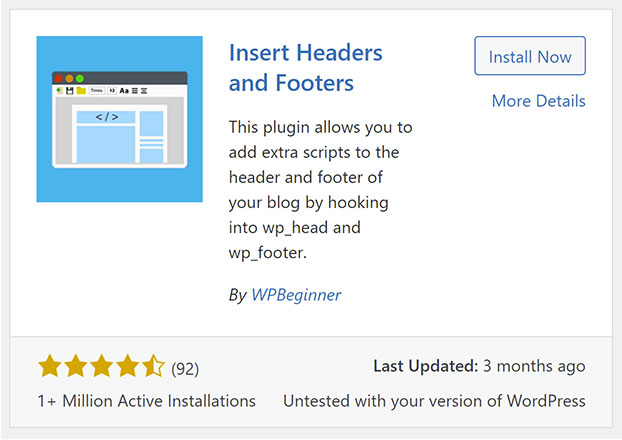
- Then, click on the “Activate” button.
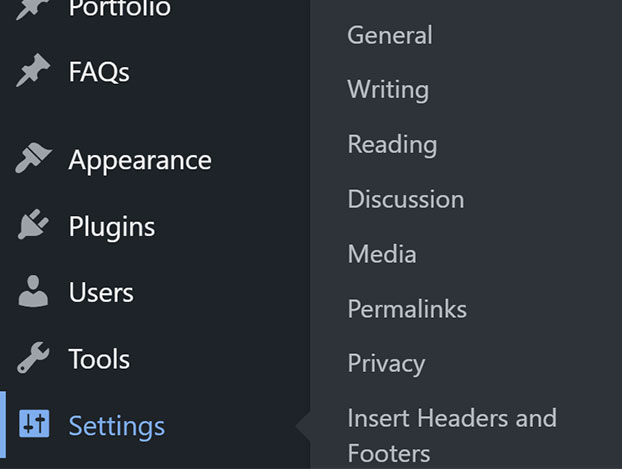
- After you install this plugin, select “Settings” and then “Insert Headers and Footers” from the WordPress dashboard.
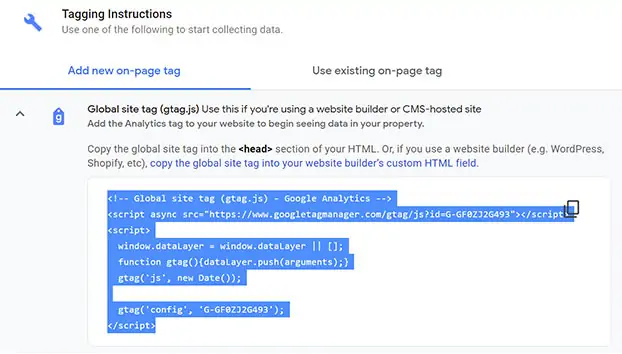
- Return to Google Analytics and copy the “global site tag (gtag.js)” code listed on the “Tagging Instructions” screen under the “Add new on-page tag” section.
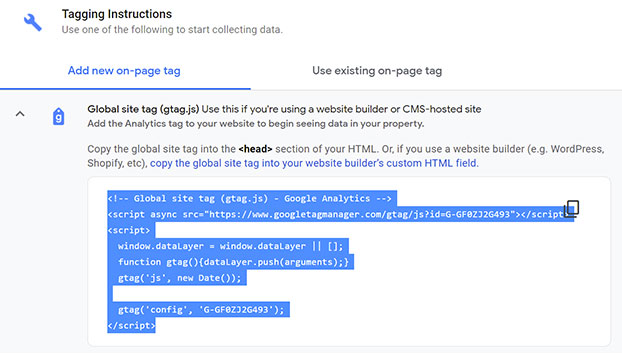
Note: If you accidentally closed out of this section, you can find it again by selecting “Data Streams” from the left sidebar of the Google Analytics dashboard and then choosing your website’s data stream. - Return to your website and paste the copied code into the “Scripts in Header” section.
- Click on the “Save” button.


Step 2 (Option B): Connect Google Analytics Using Google’s Site Kit Plugin
Alternatively, you can connect your Google Analytics account to your WordPress site with Site Kit — Google’s official WordPress plugin.
To Connect Your Google Analytics Account Via the Site Kit Plugin:
- Select “Plugins” and then “Add New” from the WordPress dashboard.
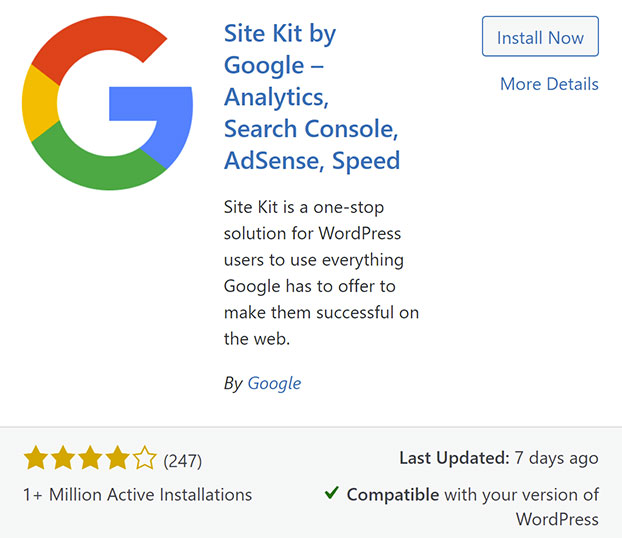
- Type “Site Kit” into the search box.
- When the screen below appears, click on the “Install Now” button.
- The, click on the “Activate” button.
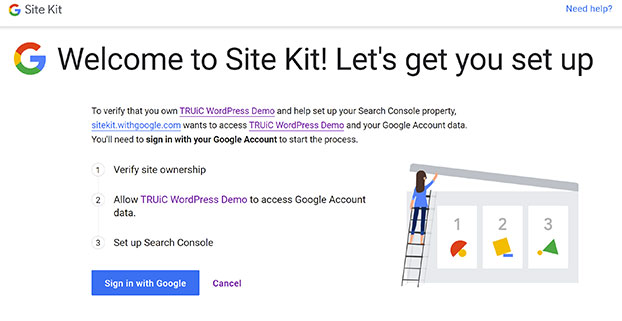
- After you install this plugin, click on the “Start Setup button.”

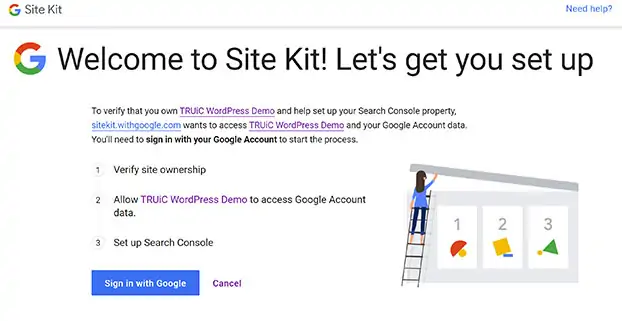
- Click on the “Sign in with Google” button.
- Sign in with your Google Analytics username and password.
- When prompted, click on the “Allow” button three times to give Google the access it needs to run this plugin on your website.
- On the next screen, click on the “Proceed” button to verify you own the website to which you want to connect your Google Analytics account.

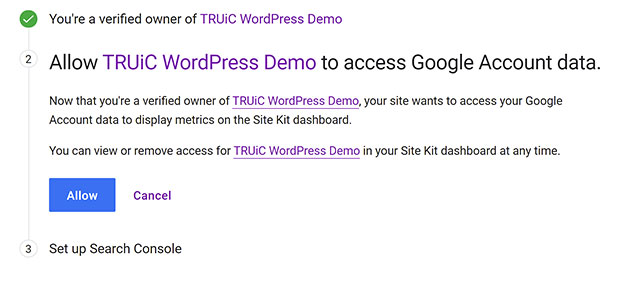
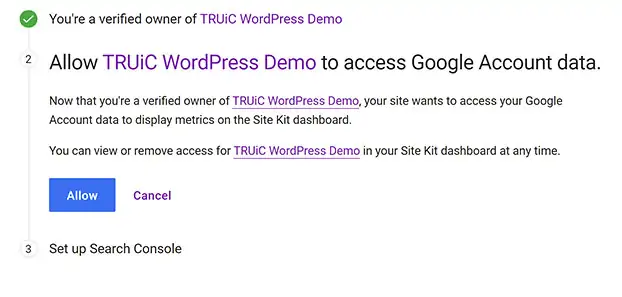
- Next, click on the “Allow” button to give Google permission to access your Google Account data to display it on the Site Kit dashboard.
- On the next screen, click on the “Add site” button to add your website to Google’s Search Console — a tool often used to discover how people locate your website.

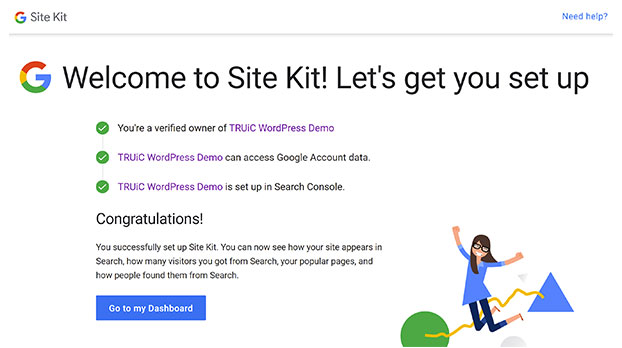
- Once you finish your Site Kit setup, click on the “Go To My Dashboard” button to return to your WordPress website and finish connecting Google Analytics.
- When you arrive back on your WordPress site, you’ll see the following Google Site Kit dashboard screen.
- Under Analytics, click the “Connect Service” link.
- Sign in with the Google username and password you used when creating your Google Analytics account.
- When prompted, click on the “Allow” button twice to give Google the access it needs to connect Google Analytics to your website.
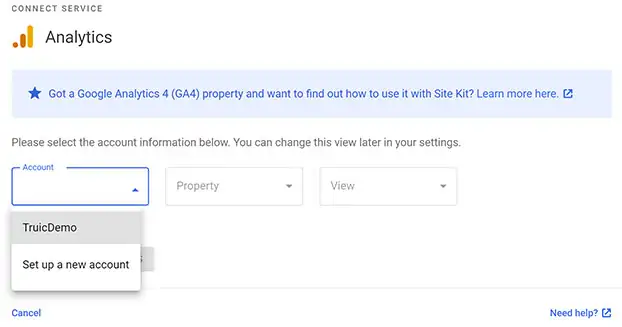
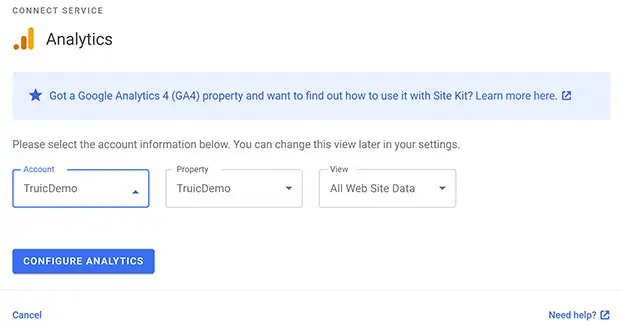
- Select the Google Analytics account you wish to connect.

- Finally, click on the “Configure Analytics” button.


Final Thoughts
While connecting Google Analytics to your WordPress website might seem a bit overwhelming, these three plugins make it easy to complete the process within an hour.
Don’t have a WordPress website yet? Check out our guide on How To Make a WordPress Site to learn everything you need to know to have a professional business website built with WordPress.
Once you start tracking the traffic to your WordPress website with Google Analytics, work to increase that traffic by following the advice in these related articles: