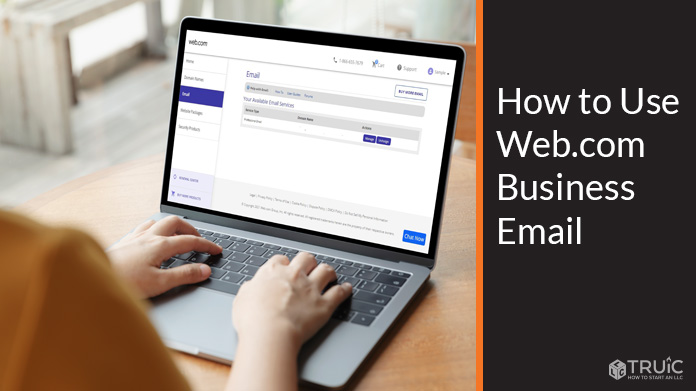
How To Use Web.com Business Email: A Step-by-Step Guide
As a small business owner, creating a business email account represents one of the first steps to building brand awareness and consumer trust. A business email account will not only allow you to engage with your customers via promotional and marketing materials, but also respond to queries on your website.
This guide will walk you through the steps to creating a business email account with Web.com — from purchasing your email services to setting up your account and optimizing its settings so you can reap the maximum benefit.
Make sure your business website has everything it needs to shine. Check out our How to Build a Website guide to learn more.
Step 1: Sign Up for Web.com Business Email
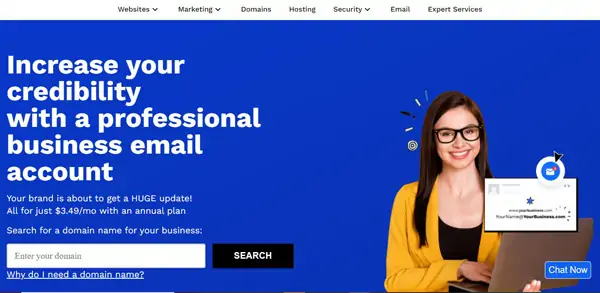
First, visit Web.com in your preferred browser and click on the “Email” item in the navigation menu. This’ll take you to a page with more information about Web.com’s business email services.

Next, you’ll need to enter the domain name you wish to use for your business email address (e.g., [email protected]). Once you decide on the domain you wish to use, enter it into the search bar and click on the “Search” button.
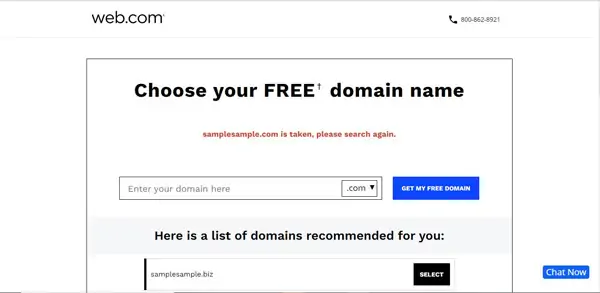
If your preferred domain is available, click on the “Get My Free Domain” button to continue. If not, Web.com will provide you with a selection of suggested alternatives. Once you find one you like, simply click on the “Select” button next to it to continue.
Want to buy a domain name for your business? Check out our guide on How to Buy a Domain From Web.com.

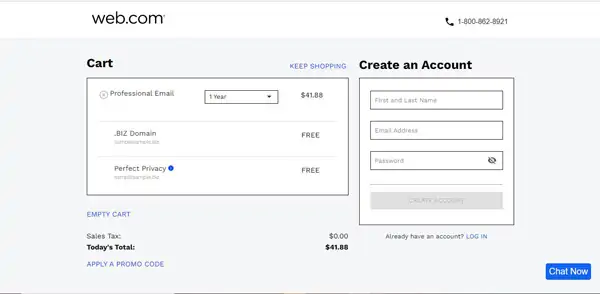
You’ll then need to choose your business email account term (e.g., one year) and enter your email information to create an account. If you already have a Web.com account, such as for a website-building plan, you may log in by clicking on the “Log In” link in the lower-right corner. If you don’t already have an account, enter the required information and proceed to a page where you’ll need to provide your payment information.
Step 2: Set Up Your Web.com Business Email Account
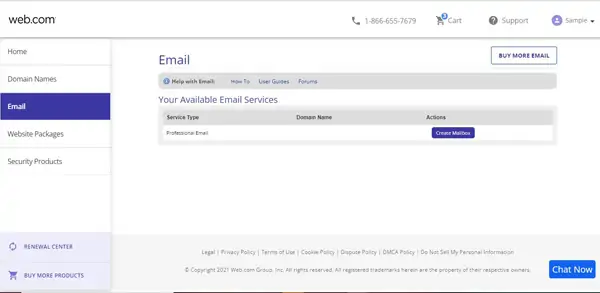
Once you successfully complete your purchase, it’s time to set up your Web.com business email account. First, log in to your account to access your main Web.com dashboard. Click on the “Email” tab on the dashboard’s left-hand menu.
Note: Email services may take up to 24 hours to appear on your account after you make your purchase.
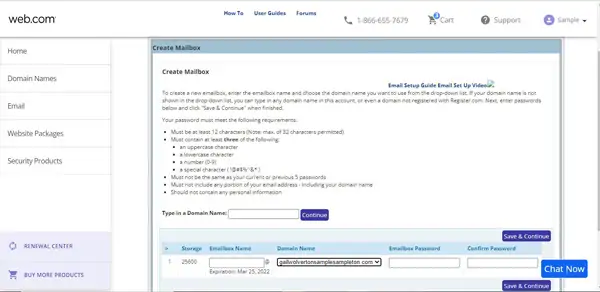
Under your available email services, click on the “Create Mailbox” button to continue. To create your mailbox, you must confirm your domain, choose a name for your mailbox (only used to locate your mailbox in your available email services), and select a password. Once you do that, click on the “Save & Continue” button to continue.
You should now give your business email account a few hours to configure before attempting to log in to your Web.com mailbox.
Once your email account finishes the configuration process, you may return to the “Email” tab of your main Web.com dashboard. Under the available email services, you’ll now see the email service you just configured. Click on the “Manage” button to continue.
You’ll now reach a page where you can view and edit your mailbox details. You also may change your password and manage renewal settings from this page. To view your “Webmail” portal, click on the “Webmail Login” button to continue.
A pop-up window will automatically open that’ll then ask you to provide the login credentials you selected when configuring your mailbox. Enter this information, and then click on the “Sign In” button to reach your mailbox’s main dashboard screen.
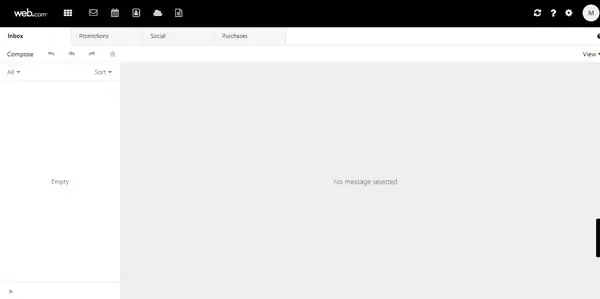
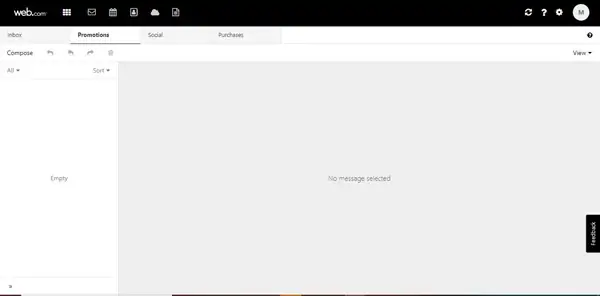
From this email dashboard screen, you may view your main inbox as well as your inbox for promotions, social media campaigns, and purchases.
Step 3: Compose an Email
To send an email with Web.com, you must first click on the “Compose” tab at the top of your email dashboard screen. If you’d like to send a promotional email to your customers, for example, you’d start by clicking on the “Promotions” tab.
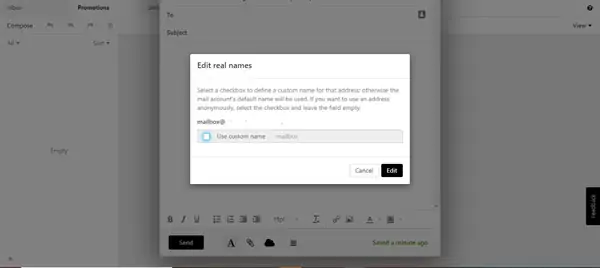
Next, click on the “Compose” link in the upper-left corner. To choose the sender’s name you want to appear in front of your domain, click on the domain name, and then click on the “Edit Names” option from the drop-down menu that then appears. A pop-up window will then open on which you may check the box to use a custom sender name of your choosing. If your name is John Doe, for example, you may choose [email protected].
After you choose your sender name, you may select your recipients. To learn more about adding contacts, read the Step 4: Add a Contact List section of this article.
After you select your recipients, you can start to populate your email message with text and images. Be sure to choose a subject that’s succinct and attention-grabbing. Keep your content brief and informative. You may use the text tools at the bottom of the page to modify the text’s font as well as its style (e.g., bolded, italicized, or underlined).
You also may use these tools to add attachments from your device and from your Web.com business email drive. For more information on your drive, read the Step 5: Add Documents to Your Drive section of this article.
Once your email has everything it needs, simply click on the “Send” button! Responses will appear within the corresponding “Inbox” tab on your email dashboard screen.
Step 4: Add a Contact List
One of the primary components of a successful email marketing campaign is your contacts list. Most small business owners will collect customers’ email addresses — as well as their consent to receive correspondence — whenever a transaction occurs. This allows you to keep in touch with previous clients or customers in order to drive repeat business.
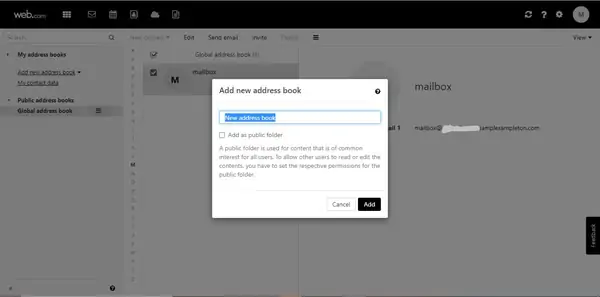
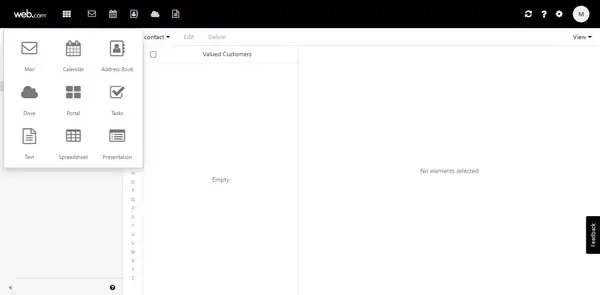
Adding a contacts list to your Web.com business email account is easy. Simply click on the “Contact Book/Person” icon at the top of your email dashboard screen. Then, click on the “Add new address book” link that’ll appear in the “My address books” menu on the left. Next, select a name for your address book. We want ours to be a list of our previous customers so we’ll name our book “Valued Customers.”
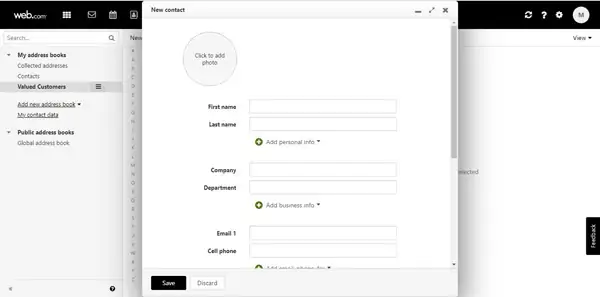
To add a new contact to your address book, simply click on the three horizontal lines to the right of the address book’s name and select “New Contact” from the list of options that then appears. Next, add your new contact’s personal information in the “New contact” pop-up window that’ll automatically open. In addition to their name, address, email address, and phone number, you also may add notes for this contact to help optimize their service in future correspondence.
Once you finish, click on the “Save” button to add the contact to the corresponding address book.
Creating a distribution list of specific contacts can help you identify customers you may want to target for email marketing purposes. If you own a spa and want to identify customers who previously purchased hot stone massages, for example, you may want a distribution list you can later use to create a separate, targeted campaign for just those customers.
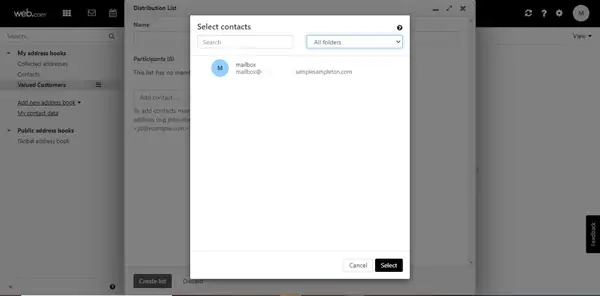
To add a distribution list to your Web.com business email account, click on the three horizontal lines to the right of the address book’s name and select “New Contact” from the list of options that then appears. Next, click on the “New distribution list” link. A “Distribution List” pop-up window will then appear. From there, you may manually add participants from various folders in your address book.
Step 5: Add Documents to Your Drive
Web.com’s business email services allow you to create a variety of documents — including presentations, spreadsheets, and text documents — that you can easily save to your drive and share via email. These documents can prove valuable for service-based professionals looking to pitch their work to potential clients and/or to create invoices.
Click on the Web.com “Portal” icon in the upper-left corner of the main Web.com dashboard screen. (It looks like a grid of nine small squares.) Select the type of document you wish to create (e.g., text, spreadsheet, or presentation).
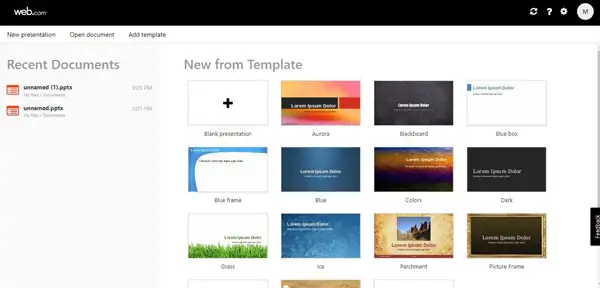
For the purpose of this guide, we’ll select the presentation document type. These documents function similarly to their Microsoft Office counterparts, meaning anyone proficient in these programs can easily modify them. Once you make your selection, you’ll see a range of templates from which you may choose to help you get started.
After you choose a template, you may modify the document to your specifications by clicking on elements to add and replace text, images, and other graphics. Once you finish modifying the document to meet your requirements, simply select “File,” click on the “Save in Drive” option, click on the “Save as” button, and then choose a name and file path for your document. When you’ve finished, click on the “Save” button and the document will appear in your drive.
To view documents in your drive, return to your main Web.com dashboard, click on the “Portal” icon, and then click on the “Drive” link. From there, you may add and delete files and folders as well as upload documents from your device. In addition, you can save documents from your drive onto your device.
Final Thoughts
Hopefully, this step-by-step guide helped you understand how Web.com business email works as well as how you can leverage its features to support your company’s email marketing efforts. For more information on creating a website with Web.com, read our How To Make a Web.com Website and How To Use Web.com guides.