How To Use the Web.com Website Builder: A Beginner’s Guide
Web.com is a popular platform for building small business websites. While it also offers professional website creation services, the Web.com website builder requires no coding experience.
This guide provides step-by-step instructions on how to set up and customize your Web.com website to precisely meet your small business’s needs. By the end, you’ll have a fully functioning website that’s sure to impress.
Before you get started: Make sure you have an active Web.com account.

Signing up With Web.com
To start creating a website using the Web.com website builder, visit Web.com and click on the “Get Started” button.
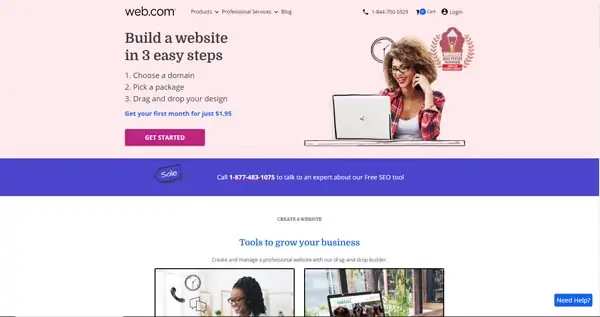
Web.com will then walk you through the steps of choosing a domain name, which it offers free of charge for one year.
Next, you’ll need to choose your plan. To learn about the available options, check out our Web.com Pricing and Plans for Small Businesses article.
Web.com will then send you to a “Checkout” screen where you must enter your name and email address to create an account and a Web.com login. Next, you’ll enter your payment information.
You’ll then receive an email confirmation with a “Get Started” button. Click on that button to choose a template and start building your small business website.
For more detailed instructions on creating a Web.com account, check out our How To Make a Web.com Website guide.
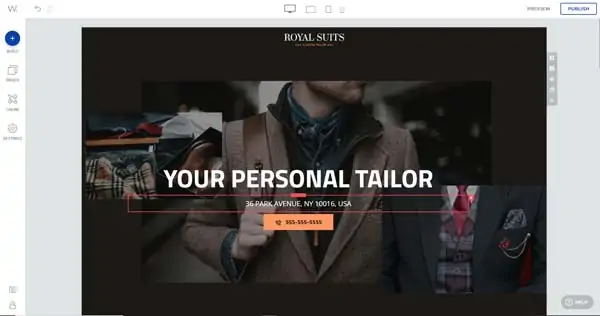
Customizing a Web.com Template
Web.com’s site editor enables you to customize your chosen template to look exactly how you want it to appear and include information relevant to your business.
To customize your template, you’ll need to modify its existing elements. These include the text, backgrounds, images, blocks, and themes.
Editing the Text
To edit any text on your site, click on the words you want to change. A blue box will then appear around the text along with a cursor. Delete the existing text and type in the words you want to use.
To delete a block of text entirely, click on the “X” button in the upper-right corner of the text box. The blue box surrounding the block of text will turn red when your cursor touches the “X” button.
To edit the properties of your text, highlight the words you want to change. A toolbar will then appear below the highlighted text. From this toolbar, you can make the lettering appear bolded, italicized, or underlined. You also can adjust the highlighted text’s heading setting, font, size, and color as well as add a link.
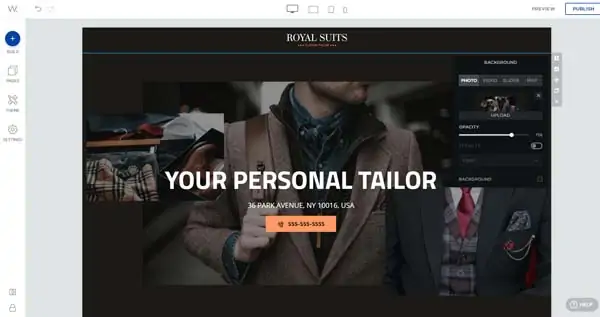
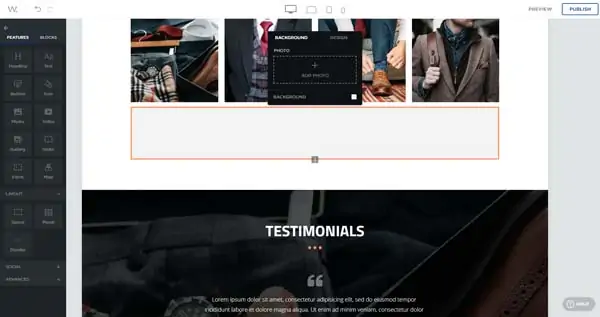
Changing Backgrounds
To change a background, click on the block that contains the background you want to change. Next, choose the “photo” icon that appears second from the top in the light-gray toolbar to the right.
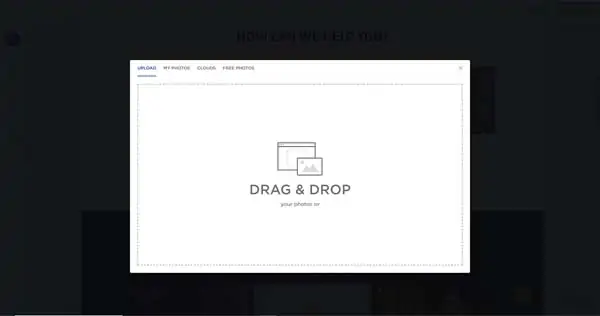
A “Background” menu will then slide out from the toolbar. From there, you can change the background photo by hovering over the photo in that window and clicking on the “Upload” overlay that appears at the bottom of the photo.
A window will then open in which you can drag and drop a new photo. Alternatively, you can upload your preferred image via the “My Photos” or “Clouds” tabs or from the “Free Photos” library Web.com provides through Unsplash.
You also can change a photo background to a video by clicking on the “Video” tab in the “Background” menu and then entering the URL of the video you want to use.
If you instead want to create a slider background (a rotating series of photos) or a map background, click on the “Slider” or “Map” tabs in the “Background” menu.
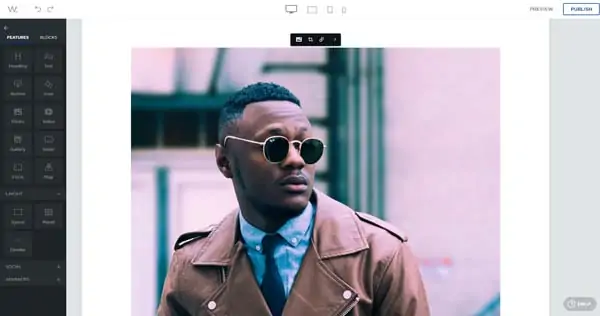
Replacing Images
To replace an image, click on the photo you want to change. A toolbar will then appear above the image. Click on the “image” icon at the far left of the toolbar to switch to a different photo.
A window will then open in which you can drag and drop a new photo. Alternatively, you can upload your preferred image via the “My Photos” or “Clouds” tabs or from the “Free Photos” library Web.com provides through Unsplash.
Click on the second icon in the same toolbar to crop the photo or the third icon (which looks like a chain link) to add a link to your new image. You can link to a page within your website, an external URL, a file, an email address, or a phone number.
Adjusting Blocks
To adjust a block (a section of a specific web page), click on the block to open a light-gray toolbar to the right.
Use the first icon in this toolbar to adjust the block’s layout, such as its columns and alignment.
Use the second icon in this toolbar to adjust the block’s background.
Use the third icon (which looks like intersecting arrows) to move the block to another location on the page. When you click on this icon, yet another toolbar will appear on the right that shows the current order of the blocks. Drag and drop them into your preferred order.
The fourth icon duplicates the current block so you don’t have to create another similar block from scratch.
Use the last icon, an “X,” to delete a block.
Modifying Themes
To modify the theme of a page within your website, click on the third icon from the top in the left-hand toolbar. This’ll open another toolbar from which you can adjust various aspects of your site’s appearance including the theme menu.
Adjusting Colors
The first tab on the “Theme” menu adjusts the color scheme throughout your website.

You can choose the current color scheme by clicking on the drop-down menu under the “THEME” section. The Web.com website builder assigns specific schemes to various occupations.
If you want to manually adjust your site’s colors, you can choose the shades to use for its “Primary,” “Secondary,” “Text,” “Light Text,” and “Complementary” elements.
If you want to set your website’s color scheme to match your company logo, choose the “Color Wizard” option and drag and drop your logo into the window that appears. The platform will then automatically create a color scheme to match.
Learn why having a cohesive color scheme is important for both your business branding and website. Check out our How to Choose a Great Website Color Palette guide for more.
Choosing Fonts
The second tab on the “Theme” menu controls the font(s) used on your website.
You can opt to use a single font for your entire site by turning the toggle switch next to “USE ONE FONT ONLY” into the “on” position. Alternatively, you can choose different fonts for your site’s headings and text in the next two sections.
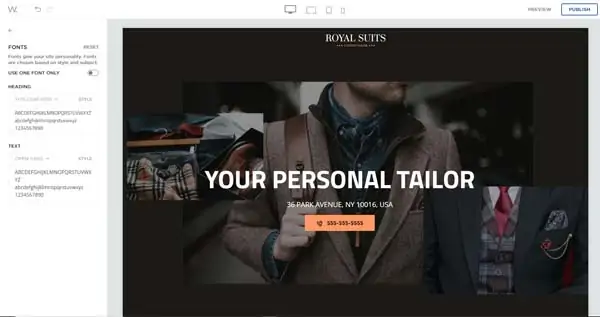
Make sure you choose a font that best represents your business and branding. Use our guide on Best Website Fonts for more.
Editing Headings
The third tab on the “Theme” menu controls the appearance of your headings. You can adjust the size, case, and style of your banner text, main heading, small headings, subheadings, and text from this submenu.
Updating Text Links
The fourth tab seen in Web.com’s “Theme” menu adjusts the appearance of any text links you include on your website. From this submenu, you can choose from six preset styles. You also can control if your links appear in bolded, italicized, underlined, or crossed-out text as well as the color of your text link’s lettering.
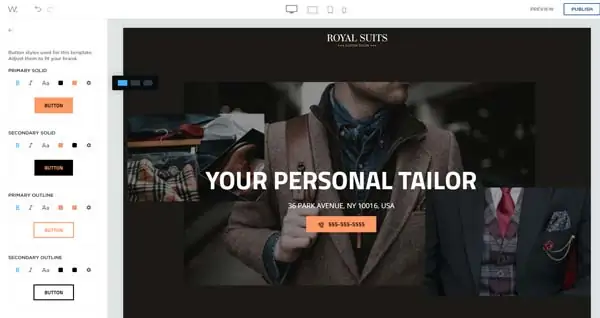
Adjusting Buttons
The fifth tab on the “Theme” menu adjusts the appearance of any buttons you include on your website. The buttons come in four types: “Primary Solid,” “Secondary Solid,” “Primary Outline,” and “Secondary Outline.”
For each type of button, you can adjust the font, style, text color, and background color. To adjust the shape of your buttons, click on the “Gear” icon in the upper-left corner of the section for the button type you want to change. A small black toolbar with three shape options will then appear. Click on the shape you want to use.
Editing Quotes
The sixth tab on the “Theme” menu edits the appearance of any quotes you include on your site. Quotes come in two categories: “Primary” and “Secondary.”
For each category, you can choose from 20 styles in the “Style” drop-down menu. You also can select a font, use bolded or italicized text, and pick the colors for the quote text and background.
Adjusting Dividers
The last tab on the “Theme” menu adjusts the appearance of any dividers you use on your website. When you click on the “Divider” option, a submenu will open with a “Theme” section. The drop-down menu under that “Theme” section allows you to choose from seven different styles.
Under that, a “Heading” box gives you control over your dividers’ alignment and color as well as how far they’ll stretch across pages within your site.
Adding New Web.com Elements
In addition to customizing the blocks and components within your chosen template, you also can add new blocks and components to your website.
To add these new elements, click on the plus (“+”) icon labeled “Build” at the top of the Web.com site editor’s left-hand toolbar. This will open a new menu, offering two tabs: “Features” and “Blocks.”

Adding Features
The “Features” tab on the “Build” menu allows you to add single elements anywhere on your website.
Creating Headings
Headings in Web.com are simply text blocks that appear larger than your site’s regular text in order to catch a visitor’s attention. To add a heading to any page on your website, click on the “Heading” button under the “Features” tab, drag it over to your web page, and then drop it in your preferred location.
Next, delete the placeholder text that automatically appears (i.e., “Heading”) and type in the wording you want to use instead.
You can adjust the appearance of the text in your new heading by highlighting that text and using the toolbar that’ll appear above it to make edits.
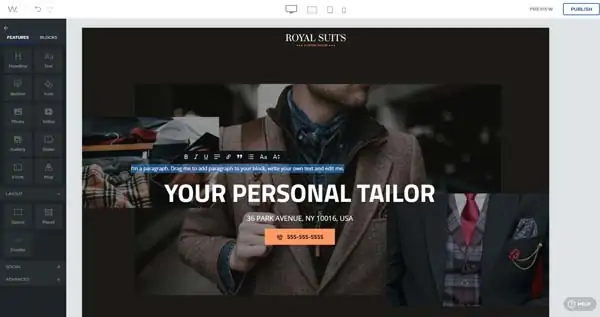
Inserting Text
Text is the wording featured on the various pages of your website. To add a block of regular text, click on the “Text” button under the “Features” tab, drag it over to your web page, and then drop it in your preferred location.
Next, delete the placeholder text that automatically appears and type in the wording you want to use instead.
You can adjust the appearance of your new text by highlighting the words you want to change and using the toolbar that’ll appear above them to make edits.
Adding Buttons
Buttons are small boxes visitors can click on to navigate to a different page within your site or to perform an action like sending an email or making a phone call.
To add a button, click on the “Button” button under the “Features” tab, drag it over to your web page, and then drop it in your preferred location.
You can adjust your new button’s appearance by clicking on it and using the toolbar that’ll appear above it to make edits.
Adding Icons
Icons are graphic symbols you can add to your website to represent specific content. To add an icon, click on the “Icon” button under the “Features” tab, drag it over to your web page, and then drop it in your preferred location.
The new icon will automatically appear as a star. Click on the star to open the toolbar above the icon. You can use this toolbar to change your new icon’s settings, background, and alignment. It also enables you to rotate the icon left or right as well as flip it horizontally or vertically.
When you click on the first item in this toolbar, a “Settings” menu appears from which you can choose which kind of icon you want to use as well as change its size or color.

Inserting Photos
To add an image to your website, click on the “Photo” button under the “Features” tab, drag it over to your web page, and then drop it in your preferred location. Next, click on the “Add Photo” link in the center of the white box that appears on your web page.
A window will then open in which you can drag and drop the photo you want to add. Alternatively, you can upload your new photo via the “My Photos” or “Clouds” tabs or from the “Free Photos” library Web.com provides through Unsplash.
Once the photo appears on your page, simply click on it to start making any desired adjustments. A toolbar will then appear above the photo, allowing you to replace, crop, or add a link to that image.
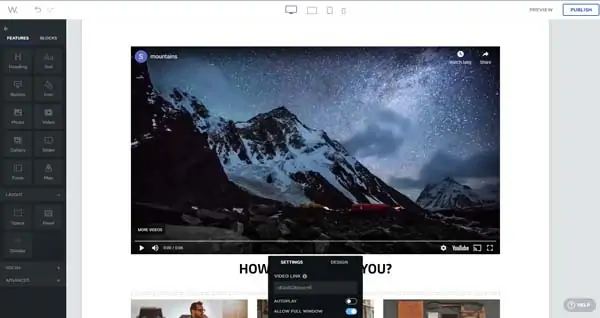
Adding Videos
You also can add streaming video to your Web.com website. To do so, click on the “Video” button under the “Features” tab, drag it over to your web page, and then drop it in your preferred location. Next, hover your cursor over the new video box and click on the “Edit” icon that appears in its upper-right corner.
A “Video” menu will then appear beneath the new video with two tabs. The “Settings” tab provides a field for entering the URL of the video you want to use plus toggle switches that allow you to enable autoplay and full-window play.
The “Design” tab allows you to choose a red or white color theme as well as add a preview of the video.
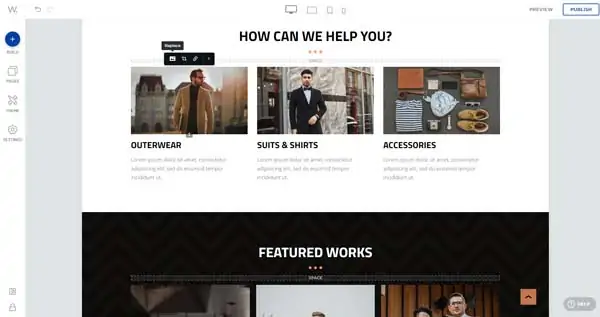
Creating Galleries
Galleries are groups of photos that appear in a block on your website. To add a gallery, click on the “Gallery” button under the “Features” tab, drag it over to your web page, and then drop it in your preferred location.
The new gallery will automatically appear with seven photos. If you want to use fewer photos, hover over one of the photos and click on the “X” symbol that’ll appear in its upper-right corner. If you want to include more than seven photos, click on the “Add Photo” box on the far right side of the gallery.
To replace the photos the Web.com website builder automatically places in your gallery, click on a photo. This’ll open a toolbar with two icons above that image. Click on the “Photo” icon on the left with the “Replace” label. You can then choose from the same options that appear when you add a single photo.
To change the appearance of the gallery, click on the gallery box, and then click on the “Edit” icon that appears in its upper-right corner. This’ll open a toolbar above or below the gallery, depending on the gallery’s location on your web page.
Use the “Layout” tab in this toolbar to adjust the photo spacing and size. You also can add more photos from this tab.
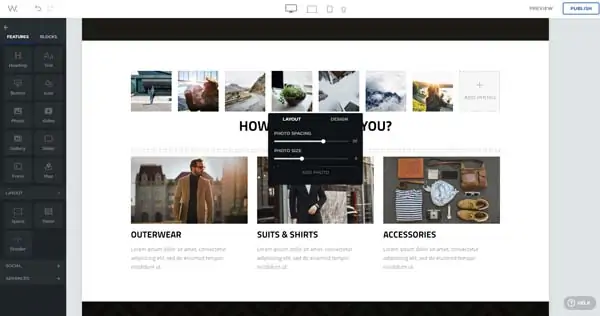
Use the “Design” tab in this toolbar to crop the gallery’s photos, adjust their aspect ratio, enable the “on-click enlarge” functionality, and choose a dark or light theme.
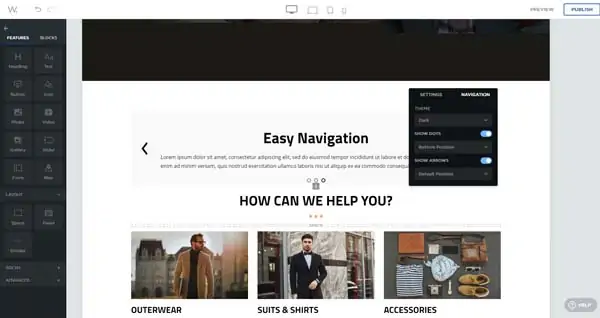
Creating Sliders
A slider — sometimes called a carousel — is a series of slides populated with text blocks that display one after another. To add a slider, click on the “Slider” button under the “Features” tab, drag it over to your web page, and then drop it in your preferred location.
In Web.com, a slider will automatically appear as a series of three text blocks. Click on the placeholder text to delete it, and then type in the wording you want to use instead.
To add or remove slides, hover over the slider block and use the plus (“+”) and minus (“–”) buttons that appear in its upper-left corner.
To change the slider’s background, hover over the slider block and click on the “Image” icon that appears in its upper-right corner. You can use a photo, video, or map as a slider background.
When you click on the “Edit” icon in the upper-right corner of the slider block, a menu with two tabs opens. The “Settings” tab allows you to control if the slides will rotate in a continuous loop and if you want to use the autoplay feature. You also can adjust the slides’ alignment with toggle switches.
The “Navigation” tab allows you to choose a light or dark theme. It also gives you the option to display dots that indicate which slide in the loop currently appears as well choose the location of those dots. You also can opt to add arrows to your slider, which allow visitors to scroll through the slides, and pick the location of those arrows.
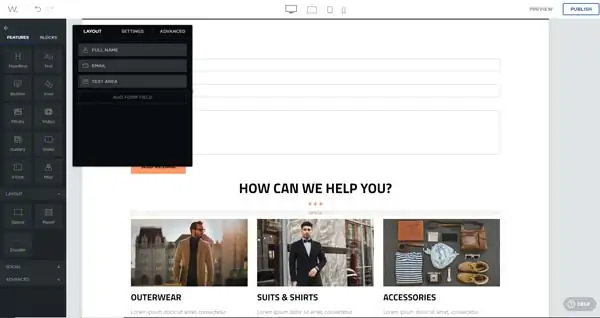
Adding Forms
Web.com forms are sections of your website where visitors can enter personal information. To add a form, click on the “Form” button under the “Features” tab, drag it over to your web page, and then drop it in your preferred location.
The new form will automatically appear with fields for a full name, an email address, and a text area where visitors can enter messages. To customize your form, hover over it, and then click on the “Edit” icon that appears in its upper-right corner.
This will open a window with three tabs. Use the “Layout” tab to edit each existing field of the form by hovering over the field you want to change and clicking on the “Edit” button that appears. You also can delete a field by clicking on the “X” symbol next to the “Edit” button.
To add more fields, click on the “Add Form Field” button beneath the existing fields in this window.
Use the “Settings” tab to change the form’s name and the email address to which it sends information it collects from site visitors.
Use the “Advanced” tab to control the message visitors will see after they complete the form.
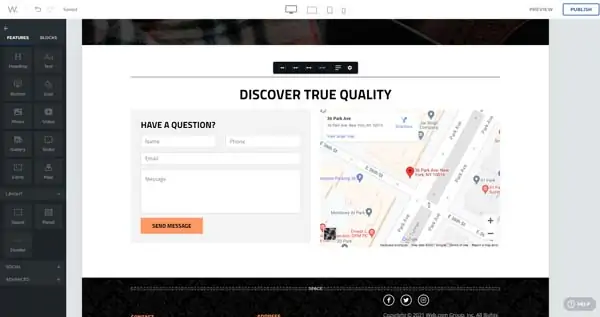
Inserting Maps
To add a map to your Web.com website, click on the “Map” button under the “Features” tab, drag it over to your web page, and then drop it in your preferred location. You can make adjustments to the map by hovering over it and clicking on the “Edit” button that’ll appear in the upper-right corner.
That action will open a menu that allows you to change the map’s featured address, choose between a road or satellite map, and set the zoom level.

Adding Layout Elements
In addition to the components listed above, you also can add layout elements to your Web.com website.
Adding Spacers
You can insert extra space between blocks on your Web.com website by clicking on the “Space” button under the “Features” tab, dragging it over to your web page, and then dropping it in your preferred location.
You can now adjust the size of the extra space by hovering over it, and then clicking on and dragging the arrows that appear at the bottom-center of the space. You can shrink the space to as few as 10 pixels or expand it to as large as 200 pixels.
Adding Panels
A panel is a wall-to-wall box that can contain a photo. To add a panel, click on the “Panel” button under the “Features” tab, drag it over to your web page, and then drop it into your Web.com website.
You can now adjust the panel’s size by hovering over it, and then clicking on and dragging the pair of arrows that appear at the bottom-center of the panel.
To fill the panel, hover over it and click on the “Edit” button that appears in the upper-right corner. This’ll open a window with two tabs. Use the “Background” tab to add a photo and change the background color. Use the “Design” tab to edit the panel’s border color and thickness as well as its radius and shadow color.
Inserting Dividers
Dividers are visual lines that separate different sections of a web page. To insert a divider, click on the “Divider” button under the “Features” tab, drag it over to your web page, and then drop it in your preferred location.
To adjust the divider, click on it to open a toolbar that’ll appear above or below it based on its location on the page. Use this toolbar to choose how far across the page the divider stretches as well as its alignment, color, spacing, and style.
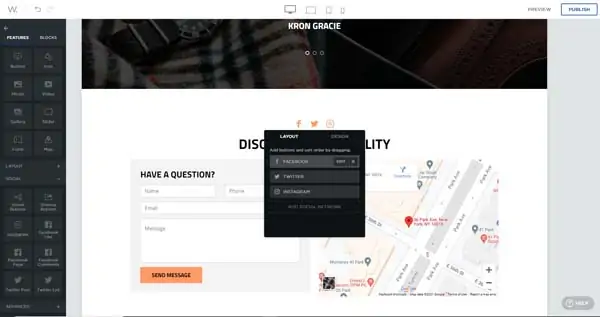
Adding Social Links
Under the “Features” tab, you’ll also find a “Social” section. It enables you to add these eight social media elements to your website:
- Social Buttons
- Sharing Buttons
- Facebook Like
- Facebook Page
- Facebook Comments
- Twitter Post
- Twitter List
To add one of these elements, click on plus (“+”) icon next to the “Social” section’s title to expand its submenu. Next, click on the relevant button within the “Social” section’s submenu, drag it over to your web page, and then drop it in your preferred location.
After placing your new social element, hover over it and click on the “Edit” button that’ll appear on the right side of the block. That action opens a window from which you can control the element’s appearance and add the URL for your business’s Facebook, Twitter, or Instagram account.
Adding Blocks
The “Blocks” tab on the “Build” menu provides a variety of premade blocks you can drag and drop onto your website, saving you the trouble of designing them from scratch.
This tab offers blocks for the following elements:
- Getting Started (This is a menu of headings.)
- Menu (This is a navigation bar to help visitors find their way around your site.)
- Cover (This is a large image with text that can live at the top of any page on your website.)
- Banners
- Features (This type of block showcases your business’s offerings.)
- Gallery
- Text
- Team (This block introduces your team members.)
- Call to Action (This type of block urges site visitors to do something.)
- Logos
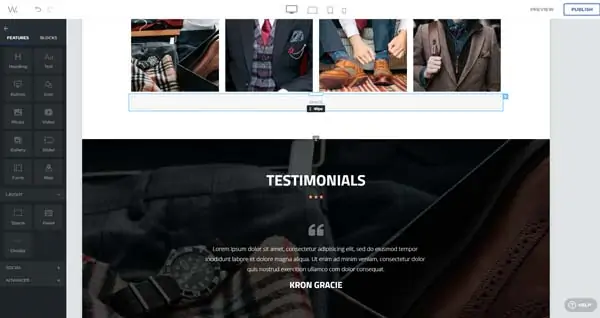
- Testimonials (This block features quotes from customers or clients that describe how your business benefited them.)
- Contact
- Video
- Footer (This block resides at the bottom of each page on your website.)
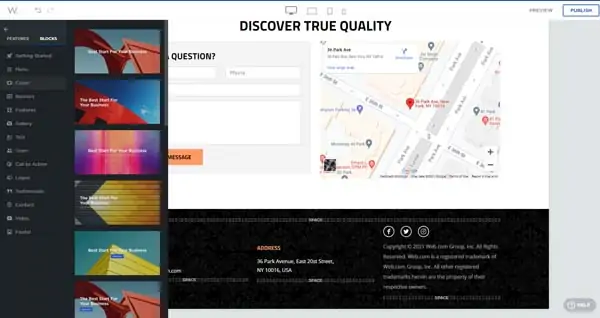
To add any of these blocks, click on the relevant one under the “Blocks” tab, drag it over to your web page, and then drop it in your preferred location. You can then adjust your new block by clicking on it and making your desired edits with the toolbar that’ll then appear.
Adding Pages to Web.com
If you want to add another page to your website, click on the “Pages” icon in the Web.com site editor’s left-hand toolbar. Choose “Add” from the menu that opens, and then select “Page” from the available options.
A window will then appear from which you can choose to create a blank page to fill from scratch, duplicate an existing page of your website, or choose a page template.
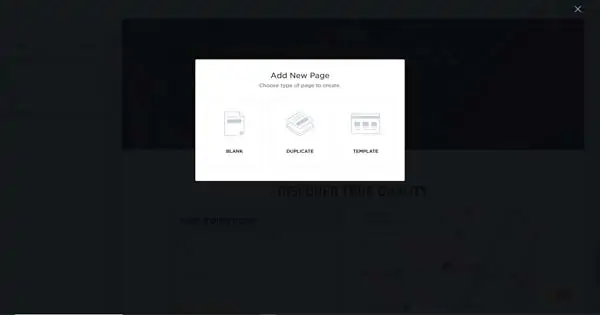
Clicking on the “Template” button will open a menu of premade page templates for a variety of common website purposes. You’ll find templates for product pages and app landing pages, for example, as well as templates designed for specific kinds of businesses.
Viewing Your Web.com Website In Mobile Device Modes
The Web.com website builder makes it easy to see how your website will appear to visitors on a variety of devices. To do so, click on the “Desktop,” “Laptop,” “Tablet,” and “Phone” icons at the top-center of Web.com’s site editor to view your site in each of these modes.
Previewing and Publishing Your Web.com Website
To see exactly how your website will appear to online visitors, click on the “Preview” button in the upper-right corner of the Web.com site editor. This enables you to spot any areas that still need some adjustment and make those edits before you launch your site.
Once your website is ready to go live, click on the “Publish” button in the upper-right corner of the Web.com site editor.
Final Thoughts
Congratulations! You now have a fully functioning and impressive Web.com website for your business.
Hopefully, this guide proved useful as you learn how to use the Web.com website builder to customize your business website. For more information, check out our Web.com Website Builder Review.
Get Started With Web.com
Web.com has most everything a small business owner needs to get a professional website published within a day. Click the button below to get started with an hour of free expert support.