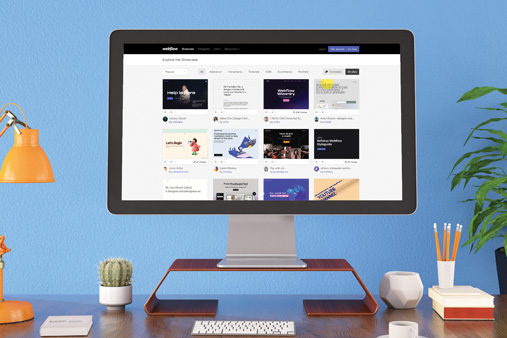
How To Use Webflow – Webflow Tutorial For Beginners
The Webflow website builder makes it easy to build and customize a business site without knowing how to write computer code. Although Webflow’s drag-and-drop builder is highly intuitive, you may need a little help understanding how to get the most out of this popular platform.
Our Webflow tutorial provides step-by-step instructions for adding advanced Webflow features. We’ll cover advanced Webflow ecommerce store features, Webflow blog tutorials, and more.
Make sure Webflow is the best fit for your business. Read our Best Website Builder Review to learn more.

Signing up With Webflow
To get started, visit webflow.com and click on the “Get Started – it’s Free” button.
You can sign in with a Google account or an email address, and then you’ll need to create a password with a minimum of 10 characters. Finally, click on the “Create Account” button.
Recommended: It might be useful to read our How to Make a Webflow Website guide to feel better prepared for this Webflow course.
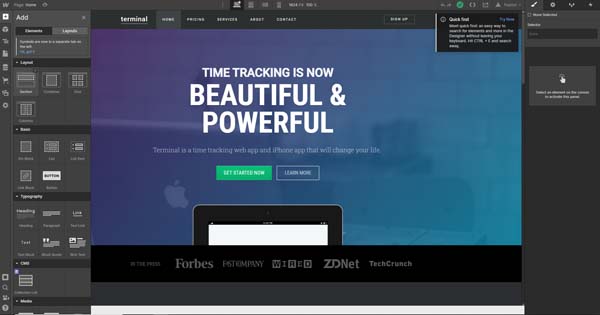
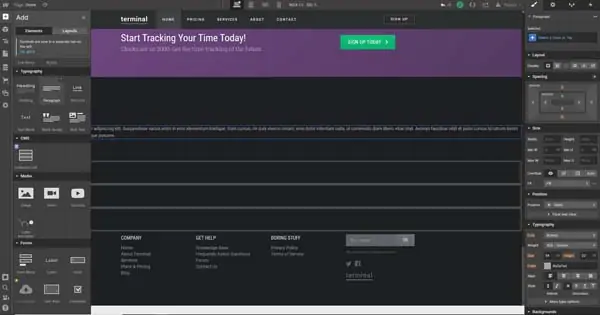
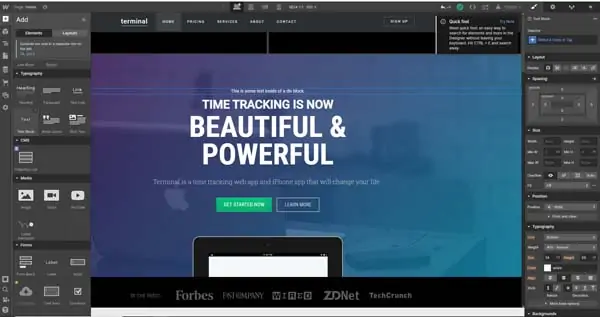
Adding Elements in Webflow
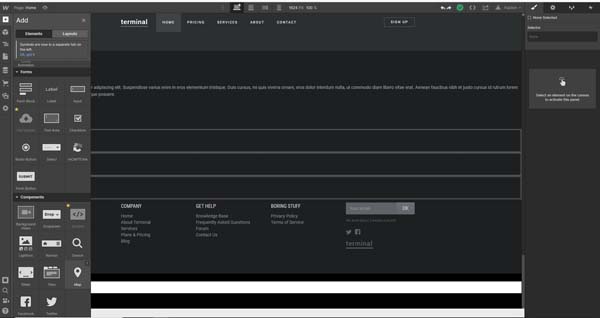
The Webflow website builder’s editing dashboard makes it easy to add a variety of elements to your business website — from columns, buttons, and images to videos, photo galleries, and more.
For all of the actions listed throughout this guide, you’ll first need to log into your Webflow account and click on the project — your website’s name — in your “Dashboard.”
To access a project (your website):
- Visit Webflow.
- Log in to your Webflow account.
- Go to your “Dashboard.”
- Click on the project you want to edit.
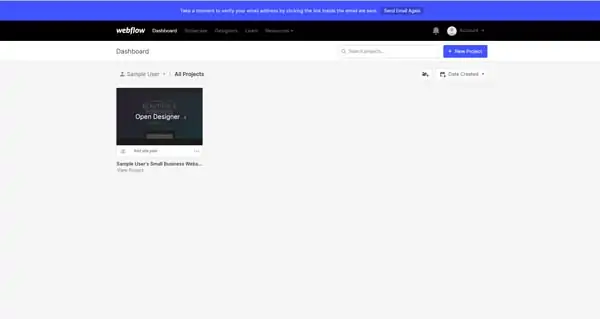
This’ll open the “Webflow Designer” screen where you can make changes and add elements to your website.
Adding Sections
In the Webflow website builder, a “Section” represents a layout element that stretches across your browser window. It’s ideal for full-screen background images, videos, and other content.
To add a “Section”:
- Click on the plus sign (“+”) icon at the top of the left-hand toolbar. The “Add” menu will then appear.
- Under the “Layout” section, click on the “Section” box.
- Drag that section over to your web page and drop it in your preferred location.
- After you place your new section, click on it and use the right-hand menu that’ll then open to adjust its size and contents. You can type in text or drag and drop media into that section.
Adding Columns
The Webflow website builder also enables you to create side-by-side columns of content on your website similar to the columns in newspapers.
To add a column:
- Click on the plus sign (“+”) icon at the top of the left-hand toolbar. The “Add” menu will then appear.
- Under the “Layout” section, click on the “Columns” box.
- Drag the columns over to your web page and drop them in your preferred location.
- Two columns will automatically appear in that area. To adjust the number and layout of the columns, click on them and then click on the “Gear” icon that’ll appear above them. This’ll open a “Columns Settings” menu beneath your new columns.
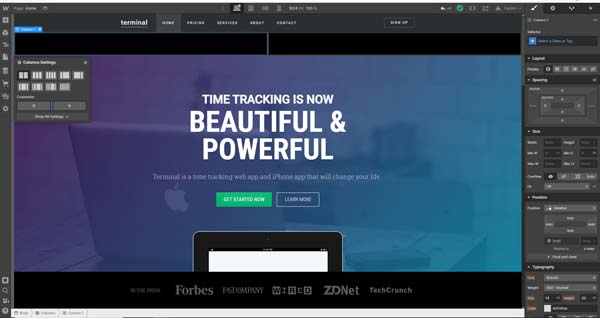
- Use the “Columns Settings” menu to choose your preferred number and/or layout.
- Click on each column and use the right-hand menu that’ll then open to adjust its contents. You can type text in each column or drag and drop media into them.

Adding Grids
A grid is a series of blocks on a web page that can contain text, photos, or other media.
To add a grid:
- Click on the plus sign (“+”) icon at the top of the left-hand toolbar. The “Add” menu will then appear.
- Under the “Layout” section, click on the “Grids” box.
- Drag the grid over to your web page and drop it in your preferred location.
- The new grid will automatically appear with four blocks placed in a two-by-two formation. To add more blocks, click on the grid.
- Click on the red, “Edit Grid” button that’ll appear in the upper-right corner of the grid.
- Click on the plus sign (“+”) icon in the upper-right corner of the grid block to add another column.
- Click on the plus sign (“+”) icon in the lower-left corner of the grid block to add another row.
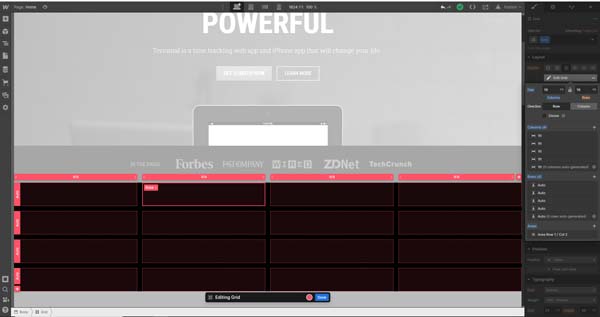
- When you finish adding your desired number of blocks to the grid, click on the “Done” button in the “Editing Grid” box under the grid.
- You can now fill the grid with text or media by clicking on the block you want to edit, and then using the right-hand menu. You can type text directly into each grid block or drag and drop media into them.

Adding “Div Blocks”
“Div Blocks” are single boxes you can place on a web page to house text, images, or other media.
To add a “Div Block”:
- Click on the plus sign (“+”) icon at the top of the left-hand toolbar. The “Add” menu will then appear.
- Under the “Basic” section, click on the “Div Block” box.
- Drag the new “Div Block” over to your web page and drop it in your preferred location.
- You can now fill the “Div Block” with text or media by clicking on it, and then using the right-hand menu.
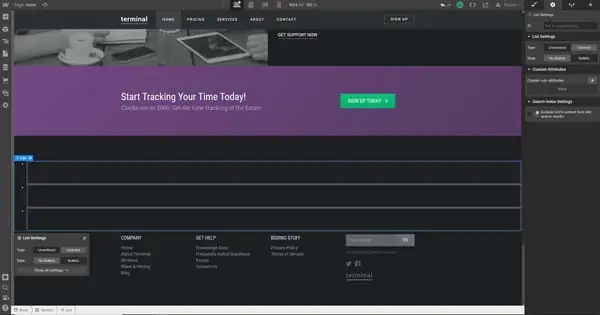
Adding Lists
Lists allow you to group elements or content in a manner that’s easy for your website visitors to follow.
To add a list:
- Click on the plus sign (“+”) icon at the top of the left-hand toolbar. The “Add” menu will then appear.
- Under the “Basic” section, click on the “List” box.
- A “List Settings” menu will then appear from which you can choose your preferred list type (unordered or ordered with numbers) and style (no bullets or bullets).

- Click on and drag the new list over to your web page and drop it in your preferred location.
- The Webflow website builder automatically generates new lists with three items. To add more items to a list, right-click on one of the list items and click on the “Duplicate” option.
- You can now type text directly into each list item or drag and drop media elements into them. You also can use the right-hand menu to adjust the list’s font, color, and background.
Adding “Link Blocks”
You can fill a “Link Block” with text just like you’d fill a “Div Block.” When site visitors click on the link, it’ll take them to another page within your website or to an external site — or even enable them to send an email or make a call.
To create a “Link Block”:
- Click on the plus sign (“+”) icon at the top of the left-hand toolbar. The “Add” menu will then appear.
- Under the “Basic” section, click on the “Link Block” box.
- Drag the new “Link Block” over to your web page and drop it in your preferred location.
- Enter the text you want to appear in the “Link Block.” You can control the font, color, background, and block size via the right-hand menu.
- To add the link, click on the “Link Block” and then click on the “Gear” icon that appears in the upper-right corner of the block.
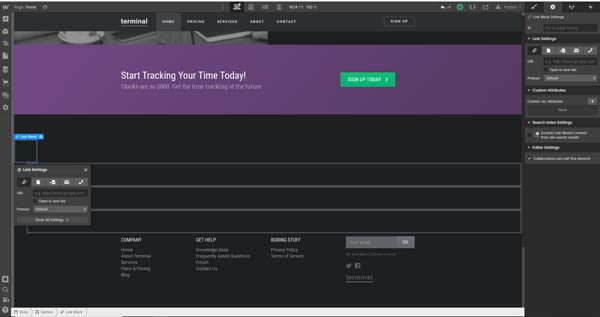
- To send visitors to an external website, click on the “Chain” icon at the top of the “Link Settings” menu on the right and paste the destination web address into the “URL” field. If you want the website to open in a separate tab, check the box next to “Open in new tab.”
- To send visitors to another page within your website, click on the “Page” icon at the top of the “Link Settings” menu. This’ll open a drop-down menu from which you can choose the destination page. If you want that web page to open in a separate tab, check the box next to “Open in new tab.”
- To send visitors to a specific section of another page within your website, click on the third icon at the top of the “Link Settings” menu (it looks like a page with an arrow). This’ll open a drop-down menu from which you can choose the destination section on a specific page within your site. If you want the section to open in a separate tab, check the box next to “Open in new tab.”
- To enable visitors to send an email, click on the “Envelope” icon at the top of the “Link Settings” menu. Enter the email address you want them to contact in the “Email” field. Then, type in a subject line for their email in the “Subject” field.
- To enable visitors to make a phone call, click on the “Phone” icon at the top of the “Link Settings” menu. Enter the phone number you want users to contact in the “Phone” field.

Adding Buttons
Buttons are visual blocks site visitors may click to navigate to an external website or another page or section within your site. They also can use them to send an email, or make a phone call. While buttons function similarly to “Link Blocks,” they usually contain just a small amount of text with no other content elements.
To add a button:
- Click on the plus sign (“+”) icon at the top of the left-hand toolbar. The “Add” menu will then appear.
- Under the “Basic” section, click on the “Button” box.
- Drag the new button over to your web page and drop it in your preferred location.
- Enter the text you want to appear on the button.
- To add the link, click on the “Button” and then click on the “Gear” icon that appears in the upper-right corner of the button.
- To send visitors to an external website, click on the “Chain” icon at the top of the “Link Settings” menu on the right and paste the destination web address into the “URL” field. If you want the website to open in a separate tab, check the box next to “Open in new tab.”
- To send visitors to another page within your website, click on the “Page” icon at the top of the “Link Settings” menu. This’ll open a drop-down menu from which you can choose the destination page. If you want that web page to open in a separate tab, check the box next to “Open in new tab.”
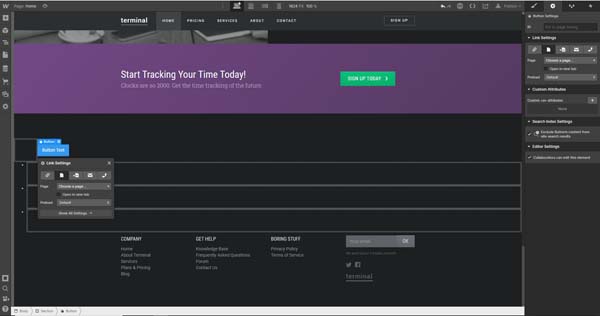
- To send visitors to a specific section of another page within your website, click on the third icon at the top of the “Link Settings” menu (it looks like a page with an arrow). This’ll open a drop-down menu from which you can choose the destination section on a specific page within your site. If you want the section to open in a separate tab, check the box next to “Open in new tab.”
- To enable visitors to send an email, click on the “Envelope” icon at the top of the “Link Settings” menu. Enter the email address you want them to contact in the “Email” field. Then, type in a subject line for their email in the “Subject” field.
- To enable visitors to make a phone call, click on the “Phone” icon at the top of the “Link Settings” menu. Enter the phone number you want users to contact in the “Phone” field.

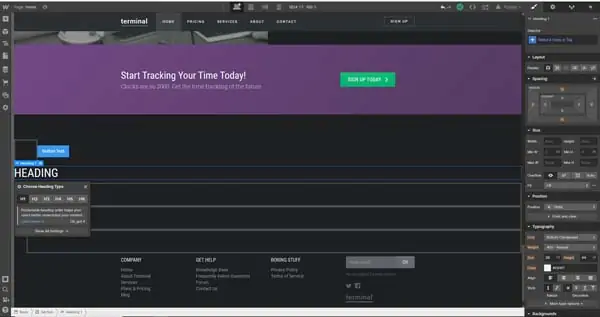
Creating Headings
Headings serve as the titles of individual pages and subsections on your website. Search engines use headings to determine your site’s most important content themes and topics. Heading also can help visitors quickly find the information they seek on your site.
To create a heading:
- Click on the plus sign (“+”) icon at the top of the left-hand toolbar. The “Add” menu will then appear.
- Under the “Typography” section, click on the “Heading” box.
- Drag the new heading over to your web page and drop it in your preferred location.
- Enter the text you want to appear in the heading.
- To choose the heading type (e.g., “H1” through “H6”), click on the new “Heading” and then click on the “Gear” icon that appears in the upper-right corner of the heading.
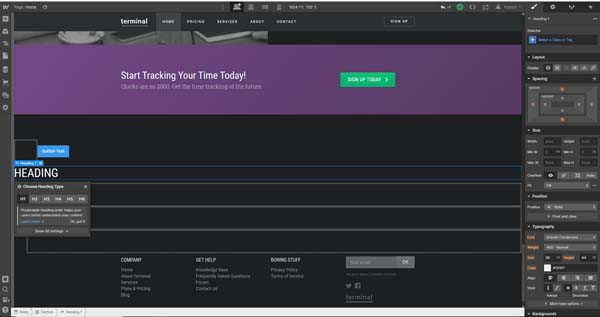
- You can adjust a heading’s font, size, color, and background under the “Paintbrush” tab in the right-hand menu.
Creating Paragraphs
A paragraph is a block of text that contains multiple sentences.
To create a paragraph:
- Click on the plus sign (“+”) icon at the top of the left-hand toolbar. The “Add” menu will then appear.
- Under the “Typography” section, click on the “Paragraph” box.

- Drag the new paragraph over to your web page and drop it in your preferred location.
- Enter the text you want to appear in the paragraph.
- You can adjust a paragraph’s font, size, color, and background under the “Paintbrush” tab in the right-hand menu.
Creating Text Links
Text links are pieces of text on your website that enable visitors to navigate to an external website or another page or section within your site. They also can enable visitors to send an email or make a phone call. You can attach text links to a word, phrase, sentence, or paragraph.
To create a text link:
- Click on the plus sign (“+”) icon at the top of the left-hand toolbar. The “Add” menu will then appear.
- Under the “Typography” section, click on the “Text Link” box.
- Drag the new text link over to your web page and drop it in your preferred location.
- Enter the text you want to appear in the text link.
- To add the link, click on your new “Text Link” and then click on the “Gear” icon that appears in the upper-right corner of the link.
- To send visitors to an external website, click on the “Chain” icon at the top of the “Link Settings” menu on the right and paste the destination web address into the “URL” field. If you want the website to open in a separate tab, check the box next to “Open in new tab.”
- To send visitors to another page within your website, click on the “Page” icon at the top of the “Link Settings” menu. This’ll open a drop-down menu from which you can choose the destination page. If you want that web page to open in a separate tab, check the box next to “Open in new tab.”
- To send visitors to a specific section of another page within your website, click on the third icon at the top of the “Link Settings” menu (it looks like a page with an arrow). This’ll open a drop-down menu from which you can choose the destination section on a specific page within your site. If you want the section to open in a separate tab, check the box next to “Open in new tab.”
- To enable visitors to send an email, click on the “Envelope” icon at the top of the “Link Settings” menu. Enter the email address you want them to contact in the “Email” field. Then, type in a subject line for their email in the “Subject” field.
- To enable visitors to make a phone call, click on the “Phone” icon at the top of the “Link Settings” menu. Enter the phone number you want users to contact in the “Phone” field.
Creating Text Blocks
As a generic text container, a text block is ideal for text that isn’t a heading, paragraph, or link.
To create a text block:
- Click on the plus sign (“+”) icon at the top of the left-hand toolbar. The “Add” menu will then appear.
- Under the “Typography” section, click on the “Text Block” box.

- Drag the new text block over to your web page and drop it in your preferred location.
- Enter the text you want to appear in the text block.
- You can now adjust the text block’s font, size, color, and background under the “Paintbrush” tab in the right-hand menu.
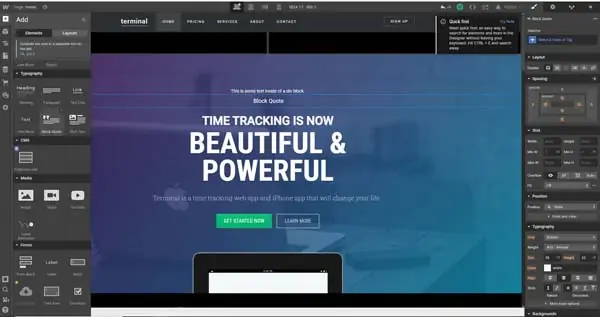
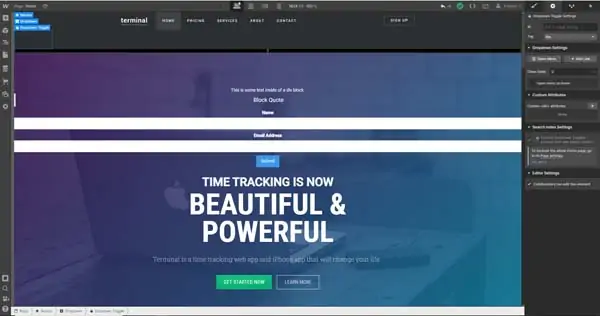
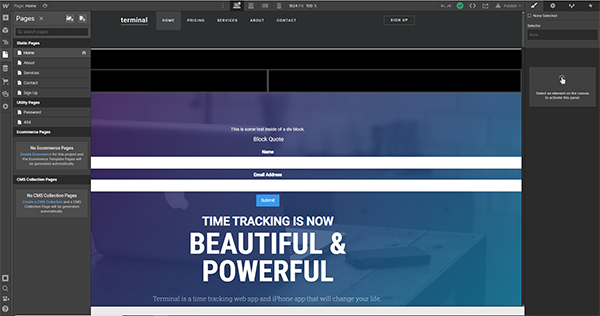
Creating Block Quotes
A block quote is a text box purposely set aside to make it stand out — typically using a larger font than the other text on a page. Magazines and newspapers often use block quotes to highlight a direct quote from a person or other source. But, you also can use them as “pull quotes” that showcase important passages from the text on a web page.
To create a block quote:
- Click on the plus sign (“+”) icon at the top of the left-hand toolbar. The “Add” menu will then appear.
- Under the “Typography” section, click on the “Block Quote” box.
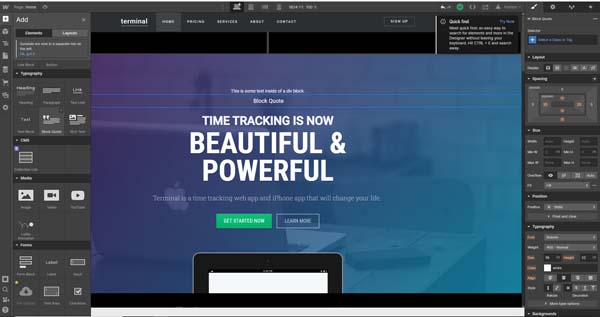
- Drag the new block quote over to your web page and drop it in your preferred location.
- Enter the text you want to appear in the block quote.
- You can now adjust the block quote’s font, size, color, and background under the “Paintbrush” tab in the right-hand menu.
Adding Forms
Forms are sections of your website that visitors can complete with their personal details and contact information. The information gathered via online forms can prove highly valuable for any business’s marketing and sales purposes.
To add a form:
- Click on the plus sign (“+”) icon at the top of the left-hand toolbar. The “Add” menu will then appear.
- Under the “Forms” section, click on the “Form Block” box.
- The new form will automatically include fields in which site visitors can enter their names and email addresses as well as a “Submit” button.
- Drag the new form over to your web page and drop it in your preferred location.

- You can then add several elements to your form by dragging them from the Forms menu and dropping them in the space where you want them to appear. These elements include:
- Labels: You can use these text blocks to communicate the purpose of each field on the form.
- Input Fields: These are fields in which visitors will enter their information.
- File Uploads: This mechanism enables your site visitors to submit an electronic file.
- Text Areas: This element provides a space in which visitors may enter messages or comments.
- Checkboxes: Site visitors can click on these items to indicate they apply to their form submission.
- Radio Buttons: This element creates a list of options from which visitors must choose one.
- Select Menus: These drop-down menus enable visitors to select one item from the available options.
- reCAPTCHA Feature: This free service from Google provides a mechanism to prevent spam and ensure only real visitors use your form.

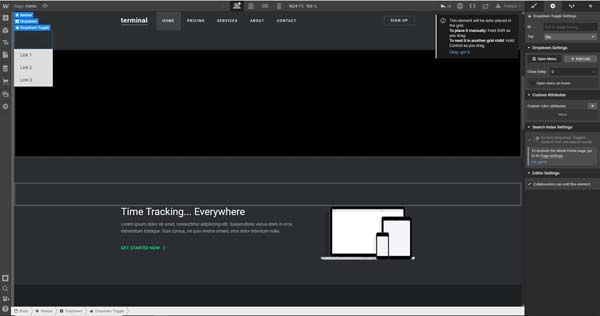
Adding Drop-Down Menus
A drop-down menu presents site visitors with a list of options from which to choose. As a result, they often can help them navigate through the various parts of a website.
To add a drop-down menu:
- Click on the plus sign (“+”) icon at the top of the left-hand toolbar. The “Add” menu will then appear.
- Under the “Components” section, click on the “Dropdown” box.
- Drag the new drop-down menu over to your web page and drop it in your preferred location.
- Enter the text you want visitors to see in the text block that’ll appear once you drop the menu.
- Click on the new drop-down menu and select the “Dropdown Toggle” option. This’ll open the “Dropdown Toggle Settings” menu on the right side of your screen.
- Under the “Gear” icon in the right-hand menu, click on the “Open Menu” button.
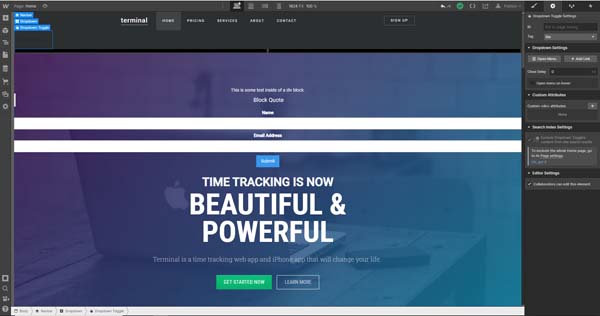
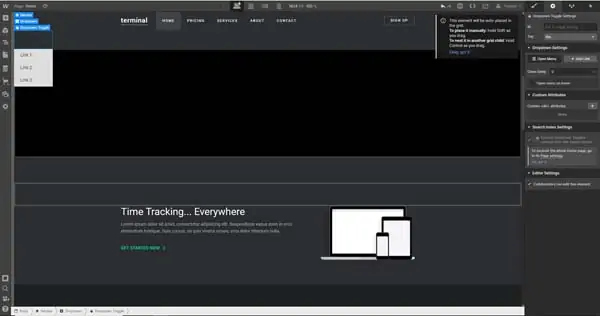
- A list with three links will automatically appear under your new drop-down menu.
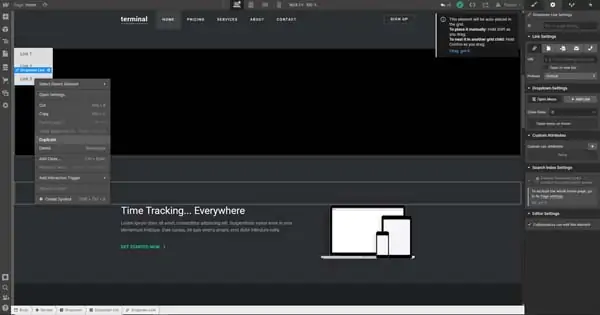
- To add more links, right-click on one of the existing links and select the “Duplicate” option.

- To add links to each item in the menu, start by clicking on a link. This’ll open the “Dropdown Link Settings” menu on the right of your screen. Then, follow one of these steps under this menu’s “Gear” icon:
- To send visitors to an external website, click on the “Chain” icon and then enter the destination web address in the “URL” field.
- To send visitors to another page within your website, click on the “Page” icon. This’ll open a drop-down menu from which you can choose the destination page.
- To send visitors to a specific section of another page within your website, click on the third icon (it looks like a page with an arrow). This’ll open a drop-down menu from which you can choose the destination section on a specific page within your site.
- To enable visitors to send an email, click on the “Envelope” icon, and then enter the email address you want them to contact in the “Email” field and a subject line for their email in the “Subject” field.
- To enable visitors to make a phone call, click on the “Phone” icon, and then enter the phone number you want users to contact in the “Phone” field.
- To change the names of each of the links your visitors will see in your new drop-down menu, double-click on each link and type in your preferred text.
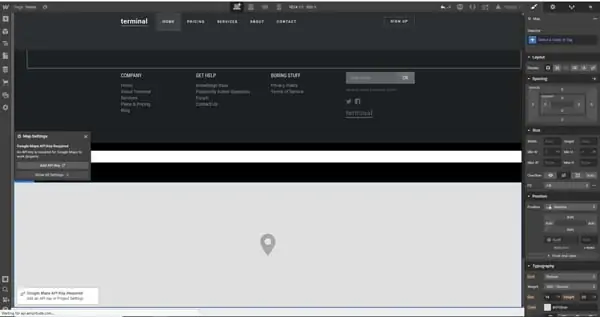
Adding Maps
You can add a customized map to your website to show potential customers your business location.
To add a map:
- Click on the plus sign (“+”) icon at the top of the left-hand toolbar. The “Add” menu will then appear.
- Under the “Components” section, click on the “Map” box.
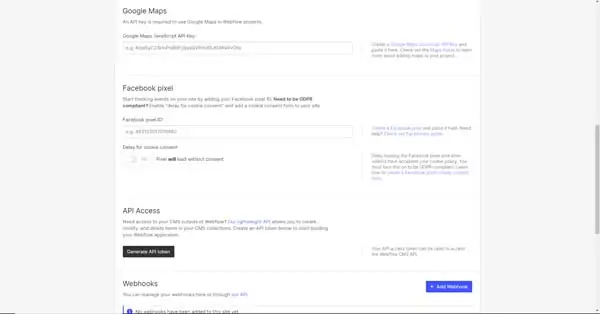
- The Webflow website builder will insert the new map at the bottom of your web page and display a notification about the Google Maps™ application programming interface (API) key requirement.

- Click on the “Add API Key” button.
- The Webflow website builder will then bring you to a Google Maps page where you can enter your API key to populate your map.
Adding Media on Webflow
The Webflow website builder allows you to use photos and videos in multiple ways across your website. For example, you can add freestanding images and videos or use them as backgrounds. You also can embed YouTube™ videos or create light boxes and sliders.
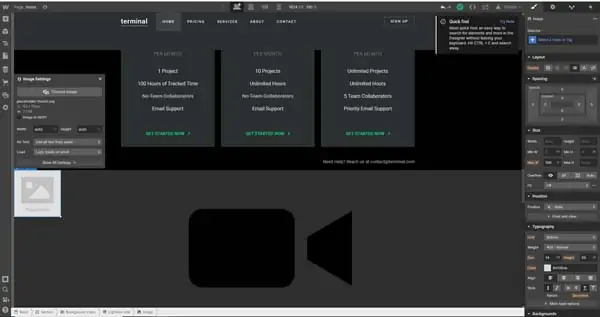
Adding Photos
Photos add an engaging dimension to your website. By using lots of images, you can make your site more appealing to visitors.
To add a photo:
- Click on the plus sign (“+”) icon at the top of the left-hand toolbar. The “Add” menu will then appear.
- Under the “Media” section, click on the “Image” box.
- Drag the new image over to your web page and drop it in your preferred location.
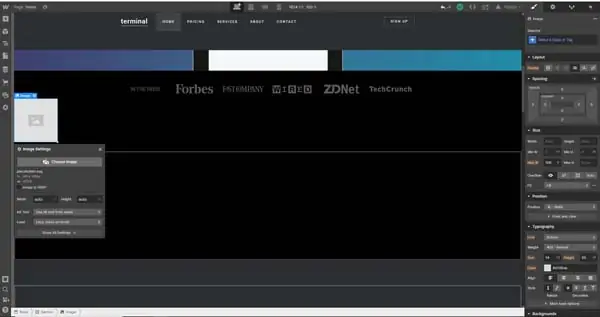
- Click on the image, and then click on the “Gear” icon that’ll appear above the box.
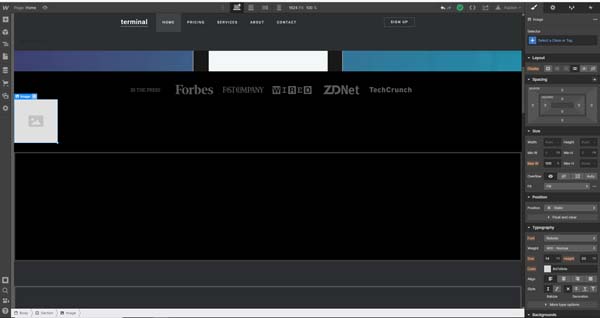
- Click on the “Choose Image” button in the menu that opens below the image.

- This’ll open yet another menu that allows you to choose an image you already imported into the Webflow website builder or import a new image.
- If you saved the photo you want to use on your computer, click on the “Upload” button and select the photo.


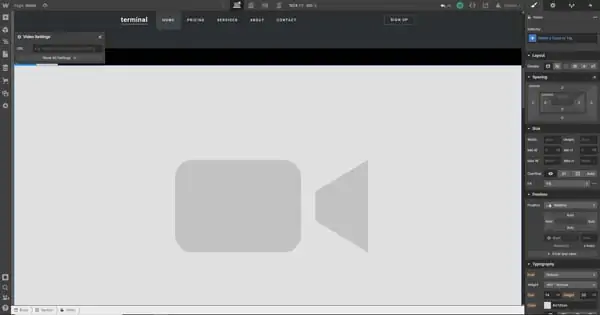
Adding Videos
Like photos, videos also can help make your website more engaging. By adding both color and movement, they create a more dynamic site.
To add a video:
- Click on the plus sign (“+”) icon at the top of the left-hand toolbar. The “Add” menu will then appear.
- Under the “Media” section, click on the “Video” box.
- Drag the new video over to your web page and drop it in your preferred location.
- Click on the new video to open the “Video Settings” menu.
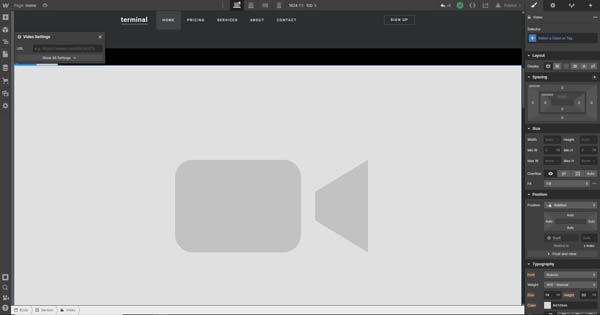
- Enter the web address of the video you want to use in the “URL” field.
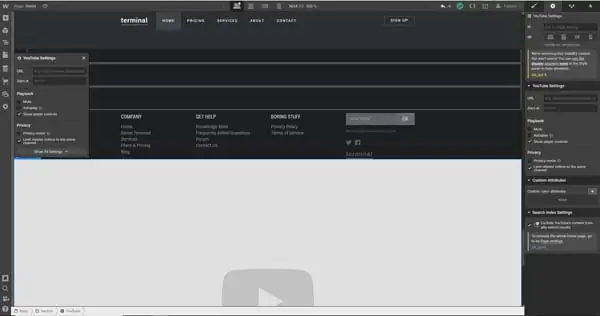
Embedding YouTube Videos
You can also embed YouTube videos directly on your website.
To embed a YouTube video:
- Click on the plus sign (“+”) icon at the top of the left-hand toolbar. The “Add” menu will then appear.
- Under the “Media” section, click on the “YouTube” box.
- Drag the YouTube box over to your web page and drop it in your preferred location. A “YouTube Settings” menu will then open above the YouTube box.
- Enter the URL for the video you want to use as well as the timestamp in the video where you want it to start.
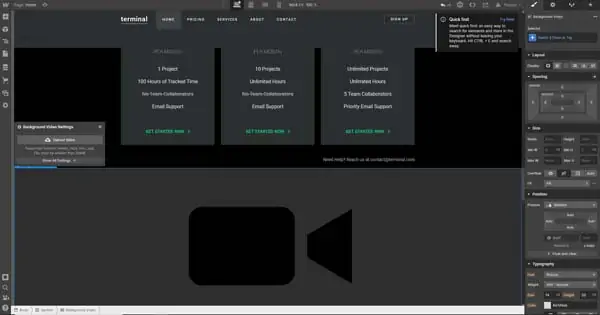
Adding Background Videos
In addition to freestanding videos, the Webflow website builder allows you to place videos in the background of a section within your website.
To add a background video:
- Click on the plus sign (“+”) icon at the top of the left-hand toolbar. The “Add” menu will then appear.
- Under the “Components” section, click on the “Background Video” box.
- Drag the new background video over to your web page and drop it in your preferred location. A “Background Video Settings” menu will then open above the background video box.
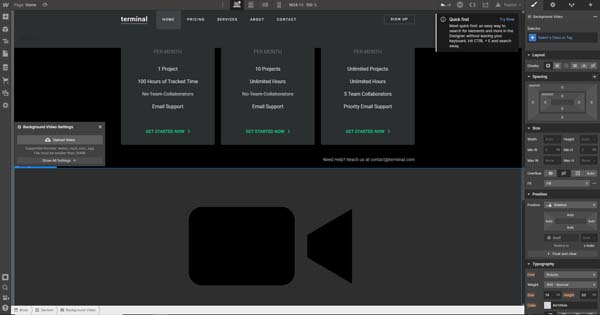
- Click on the “Upload Video” button to add a video saved on your computer. While Webflow’s background video player supports WebM, MP4, and QuickTime® Movie (MOV) file formats, your video file must not exceed 30 megabytes (MB).
Adding a Light Box
The Webflow website builder’s “Lightbox” feature allows you to display images with captions or videos inside a module that’ll present them in a full-screen view that’s compatible with all devices.
To add a light box:
- Click on the plus sign (“+”) icon at the top of the left-hand toolbar. The “Add” menu will then appear.
- Under the “Components” section, click on the “Lightbox” box.
- Drag the new light box over to your web page and drop it in your preferred location.
- Click on the “Gear” icon that’ll then appear above the light box thumbnail.
- Click on the “Choose Image” button to add the media you want to display.
Adding Sliders
A slider is a rotating gallery of photos or videos. You also can fill each slide with background images and text.
To add a slider:
- Click on the plus sign (“+”) icon at the top of the left-hand toolbar. The “Add” menu will then appear.
- Under the “Components” section, click on the “Slider” box.
- Drag the new slider over to your web page and drop it in your preferred location.
- The new slider will automatically contain two slides. To increase this number, right-click on a slide and choose the “Duplicate” option from the drop-down menu that then appears.
- Drag and drop the images or other media you want to use into each slide.
Adding Social Media Buttons on Webflow
Modern marketing efforts require businesses to have a strong social media presence. That makes it vital to link your website to your business’s social media accounts.
The Webflow website builder allows you to add buttons to your site that’ll connect visitors to your Facebook and Twitter accounts.
Adding a Facebook Button
With the Webflow website builder, you can add a Facebook button to your site that enables visitors to “like” and share your Facebook page.
To add a Facebook button:
- Click on the plus sign (“+”) icon at the top of the left-hand toolbar. The “Add” menu will then appear.
- Under the “Components” section, click on the “Facebook” box.
- The new Facebook button will then appear at the bottom of your web page in the footer area.
- Enter your Facebook URL in the “Facebook Settings” menu that appears above the Facebook button.
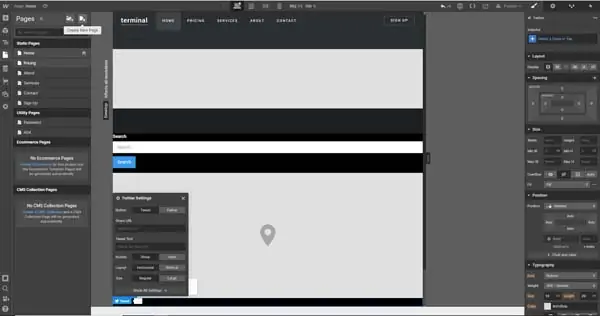
Adding a Twitter Button
Adding a Twitter button to your website will enable visitors to either follow your Twitter account or tweet a link to your website.
To add a Twitter button:
- Click on the plus sign (“+”) icon at the top of the left-hand toolbar. The “Add” menu will then appear.
- Under the “Components” section, click on the “Twitter” box.
- The new Twitter button will then appear at the bottom of your web page in the footer area.
- Click on the new Twitter button to open the “Twitter Settings” menu. From there, you can choose to enable your visitors to either follow your Twitter account or tweet a link to your website.
Adding New Pages on Webflow
The Webflow website builder also makes it easy to add new pages to your website.
To add a page:
- Click on the “Page” icon — fourth from the top — in the left-hand toolbar. The “Pages” menu will then appear.
- Click on the “Create New Page” icon in the upper-right corner of the “Pages” menu. This’ll open a “Page Settings” menu to the right of the “Pages” menu.
- Enter the name you want to use for the page in the “Page Name” field at the top.
- Choose your preferred search engine optimization (SEO) settings in the “SEO Settings” section.
- Enter your “Title Tag” and “Meta Description” in the fields provided.
- Choose your “Open Graph Settings” from the options provided.
- Choose your “Site Search Settings” from the options provided.
- Click on the “Save” button in the upper-right corner of the “Page Settings” menu.
Editing Your Webflow Website for Specific Devices
The Webflow website builder allows you to edit your site for specific types of devices. You can do this by viewing your website in four different modes: desktop, tablet, portrait mobile mode, and landscape mobile mode.
To access each of these modes, simply click on the icons located at the top of the main Webflow dashboard near the center of your screen.
Final Thoughts
The Webflow website builder offers an impressive number of customization options for your website.We recommend you bookmark this page so you can return to it to add more functionality to your Webflow business website.
While this guide covered how to incorporate the most commonly used elements into your website, you can find even more information about creating a Webflow website in our How To Make a Webflow Website article.
Get Started With Webflow
We think Webflow is a versatile website builder that can help most any small business grow. Begin building for free by clicking the button below.