How To Use the Pagecloud Website Builder: A Beginner’s Guide
The Pagecloud website builder is an ultra-intuitive, code-free tool with drag-and-drop technology that enables anyone to create a high-performance business website in a matter of hours.
While beginners typically find this platform easy to use, getting started may seem a bit daunting. This detailed guide will walk you through Pagecloud key features, and help you learn how to make the most of this tool. Read on to discover how you can use Pagecloud to build a gorgeous website that’ll attract and engage online visitors.
Still looking for the right website builder for you? Check out our Best Website Builder of 2026 guide for more insights.
Signing up With Pagecloud
Before you can start building your website with this tool, you must first create a Pagecloud account.
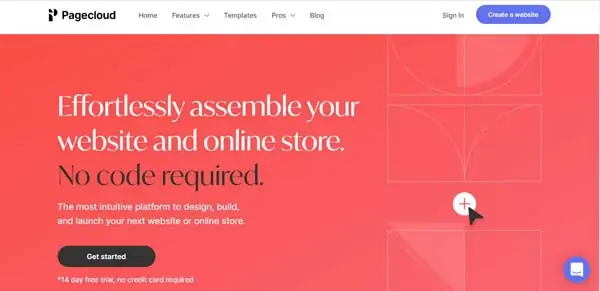
Go to Pagecloud.com and click on the “Get Started” button. Enter your email address — or continue with a Facebook or Google account — and choose a password, and then click on the “Continue” button. Next, you’ll need to answer a few short questions before clicking on the “Continue” button again to create your account.
Using Pagecloud Templates
Pagecloud offers a variety of stunning templates you can modify to meet the needs of your small business. You’ll find these templates grouped by industry or category, including “Business,” “Fashion & Beauty,” “Health & Fitness,” and many more.
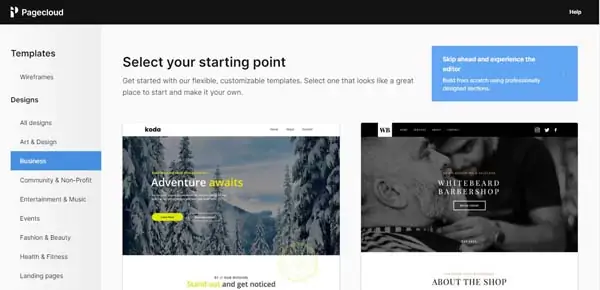
Once you choose a template, hover over it and click on the “Select” button. Pagecloud will then prompt you to enter a name for your website and click on the “Continue” button. Next, you’ll reach Pagecloud’s “Editing” dashboard where you’ll find icons at the top that allow you to toggle between editing your site for either desktop or mobile screens.
To see what you can create with Pagecloud templates, be sure to check out our Best Pagecloud Website Examples article.
Changing a Template’s Color Scheme
Once you choose a template, you can adjust its built-in elements like its overall color scheme.
Learn why having a cohesive color scheme is important for both your business website and branding. Check out our How to Choose a Great Website Color Palette guide for more.
To change a template’s color scheme:
- In the lower-left corner of the “Editing” dashboard, you’ll see a “Paintbrush” icon on the “Site settings” tab.
- Click on that tab to open the “Site settings” menu, and then click on the “Add site-wide colors” button. This’ll open a full color palette.
- Choose a color within that full color palette to use across your site and assign it a name.
- Once you select your preferred color, click on the “Add site-wide color” button and it’ll sync across your website and update wherever you use it going forward.
- You also may modify the colors used on your website in the “Page settings” tab below the “Site settings” tab.

Adding New Text
Populating your template with information tailored to your business will ensure your website aligns with your business’s image and branding.
To add new text:
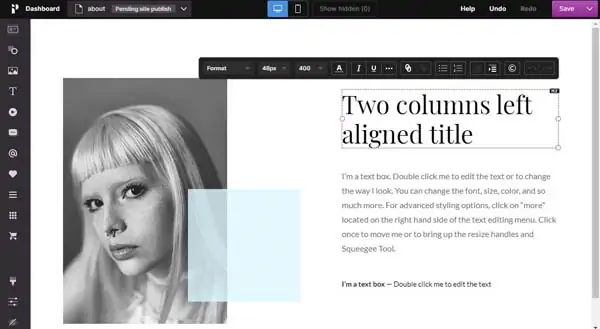
- Click on the “T” icon in the “Editing” dashboard’s left-hand menu.
- Choose your preferred text format from the menu that then appears. Available formats include headings from level one to five, large and small paragraphs, bulleted lists, and numbered lists.
- Next, click on your new text box to view a full menu of options.
- Use the pop-up toolbar that appears above the new text box to edit the font, font size, and font weight as well as the text color, style, indentation, and variety of other customization options.
- You can edit existing text just as easily by clicking on it, and then using the options listed above from the pop-up toolbar that’ll open above that text.
Make sure your website font matches your overall branding. Check out our Best Website Fonts guide to learn more.
Adding Buttons
Call-to-action (CTA) buttons can help you convert your website visitors into customers.
To add a button:
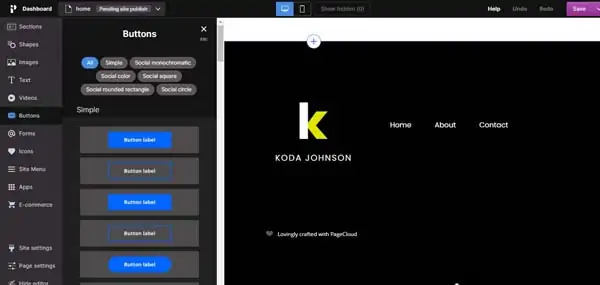
- Click on the “Buttons” tab in the “Editing” dashboard’s left-hand menu. This’ll open the “Buttons” menu.
- Choose a button from the options in that menu, such as a simple CTA button or one that’ll link to a social media account. You can filter the available button types using the style categories at the top of the menu.
- Click on your chosen button, drag it over to your web page, and then drop it in your preferred location.
To edit a button:
- Click on the button you want to edit to open an editing toolbar.
- Click on the “Paper Clip” icon in that toolbar to add a link to the button.
- Click on the “Trash Can” icon in that toolbar to delete the button.
- Click on the “Style” tab in that toolbar to edit the colors, add a gradient, and modify the text.
Customizing the Homepage Header
Your homepage header acts like a handshake — it helps your business make a first impression with potential customers. That means you need to get it right so online visitors instantly know what your brand is all about.
To customize the homepage header:
- Click on the header to make the “Header Style” button appear.
- Use the menu on the right-hand side to edit the “Section” options for your header.
- Choose your preferred header position from the three available options: “Normal,” “Sticky,” or “Fixed.”
- Change the header background to one of the three available options: “Color,” “Gradient,” and “Image.”
- Adjust the style of the header’s border (e.g., “Solid,” “Dashed,” and “Dotted”) as well as its thickness.
You also can add your logo to the homepage header by uploading an image. Remember to use the right-hand menu box to ensure your logo image links back to your site’s homepage. If desired, you also can modify the content and text of the header’s navigation menu.
Make sure your homepage has everything it needs to shine. Learn more by reading our How to Design a Homepage guide.
Adding Pages
If your chosen website template doesn’t include all the pages your site needs, it’s easy to add more.
To add a page:
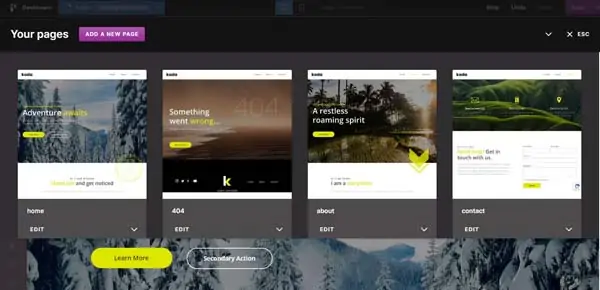
- Click on the “Down Arrow” icon in the upper-right corner of the dashboard to open a screen that displays thumbnail images of your site’s pages.
- Click on the “Add a New Page” button.
- Next, choose from these three options for adding a new page:
- Click on the “Copy a Page” link to copy the theme of an existing page.
- Click on the “Theme Pages” link to select a new theme.
- Click on the “Add a Blank Page” link to start with a clean slate.
- Once you make your choice, click on the “Select” button and name your new page.
- To rename an existing page, click on the “Down Arrow” icon at the bottom of the page’s thumbnail image and select the “Rename” option.
Deleting Pages
If your business doesn’t need a page that comes with your chosen template, you can easily remove it from your website. But, this doesn’t apply to your site’s homepage or a page you’re currently editing in the Pagecloud dashboard.
To delete a page:
- Click on the “Down Arrow” icon in the upper-left corner of the dashboard to open a screen that displays thumbnail images of your site’s pages.
- Find the page you want to delete and click on the “Down Arrow” icon at the bottom of that page’s thumbnail image.
- Select the “Delete” option to remove the page from your site.
Adding Sections
Using the Pagecloud website builder, you can add, edit, and fully customize every section on your site.
To add a section:
- Navigate to the page you wish to edit.
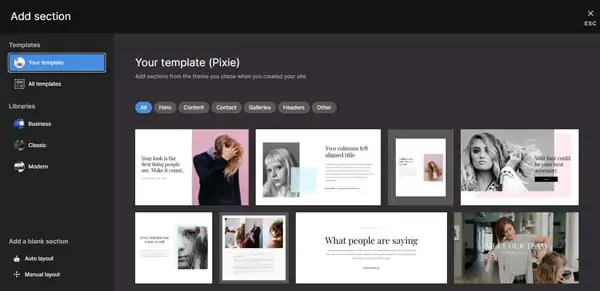
- Click on the plus sign (“+”) icon that appears at the top and bottom of each section to add new sections.
- This’ll open the “Add Section” screen where you can browse through and add sections from your current template as well as from other Pagecloud templates.
- Hover over the section you want to add, and then click on the “Add to Page” button that appears.
- The new section will then display on your page, and you can start editing it to suit your needs.
- Click on the “Save” button when you finish your edits, and then click on the “View Live” button to see how your new section will appear to visitors.
Deleting Sections
If you don’t want an existing section within your template, you can remove it as quickly and easily as adding new sections.
To delete a section:
- Navigate to the page you wish to edit.
- Click on the “Section Style” button in the upper-left corner of the section you want to delete.
- Click on the “Trash Can” icon in the drop-down menu that then appears to remove the section.
- Click on the “Save” button to confirm your changes.
Changing Section Backgrounds
Like your homepage header, your website’s sections provide several options to help you customize them to align with your business’s branding.
To change a section background:
- Click on the “Sections” tab in the “Editing” dashboard’s left-hand menu. This’ll open the “Sections” menu.
- Select “Section Background” from the options on this menu, and then choose “Image,” “Gradient,” or “Color.” As a best practice, choose only one of these.
- Click on the “Save” button to update your section.
Moving Sections
If you think your website needs a more polished look, reordering the sections in its existing layout often can help you achieve this goal.
To move a section:
- When editing a page, select a section you want to move.
- Click on the “Down Arrow” icon on the upper-left corner of that section to open the section browser.
- Click on the “Up” and “Down” arrows in the lower-right corner of the section to change the section’s order as you see fit.
- Click on the “Save” button to update your page layout.
Adding Images
Using high-quality photos on your website can help you visually convey your business’s purpose and brand personality.
To add an image:
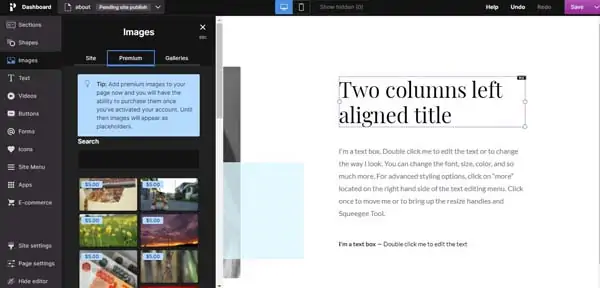
- Click on the “Images” tab (the one with the “Painting” icon) in the “Editing” dashboard’s left-hand menu. This’ll open an “Images” menu.
- Decide if you want to upload your own photo or use one of Pagecloud’s premium images, which you can browse by entering a keyword in the search box under the “Premium” tab in the “Images” menu.
- To add your own image, click on the “Upload Image” button under the “Site” tab in the “Images” menu.
- Alternatively, you can drag and drop photos from your computer directly onto your web page. You also can copy and paste image data from a graphics application — or an image URL — directly onto your page.
Replacing Images
Do you already have an image in the perfect place on your site with the right dimensions, but want to use a different photo? No problem. The Pagecloud website builder makes it easy to replace images.
To replace an image:
- Select the whichever photo included in the pre-made template that you want to replace, and then click on the “Replace” button at the top of the image’s icon.
- At the next prompt, choose the image you want to use from your device and click on that image file.
- Click on the “Save” button to update your image.
Adding a Photo Gallery
The Pagecloud website builder also enables creative users to build digital portfolios with its galleries feature.
To add a photo gallery:
- Decide on a place for your new photo gallery. You may want to opt for a dedicated page or section, depending on how you plan to use the gallery.
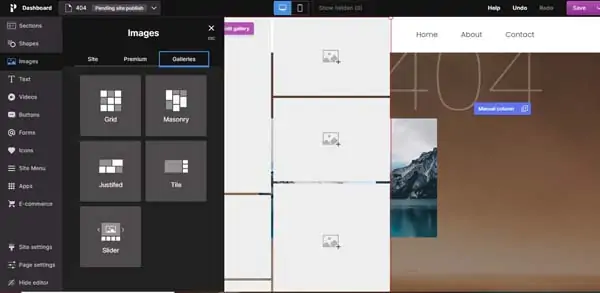
- Click on the “Images” tab (the one with the “Painting” icon) in the “Editing” dashboard’s left-hand menu. This’ll open an “Images” menu.
- Click on the “Galleries” tab in that menu.
- Next, choose the gallery layout you want to use from the available options: “Grid,” “Masonry,” “Justified,” “Tile,” and “Slider.”
- Click on your chosen gallery layout, drag it over to your page, and then drop it in your desired location.
- Next, add images to your new gallery by clicking on the “Add Images” button at the top of the gallery.
- Edit the gallery by clicking on the “Edit Gallery” button or dragging the gallery along your page and pulling its corners to adjust its size.
- If you want to delete your gallery, simply click on the gallery and click the “Trash Can” button that will appear on the top left side.
Uploading Videos
Adding videos to your website can help you create a visually engaging experience for your visitors. Pagecloud makes this very easy to do.
To upload a video:
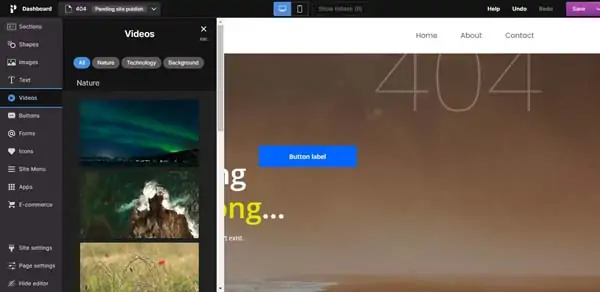
- Click on the “Videos” tab (the one with the “Play” icon) in the “Editing” dashboard’s left-hand menu. This’ll open an “Videos” menu.
- Use the filters at the top of this menu (e.g., “Nature,” “Technology,” and “Background”) to find a video you want to add to your site.
- Click on your chosen video, drag it over to your page, and then drop it into your desired location.
- Select the “Style” tab on the editing menu that then appears and use the options there to edit the app icon’s border, opacity, and shadow.
- If you want to upload your own video, click on the video and then click “Click to Replace” at the top of the video box.
Adding Apps
Adding apps to your website can not only seamlessly connect your site to your business’s social media accounts, but also enable visitors to purchase tickets and engage with your online store.
For example, the Pagecloud website builder enables you to add social media apps like Facebook, YouTube™, and Instagram® as well as ecommerce apps like Shopify® and PayPal® and ticket sales apps like Eventbrite®.
To add an app:
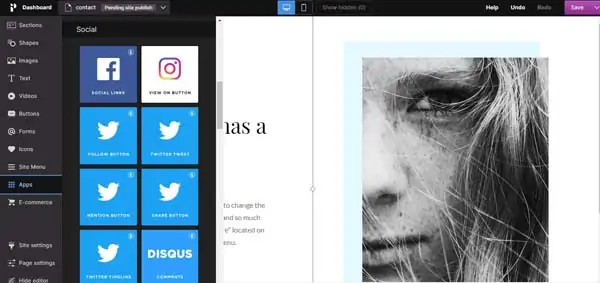
- Click on the “Apps” tab (the one with the nine-dot icon) in the “Editing” dashboard’s left-hand menu. This’ll open a menu with several categories of drag-and-drop icons you can use to link your site to a variety of apps.
- Choose a category (e.g., “Events, “Video,” “Social, “Fonts,” “Maps,” “Forms,” “Ecommerce,” “Music,” “Images,” and “Generic”), and then select an app from that category to add to your page.
- Click on your chosen app’s icon, drag it over to your page, and then drop it in your desired location.
- When prompted, enter the link to the event, video, or social media profile you want to display on your page.
- Select the “Style” tab on the editing menu that then appears and use the options there to edit the app icon’s border, opacity, and shadow.
- If you want to delete an app, simply click on the app that you added to your page and select the trash icon that appears on the top-left corner.
Adding Forms
Adding forms to your website can help you build a sense of community with your online visitors as well as enable customers to submit inquiries, make appointments, send an R.S.V.P., and more.
To add a form:
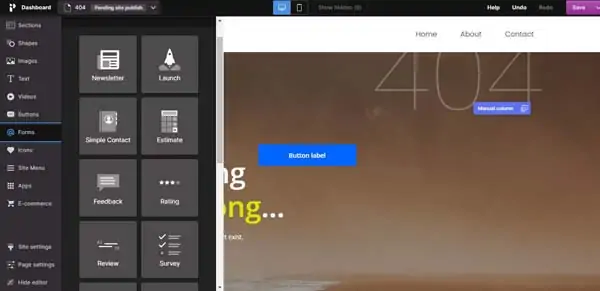
- Click on the “Forms” tab (the one with the “@” symbol) in the “Editing” dashboard’s left-hand menu. This’ll open a menu of drag-and-drop forms (e.g., contact, rating, newsletter, review, and more).
- Click on your chosen form’s icon, drag it over to your page, and then drop it in your desired location.
- Click on the “Save” button to update your changes.
To add an input field in a form:
- Click on the form you want to edit on your website.
- Click “Edit Form” on the top-left side of your selected form.
- A dropdown menu will appear. Select the “Add Field” tab
- You can add a variety of different fields to your form, including:
- Single-Line Text
- Multi-Line Text
- Checkbox
- Radio Button
- Drop-Down Menu
- Choose a field from the available options, and then drag it over to your form.
- You can reorder a form’s existing fields by dragging and dropping them into your preferred order.
To change a form’s text:
- Click on the form you want to edit on your website.
- Double-click on the text within the form that you want to edit.
- Select the “Style” tab on the editing menu that then appears and use the options there to adjust the text’s font, spacing, color, and style.
- Click on the “Done” button at the top of the form to save your changes.
To view form submissions:
- Navigate to your site’s “Main” dashboard.
- Click on the “Inbox” tab at the top of that dashboard to open a list of the various forms you use on your website.
- Click on the “View Submissions” link to view a list of all of the submissions for that form.
Adding a Site Menu
A site menu can help online visitors more easily navigate your website. With the right style and format, this menu will help ensure they quickly find the information and products they seek.
To add a site menu:
- Click on the “Site Menu” tab (the one with three horizontal lines) in the “Editing” dashboard’s left-hand menu. This’ll open the “Site Menu” menu.
- Click on and drag the site menu feature over to your web page.
- Click on the “Edit Menu Links” button under the “Style” tab on the editing menu that then appears to adjust the site menu’s settings.
- Choose the links you want to add to your site menu from the left-hand column.
- Click on the “Add to Menu” button when you feel you have enough links for your site menu.
- When you finish editing your site menu, click on the “Apply and Close” button to save your changes.
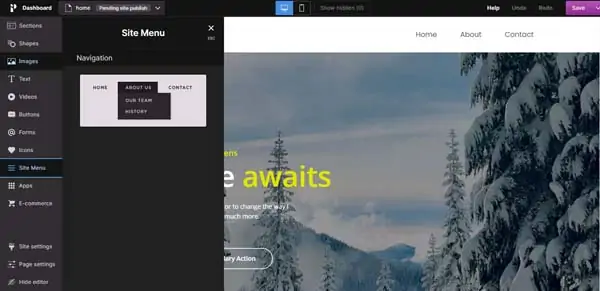
To organize links into a drop-down menu:
- Select your menu and click on the “Edit Menu Links” button under the “Style” tab on the editing menu that then appears.
- Click on the “Right Arrow” icon beside the link you want to include in your drop-down menu.
- The link will now appear in the center of the above link. The highest link will then activate the drop-down menu function.
- Click on the “Apply and Close” button to save your changes.
Editing the Footer in Pagecloud
Because your footer will provide useful information at the bottom of every page on your website, you should take time to fully customize this area.
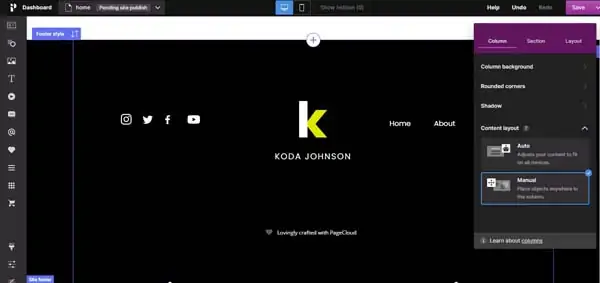
To edit the footer:
- Click on the footer to make the “Footer Style” button appear.
- Use the sidebar to edit the “Section” options for your footer.
- Change the footer background — you can use a “Color,” “Gradient,” or “Image,” but, as a best practice, choose only one of these options.
- Change the style and thickness of the footer border (e.g., “Solid,” “Dashed,” or “Dotted”).
- Add any buttons or icons you want your visitors to see when they reach the bottom of a page on your website.
Previewing and Publishing Your Site in Pagecloud
Once you build and customize your website to your satisfaction, it’s time to preview it to see how it’ll appear to visitors. After that, all that’s left to do is publish!
To preview and publish your website:
- Click on the “Down Arrow” icon next to the “Save” button in the upper-right corner of the “Main” dashboard.
- Click on the “Preview” link to open a preview version of your website.
- Review every page of your site in detail to ensure everything looks and functions as expected.
- If you want to make any edits before going live, simply click on the “Quill” icon to return to the “Editing” dashboard.
- When you’re satisfied with your website, click on the “Publish Site” button in the upper-right corner of the “Main” dashboard.
- While Pagecloud offers a 14-day, free trial, you must purchase one of its premium plans in order to publish your site. Once you select a plan that suits your business, you can go live.
Congratulations! You just built a fully functional website with no prior experience required.
Final Thoughts
Hopefully, this article helped you learn how to expertly use the Pagecloud website builder’s key features. Those skills should enable you to customize and maintain a beautiful website that not only represents your business’s brand, but also helps it grow.
For more information on Pagecloud, check out these other useful articles: