How to Use the Duda Website Builder: Duda Website Tutorial
The Duda website builder is one of the simplest drag-and-drop editors around — especially for small business owners seeking to create a gorgeous website quickly. From ecommerce sites and freelancer landing pages to service-based business websites, Duda has almost anything a small business owner would need.
Recommended: It’s best to follow along to this guide with your own Duda acccount. If you don’t have one, get started with a Duda free trial.

Signing up With Duda
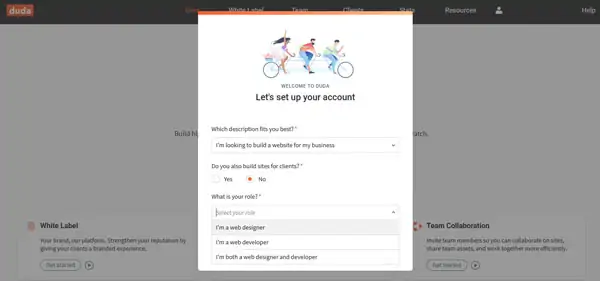
To get started, you must first create a Duda account. Duda will then ask you to select the type of website your business needs and provide a name for your site.
We also recommend upgrading to a paid plan right away so you can have full access to all of the features Duda provides.
Using Duda Templates
After you create a Duda account and provide details on your specific business website needs, Duda will ask you to select a website template. You can choose from a wide range of templates created by Duda that include premade content to help you visualize the possibilities.
Duda allows you to save a library full of different templates as well as easily transfer all your information from one to another. But, doing so will require you to review your site carefully and troubleshoot any issues created during the transfer.
You can always change the appearance of your template without swapping it for a separate template. The Duda website builder makes it easy to personalize and update almost any aspect of your site, allowing you to experiment with fonts, colors, and layout until you create your ideal site.
Changing a Duda Layout Option
The Duda website builder offers several layout options for each template. These options will change the orientation and appearance of your website as well as the location of your business logo and the main navigation bar.
To change a Duda layout:
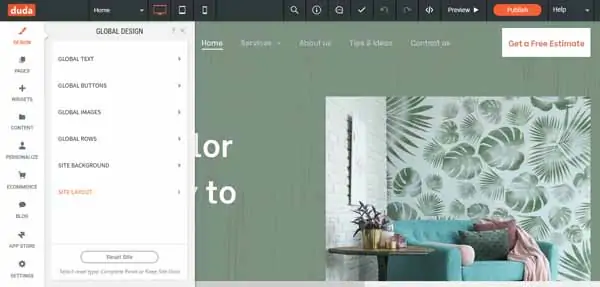
- From the main dashboard, click on the “Design” icon at the top of the left-hand menu.
- Click on the “Site Layout” tab.
![How to use Duda.]()
- The “Site Layout” menu will then appear, giving you a range of options for how to organize your website and how it will look on different devices.
- Click on the layout you prefer, and then the Duda website builder will update your website accordingly.
Don’t worry about trying out several layout options. The Duda website builder automatically creates a backup whenever you update your site’s layout, making it easy to retrieve an alternate version later on.
Changing the Color
The Duda website builder structures its versatile web pages to include editable blocks called “rows.” Within each row, you can add columns, text boxes, widgets, buttons, and many other options. It’s also fairly easy to update a row’s background color.
Need to find a cohesive color strategy for your branding and website? Check out our How to Choose a Great Website Color Palette guide to learn more.
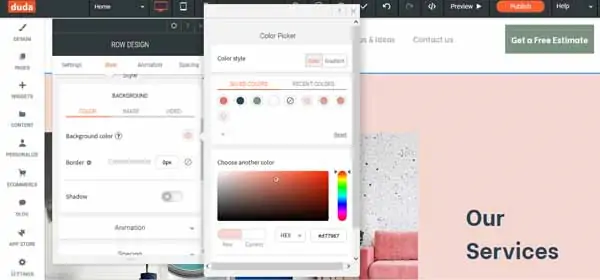
To change the color of a row:
- Click on the row you want to alter to open the “Row Design” menu.
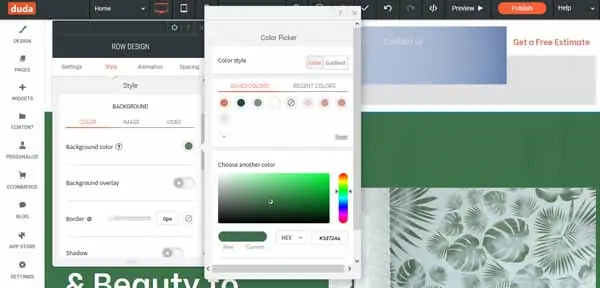
- Under the “Style” section, click on the “Color” option. This will reveal editing options for the row’s background color, background overlay, border, and shadow.
![How to use Duda.]()
- Click on the colored circle to the right of the “Background color” option to open the “Color Picker” tool. You can now choose a new color to fill in your chosen row.
- Repeat this process for any row in which you want to update the color palette.
Note: You can always use the “Undo” and “Redo” arrow buttons in the top editing bar to correct any mistakes. A white “check mark” indicator located next to the “undo” and “redo” buttons will then appear to confirm the Duda website builder saved your changes.
Changing the Fonts
Again, the Duda website builder makes it very easy to alter any font or text on your site with just a few clicks. Make sure you’ve chosen the right font for your website by reading our Best Website Fonts guide first.
To change a font:
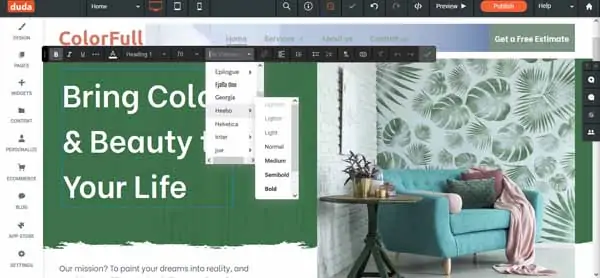
- Click on the text you want to alter and the “Text” editing menu will appear.
- Scroll along the top menu bar to update your text’s color, style, and font.
![How to use Duda.]()
- When you click on your desired font, the Duda website builder will automatically update the text within the text box and save your changes.
Changing the Buttons
With the Duda website builder, the sky’s the limit in terms of editing a button’s content and appearance as well as where it directs your online visitors.
To change a button:
- From the main dashboard, click on the “Widgets” icon near the top of the left-hand menu.
- Scroll down to the “Basics” section where you’ll find the “Button” widget, and then drag and drop the button to your desired location on the page.
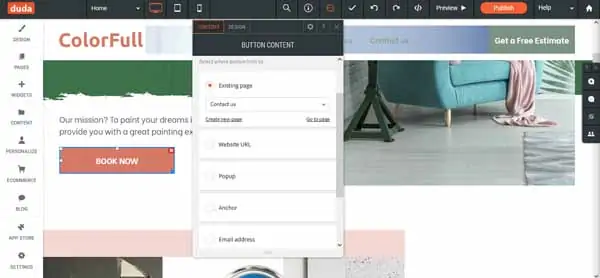
- Once you reposition that button, the “Button Content” editor will open. It’ll allow you to change the button’s text, assign a page to which the button will direct visitors, and create a pop-up window or a “click to call” function.
![How to use Duda.]()
- From here, you also can click on the “Design” tab to the right of the “Content” tab to alter your button’s layout, style, and color.
As always, the Duda website builder will automatically save your changes and you can erase any mistakes with a click of the “Undo” button.
Customizing the Homepage Header in Duda
Your chosen template determines your homepage header’s look and feel, but you can personalize it even further. With just a few tweaks, you can create a header that’ll help your business website stand out and support its purpose and structure.
The Duda website builder offers you multiple header options, including a static image, a rotating carousel of images, and a video. It also gives you multiple ways to edit your homepage header. Just follow these steps to learn the simplest way to edit elements of your Duda website — by clicking on them.
To customize the homepage header:
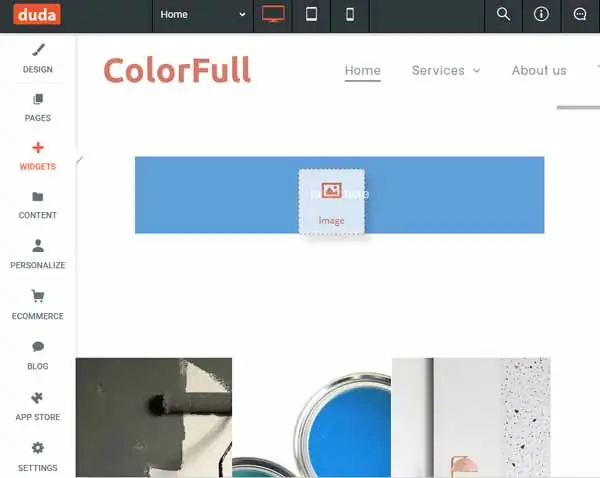
- Hover your mouse over the header section in your Duda website builder dashboard, and then click on the orange lettering that indicates you’ve highlighted the “Header.”
- The “Header” menu will then appear.
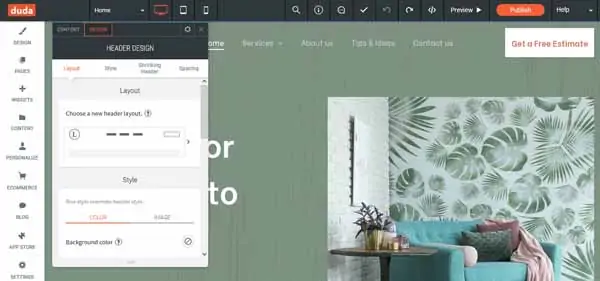
- Click on the “Design” tab to open the “Header Design” editor.
![How to use Duda.]()
- From the “Header Design” editor, you can change the header’s layout, image, color, style, and spacing. We’ll discuss these in more detail next.
Changing the Header Image
As previously mentioned, your homepage header can feature a static image, a slideshow, or a video. We’ll discuss how to update a static image before moving on to slideshow and video headers.
When you choose a header image, make sure it doesn’t obscure your website’s main navigation menu. Select an image that’s dark or light enough to make the main navigation bar and text visible to visitors.
To change a header image:
- After following the steps above to access the “Header Design” editor, go to the “Style” section.
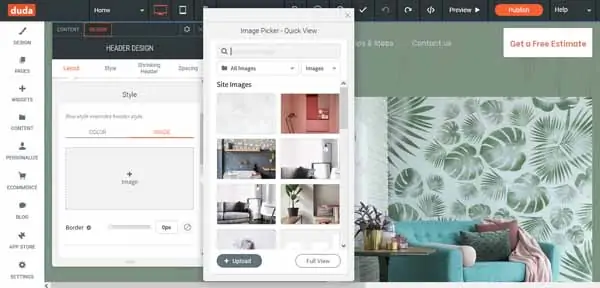
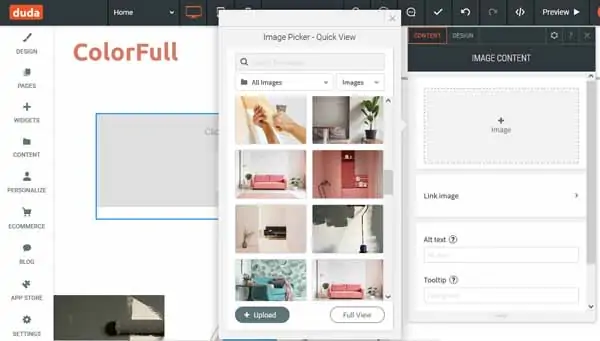
- Select “Image,” and then click on the “+ Image” button.
- The “Image Picker – Quick View” menu will then appear.
![How to use Duda.]()
- From here, simply click on the “Upload” button to add your own personalized photo. The image will automatically appear as the new header image and the Duda website builder will save your work.
- To ensure your image uses your preferred orientation, go to the “Header Design” editor. Under “Image” below the “Replace” and “Edit” buttons, you’ll find options for how to orient your header image.
- Choose “Cover,” “Full Image,” “Tile,” or “No Repeat” to adjust how your header image will appear.
- Use the “Position” tool to choose the image’s focal point.
Adding a Slideshow to the Header
The popularity of slideshow headers continues to grow — especially for ecommerce businesses and brands seeking to showcase more of what they offer at a glance. But, keep in mind that some rotating headers can seem busy and distracting. Aim to use appealing, yet simple images to keep site visitors engaged vs. overwhelmed.
The process of adding a slideshow to the homepage header takes a different route than the “Header Design” editor discussed so far.
To add a slideshow to the header:
- Hover over your header until you see the word “Row” highlighted in blue. Click on the highlighted word “Row” to open the “Row” menu.
- Select “Edit Design” at the top of the “Row” menu to open the “Row Design” editor.
- In the “Style” section of the “Row Design” editor, select “Image.”
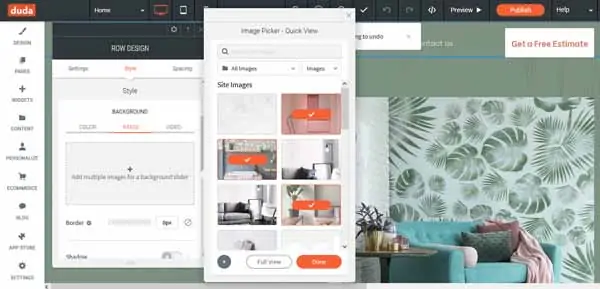
- You’ll then see a box with a prompt to “Add multiple images for a background slider.” Click on this box to open the “Image Picker – Quick View” menu.
- Upload and select multiple images to use in your slideshow.
![How to use Duda.]()
- Click on the “Done” button to add your images to the header background.
- Scroll down through the “Style” section of the “Row Design” editor until you find the “Slide Transition” and “Slide Speed” tools. Use them to further adjust how your images will appear and rotate through the header.
- Underneath the “Slide Speed” tool, you’ll find the familiar “Cover,” “Full Image,” “Tile,” or “No Repeat” options for the positioning of your images within the header.
You can add as many images as you want here. But, remember that too many images can distract and disorient site visitors.
Adding a Video to the Header
Featuring a video in your homepage header can boost customer engagement on your website. But, videos can sometimes feel distracting to online visitors.
As such, the Duda website builder doesn’t play any sound for background videos. This not only creates a less distracting user experience, but also streamlines the process for you because header videos shouldn’t include sound as a best practice.
To add a video to the header:
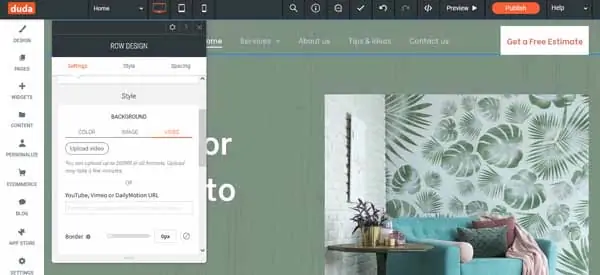
- From the “Row Design” editor, go to the “Style” section.
- Click on the “Video” tab, which appears to the right of the “Image” tab.
![How to use Duda.]()
- Click on the “Upload Video” button to use the “Video Picker” tool to help you upload a video directly from your computer. Alternatively, you can insert a link to a video stored on YouTube, Vimeo, or DailyMotion.
Making Other Header Adjustments
The Duda website builder provides several options for altering the appearance of your header image and text — from image alignment to text color.
To make other header adjustments:
- Hover over your header, and then click on the orange section with the word “Header.” The “Header” drop-down menu will then appear.
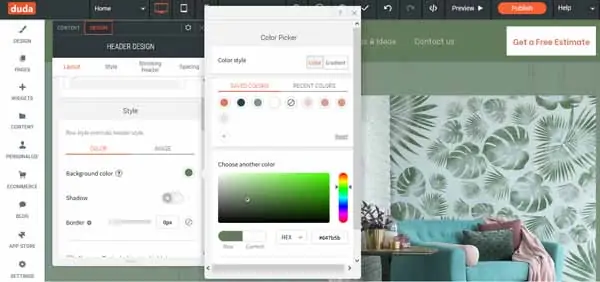
- Click on the “Edit Design” option to arrive at the “Header Design” editor where you can change the layout, background color, and shrinking header options.
- To change the background color of your header, click “Color” (just left of “Image”) to open the “Color Picker” tool.
- Use this tool to select your desired color, create a border, and/or add a shadow.
![How to use Duda.]()
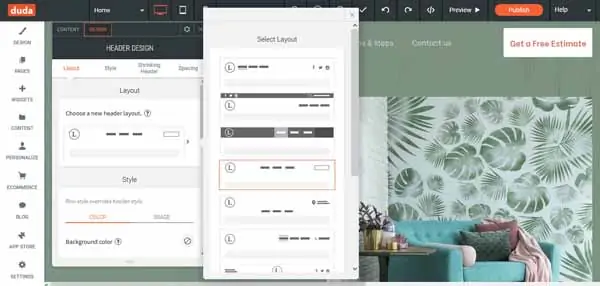
- The “Layout” section of the “Header Design” editor also offers several header alignment options.
- Under “Choose a new header layout,” you’ll find a brief overview of your current layout. Click on the arrow to the right of that overview to open the “Select Layout” editor.
![How to use Duda.]()
- Scroll through and try a few different layouts. Duda will always save your previous version so you can “undo” any changes you don’t like.
- Next, go to the “Spacing” section of the “Header Design” editor if you want to change the inner spacing of the header layout to enhance its readability on mobile devices.
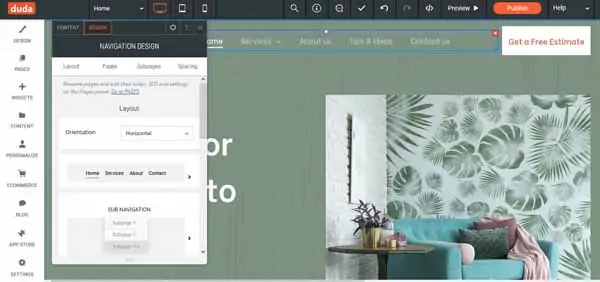
- To update your header’s links and content, close the “Header Design” editor and hover over the text of your navigation menu. Once you click on it, the “Navigation Content” editor will appear.
- Click on the “Design” tab to open the “Navigation Design” editor.
![How to use Duda.]()
- On the “Navigation Design” editor, you’ll see tabs for “Layout,” “Pages,” “Subpages,” and “Spacing.”
- Within the “Layout” tab, you’ll find different text orientation options for your header links.
- Within the “Pages” tab, you can update the “Link Style” and “Link Text.” This is where you can change the font of the links within your header.
- Within the “Subpages” tab, you can update the “Link Style” and “Link Text” for any pages with drop-down menus within the main navigation menu.
- Within the “Spacing” tab, you’ll find different options for inner spacing as well as a preview of how those options will appear on mobile devices vs. desktop computers.
As always, the Duda website builder will automatically save your changes. You also have the option to undo anything you’re not satisfied with.
Make sure you create a homepage that really shines. Be sure to refer to our How to Design a Homepage guide to learn more.
Setting up Pages and Site Navigation in Duda
While we briefly addressed how to edit the links in your homepage header navigation, you may still need to know how to set up pages within your Duda business website.
Some Duda templates won’t have the specific pages your website needs and others may come with too many. Knowing how to add and delete pages is key. To keep your header navigation menu clean and professional, we recommend limiting it to no more than six page links. Using drop-down menus for subpages under those main page links will help you apply this best practice as you flesh out your website.
Keep reading to learn how to further customize your business site using the Duda website builder.
Adding a Page in Duda
You encounter several options when adding a new page to your Duda website. Each page comes with its own layout tailored to its designated purpose. After you add a page, you can designate if it’ll appear in the main navigation menu or if visitors can only access it from other pages throughout your website.
To add a page:
- From the main dashboard, click on the “Pages” icon near the top of the left-hand menu.
- The “Pages and Pop-ups” editor will then appear with a list of your site’s current pages.
- Click on the “+ New Page” button at the top to start creating your new page.
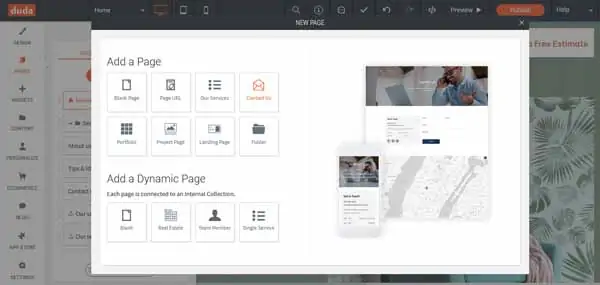
- You’ll now have several options for adding standard and dynamic pages. Hover over each for a quick preview of how they’ll appear on both a desktop computer and a mobile device.
![How to use Duda.]()
- Click on the type of page you’d like to add, you will then be prompted to name this new page.
- Ensure your new page name is accurate, and then click on the “+ Add Page” button. This will instantly add your new page to your website as well as to your homepage navigation menu.
- If you don’t want this new page in your homepage navigation menu, go back to the “Pages and Pop-ups” editor and scroll down to your new page.
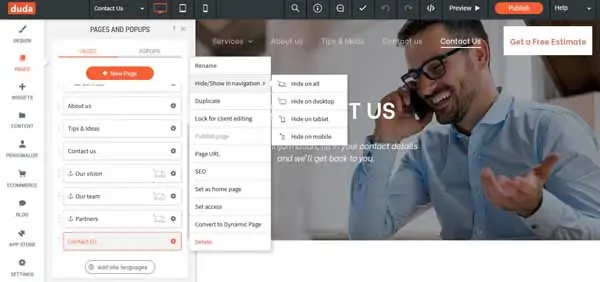
- Click on the “Settings” icon to the right of the page name to open a drop-down menu.
- Hover over the “Hide/Show in navigation” option to select your desired specifications.
![How to use Duda.]()
- If you want to make this a private page accessible to only members or yourself, select “Set access” from this same drop-down menu. Duda allows you to leave a page open to everyone or make it password-protected.
As always, the Duda website builder will immediately save all of your edits and you can click on the “Undo” button if you change your mind.
Reorganizing the Navigation Menu
The “Pages and Pop-ups” editor lists your website’s pages in the order they appear on your homepage navigation menu. Whenever you add a new page, it automatically appears at the end of the list. It’s easy to change the order of this list by clicking on a page and dragging it to where you want it to appear in the corresponding navigation menu.
To reorder navigation menu items:
- From the “Pages and Pop-ups” editor, click on a page to want to relocate.
- Next, drag that page to your preferred location within the homepage navigation menu. This will automatically restructure the order of your website’s page list.
Duda will again save your changes, and you always have the option of retracing your steps if desired.
Adding Pages to a Drop-Down Menu
One of the best ways to limit your homepage navigation menu to no more than five or six items involves creating drop-down menus with appropriate subpages. To do this using the Duda website builder, you must first create a
“Folder” page.
To add a “Folder” page:
- Follow the above instructions for adding a new page until you arrive at the “New Page” window with the option to “Add a Page” or “Add a Dynamic Page.”
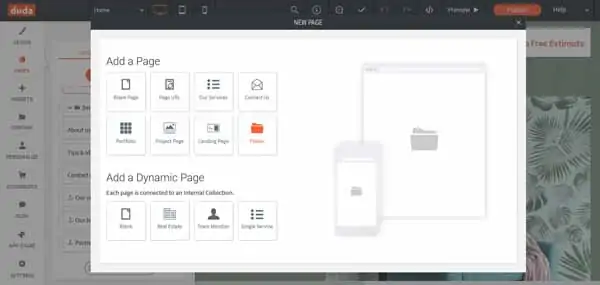
- Select the “Folder” page option.
- Type in your page name, ensure it’s correct, and then click on the “+ Add Page” button.
![How to use Duda.]()
- To add existing pages to this new “Folder” page, return to the “Pages and Pop-ups” editor.
- Click on the page you want to add to the new “Folder” page.
- Next, drag that page over to the new “Folder” page. By hovering and dropping it slightly to the right of the “Folder” page, you’ll attach this page to your “Folder” page and create a drop-down menu.
Deleting Pages
We already discussed how to hide pages from your homepage navigation menu. Now it’s time to learn how easy it is to delete pages with the Duda website builder.
To delete a page:
- From the main dashboard, click on the “Pages” icon near the top of the left-hand menu to open the “Pages and Pop-ups” editor. This will give you access to a list of your site’s current pages.
- Hover over the “Settings” icon to the right of the page name you want to delete. A drop-down menu will then appear with several options.
- Click on the “Delete” option (in red) at the bottom of the drop-down menu to delete the page.
Arranging Content in Duda
Because the Duda website builder includes a true drag-and-drop editor, it’s very easy to edit and arrange content on your Duda website. With a simple click, the editor enables you to change, add, or delete images, text, buttons, and more.
Most content sections live in what the Duda website builder calls “rows.” Clicking on a highlighted area will open the “Row Design” editor, which allows you to organize and arrange the content on your site.
To access the “Row Design” editor:
- Hover over the area you’d like to edit until a blue line appears with the word “row.”
- Next, click anywhere to open the “Row Design” editor.
- Alternatively, you can click on the blue, highlighted word “row” to open the “row” drop-down menu. Within that drop-down menu, click on the “Edit Design” option at the top to open the “Row Design” editor.
Adding a Row
Adding a row to your Duda website is incredibly easy. Even blank pages come equipped with rows, allowing you to simply hover and click on them to add new rows.
To add a row:
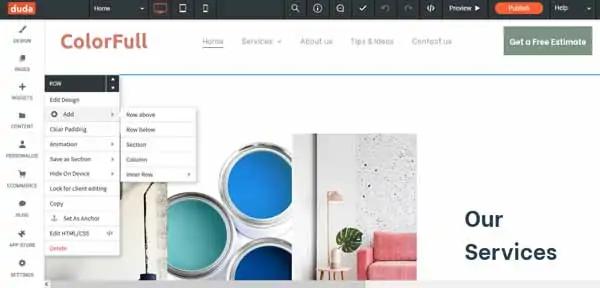
- Hover over any row and click on the blue, highlighted word “row” that appears in the upper-left corner. The “row” drop-down menu will then appear.
- Hover over the “+ Add” section to open yet another drop-down menu.
![How to use Duda.]()
- At this point, you have several options. We’ll discuss them in more detail in the Customizing Content Within a Row section below.
- For now, simply click on the “Row above” or “Row below” option to add a new row.
Changing a Row’s Background
Updating a row’s background can help you maintain a consistent use of your brand’s color palette throughout your website.
To change a row’s background:
- Access the “Row Design” editor per the steps outlined above.
- Go to the “Style” section where you’ll find three options: “Color,” “Image,” and “Video.”
- Click on the “Color” option.
![How to use Duda.]()
- Click on the “Background Color” option to open the “Color Picker” tool.
- You may now select your desired background color.
- If you instead want to use a background image, click on the “Image” option.
- Next, click on the box below to open the “Image Picker – Quick View” menu.
- Upload your own images or select one of the stock photos included with your template. Your chosen image will automatically appear as the row’s background.
As always, the Duda website builder will save your edits as you work.
Customizing Content Within a Row
Beyond simply changing a row’s background color, image, or video, the Duda website builder also gives you many more row options. This includes adding one or more columns to a row as well as adding an “inner row.”
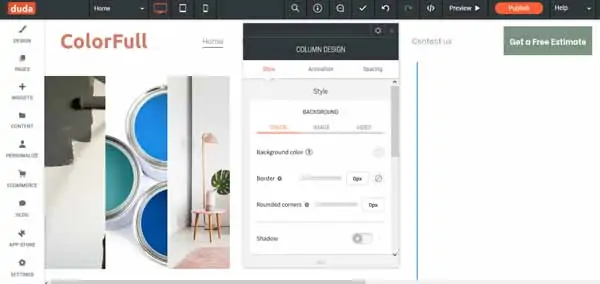
To add columns to a row:
- Hover over the row in which you want to add a column, and then click on the blue, highlighted word “row” to open the “row” drop-down menu.
- Hover over the “+ Add” section, and then select “Column” from the drop-down menu.
- A blank column will automatically appear on the right side of your selected row.
- To edit this new column, simply click on it to open the “Column Design” editor.
![How to use Duda.]()
- You can add up to four columns within a row.
As always, the Duda website builder will automatically save any changes you make here.
To add an “inner row”:
- Hover over the row to which you want to add an “inner row,” and then click on the blue, highlighted word “row” to open the “row” drop-down menu.
- Hover over the “+ Add” section, and then select “Inner Row” from the drop-down menu.
- An “Inner Row” automatically includes two columns, which you can edit by clicking on them.
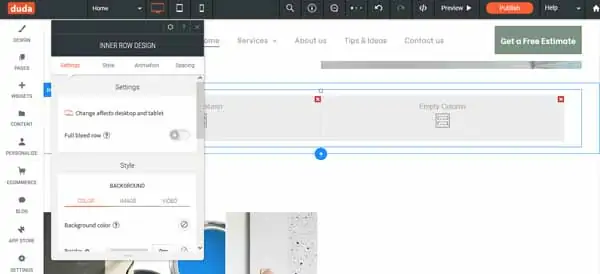
- To further edit an “inner row,” click on the blue, highlighted words “Inner Row” to open the “Inner Row” drop-down menu.
- Click on “Edit Design” at the top of the drop-down menu to open the “Inner Row Design” editor.
![How to use Duda.]()
- Next, select “Settings,” “Style,” “Animation,” or “Spacing” to make your desired further edits.
The Duda website builder will automatically save your changes, which you can easily undo or try again by clicking on the “Undo” and “Redo” buttons.
Managing Sections
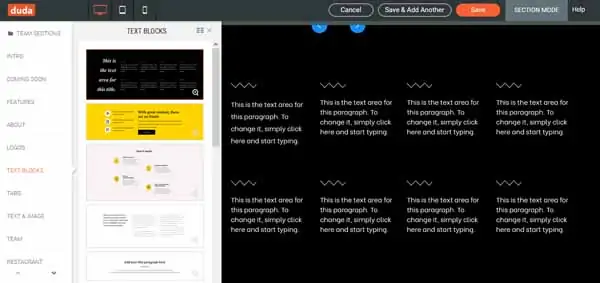
The Duda website builder allows you to save any row as a “Section,” which can provide a convenient way to group content into batches. Here’s an example of a “Features Section”:

This premade section comes with specific columns and icons, saving you time and energy. To make it your own, you simply need to click on any items you want to edit. This will open a helpful, pop-up window from which you can alter the text, font, and layout.
To create a section:
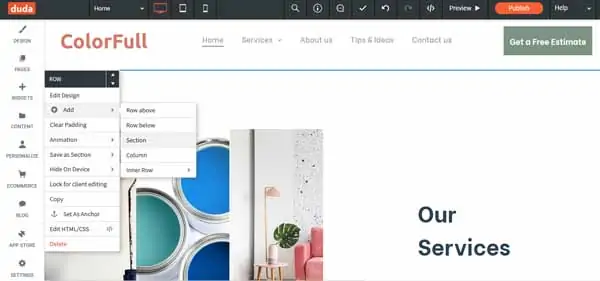
- Hover over the row to which you want to add a section, and then click on the blue, highlighted word “row” to access the “row” drop-down menu.
- Hover over the “+ Add” section, and then select “Section” from the drop-down menu. This’ll send the Duda website builder into “Section Mode,” allowing you to find and try any section before applying it to your site.
- In the column on the left, which features a list of available section types, use the “arrow” symbols at the bottom to scroll up and down.
- Find and click on the type of section you want. This’ll open another drop-down menu that allows you to view the premade section templates available for that type of section.
- Click on one you like and a test version of it will appear.
![How to use Duda.]()
- To add this section to your site, either click on the “Save” button or on the “Save & Add Another” button to continue adding sections.
- After you save the section to your Duda website, you can customize it simply by clicking on any area you want to edit.
To delete a section:
- Hover over the row containing the section you want to delete, and then click on the blue, highlighted word “row” to open the “row” drop-down menu.
- Click on the “Delete” option (in red) at the bottom of the “row” drop-down menu to delete the section. (Note: If you deleted this section by mistake, simply click on the “Undo” button to return your section to its former glory.)
Working With Images and Other Media in Duda
The Duda website builder allows you to add several types of media to your site. These include:
- Images: You can use most of the popular image types, including portable network graphics (PNG), joint photographic experts group (JPG or JPEG), and graphics interchange format (GIF) files. Image size requirements vary, depending on how you plan to use the image. The Duda website builder always displays this information as a reminder when you upload photos. Importantly, any images you upload will become publicly available and should not exceed 15 megabytes (MB) in size.
- Video: These can include files you upload from your computer or a video link you connect from Vimeo or YouTube. You can upload videos up to 200 MB in any file format. Keep in mind that mobile versions of Duda websites don’t support some video functions and your videos become public upon upload to your site. All background videos automatically play without sound.
- Audio: The Duda audio widget accepts links from SoundCloud and Mixcloud. You can upload your own tracks to these platforms and link them to your site or pull from any publicly hosted tracks.
Adjusting Images
With the Duda website builder, you can either upload your own photos to your site or use professional stock photos from its image library. Small business owners may find this especially convenient because it eliminates the need to take professional photos before launching their business website.
This guide covers the basics of how to work with images in the Duda website builder. If you ever need additional guidance, you can always contact Duda’s customer service team here.
You can add images to your Duda website in several ways. For example, you can simply click within a row where you want to add a photo and use the “Row Design” editor to insert an image. Here’s a quick tutorial for another route you can take.
To add an image:
- From the main dashboard, click on the “Widgets” icon near the top of the left-hand menu and then find the “Image” icon in the menu that appears.
- Click and drag the “Image” widget over to your Duda website. This action will highlight the areas where you can place your new image.
![How to use Duda.]()
- Once you place your new image, the “Image Content” editor will appear along with the “Image Picker – Quick View” menu.
- Next, choose the images you want to upload or use from Duda’s stock photo library. (We’ll provide more details on how to change images next.)
To change an image:
- Hover over and click on your new image block.
- This will open the “Image Content” editor and the “Image Picker – Quick View” menu.
- Next, upload your own image or grab a stock photo from the Duda website builder’s image library.
![How to use Duda.]()
- The “Image Content” editor allows you to add “alt text” or change the image’s layout.
To delete an image:
- Hover over and click on the image you wish to remove.
- When the “Image Content” editor opens, you can click on the “Replace” button to upload a new image.
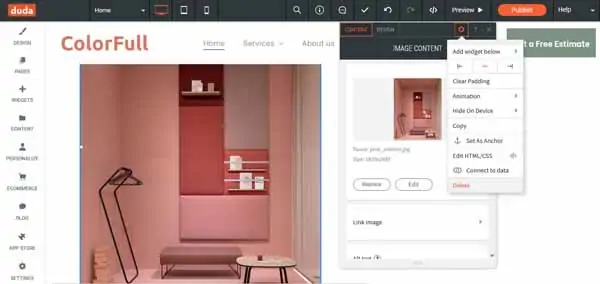
- If you need to remove the whole image block, click on the “Settings” icon in the upper-right corner.
![How to use Duda.]()
- A drop-down menu will then appear with a “Delete” option (in red) at the bottom. Click on the “Delete” option to remove the entire image block.
Adding a Photo Gallery in Duda
The Duda website builder provides one way to add a photo gallery — and it’s very similar to the process for adding an image.
To add a photo gallery:
- From the main dashboard, click on the “Widgets” icon near the top of the left-hand menu and then find the “Photo Gallery” icon in the menu that appears.
- Click and drag the “Photo Gallery” widget over to your Duda website. This action will highlight the areas where you can place your new photo gallery.
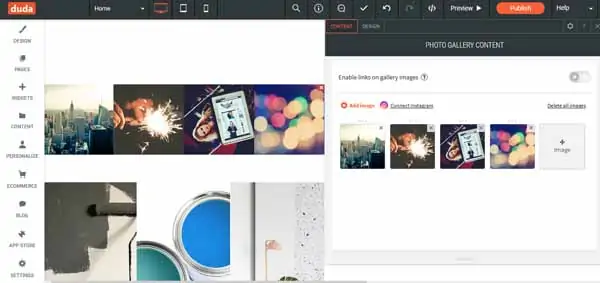
- Once you place your new photo gallery, the “Photo Gallery Content” editor will appear.
![How to use Duda.]()
- The “Photo Gallery Content” editor features several ready-to-use photos. To delete them, simply click the “X” symbol in the upper-right corner of each image.
- Next, click on the “+ Image” button to upload your own photos to this gallery via the “Image Picker – Quick View” menu.
- If you want to adjust the layout of the images in your photo gallery, click on the “Design” tab in the “Photo Gallery Content” editor. Keep in mind that some of these layouts will look different on mobile devices vs. desktop computers.
As usual, the Duda website builder will automatically save your changes.
Uploading Videos
The Duda website builder allows you to upload video several different ways. We’ve already mentioned that the “Row Design” editor provides an option to upload a background video. But, background videos lack sound on Duda websites and visitors often find them distracting.
We’ll now explain how to add a video to your Duda website that doesn’t operate silently in the background of a row.
To add a video:
- From the main dashboard, click on the “Widgets” icon near the top of the left-hand menu and then find the “Video” icon in the menu that appears (it’s under the “Media” section).
- Click and drag the “Video” widget over to your Duda website. This action will highlight the areas where you can place your video.
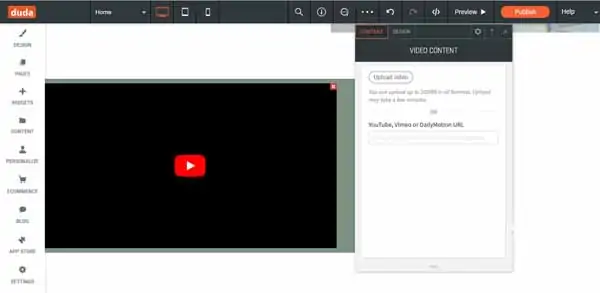
- Once you place your video, the “Video Content” editor will appear.
![How to use Duda.]()
- Next, upload your own video from your computer, record your own video directly with compatible devices, or connect a video link from YouTube, Vimeo, or DailyMotion.
Because all content you publish to your Duda site becomes publicly available, make sure you own the rights or have permission to use this content.
Connecting With Website Visitors Using Duda
Duda offers several ways for you to connect with your website visitors. Specifically, you can:
- Connect your Instagram feed to your website
- Add social media icons that direct people to your business’s social media channels
- Enable visitors to contact you by adding a WhatsApp™ button
- Make it easier for visitors to share your business website on their social media platforms by using the Duda Share widget
- Add a contact form or an “Email us” button to drive engagement
Adding Social Media Icons
Duda provides premade social media icons for the following social media platforms:
- YouTube
- Yelp
- Google My Business
- Waze
- Vimeo
- Snapchat
- Tripadvisor
- Foursquare
These icons enable you to link your website to your business’s social media pages. Connecting any of these directly to your Duda website can help your business reach a larger audience. For example, linking your business website to Waze will automatically provide customers with a map to your business’s location.
To add social media icons:
- From the main dashboard, click on the “Widgets” icon near the top of the left-hand menu.
- Scroll down to the “Social” section in the menu that appears to find the “Social Icons” widget.
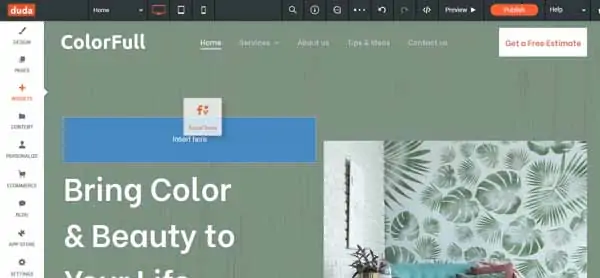
- Drag and drop the “Social Icons” widget to the area of your site where you want your social icons to appear. This action will open the “Social Icons Content” editor.
![How to use Duda.]()
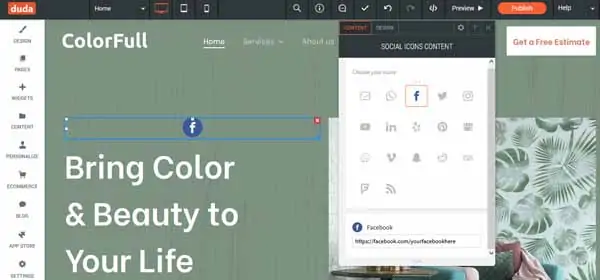
- Click on the icons you want to connect to your site from the options available in the “Social Icons Content” editor.
- Type in the corresponding link for each social media icon you click to connect.
![How to use Duda.]()
- Add as many social media icons as you wish, and the Duda website builder will automatically save your changes.
Embedding an Instagram Feed
The Duda website builder has a widget that enables you to automatically embed your Instagram feed in your website. That means that whenever you publish a post on Instagram, it’ll automatically appear on your business website.
But, keep in mind that it may take a few hours for each new Instagram post to appear on your business website and you can only connect public Instagram accounts to your Duda business website. Private Instagram accounts will block your posts from automatically uploading to your business website.
To embed your Instagram feed:
- From the main dashboard, click on the “Widgets” icon near the top of the left-hand menu.
- Select the “Photo Gallery” widget, and then drag and drop it in the location you want your embedded Instagram feed to appear.
- Click on your new “Photo Gallery” to open the “Photo Gallery Content” editor.
- Select the “Connect Instagram” option within this editor.
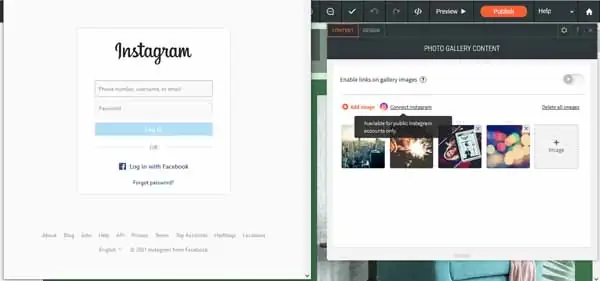
- This action will open a new browser window, asking you to log into your Instagram account.
![How to use Duda.]()
- Once you log into your account, confirm which information you want to share with your Duda website.
- Click on the “Authorize” button to finish embedding your Instagram feed in your business website.
Adding an Email Subscription Form
The Duda website builder includes several useful widgets that help you to create a variety of contact and subscription forms. For example, you can use them to enable site visitors to opt into your business mailing list or book appointments.
As with all things Duda, you can add these features to your site in several ways.
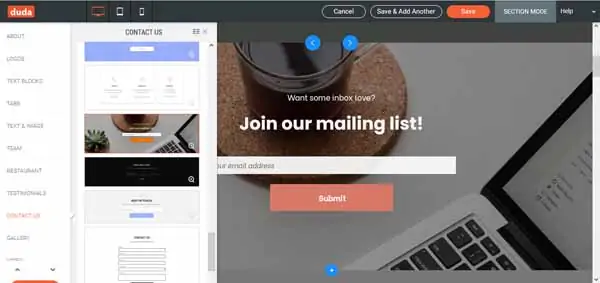
To add a subscription section:
- Hover over the row in which you want to add a subscription section, and then click on the blue, highlighted word “row.” The “row” drop-down menu will then appear.
![How to use Duda.]()
- Hover over “+ Add” and select “Section.”
- This will put your Duda website builder into “Section Mode.”
- In the left-hand menu, scroll down using the “down” arrow at the bottom.
- Click on the “Contact Us” option to open the Contact Us menu. You can scroll up and down this using the bar on the right side of the menu.
- Pick one of the “Mailing List” options that’ll best fit your brand and business. (You can, of course, update the photo and layout to further meet your needs.)
![How to use Duda.]()
- Once you find the option you like, click on the “Save” button to add your new subscription section to your business website.
- To personalize this section, hover over and click on any portion of the form you want to edit. It’s easy to alter the text and font to fit your brand.
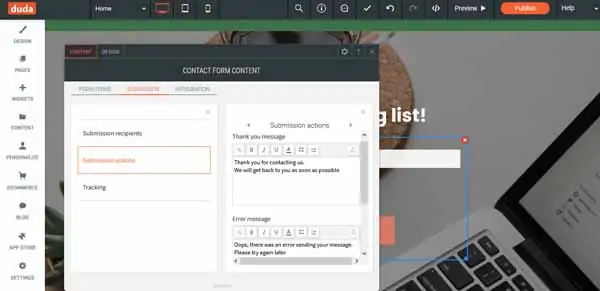
- The “Contact Form Content” editor will open when you click on any space where a visitor would need to enter information or any button they must click to submit.
- Using the “Contact Form Content” editor, you can add a “New Field” if the template you chose doesn’t have enough options for you. (E.g., A new field includes any space in which a visitor would enter a name, email, or other piece of contact information.)
- Use the “Submission” section of the “Contact Form Content” editor to designate where these submissions should go, what sort of actions or automatic messages will pop up, and how to track the submissions.
![How to use Duda.]()
- Use the “Design” tab of the “Contact Form Content” editor to adjust the layout of your submission section. You can personalize it to your heart’s content.
Adding a Contact Form
The Duda website builder also gives you several ways to add a contact form to your site. You can follow the steps above and select a “Contact Form” section that meets your needs. Alternatively, you can follow the instructions below.
To add a contact form:
- From the main dashboard, click on the “Widgets” icon near the top of the left-hand menu.
- Scroll down to the “Business” section to find the “Contact Form” widget.
- Click on the “Contact Form” widget, and then drag and drop it into the location you want your new contact form to appear.
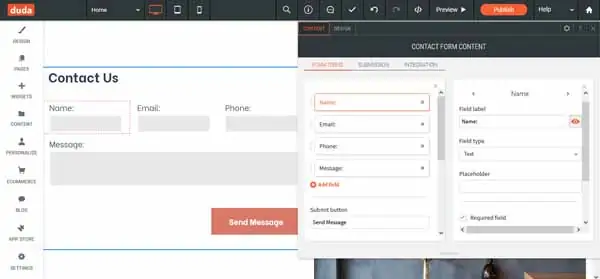
- Once you place your new contact form, the “Contact Form Content” editor will appear. (You also can open this editor by clicking on any portion of your new contact form.)
- Use the “Form Items,” “Submission,” and “Integration” tabs within the “Contact Form Content” editor to further personalize your form’s layout and the information required for each field.
![How to use Duda.]()
- Select the “Design” tab to access the “Contact Form Design” editor. Use this editor to continue customizing your contact form’s layout.
Adding Reviews or Testimonials
Designed with ease of use in mind, the Duda website builder also can help you grow your business in several ways. Beyond adding social media icons to connect visitors to your Google My Business and Facebook accounts, this tool enables you to add glowing customer reviews and testimonials to your website via a Yelp connection.
Currently, the only reviews widget available with the Duda website builder is the Yelp Reviews widget. It’ll send a maximum of three Yelp reviews at a time to your site, updating them as customers post new reviews.
To add the Yelp Reviews widget:
- From the main dashboard, click on the “Widgets” icon near the top of the left-hand menu.
- Scroll down to the “Business” section to find the “Yelp Reviews” widget.
- Click on the “Yelp Reviews” widget, and then drag and drop it into the location you want your reviews to appear.
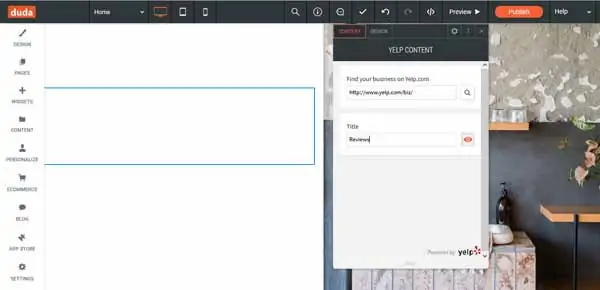
![How to use Duda.]()
- Once you place the “Yelp Reviews” widget, the “Yelp Content” editor will appear. Use this editor to add a link to your business’s Yelp page, adjust the reviews font, and make any other desired design edits.
As always, the Duda website builder will automatically save your edits and enable you to easily undo any mistakes.
If you want to add customer reviews of your business that exist outside Yelp, you have the option to manually enter them. You can do this by creating a dedicated “Page” for those reviews and typing them in yourself. Alternatively, you can add “List” and “Text” widgets directly to any row in your Duda website. While these two approaches won’t automatically update the reviews like the Yelp Reviews widget does, they still offer a good way to highlight your business’s customer service.
Adding a Favicon to a Duda Website
Like other site icons, favicons allow you to not only customize the appearance of your business website, but also create a distinctive experience for visitors. Your favicon will appear next to your website name in each visitor’s browser tab. This tiny icon allows internet users to easily identify and navigate to your site — even with multiple tabs open.
Most favicons are miniature versions of a company’s logo or other graphic aligned with the brand. The Duda website builder allows you to use a favicon image that’s 24 by 24 pixels, 36 by 36 pixels, or 48 by 48 pixels.
Duda not only enables you to include a favicon for your website, but also provides easy and accessible ways to upload a “Social Networks Image” and a “Home Screen Icon” for mobile device users. The steps to add or edit these look incredibly similar to the steps required to add a favicon.
To add a favicon:
- From the main dashboard, click on the “Settings” icon at the bottom of the left-hand menu. The “Site Settings” drop-down menu will then appear.
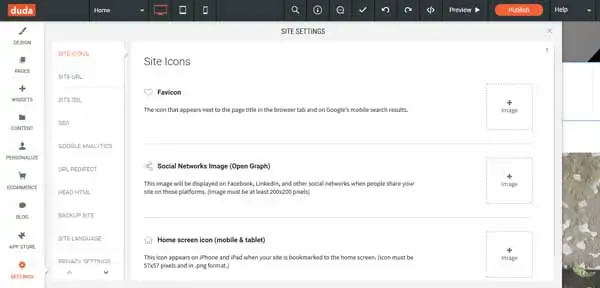
- Click on the “Site Icons” option at the top to open the “Site Icons” menu.
![How to use Duda.]()
- Click on the “+ Image” button to the right of the “Favicon” section to upload your image.
- Your image will automatically upload to the Duda website builder, which will add your favicon to your site.
If you don’t see this change right away, you may need to refresh the page or clear the cache in your internet browser. If this issue persists, you may need to republish your Duda website. If needed, you can always contact Duda’s support team for assistance.
Editing the Footer in Duda
While your main navigation menu appears at the top of each page of your website, your footer will appear at the bottom. It’s also the same on every page. Importantly, footers help ensure visitors can easily access links to your terms of service, privacy policies, social media icons, and contact information — regardless of the page they’re on.
To edit the footer:
- Hover over the top of the footer and click on the orange, highlighted word “Footer.” This will open the “Site Footer” editor.
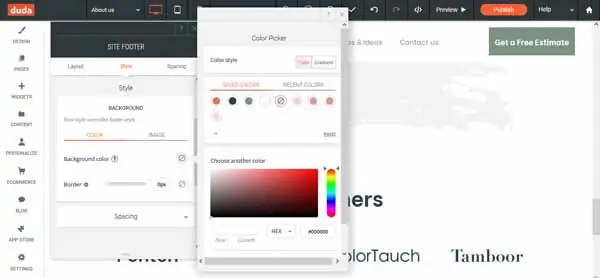
- Use the “Style” section of the “Site Footer” editor to adjust the background color as well as the border color and thickness, if desired.
![How to use Duda.]()
- Use the “Layout” section of the “Site Footer” to hide the footer on specific pages, if desired.
- Click on any of the text boxes within your footer to add or edit your business information.
- Click on the social icons within your footer to open the “Social Icons Content” editor.
The Duda website builder will automatically save your changes, which will appear in the footer of each page of your business website unless you specifically opt to hide the footer on certain pages.
Publish Your Website Using Duda
After completing all this work, it’s finally time to publish your business website. Click on the orange “Publish” button in the upper-right corner and pat yourself on the back. Your Duda business website is now officially live!
Final Thoughts
Hopefully, this guide proved useful as you learn how to use Duda features and tools to personalize your business website. Be sure to bookmark this page if you ever need to return to it for some light troubleshooting or want to add further functionality to your website.
For additional information, check out our How To Make a Website article.
Get Started With Duda
The Duda website builder can help you create a professional, busienss website with ease. Get started with a free trial today and upgrade when you’re ready.