How To Make a Bluehost Website: A Beginner’s Guide To Bluehost
In today’s technology-focused times, it’s essential for every business to have a professional website. Your business website will help draw in new customers, expand your reach, and grow your brand. But, most small business owners don’t have the time or training to create a website from scratch.
That’s where website-building platforms like Bluehost come in. Bluehost makes installing and building a WordPress site easy for beginners. This guide will walk you through the seven simple steps required to make a business website using the Bluehost website builder.
To make sure Bluehost is the right fit for you and your business website, read our review of Best Website Builders of 2026.
Before You Begin
As exciting as it can be to want to immediately get started, it’s important to clarify something here. This builder is designed to be compatible with hosting and creating a WordPress website.
WordPress can be a tricky platform to use, and Bluehost is providing a much needed service by streamlining the process and making it easy for just about anyone to make a WordPress site.
However, it does come with some drawbacks. These include a general clunkiness and slow load time of the builder, as well as some minor limitations to what WordPress code you can include. It might be worthwhile to invest in some research before getting started.
Along with this “How to Make” guide, check out these other helpful articles to understand whether or not Bluehost is the right tool for you and your business:
The 7 Steps to Make a Bluehost Website
The ease of use of this builder does have some limitations. The Bluehost website builder is great for any beginner looking to design a WordPress website.
However, as you get more advanced and want to add more functionality to your site, Bluehost makes that possible but not all WordPress plugins will work with the Bluehost website builder. Read on to find the steps you need to set your website up for success.
Skip Ahead
- Sign up for Bluehost
- Choose a Bluehost Template
- Update the Homepage Header Area
- Update the Rest of the Homepage
- Add More Pages to Bluehost
- Preview Your Website
- Publish Your Bluehost Website
Step 1: Sign up for Bluehost
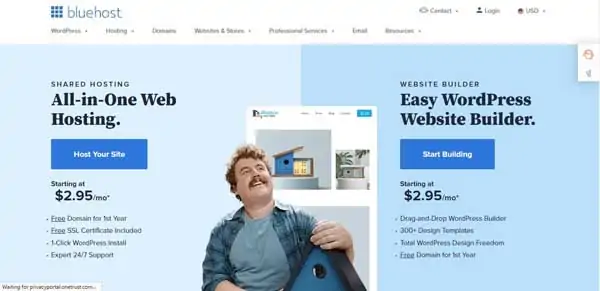
The first step to creating your Bluehost website is signing up at Bluehost. Because this guide will focus on how to use the Bluehost website builder instead of simply hosting a website, click on the “Start Building” button on the right side of the page.
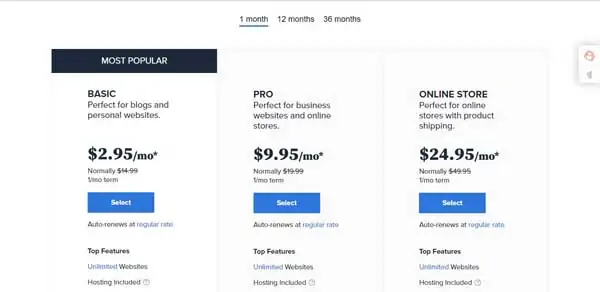
Next, you’ll need to choose a Bluehost builder plan. Bluehost doesn’t offer a free trial, but each of its plan tiers comes with a reduced rate for the first month. This allows you to try all the features in whichever plan is right for your small business from the very beginning.
To learn more about Bluehost’s pricing and plans, read our Bluehost Pricing and Plans for Small Businesses guide.
To proceed, simply click on the “Select” button below your chosen plan. We recommend the Bluehost Basic plan for most small business owners.
On the next page, you’ll have the option of creating a new domain or using an existing domain. For either option, select your domain and follow the subsequent prompts. If you opt to create a domain and your desired domain is unavailable, Bluehost will offer you some recommended alternatives that may suit your needs.
Save time by using our free domain name generator tool. Instantly create your new domain name and rest assured knowing it’s fully available.
You also may opt out of selecting a domain at this time by clicking on the “I’ll create my domain later” link at the bottom of the page.

On the next page, you’ll need to provide some information. This starts with your personal information, including your name, phone number, street address, and email address. You also may enter your business’s name, if desired.
After this, Bluehost will ask you to confirm your plan — referred to here as a “package” — as well as any package extras you want to include. You must purchase these individually priced extras as annual add-ons.
Lastly, you’ll need to provide your payment details. Once you do so, simply check the box stating you’ve read the terms and conditions then click on the green “Submit” button.
Finally, you’ll reach a page that prompts you to enter a password and once again gives you the option of providing a domain name if you haven’t done so already.
Entering a domain is optional, but the password isn’t. Once you do this, check the box stating you agree to Bluhost’s privacy policy and terms of service. Then, click on the “Create Account” button.

Congratulations! You officially have signed up with the Bluehost website builder. The next steps will be to choose a template specific to your industry and begin customization.
Bluehost for domain registration and website building
Still need to get started with Bluehost? TRUiC readers can register their domain with Bluehost free for the first year and plans start as low as $2.95 per month when you click the button below.
Step 2: Choose a Bluehost Template
Before you choose a template, Bluehost will ask you to indicate the purpose of your website. The options include, “Blog,” “Store,” “Business,” and “Portfolio/Resume.” Choose whichever option is most relevant to your business model.
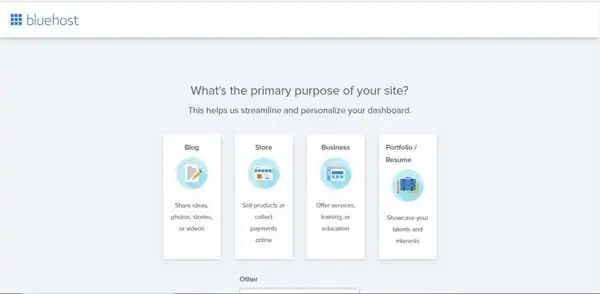
Bluehost will then ask about your comfort level with web design on a scale of one to five before it sends you to a screen that asks, “What’s your site about?” Options range from technology, art, and culture to food, music, and more. You also may search by keyword.
This information will help Bluehost generate a template for your website, so it’s important to choose the option that mostly closely aligns with your business.

After this, you’ll need to choose a name for your website before you reach the Bluehost website builder.
Step 3: Update the Homepage Header Area
The header area is the top section of your website’s homepage. It usually contains a logo and a navigation bar. Sometimes, it may include call-to-action (CTA) buttons, social media icons, or additional information.
What you include on your homepage header should represent your company and branding in a professional and authentic way. It’s essentially the “first impression” of your business website, so it’s important to make sure it’s accurate and appealing.
Add Your Business Logo to Bluehost
Your logo is the best way to instantly communicate your brand and an easy way for customers to remember your business. Bluehost makes it easy to add your logo to your homepage header.
Still need a logo for your business and website? Check out our free logo maker tool to get started.
To begin, click on the gear icon labeled “Settings.” From there, select the “My Site” option in the “Settings” menu that then appears to open the “My Site” submenu. From the “My Site” submenu, click on the “Logo” option, this will open the page shown below.
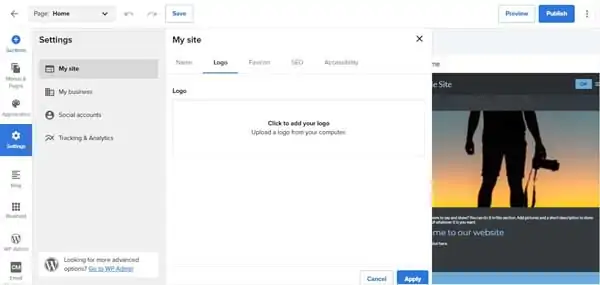
From here, all you have to do is click on the “Click to add your logo” link and choose a file from your device. Once you’ve made your selection, click the “Apply” button and your logo will instantly appear in the upper-left corner of your site’s homepage header area.
Change the Background Color
The Bluehost website builder also makes it easy to customize the background color of your header. It’s important to keep in mind that the color you choose should represent your company’s branding, as well as be readable and pleasing to site visitors.
To change the header background color:
From the Bluehost website editor, click on the section you wish to edit, in this case the “header” area. This will open the “Cover Image” menu on the right. Simply click on the “Background” tab in the “Cover Image” menu to open the menu shown below along the right-side of the editor.
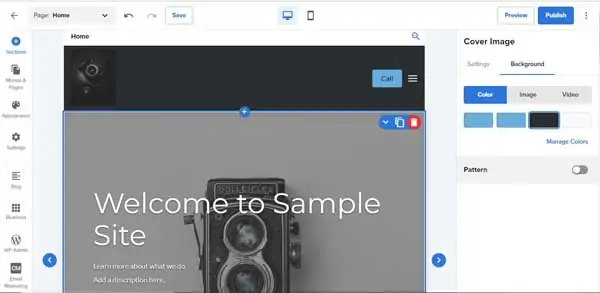
When you select the “Background” tab, you will be given three options: “Color,” “Image,” and “Video.” Click on the “Color” option and then choose the color you want to use from within the available color palette.
Change the Headline
Headlines are brief lines of text that stand out and separate the sections of your Bluehost business website. They should be succinct and accurately reflect your company and what you do.
To change the headline of your header:
Click on the existing headline to open an editing toolbar above the text box. Simply delete the existing text, and then type in the text you want to use as your headline.
From here you also can adjust the font, style, color, and size of the lettering in your homepage header area headline from the editing toolbar.
Update the CTA Button
CTA buttons invite site visitors to take specific actions, such as “Learn More,” “Make an Appointment,” or “Subscribe.” These are important for any small business offering a service or promoting a product. The Bluehost website builder makes it easy to add and customize these useful tools.
To update the header CTA button:
To begin, hover your cursor over the existing CTA button, this will cause an editing toolbar to appear.
To change the button’s text, simply highlight and delete the existing text then replace it with your own. Again, make sure to use compelling language and keep it short.
You can add a link to your button by clicking on the “Chain” icon and following the prompts. This way, when a visitor clicks on the button they are taken to a page where they can “Sign Up” or “Buy” whatever is being advertised.
To change the button’s size, click on the “S,” “M,” or “L” buttons, which represent small, medium, and large options.

To adjust how the button appears, such as color and border, simply use the button’s toolbar, pictured above. Click on the blue square to modify the button’s border. Use the blue circle to modify the button’s color.
The option at the right end of the editing toolbar will change the button into an icon. This includes options like the Visa and MasterCard logo, for example, to signify your website accepts this type of payment.
If you ever need to remove the CTA button, move the toggle to the right of the “Header button” option into the “Off” position. This option will automatically appear within the “Navigation” menu on the right side of the screen.
Step 4: Update the Rest of the Homepage
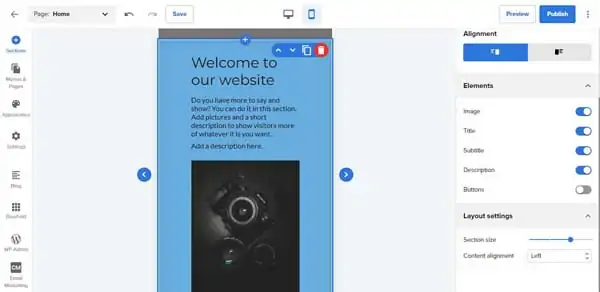
The next step involves updating the rest of your Bluehost homepage so all text, images, and links accurately represent your business.
Make sure your homepage has everything it needs to be successful. Read our How to Design a Homepage article.
Update Text with Bluehost
Most business websites include blocks of text that provide information and introduce visitors to the brand. Updating this text to accurately reflect who you are and what you do is easier than ever with the Bluehost website builder.
To update text on your Bluehost website:
Find and click on the text box you want to update. This will cause an editing toolbar to appear above the text box. From the toolbar, click on any of the provided options, such as font, font size, font color, and more. You can then delete the existing placeholder text, and then enter the wording you want to use.
Replace and Edit the Images
Images add visual appeal to a website and help engage your online visitors. These images should be of a professional quality and reflect your business. It’s always best to use your own images, but rest easy knowing the Bluehost website builder has an in-depth image library full of royalty-free photos to choose from.
To replace images on your site:
Hover over the image you want to replace, this will cause an editing toolbar to appear. This toolbar will have four options.

The first option will be to crop the image. The second option will be to replace the image and upload one from your device. The third option will be to replace the image with a linked image. And the fourth option will be to edit the “Alt Text” for the image.
Alt text is incredibly important, both for accessibility of your website and for search engine optimization (SEO). Your site will rank better and faster when you use alt text to describe the image, as well as allow individuals using screen readers to fully engage with your site.
To learn more about what SEO is and how to improve your site’s search engine rankings, check out our article on Search Engine Optimization Basics.
Update the Footer
The footer is the section at the very bottom of every page on your website. It typically includes your business’s copyright information, physical address, and social media icons.
To update the footer:
Scroll to the bottom of your Home page in the Bluehost website editor to arrive at your footer. From here, click on the text box in the footer of your website template. A helpful editing toolbar will appear above the text box to help guide you.
Delete any existing placeholder text and insert your own wording and branding. You also can change the lettering’s style, font, size, and color from this toolbar.
Next, hover over the social media icons and click on the “Gear” icon that then appears.

From this “Settings” menu, enter the URLs of your social media accounts to link them via these icons to your website’s footer area. Including social media icons is an easy and instant way for site visitors to follow you on other platforms and extend your company’s reach.
If you ever need to remove social icons from the footer, simply move the toggle to the right of the “Social icons” option into the “Off” position.
Step 5: Add More Pages to Bluehost
Most business websites also include a “Products” or “Services” page with some of the business’s offerings as well as a “Contact” page that tells visitors how to reach the company via phone, email, or other means. With Bluehost, this “Contact” page will include a submission form you can manage from your site’s dashboard.
To add additional pages:
Navigate to and click on the “Menus and Pages” option in the left-hand toolbar, and then click on the “New Page” option. A list of available page templates will appear and you’ll find options for both “Contact” and “Products” pages.
Select the new page template of your choice and click on the “Add Page” button. Bluehost will instantly add your new page to your website.

For more information on adding products to your website, check out our in-depth How To Use Bluehost tutorial.
Step 6: Preview Your Website
Once you finish making all of the changes outlined above, you should preview your site prior to launch to see precisely how it’ll appear to online visitors.
To preview your Bluehost site:
Bluehost makes the process of previewing your site an absolute breeze. Simply click on the “Preview” button in the upper-right corner of the Bluehost website builder. The preview pane will open in “Desktop View,” which shows how your website will appear on a desktop computer.
Scroll through your site and carefully review each page and section, checking to ensure every link and button works as expected and there are no typos. It may also be helpful to have a trusted friend or business resource go over everything to catch anything you may have missed. If something doesn’t look right, return to the Bluehost website builder and make the necessary edits.
When you’re done, scroll back to the top of the homepage and click on the “Cellphone” icon located at the top of the preview pane near the center. This view shows how your website will appear on a mobile device.
Again, scroll through your website, reviewing each page and section carefully. Be sure to return to the Bluehost website builder and make any needed changes if something doesn’t look right.
Step 7: Publish Your Bluehost Website
Once you finish previewing your website and making any final edits, it’s time to click on the blue “Publish” button in the upper-right corner of the Bluehost website builder. In a moment, your website will be live on the internet.
Congratulations! You’ve just made a simple, easy-to-use website with the Bluehost website builder in no time at all!
Final Thoughts
Now that you have a professional and fully functional small business website, you can focus on running your business and reaping the rewards of your new online presence. Bluehost makes it easy for you to do just that by taking the extra hassle of manual updates and backups off your hands.
Be sure to see our Additional Resources section at the bottom for more useful articles on how to improve your business and website.
Get Started With Bluehost
The Bluehost website builder makes it a breeze to get your business website up and running. Get started building for as low as $2.95 per month by clicking the button below.