How To Use the Strikingly Website Builder: A Strikingly Tutorial
Regardless of your technical skills, the Strikingly website builder can help you to create a professional business website — complete with mobile optimization — in minutes.
But, even intuitive tools can sometimes seem tricky to navigate. This tutorial will walk you through some Strikingly advanced features as well as the website builder’s most common tasks. By the end, your Strikingly business website will have what it needs to succeed.
Still looking for the right website builder for you? Check out our Best Website Builder of 2026 guide for more insights.
Signing up With Strikingly

You’ll need to sign up with Strikingly if you haven’t done so already. The process is incredibly simple. Just type in your name, email address, password, and then click on the “Get Started. It’s Free!” button.
To find detailed instructions for this, read our How To Make a Strikingly Website guide.
We also recommend you upgrade now so you can take full advantage of Strikingly’s premium features. For plan options, check out our Strikingly Website Builder Review article.
Using Strikingly Templates
The Strikingly website builder is one of the few such tools that doesn’t take you through a questionnaire to get started. Once you sign up, you’ll reach a screen where you can choose your website template. The menu bar at the top allows you to select your industry to help you narrow down your potential template options.
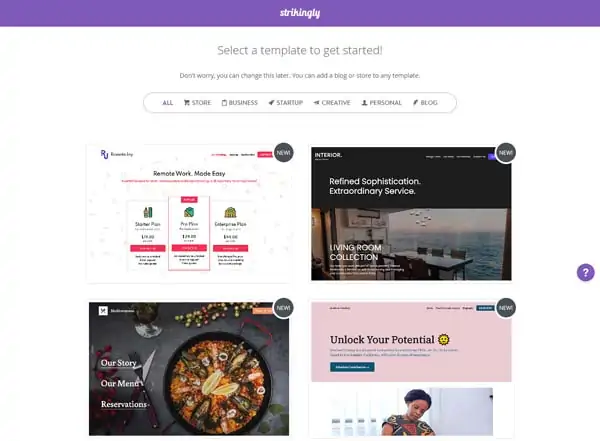
The wonderful thing about the Strikingly website builder is it’s incredibly easy to change your template at any time without the need to start over and create a new website. You also can modify the appearance of your website at any time by changing its accent color, fonts, and buttons as well as customizing the homepage header.
Need some inspiration? Check out the business sites in our Strikingly Website Examples For Small Business article.
Changing a Strikingly Template
In the Strikingly Editor, it’s incredibly easy to update or replace your chosen template. Different Strikingly templates typically suit specific industries, but you can always update the theme of whichever template you choose.
To change a Strikingly template:
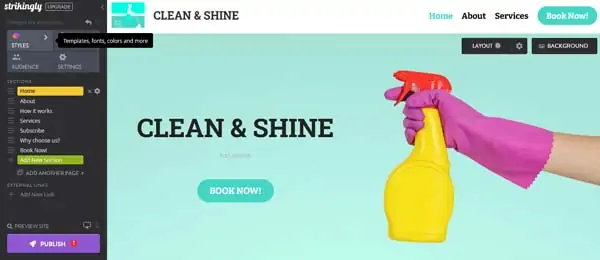
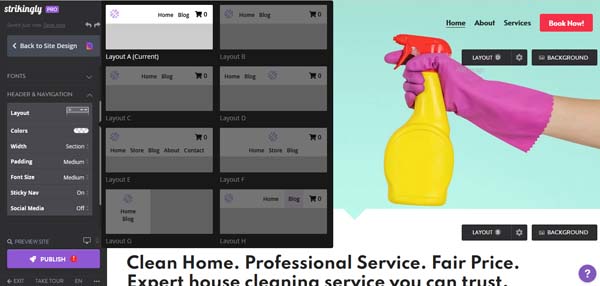
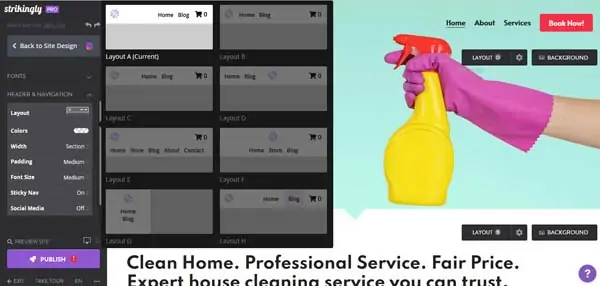
- In the Strikingly Editor’s left-hand “Site Design” menu, click on the “Styles” block at the top of that menu to open the “Edit Styles” menu.

- In the “Edit Styles” menu, select “Change Template” to reach the “Switch Template” menu.
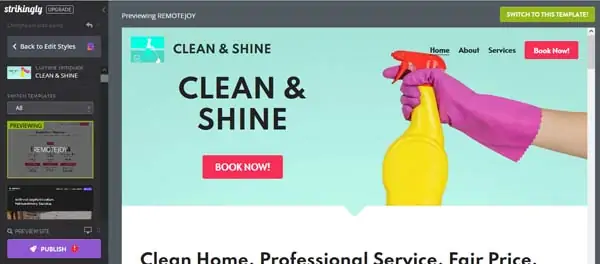
- From there, you can automatically preview any new templates by clicking on them.

- Once you find a template you prefer, click on the “Switch to This Template” button in the upper-right corner.
- The Strikingly website builder will automatically update your website with your new template and return you to the Strikingly Editor.
Changing a Template’s Accent Color
The Strikingly website builder enables you to change the accent color for your entire template. The accent color appears in headings, buttons, backgrounds, and other website elements.
Need a good color scheme for your website and branding? Use our How to Choose a Great Website Color Palette guide to learn more.
To change a template’s accent color:
- From the “Site Design” menu, click on the “Styles” block to open the “Edit Styles” menu.
- Select “Color Scheme” to open a drop-down menu with a color-picker tool.
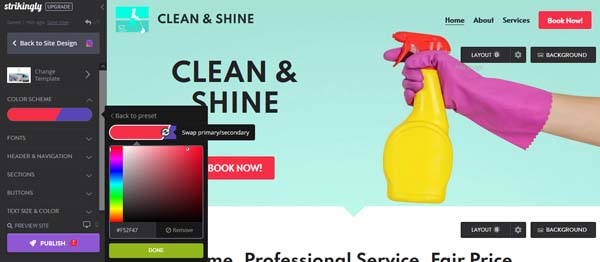
- Use the color-picker tool to adjust the color, tone, shade, and brightness of your color scheme. You can even swap your primary and secondary colors, if desired.

Changing the Fonts
The ingenuity of the Strikingly website builder is that it not only allows you to choose from a large library of fonts, but also use Google to search for a font or upload your own.
Your website can use up to four different fonts for its title, headings, text, and buttons. We recommend you stick with just two fonts to keep things simple, using one font for your site’s title and headings and another for its text and buttons.
For more guidance on how to find and use the right fonts for your website, refer to our Best Website Fonts guide.
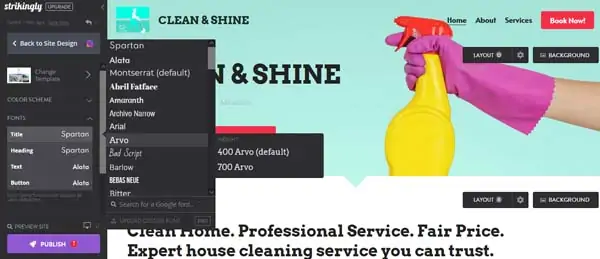
To change the fonts:
- From the “Site Design” menu, click on the “Styles” block to open the “Edit Styles” menu.
- Select “Fonts” to open this drop-down menu.
- To update the title font, click on “Title” to open the “Font Library.”
- Hover over each font in the “Font Library” to see:
- Its “weight” options (i.e., how bold it’ll appear on your site).
- A preview on your screen of what it’ll look like in your template.
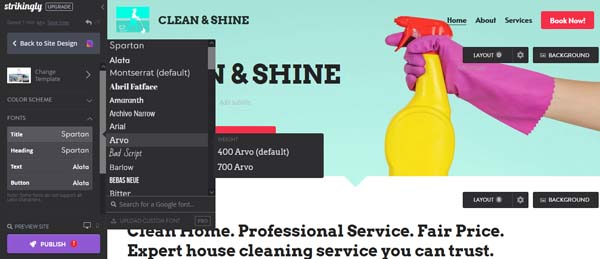
- Click on your preferred font to instantly update the title font throughout your template.
- Repeat these steps to update the fonts for your site’s headings, text, and buttons.
Changing the Buttons
The Strikingly website builder gives you one button design to use throughout your site. You can choose to add buttons anywhere on your website and use them as “Primary” buttons for your main call-to-action (CTA) statements and “Secondary” buttons for supporting actions like “Learn More.”
To change the buttons:
- From the “Site Design” menu, click on the “Styles” block to open the “Edit Styles” menu.
- Select “Buttons” to open the “Buttons” drop-down menu.
- Click on “Color” to choose from a limited selection of options.
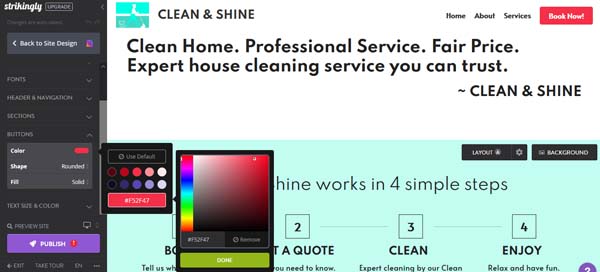
- Click on the current color button to open a color-picker tool from which you can choose your own unique color. Click on the “Done” button when you finish making your changes.
- Next, click on “Shape” in the “Buttons” drop-down menu. You can choose to have your buttons appear “Square,” “Rounded,” or as a “Pill” shape.
- Make your choice and Strikingly will automatically update all the buttons across your site.
- Next, click on “Fill” in the “Buttons” drop-down menu. You can choose either “Solid” for a complete fill or “Ghost” to have just an outline of your button appear.
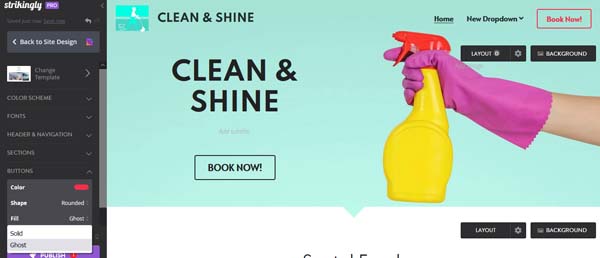
- Make your choice and Strikingly will automatically update all the buttons across your site.


Customizing the Homepage Header in Strikingly
Your Strikingly template will determine the look and feel of your site’s homepage header area. But, you can always customize its background to better match your business’s branding.
Most templates enable you to use images, videos, or slideshows in the background of your homepage header. You also can adjust the text placement, the appearance of the navigation menu, and the brightness of the background or text.
Your homepage header is just the beginning. Make sure your homepage has everything it needs by using our How to Design a Homepage guide.
To customize the homepage header:
- Ensure the header image already appears in your preferred location. If not, follow the instructions in the “Changing a Strikingly Template” section to select the type of homepage header with your desired image position.
- Next, click on the “Styles” block in the “Site Design” menu to open the “Edit Styles” menu.
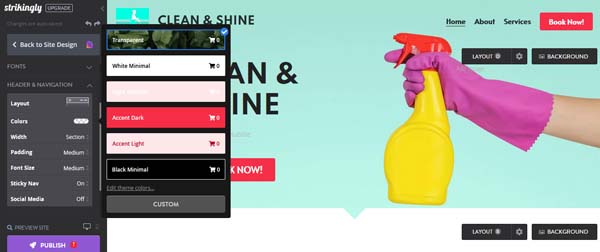
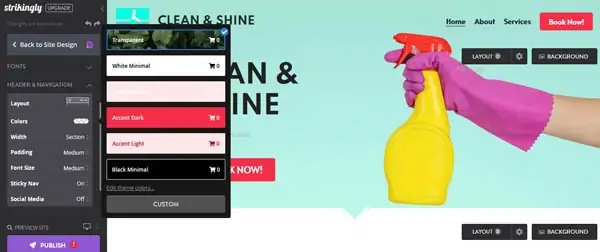
- Select “Header & Navigation” to open the corresponding drop-down menu from which you can adjust the majority of elements within your homepage header area.
- Click on “Color” to open the “Color” drop-down menu. If you want to use a header image, make sure to select the “Transparent” option.
- Follow the directions below for using an image, video, or slideshow as your homepage header background.
Changing a Header Image
Headers can feature a static image or a slideshow of images. These directions focus on updating a static image. You also can skip to the “Adding a Slideshow to the Header” section below.
To change a header image:
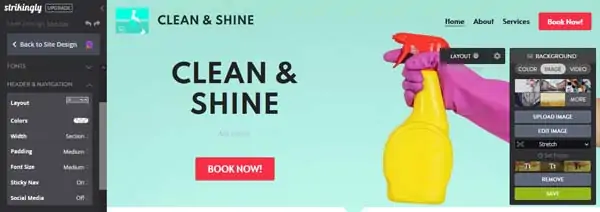
- In the Strikingly Editor, click on the “Background” button within your homepage header area. This’ll open a drop-down menu with several options, including the option to choose, edit, or upload photos.

- The Strikingly website builder will automatically suggest several free, stock images from which you can choose. Simply hover your mouse over any of the suggested images to preview how it’ll look as your header image.
- To upload your own photos, click on the “Upload Image” button to open a pop-up “Upload Images” window.

- Use this window to upload an image from your computer, link an image from the internet, or access the “Strikingly Library” of images.
- Once you upload your image or choose one from the “Strikingly Library,” it’ll automatically appear in your homepage header area.

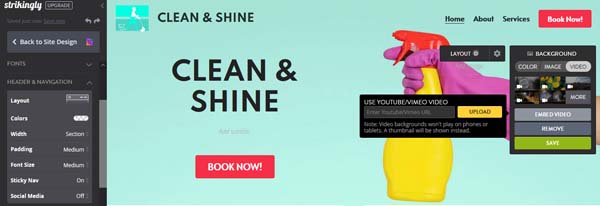
Adding a Video to the Header
Using a video in your homepage header can help your website stand out and grab your visitors’ attention. But, as a best practice, videos used in headers shouldn’t have sound. Please also note that video backgrounds won’t play on phones or tablets.
To add a video to the header:
- In the Strikingly Editor, click on the “Background” button within your homepage header area to open the “Background” drop-down menu.
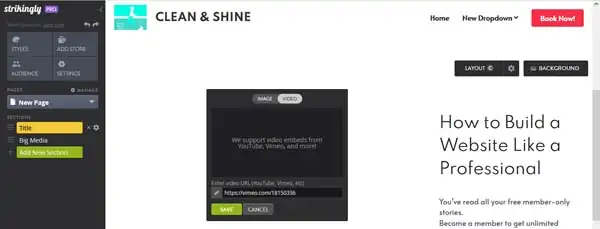
- Select the “Video” tab at the top of the “Background” drop-down menu. Strikingly will suggest several stock videos you can preview by hovering your mouse over them.
- Click on the “Embed Video” button and enter the appropriate YouTube or Vimeo link in the pop-up box.
- As always, the Strikingly Editor will automatically apply your changes.

Adding a Slideshow to the Header
Slideshow headers represent one of the most popular ways to grab visitors’ interest. Strikingly only allows access to what it calls “Slider Sections” to customers of its Pro plan or above. That means users of the Strikingly Free and Strikingly Limited plans must upgrade in order to create a slideshow header.
Importantly, you can add two different types of “Slider Sections” to your site: an image-only version with no option for text or buttons and another version with text and buttons plus optional background images. Read on to learn how to place each to your homepage header area.
To add an image-only slideshow to the header:
- In the Strikingly Editor’s left-hand “Site Design” menu, click on the “Add New Section” button.
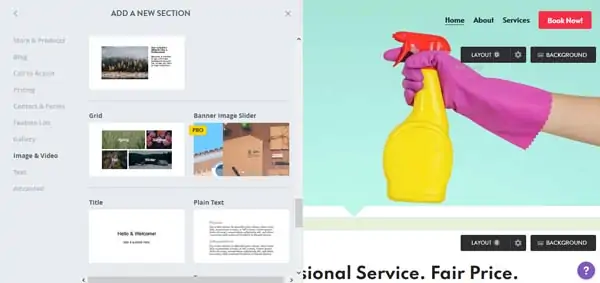
- The “Add a New Section” menu will then appear. In the left-hand column of this menu, select “Image & Video.”
- From the available section options that then appear, select the “Banner Image Slider” section.

- This’ll automatically place your new slider on your Strikingly Editor, but not in your homepage header area.
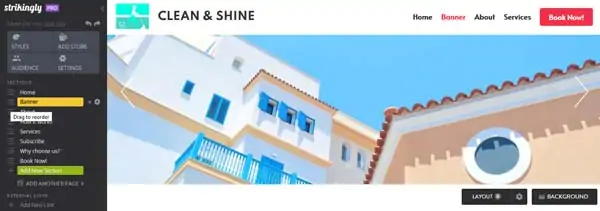
- To move the image slider to the homepage header area, hover your mouse over the three horizontal lines to the left of the “Banner” page section in the “Site Design” menu.

- Click and drag the “Banner” page to the top of the navigation (ie., the sections list) to place it in your homepage header area.
- To update the images of the “Banner,” click on the “Image & Link” button to open the “Image & Link” drop-down menu.
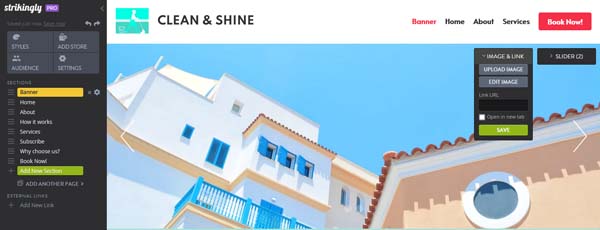
- Click on the “Upload Image” button to open the “Upload New Image” pop-up window where you can add your own images or choose from the provided library.
- Entering a link in the provided “Link URL” field will make the entire slider clickable, sending visitors to another part of your site or an external web page.


To add a slider with text and buttons to the header:
- In the Strikingly Editor’s left-hand menu, click on “Site Design” to open the “Site Design” menu. Then, click on the “Add New Section” button to open the “Add a New Section” menu.
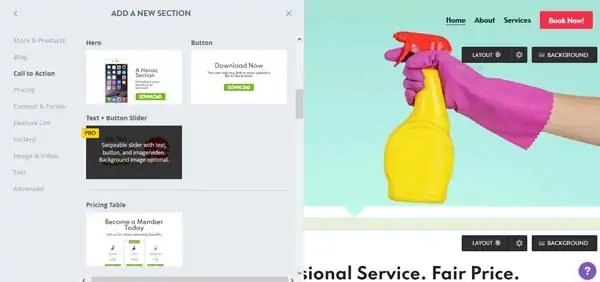
- In the left-hand column of the “Add a New Section” menu, select “Call to Action.”

- From the available “Call to Action” section options that then appear, select the “Text + Button Slider” to automatically place a “Slider” section.
- To move the “Slider” to the homepage header area, hover your mouse over the three horizontal lines to the left of the “Slider” page section in the “Site Design” menu.
- Click and drag the “Slider” page to the top of the navigation (ie., the sections list) to place it in your homepage header area.
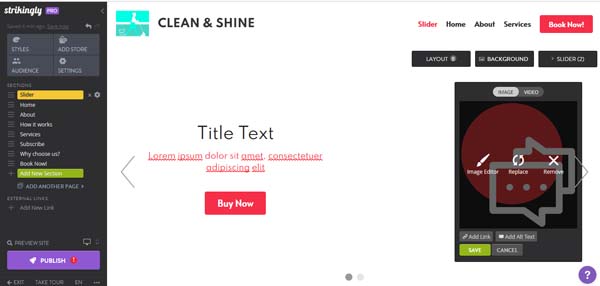
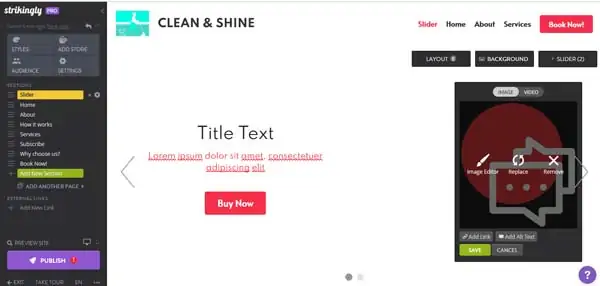
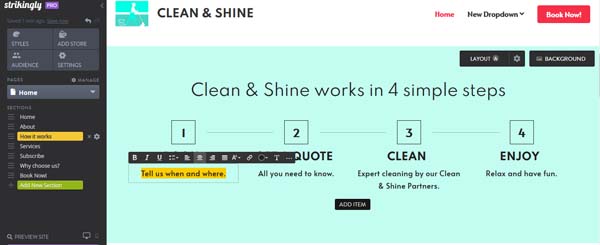
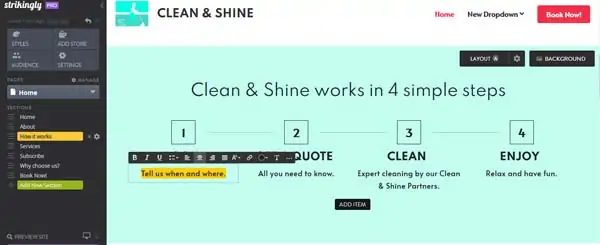
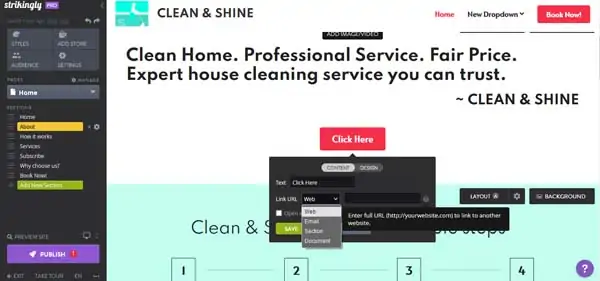
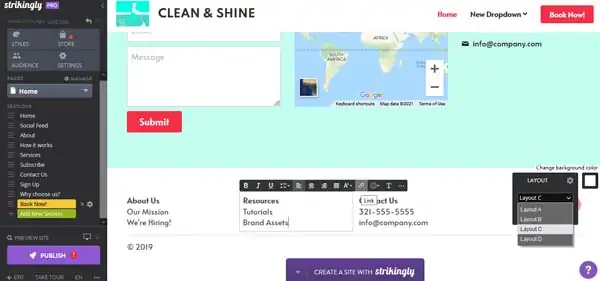
- To update any of the text within the “Slider,” simply click on it to open the “Text Editing” toolbar and type away.
- To update any of the CTA buttons, simply click on the button you want to update. A “Content and Design” drop-down menu will then open, allowing you to edit the button’s text and embedded link.

- To edit any existing image within the “Slider,” click on it to open an “Image” editing menu. Use that menu to adjust, replace, or remove the image as well as add a link and “Alt Text.”
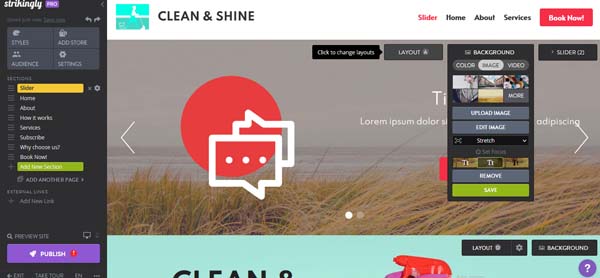
- To update the background of your “Slider,” click on the “Background” button to open a drop-down menu. Use that drop-down menu to alter the color scheme or add an image or video as the background.
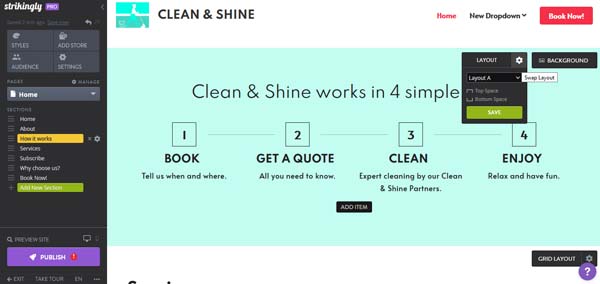
- To adjust the layout of the “Slider,” click on the “Layout” button. This’ll open a menu from which you can choose one of the three different options: “Layout A,” “Layout B,” or “Layout C.”
- Once you make your selection, the Strikingly Editor will automatically update and save your changes.


Note: “Alt Text” is vital for any sight-imparied individuals using screen readers to visit your site. A concise description of the images on your site will improve their overall experience of your business website.
Making Other Header Adjustments
The Strikingly website builder provides a few more options to change the appearance of your homepage header. For example, you can change the color of the header image overlay, adjust the text alignment and layout, or change the font size to make it stand out.
To make other header adjustments:
- Click on the “Styles” block in the “Site Design” menu to open the “Edit Styles” menu.
- Select “Header & Navigation” to open the corresponding drop-down menu.
- Select “Layout” to open a menu full of navigation layout options from which you can choose.
- Select “Colors” to open a drop-down menu of colors from which you can choose or select the “Custom” button to use the color-picker tool to choose your own.
- Select “Font Size” to choose from the “Small,” “Medium,” or “Large” options.
Setting up Pages and Site Navigation in Strikingly
As your website will most likely have multiple pages, the navigation menu should allow visitors to easily find and move between those pages. But, as a best practice, try to limit your navigation menu to just five or six items.
The first task in setting up your website’s navigation menu involves ensuring you have all the pages you want accurately displayed in your menu. If your chosen template didn’t come with all the pages you need, you’ll have to add pages to your website.
Another way to keep your main navigation menu tidy is to include drop-down menus for subpages and/or links to external websites.
Adding a Page in Strikingly
Most Strikingly website templates feature one long, single page. The navigation menu can take visitors to specific sections within this lone page. To have a site with multiple pages and other advanced features, you must purchase a Strikingly Pro plan or higher.
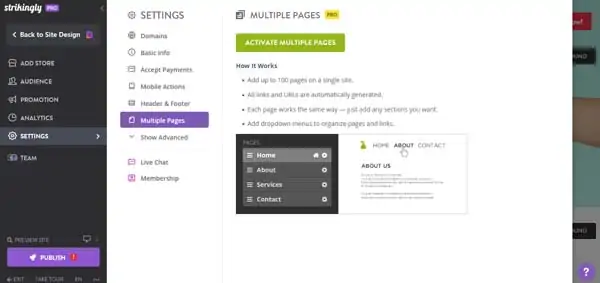
Before you can add pages to your Strikingly website, you must first activate the multiple pages functionality on your template.
To activate multiple pages:
- First, ensure you have a Strikingly Pro plan or higher to gain access to this feature.
- In the “Site Design” menu, click on the “Add Another Page” button to open the “Settings & Multiple Pages” menu.
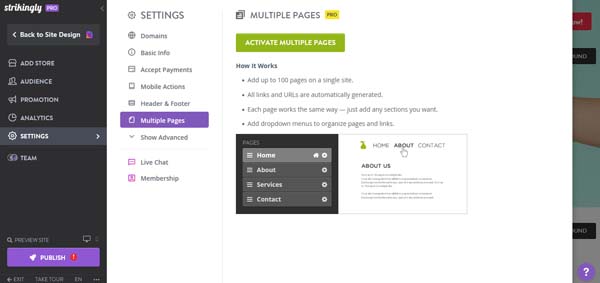
- Click on the green “Activate Multiple Pages” button. A pop-up window will then appear, asking if you’re sure you want to perform this action. Simply click on the “OK” button to continue.
- Your template can now support multiple pages.
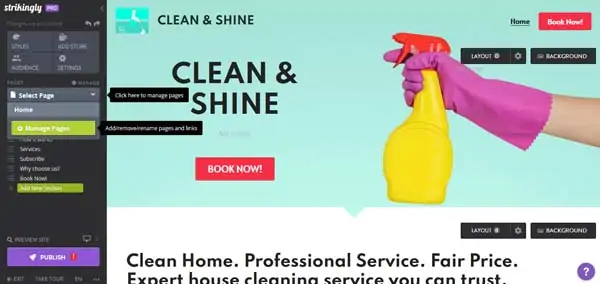
To add a page:
- In the “Site Design” menu, you’ll now find a “Pages” section. Click on it to open the “Select Page” drop-down menu.
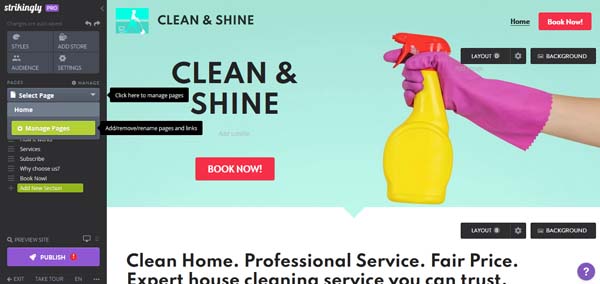
- Click on the green “Manage Pages” button to open the “Manage Pages” menu.
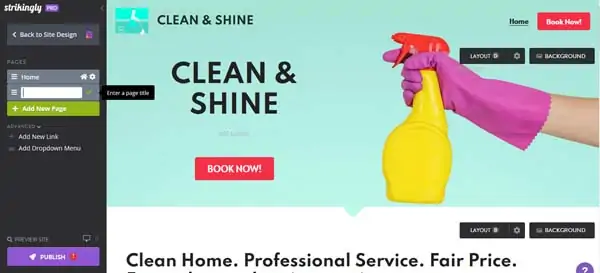
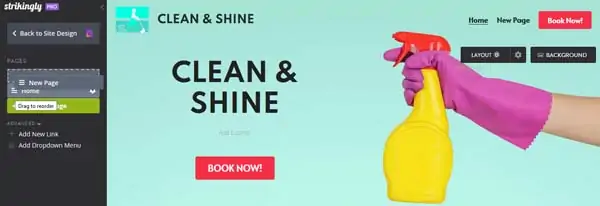
- Click on the green “+ Add New Page” button and type the page title into the text box.

- Click on the green checkmark to immediately add your new page to your website and its navigation menu.
Reordering the Navigation Menu
When you add a new page, it’ll automatically appear in your website’s navigation menu. If you want to move that page within the navigation menu, you’ll follow a similar process to some of the steps in the “Adding a Slideshow to the Header” section.
To reorder pages in the navigation menu:
- In the “Site Design” menu, select the “Pages” section to open the “Select Page” drop-down menu.
- Click on the green “Manage Pages” button to open the “Manage Pages” menu.
- From the “Manage Pages” menu, click on the three horizontal lines to the left of the page you want to reorder. Then, simply drag and place the page in the order you’d like it to appear in your site’s navigation menu.
Adding Pages to a Drop-Down Menu
Creating a drop-down menu with subpages is a great way to limit the number of items in your site’s top-level navigation menu to about five or six. To do this, first create the pages using the instructions above. You can then add a drop-down menu and select which pages it’ll include.
To add a drop-down menu:
- In the “Site Design” menu, select the “Pages” section to open the “Select Page” drop-down menu.
- Click on the green “Manage Pages” button to open the “Manage Pages” menu.
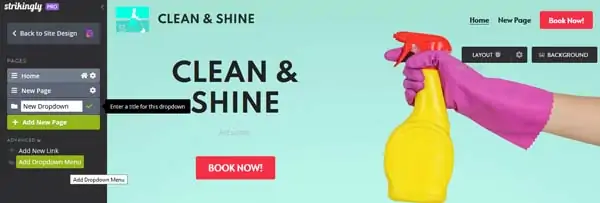
- From the “Manage Pages” menu, click on the green “Add Dropdown Menu” button to open a text box that’ll prompt you to enter a title for this new drop-down menu.
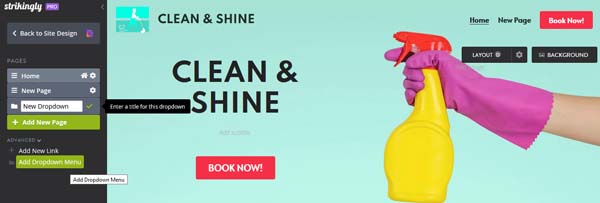
- Click on the green checkmark to make your new drop-down menu appear in your site’s navigation menu.
- To add pages to the drop-down menu, drag and place them into the new menu page.
Deleting Pages
You can always choose to hide a page from your main navigation menu or delete it altogether from your website.
To delete a page:
- In the “Site Design” menu, select the “Pages” section to open the “Select Page” drop-down menu.
- Click on the green “Manage Pages” button to open the “Manage Pages” menu.
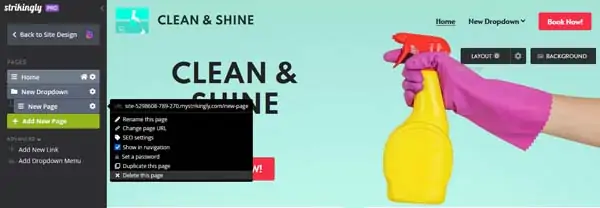
- Click on the “Settings” icon to the right of the page you want to delete. This’ll open the “Settings” drop-down menu.
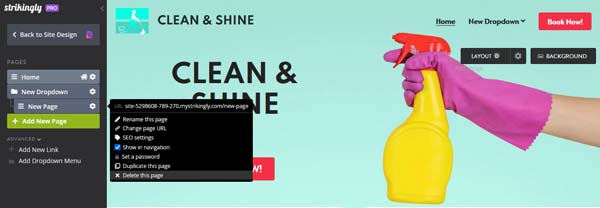
- In the “Settings” drop-down menu, select the “Delete this page” option at the very bottom.
- A pop-up window will then ask you to confirm you want to delete this page. Click on the blue “OK” button to automatically remove the page along with any content it contains.
To remove a page from the navigation menu:
- In the “Site Design” menu, select the “Pages” section to open the “Select Page” drop-down menu.
- Click on the green “Manage Pages” button to open the “Manage Pages” menu.
- Click on the “Settings” icon to the right of the page you want to remove from the navigation menu. This’ll open the “Settings” drop-down menu.
- Uncheck the box next to the “Show in Navigation” option in the “Settings” drop-down menu.

- You’ll then see an “Eye Strikethrough” icon next to that page in the “Manage Pages” menu, confirming it’s no longer visible in your site’s navigation menu.

Working With Strikingly Sections
When you add a new page to your Strikingly website, it won’t include any content. In order to add content to it, you must first add sections. The Strikingly website builder offers multiple options for sections that vary based on the purpose of the content.
We’ll start by sharing general instructions that apply to all types of sections. Then, we’ll dive into more detailed instructions tailored to specific sections.
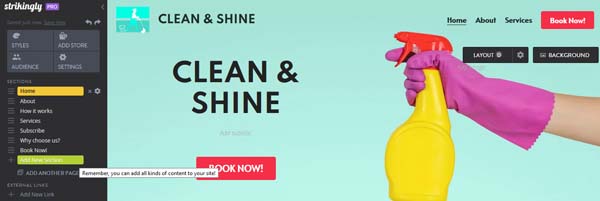
Adding a Section
The Strikingly website builder offers 10 types of sections — each with a handful of stylistic options. All sections contain placeholder content you can customize to suit your business.
To add a section:
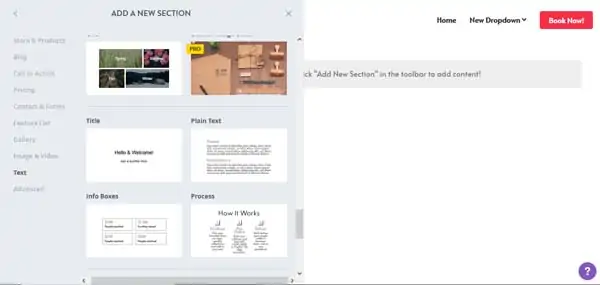
- In the Strikingly Editor’s left-hand “Site Design” menu, click on the green “Add New Section” button under “Sections.”
- The “Add a New Section” menu will then appear with a list of section types plus multiple layout options for each.
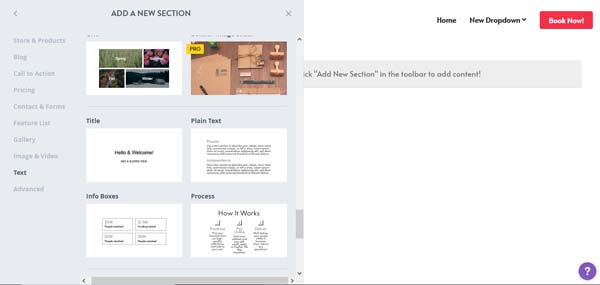
- Scroll through the available sections and click on the one you like to instantly add it to your page.
Using the “Sections” Menu
The “Sections” menu in the Strikingly website editor allows you to move, duplicate, or delete sections easily. While the “Adding a Slideshow to the Header” section of this guide already briefly touched on how to move sections, we’ll provide a refresher here as well.
To move, duplicate, or delete a section:
- To move a section, go to the “Sections” portion of the “Site Design” menu.
- Click on the three horizontal lines to the left of the section you want to move. Drag and place the section in the order in which you’d like it to appear on your page.
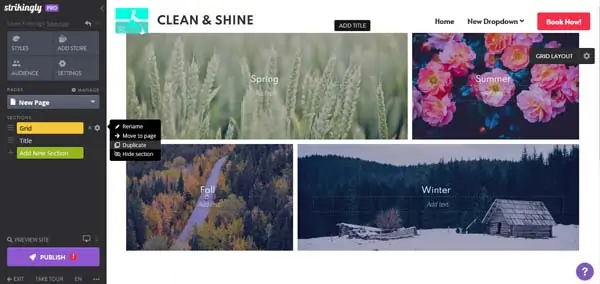
- To duplicate a section, go to the “Sections” portion of the “Site Design” menu and click on the “Settings” icon to the right of the section you want to reproduce.
- From the “Section Settings” drop-down menu that then appears, select “Duplicate” to automatically place a copy of this section immediately below the existing section.
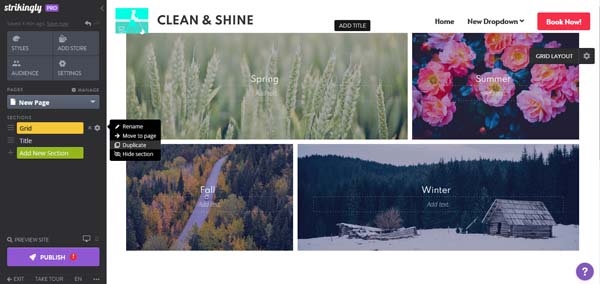
- To delete a section, simply click on the “X” to the right of the section. The Strikingly website builder will then instantly remove that section from your site.
Changing a Section’s Background
Some sections have solid backgrounds while others can use images. Varying the backgrounds of different sections on a web page can not only create visual interest, but also indicate when the content switches to another topic.
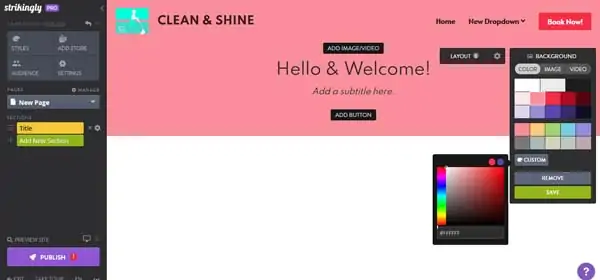
To change a section’s background color:
- Within the section, click on the “Background” button to open the “Background” drop-down menu.
- Use the “Background” drop-down menu to choose from a list of recommended colors. Or, click on the “Custom” button to open a color-picker tool to make it truly your own.
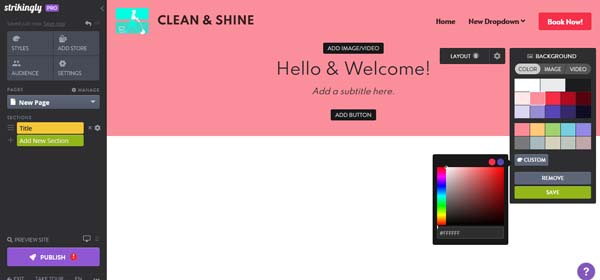
- Click on the green “Save” button to make your changes instantly appear in that section.
To change a section’s background image:
- Within the section, click on the “Background” button to open the “Background” drop-down menu.
- Select the “Image” tab within the “Background” drop-down menu.
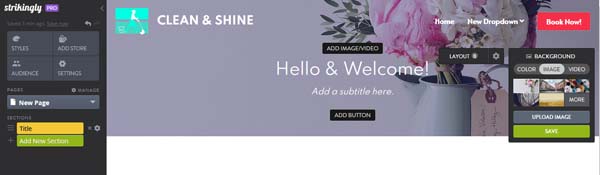
- Choose from among the suggested photos or click on the “Upload Image” button to add your own. Remember to click on the green “Save” button to make your changes instantly appear in that section.

Customizing a Content Section in Strikingly
You’ll create your website’s main content, including the text and images, using content sections. Each section has different options, but, for most of them, you can change the layout, background color, alignment, text, and image as well as add CTA buttons.
To choose a different layout:
- Within the section you’d like to edit, click on the “Settings” icon next to the “Layout” button. The “Layout Settings” drop-down menu will then appear.
- Click on the “down arrow” to view all the available layout options. Select different layouts to find one that works best for you.
- Click on the green “Save” button to return to the Strikingly Editor.

To edit the content:
- To edit any text within a section, simply click on it to open the “Text Editing” toolbar.
- Update the text to suit your business’s branding. Use the “Text Editing” toolbar to adjust the alignment, font, text color, and more.
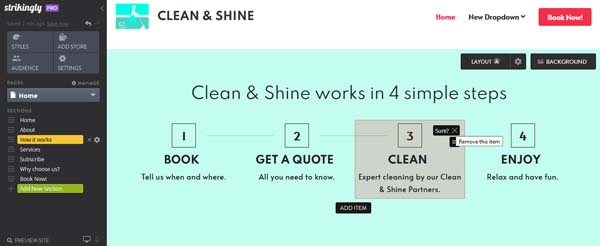
- To remove any part of the section, hover over it until an “X” appears in the upper-right corner. Click on the “X” to remove the content from the section.
- To relocate any part of the section, hover over it until the “Navigate” icon with three horizontal lines appears. Click on the “Navigate” icon to drag and drop this portion of content wherever you’d like it to appear within the section.
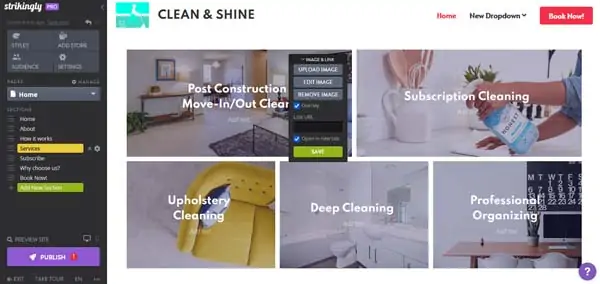
To change an image:
- Hover over the image you’d like to update to make the “Image & Link” button appear.
- Click on the “Image & Link” button to open the corresponding drop-down menu.

- From this menu, you can upload your own image, edit the current image, or remove the image entirely.
- Adding a web address to the “Link URL” field will take visitors to the corresponding link when they click on the image.
- Click on the green “Save” button to confirm your changes.
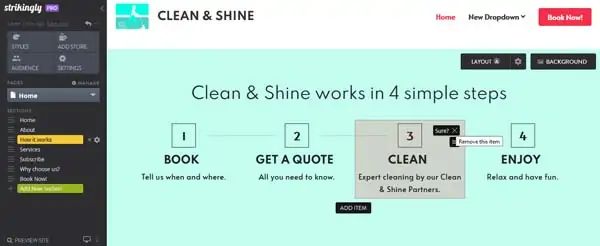
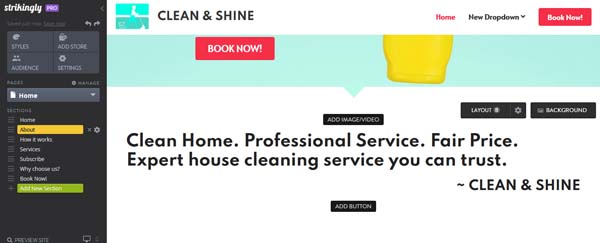
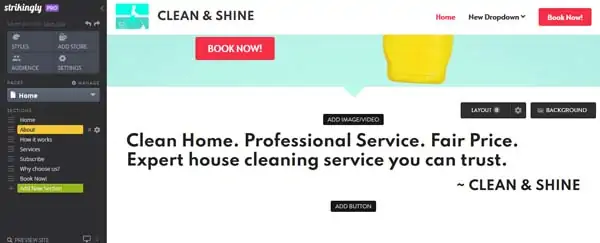
To add or edit a CTA button:
- Not all Strikingly sections come with the option to add a button. To ensure your chosen section can accommodate this, hover your mouse over it to see if the “Add Button” button appears.
- Click on the “Add Button” button to instantly place one and open the “Button Content & Design” menu. Use that menu to edit the text displayed on the button as well as choose where the button will take visitors.

- Clicking on the “Design” tab will allow you to alter the size, style, alignment, and color of the button.
- Click on the green “Save” button to confirm your changes.
Working With Images and Other Media in Strikingly
The Strikingly website builder allows you to add a variety of media to your website, including:
- Images (e.g., .gif, .jpeg, .png, .bmp, and .ico files up to 10 megabytes)
- Video (e.g., embedded videos from Vimeo and YouTube)
- Audio (e.g., embedded tracks or playlists from SoundCloud)
Adjusting Images
You can edit, upload, or remove images using the Strikingly website builder. It also has a huge collection of royalty-free, stock images you may use for free on your website.
You can work with images in multiple ways, depending on the section and layout you choose. This guide covers the basics, but you can always contact Strikingly’s “Happiness Officers” if you need additional help.
Here’s where you’ll find images when creating your Strikingly website:
- As a “Background Image” in various sections
- As individual images in “Big Media” sections
- In some “Simple Blog” sections
- In “Photo Galleries” sections
- In “Grid” and “Banner & Image Slider” sections
The section layout will determine the number and placement of images.
To add an image:
The best way to add an image is to add a section with your preferred layout and photo placement(s). Then, follow the directions for how to change an image to replace the default photo with the image of your choice.
But, if you have a section that allows you to add an image and a layout with space for one that doesn’t display a default image, you can add an image using these steps:
- Ensure the current section can add images by hovering over it until the “Add Image/Video” button appears.
- Click on the “Add Image/Video” button to open the “Image/Video” drop-down menu where you can upload your own image or choose from the “Strikingly Library” of images.
- The Strikingly Editor will instantly place your image within the section. Unfortunately, you can’t drag and drop the image to exactly where you’d like it as it’ll remain stuck in that location.
To change an image:
- Hover your mouse over the image you want to change until the “Edit” button appears.
- Click on the “Edit” button to open the “Image/Video” menu.
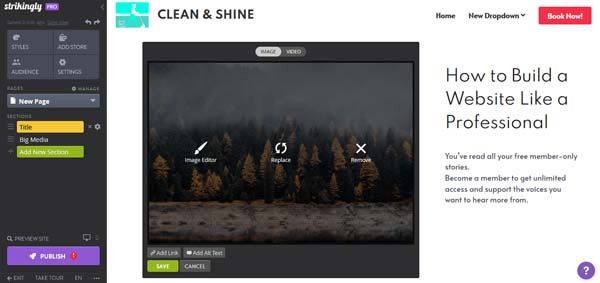
- Click on the “Replace” icon to open the “Upload Images” pop-up window. From there, you can upload your own image, choose from images you previously uploaded, and peruse the “Strikingly Library” of images.
- Select your chosen image to have it automatically replace the existing photo.
- Click on the green “Save” button to confirm your changes.

To delete an image:
- Hover your mouse over the image you want to remove until the “Edit” button appears.
- Click on the “Edit” button to open the “Image/Video” menu.
- Click on the “Remove” icon on the far right to automatically delete the image from your section.
Adding a Photo Gallery
A photo gallery features a collection of images. Artists, photographers, and graphic designers often use photo galleries to display their portfolio of work. Other businesses use photo galleries to highlight different products or aspects of what their business does.
To add a photo gallery:
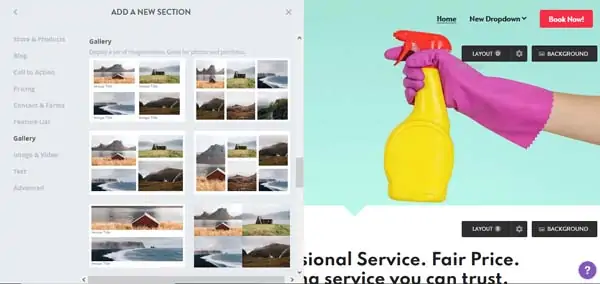
- In the Strikingly Editor’s left-hand “Site Design” menu, click on the green “Add New Section” button to open the “Add a New Section” menu.
- Scroll down to the “Gallery” section — or click on “Gallery” in the left-hand list — to view the available gallery layouts.

- Click on the gallery layout you like best to automatically place it in your Strikingly website builder. Follow the above instructions for how to change an image to update your new photo gallery.
Uploading Videos
The Strikingly website builder allows you to embed existing videos from Vimeo or YouTube. Any area within a section that can feature an image can also feature a video.
To add a video:
- Hover your mouse over the image area until the “Edit” button appears. Click on the “Edit” button to open the “Image/Video” menu.
- Select the “Video” tab and then enter the video URL in the provided field.
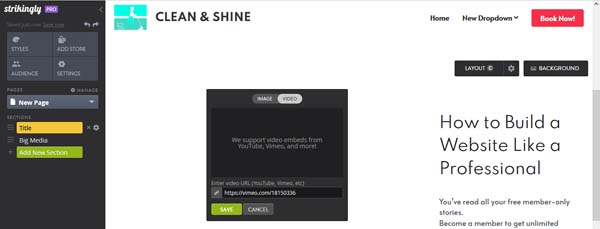
- Click on the green “Save” button to upload your video.
Connecting With Website Visitors Using Strikingly
The Strikingly website builder provides multiple ways for you to connect with your site visitors. Specifically, you can:
- Add social media icons that direct people to your business’s social media channels
- Embed a social media feed from Instagram or Twitter
- Add an email subscription form
- Add a contact form
Adding Social Media Icons
Strikingly provides premade icons for the following social media platforms:
- Facebook Messenger
- YouTube
- Snapchat
- TikTok
These icons enable you to link your website to your business’s social media pages. For Facebook, Twitter, and Instagram, you can connect your social media feed directly to your Strikingly account. This supports integration of various features, such as automatically updating your business address, hours of operation, or reviews.
To add social media icons:
- In the Strikingly website editor, scroll all the way down to your site’s “Footer” where you’ll find a section with some social media icons already placed. Hover over them until the “Edit” button appears.
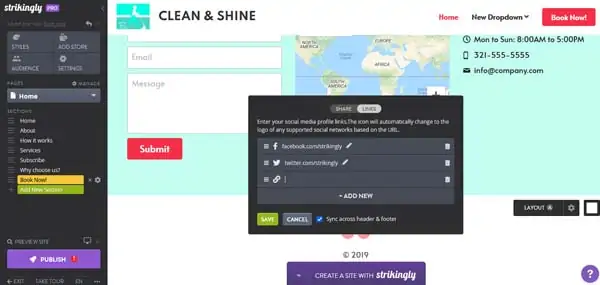
- Click on the “Edit” button to open the “Share/Links” menu. Click on the “Links” tab.
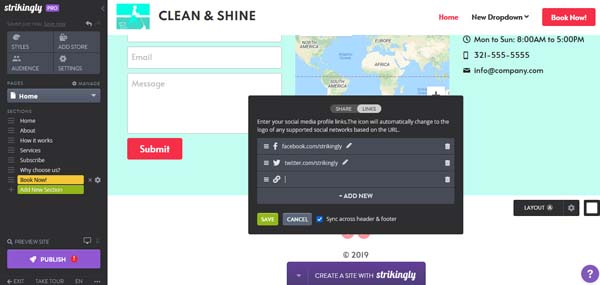
- Enter the addresses of the social media accounts you’d like to connect to your business website. Make sure to check the box next to “Sync across header & footer.”
- Click on the green “Save” button to add the appropriate social media icon to your header and footer.
Embedding a Social Media Feed
The Strikingly website builder has a helpful feature that enables you to automatically embed your Instagram, Twitter, or Facebook feed in your website. This means that whenever you publish a post on any of these platforms, it’ll automatically appear on your website.
To embed your social media feed:
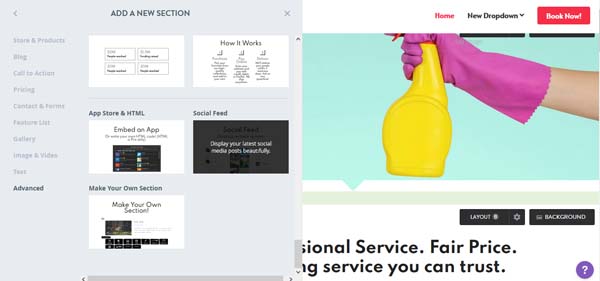
- In the Strikingly Editor’s left-hand “Site Design” menu, click on the green “Add New Section” button to open the “Add a New Section” menu.
- Scroll down to the “Advanced” section — or click on “Advanced” in the left-hand list.
- Click on the “Social Feed” option to add a “Social Feed” section to your site.
- In the newly placed “Social Feed” section, click on the “Edit” button to open the “Social Feed Manager” pop-up window.
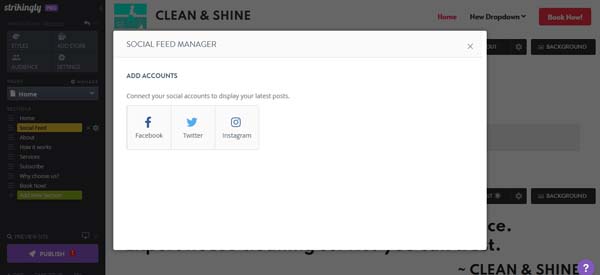
- Select the option you wish to connect to your site. You might need to enter your login information for that particular social media account if you’re not already signed in on your current device.
- Click on the “Allow” button for any authorization request to then return to the Strikingly “Social Feed Manager” pop-up window.
- Ensure all the information is correct, and then exit the “Social Feed Manager” pop-up window to view your newly connected social media feed on your Strikingly site.


Adding an Email Subscription Form
Collecting email addresses from website visitors is a great way small business owners can engage their target audience by sending periodic news and updates. Most Strikingly templates already include a “Subscribe” section, but here are directions for how to set it up as well as how to add a “Subscribe” section if your chosen template doesn’t have one.
To add a “Subscribe” section:
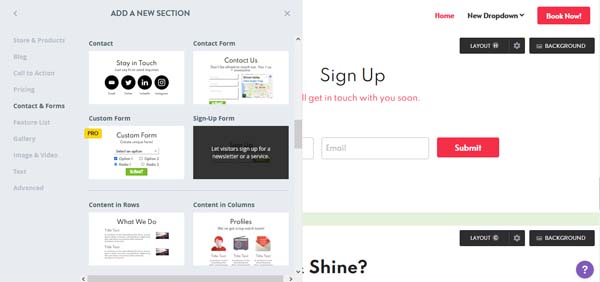
- In the Strikingly Editor’s left-hand “Site Design” menu, click on the green “Add New Section” button to open the “Add a New Section” menu.
- Click on “Contact & Forms” in the menu’s left-hand list, and then choose the “Sign-Up Form” option to instantly place the new sign-up form section.
- In the Strikingly Editor, hover over the new sign-up form section and click on the “Edit” button to open the “Form Fields” menu.
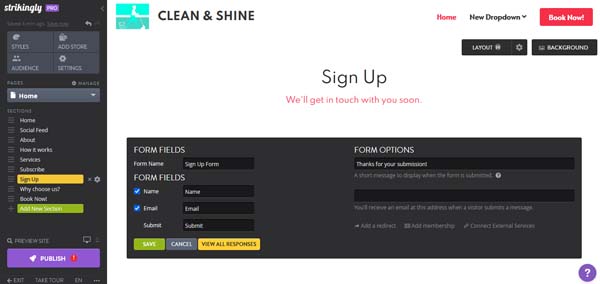
- Use the “Form Fields” menu to update the form’s name, its required fields, and the text that appears on its submission button. You can also update the response message visitors will receive after completing the subscription form and even allow site visitors to sign up for a membership.
- Finally, remember to add the email address to which you want form submissions sent.
- Click on the green “Save” button to return to the Strikingly Editor with all your changes in place.

Adding a Contact Form
Contact forms provide yet another great way to connect with your website visitors. While they’re usually found on a website’s “Contact” page, these forms can appear on any page within your site.
To add a contact form:
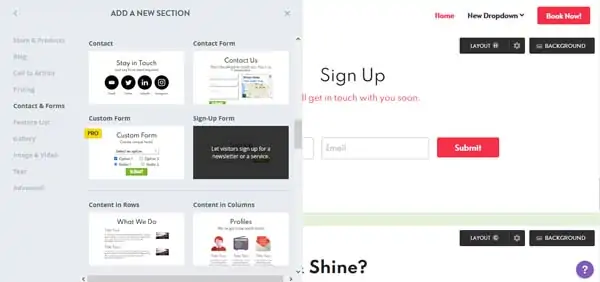
- In the Strikingly Editor’s left-hand “Site Design” menu, click on the green “Add New Section” button to open the “Add a New Section” menu.
- Click on “Contact & Forms” in the menu’s left-hand list, and then choose the “Contact Form” option to instantly place the new contact form section.
- In the Strikingly Editor, hover over the new contact form section and click on the “Edit” button to open the “Form Fields” menu.
- Use the “Form Fields” menu to update the form’s name, its required fields, the text that appears on its submission button, its response message, and the email address that should receive its submissions.
- Click on the green “Save” button to confirm your changes.
Adding Reviews or Testimonials in Strikingly
The Strikingly website builder allows your customers to leave product reviews as part of an advanced checkout feature. But, you’ll always retain control over which reviews your site displays. This feature is only available for Strikingly Pro plan subscribers — and only for product reviews.
If you don’t sell products you can still add reviews and testimonials manually. We’ll show you how to do this both ways.
Connecting Product Reviews
You can request reviews from your customers and then decide which to showcase for each product. To do this, your website must already have a “Store” section.
To connect product reviews to your online store:
- If your site doesn’t already have a “Store” section, click on the “Add New Section” button in the “Site Design” menu to open the “Add a New Section” menu. Under the “Stores & Products” section of this menu, select the “Simple Store” option to add a “Store” section to your website.
- Hover over the “Click here to start selling” portion until the “Add Product” button appears. Click “Add Product” to open the “Products” pop-up menu and the left-hand “Store” drop-down menu.
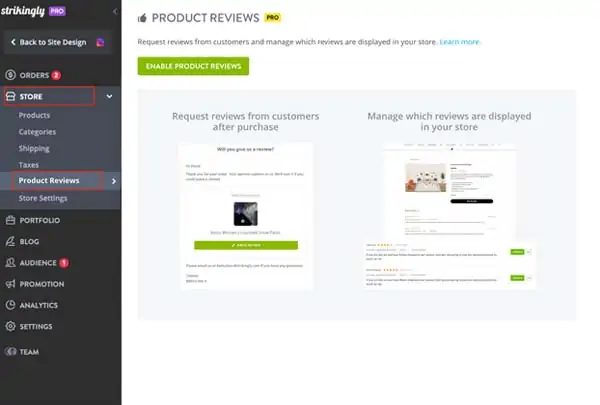
- In the left-hand “Store” drop-down menu, select “Product Reviews” to open the “Product Reviews” menu. Click on the green “Enable Product Reviews” button.

- Strikingly will then automatically email your customers seven days after you fulfill an order, requesting they write a review.
- You’ll have access from this “Product Reviews” menu to see reviews that fall into “Pending,” “Approved,” or “Rejected” categories.
Adding Reviews Manually
If you have a service-based business instead of an online store, you can still showcase positive customer reviews by manually entering them on your website.
A great way to do this is to use a “Slider” section. For a refresher on how to place a “Slider” section, click here.
To add reviews manually:
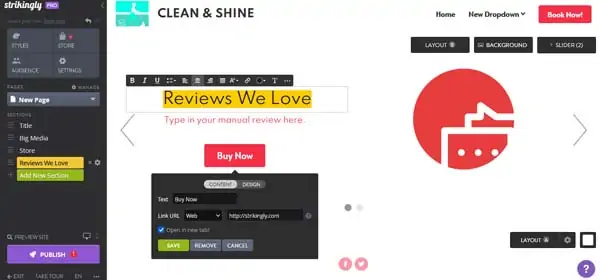
- Add your new “Slider” section where you want your reviews to appear on your website.
- Click on any existing text to open the “Text Editing” toolbar, and then replace it with the appropriate review.
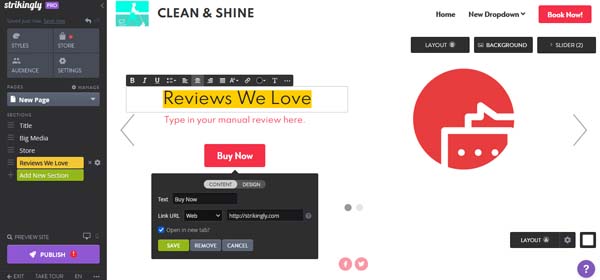
- You can update the button to link to an external reviews page, like your business’s Yelp reviews. Alternatively, you can remove the button and any other content from the “Slider” section that doesn’t fit with your reviews section.
Adding a Favicon to a Strikingly Website
A favicon is a small picture that appears on the left side of a browser tab. These tiny images help internet users quickly identify the website they’re currently visiting.
Most favicons appear as a miniature version of a company’s logo or other graphic that aligns with its branding. Small and square, favicons typically measure about 16 by 16 pixels.
If you don’t yet have a favicon, you can create one with a tool like Favicon.io. This tool gives you a downloadable ZIP file you can use as your favicon.
It’s easy to add a favicon to a Strikingly website.
To add a favicon:
- In the “Site Design” menu, select “Settings” to open the “Settings” pop-up menu.
- From the “Settings” pop-up menu, select “Basic Info” to open the “Basic Information” menu.
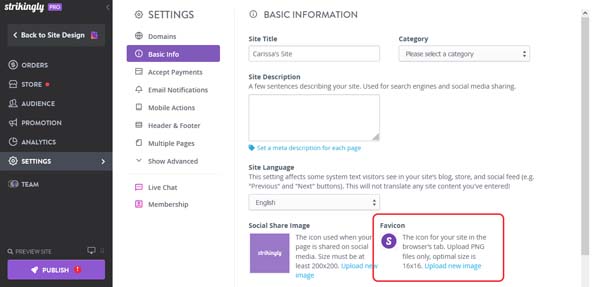
- In the Favicon section of this menu, click on the “Upload new image” link. This’ll allow you to choose a file from your own computer or connect to one from the internet.

If you have any issues with this process, the friendly Strikingly “Happiness Officers” are always available to chat.
Editing the Footer in Strikingly
One drawback of using the Strikingly website builder is that it doesn’t allow you to fully customize your footer. It does, however, allow you to:
- Choose a background color
- Manually include a copyright notice, if desired
- Display your business’s address and phone number (available in two layouts)
- Add icons linked to your social media accounts
- Include site navigation links to other pages on your website
To edit the footer:
- Scroll down to the bottom of the Strikingly Editor to arrive at your site’s “Footer.”
- Click on the “Settings” icon within the “Layout” button to try out different layouts. Most templates include four layouts — two of which will have space for adding text for your business’s contact information. All layouts include social media icons.

- Use the “Square” icon to the right of the “Layout” button to adjust the color of your “Footer” background. Simply click on it to rotate through the different color options.
- Update the text to reflect any copyright you may want to include. Use the “Text Editing” toolbar to link any text within the “Footer” to other pages on your website.
Publish Your Strikingly Website
Once you finish building and customizing your Strikingly website, it’s time to go live on the internet.
To publish your Strikingly website, simply click on the “Publish” button at the bottom of the “Site Design” menu.
Final Thoughts
Hopefully, this guide proved helpful as you built your Strikingly website.We recommend you bookmark this page so you can return to it, should you ever need to add more functionality to your Strikingly site.
For more information on how to run a successful business website, check out our How to Make a Strikingly Website article.
Looking for more information on Strikingly? Refer to these other useful articles: