How To Use Shopify: A Beginner’s Shopify Tutorial
Are you starting a new online store and think Shopify is the right ecommerce platform for your business? Have you chosen a Shopify plan and started building your ecommerce website only to discover you have questions regarding its customization?
This detailed Shopify tutorial for beginners will show you Shopify basics and how to use Shopify to create an online store tailored to your business’s specific needs. We will answer common questions about using Shopify and customizing your own online store. By the end, you’ll have a website that promotes your products and services in a manner aligned with your business’s brand personality.
Ready to start your ecommerce website? Visit Shopify.
Creating a Shopify Account
Before you follow the tips in this guide, you first need to create a Shopify account. You can sign up for a free trial and start building your new website immediately — there’s no need to choose a plan right away. Simply enter your email address and wait for the verification email from Shopify.
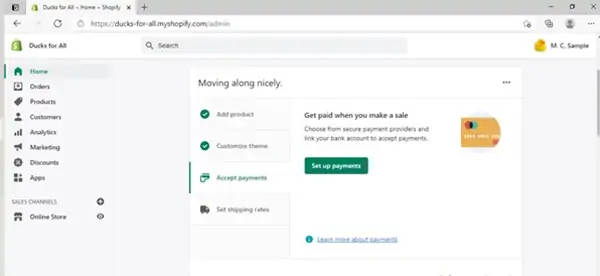
After you verify your Shopify account, log in and add your contact information as well as the name of your online store. You’ll then arrive at a main menu and dashboard where you can begin building and customizing your site. For the purposes of this Shopify beginner’s guide, we’ll primarily focus on the options you can find under the “Customize theme” tab.
Get Started With Shopify
Shopify has most everything you need to build and run a successful online store. Offer endless products and find ways to customize your store for success with Shopify. Get started with a free trial by clicking the button below.
Changing Shopify Templates
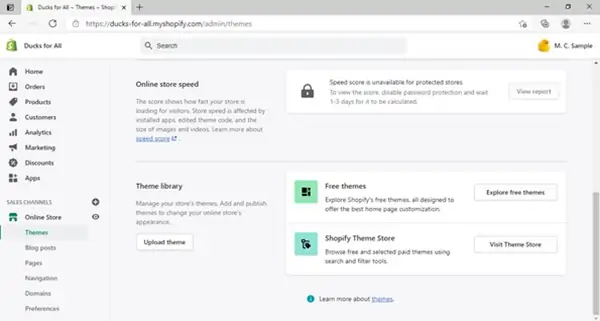
After clicking on the “Customize theme” tab, you’ll arrive at a screen for managing themes. If you then click on the “Customize” button, you’ll open Shopify’s default theme — called “Debut.” We’ll show you how to customize the “Debut” theme later on, but, for now, let’s discuss how to use themes other than the default.
If you scroll down this screen, you’ll see a “Theme library” section. This is where you can explore all the free and premium (paid) themes Shopify offers. Alternatively, you can click on the “Upload theme” button to add your own flair to your Shopify online store.
If you want to use a theme you created yourself or purchased from an outside developer, you can upload a ZIP file up to 50 megabytes (MB). Just click on the “Upload theme” button to open the upload screen.
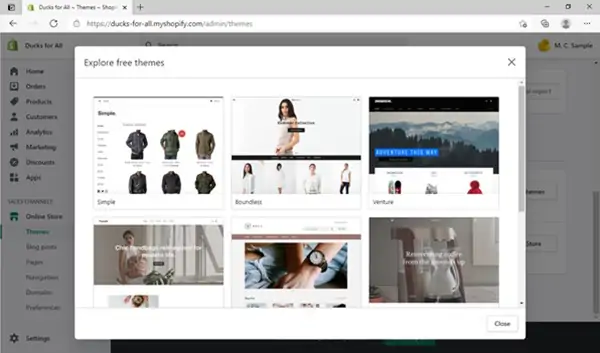
After you upload and save your theme, it’ll become part of your theme library. If you don’t have your own theme to upload, you can use any of Shopify’s options. To check out all the available themes, click on the “Visit Theme Store” button. To see only free themes, click on the “Explore free themes” button.
The theme store button opens a new browser tab, where you can choose from dozens of premium (paid) themes with various features. The free themes button opens this pop-up window:
Scroll through either the paid or free themes until you find one that appeals to you and makes sense for your business. If you haven’t thought about your logo or business branding yet, check out our free logo generator and our easy-to-use guide for naming and registering your business.
Once you select a theme for your Shopify website, it’s time to customize. For the purposes of this guide, we’ll use the default (“Debut”) theme for our example website.
Need more inspiration? Check out 12 Gorgeous Shopify Website Examples
Changing Background Colors in Shopify
Return to the previous screen where we just reviewed theme options, and then click on the green “Customize” button. That will open the dashboard and menus you’ll use to work on your Shopify site:
You’ll find all your site’s customization menus in the left-hand sidebar. As you scroll down that sidebar, you’ll also see some additional settings near the bottom. We’ll use many of these tabs as we demonstrate how to customize a Shopify website.
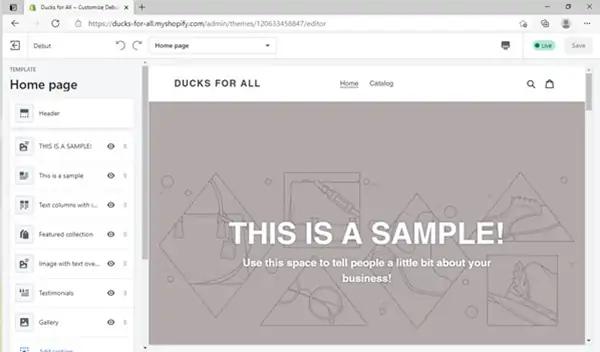
We added a little color and some details with our rubber duck samples so you can see how our sample site looks with some flair. But, we still have a white background:
To change the background color, scroll down the left-hand sidebar until you see a gear icon. Click on that “Theme settings” tab to open a secondary menu. Next, click on the “Colors” tab to open the color panel.
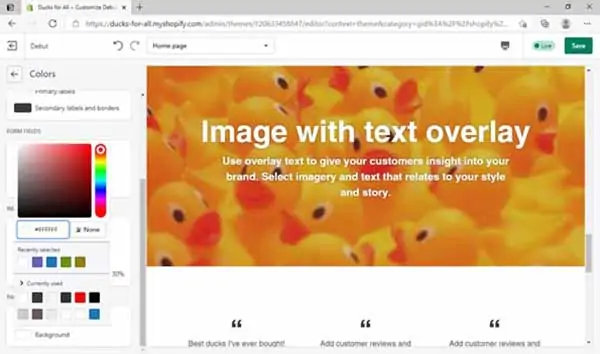
Here, you’ll see many options for adjusting the color of the text, buttons, and backgrounds on your Shopify site. To change your background color, scroll down until you reach the “Page” section and click on the white rectangle next to “Background.” This will open a color palette from which you may choose. Or, you can enter a six-digit hex code for your desired color.
We’ll use this lovely minty green, but you should select whatever color best suits your business and its products or services.
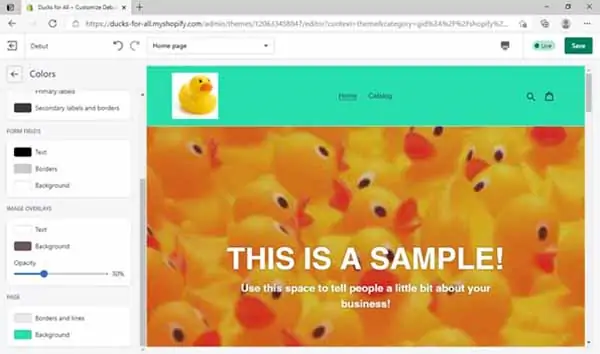
Don’t forget to hit the green “Save” button in the top right corner before you exit this submenu. Your new background color will now appear throughout your Shopify online store.
Looking for some help with creating a cohesive color scheme for your online store and business branding? Be sure to check out our guide on How to Choose a Great Website Color Palette.
Using Correctly Sized Images in Shopify
Images can say a lot about your business so make sure your website features appropriately sized photos and graphics that clearly convey your brand message.
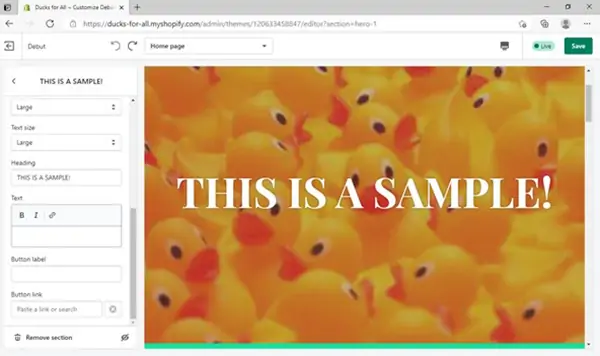
Shopify’s “Debut” theme recommends a background/top banner photo that measures 1,200 to 2,000 pixels (px) wide by 400 to 600 px high. While you can certainly use larger or smaller images, that may affect the resolution. The recommended file types include joint photographic experts group (JPG) and portable network graphic (PNG) formats.
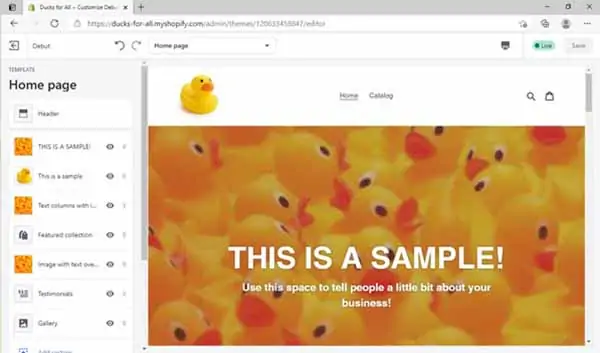
The background/top banner image in our sample website features lots of rubber ducks:

Unsure if the photo you want to use is large enough? Just check the “properties” information for the image and resize it in your favorite photo app, if necessary.
When you use a photo from an outside source, such as Unsplash or Pixabay, each image will come with a description that notes its size. This ensures you’ll always know if an image will suit your needs or require resizing.
When creating or resizing a rectangular image for use as a website banner or background image, aim to keep the width and height near a ratio of 3-to-1. This will help prevent most distortions. In contrast, try to use square images with a ratio of 1-to-1 for product catalog photos.
Changing Fonts and Font Sizes in Shopify
To change your online store’s typeface and the font sizes, head back to the “Theme settings” tab in the left-hand sidebar. After clicking on the “Theme settings” tab, click on the “Typography” tab. That’ll open this screen:
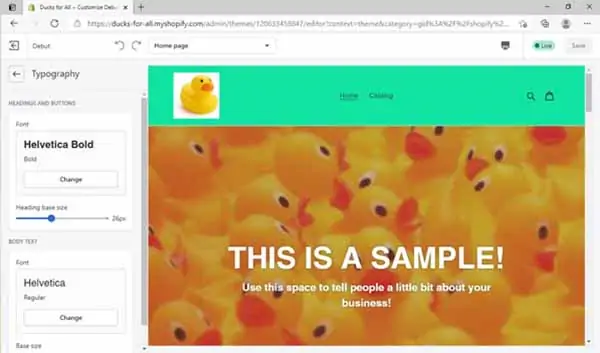
Use the “Change” buttons to adjust your font settings. Let’s edit the headings and buttons first. You’ll find dozens of typefaces from which to choose.

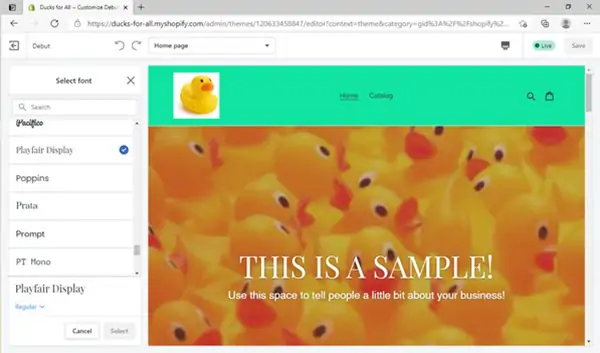
Your Shopify website will display a preview of each font as you click on them. When you find one you like, click on the “Select” button to apply that new font to your site.
You’ll also see a blue, drop-down menu below your selected font’s name. If you click on that drop-down menu, you can further customize your chosen typeface with bold and italic options. You also can adjust your font size with the blue slider button. This gives you greater control over the appearance of your Shopify online store.
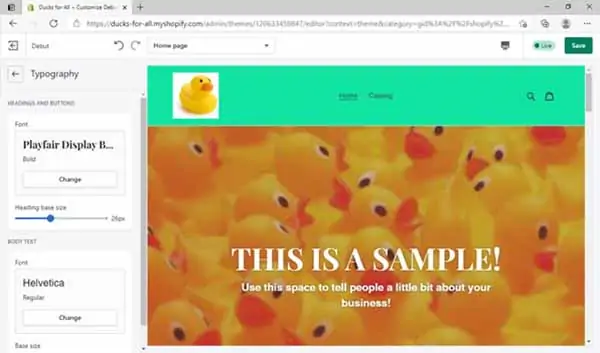
Now, that’s an eye-catching header!
To change the font, font size, and font style of your website’s body text, simply repeat the above steps by clicking on the “Change” button under the “Body Text” section.
The right font and font style can help you visually communicate your business’s brand personality — from serious to playful. Whatever fonts and font sizes you choose, remember to click the green “Save” button in the upper-right corner of your screen to complete the editing process. You can click the arrow icon next to “Typography” and then the arrow icon next to “Theme settings” to return to the main Shopify dashboard.
Looking to learn more about how to choose a great font for your website and branding? Check out our Best Website Fonts guide.
Saving Your Edits in Shopify
While the Shopify website builder is very intuitive, you must remember to frequently click the “Save” button as you work. It’s the green button in the upper-right corner of your screen. You can see it here — in gray — when you’re not actively changing a feature:

As soon as you do any work using an editing menu, such as changing your font, it’ll turn green.
You must click on the “Save” button after every change you make. Shopify also will “time out” whenever you remain inactive with the window open. Because Shopify does not have an autosave feature, users have reported that this “time out” can occur after anywhere from a few minutes to an hour, causing them to lose their edits. To avoid losing your work, always click the “Save” button before you step away from your computer.
Undoing Your Edits in Shopify
One of the best aspects of the Shopify website builder is its wide range of customization options. While it’s fun to play around with them until you find the right look for your online store, it’s good to know you can quickly undo any edits before you make a final choice and click on the “Save” button.
Here, we plan to edit our banner text:
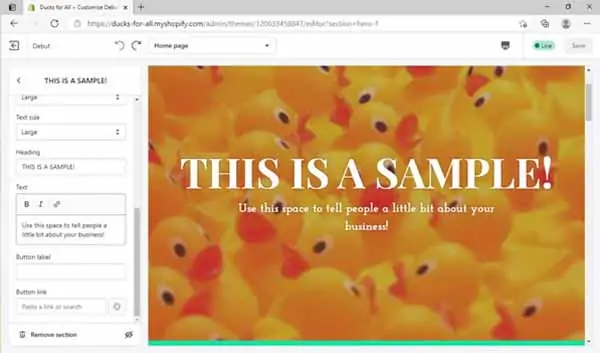
We start the process by deleting the existing copy:
But, if we didn’t really want to delete all of that text, we can use the “undo” arrow in the upper-left corner to reverse the edit. You’ll also find a “forward” arrow there, which enables you to repeat your last adjustment.
You can use these arrows in every section of your Shopify website as you work, but only until you click the “Save” button. If you don’t remember exactly how you had something, don’t save your changes until you’re satisfied with your work.
Adding Links in Shopify
You can add links to the text of your Shopify website, leading visitors to other pages in your online store or other relevant external web pages. Smart use of hyperlinks can give your business more exposure and connectivity across your online store as well as within your industry.
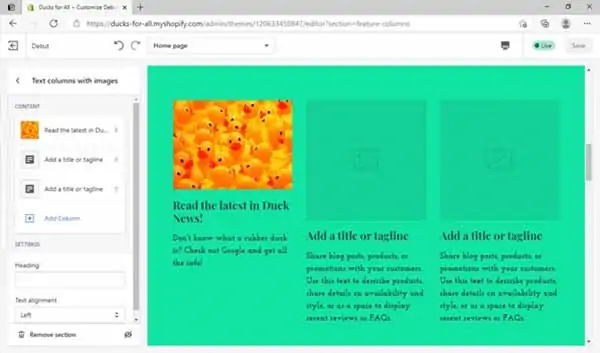
To demonstrate how to add a link to the text of a Shopify website, we’ll focus on one of the text columns in the middle of our sample site’s homepage.
In the left-hand menu, click on the “Text columns with images” tab to open this submenu:

Next, click the first option in the “Content” section to edit the left-hand text column. Delete the existing text in the text field, and then type in your new text:
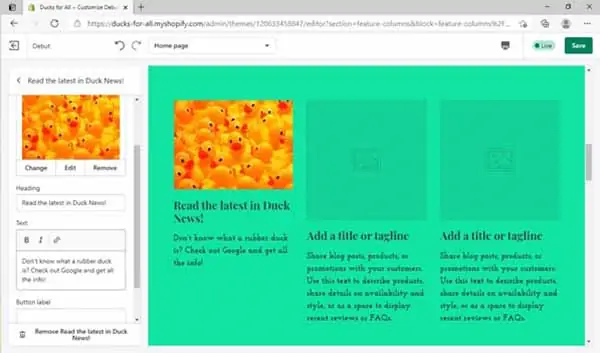
Now, highlight the word(s) you want to link. In our case, we want to direct people to search for information about rubber ducks, so we’ll highlight the word “Google.”

After you highlight the text you want to link, click the link icon (the one that looks like a chain). An “Insert link” screen will then appear in the left sidebar:
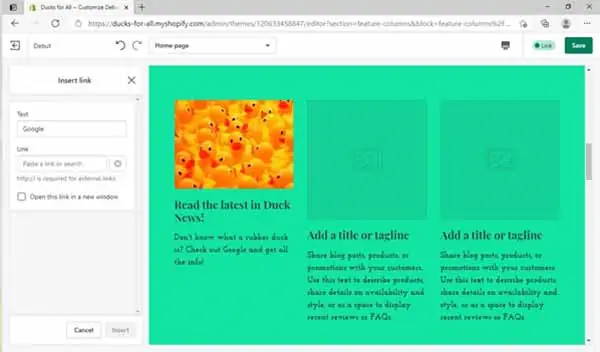
Type your link into the provided field, confirm it’s the correct site, and then check the “Open this link in a new window” box. Finally, click the green “Insert” button to make your link live. Remember to also click on the “Save” button.
If you want to add an internal link to another area of your Shopify website, those options will appear as you type your link into the provided field like this:
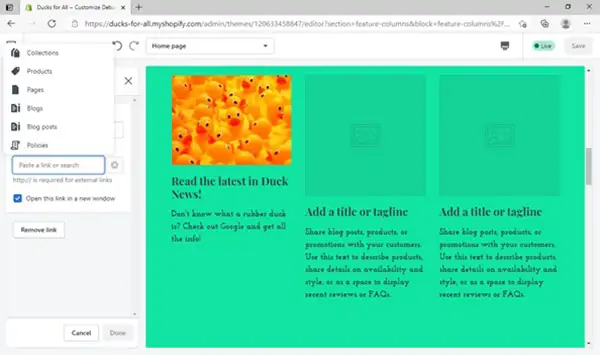
Just click the appropriate area (e.g., your site’s “Products” page) and finish the process as outlined above.
To remove any existing links, follow the same steps and instead click on the “Remove link” button to delete any hyperlinks you no longer want. And, as always, remember to save your work!
Inserting and Deleting Columns in Shopify
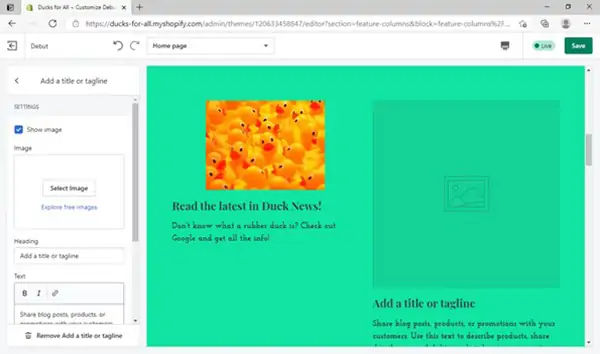
To insert a column, let’s return to the center section of our sample site’s homepage — the area we just used to demonstrate how to add links. Once again, click on the “Text columns with images” tab to arrive here:
The default settings provide three of these columns in the center of your site’s homepage. To add columns, click the blue “Add Column” button. That’ll open this submenu:
If you decide you don’t want another column after all, simply click on the trash can icon at the bottom of the screen. If you want fewer columns than the default three, click on any of the existing columns and delete them in the same way. You can add or delete columns at any time, but always remember to save your work as you go.
Creating Pages and Subpages In Shopify
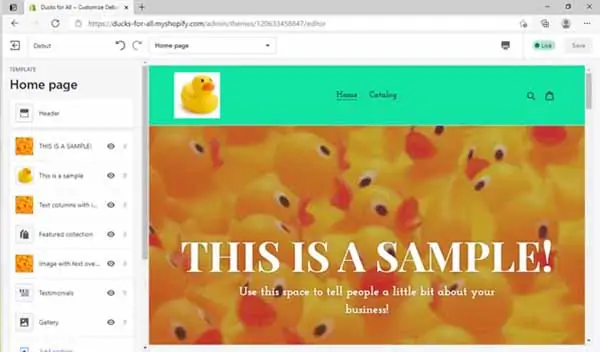
So far, we’ve focused all our customization work on our sample site’s homepage. Here’s how it now looks:
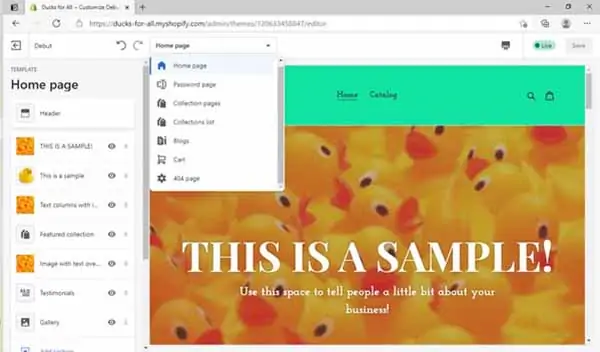
Along the top of this screen, you’ll find a drop-down menu just to the left of center. If you want to work on other pages within your Shopify website, just click on that drop-down menu to access your existing options:
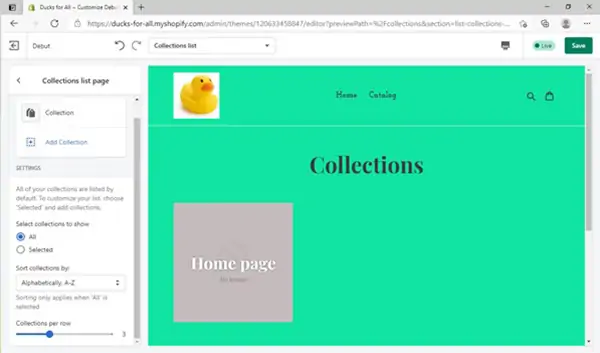
If we click on the “Collections list” option, we’ll arrive on a page that displays the existing collections offered by our sample website. Brand new websites won’t have any yet. But, when you have an online store full of products, organizing them into collections will make it easier for customers to find the products they want.
To add content to this page, use the menu on the left. You can edit the header and footer by using those buttons, of course. To add other content, click on the “Collections list page” tab to open this submenu:
Click on the “Add Collection” button, which will open yet another submenu. Next, click on the “Select Collection” button. That will bring you to yet another submenu where you’ll have the option to create a collection. Click on the “Create Collection” button, which will then open this screen in a new browser tab:
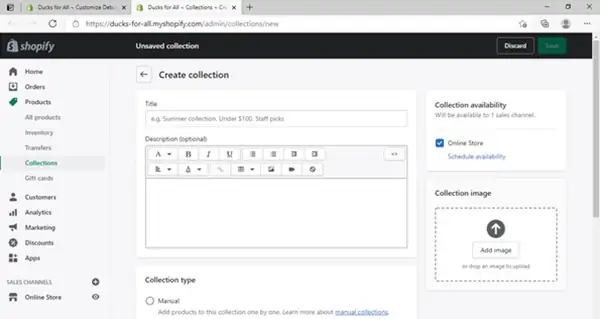
This is where you can enter all the information to group specific products into a collection. Make sure you scroll down the page to see all the options. When you’re done, remember to click on the “Save” button. On our sample site, we created a collection for our seasonal ducks:
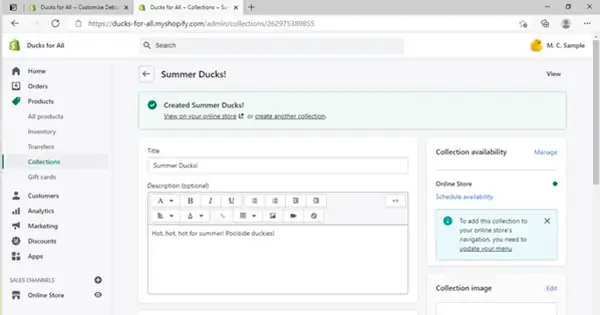
When you close this browser tab, Shopify will update your website with your new collection:
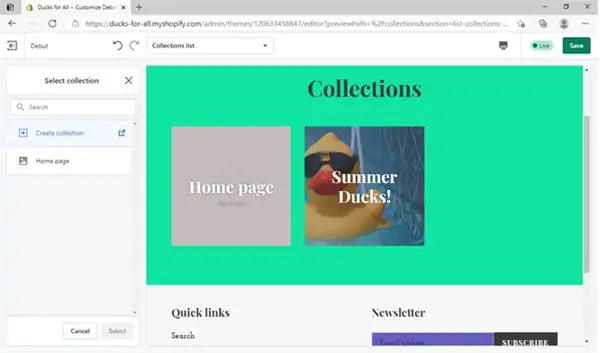
We successfully added a “Collections” page and “Summer Ducks!” collection subpage to our sample Shopify site. Once you add pages and subpages, you can then use the drop-down menu in the top toolbar to access and customize all the pages on your website in the same way. Every page and subpage option provides intuitive menus to help you ensure each part of your Shopify site matches your business’s brand personality.
Click on the drop-down menu and select “Homepage” to return to your website’s homepage.
Managing Blog Posts in Shopify
Blogs represent a popular way to connect with existing and potential customers. You can use blog posts to discuss how your new products address specific customer needs, highlight exciting developments in your industry, or share personal stories.
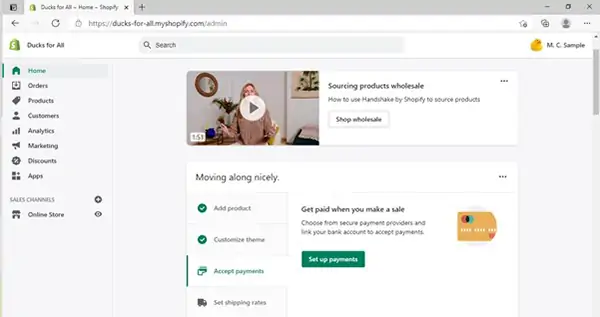
To begin blogging, go to your Shopify main account menu and dashboard. Remember to first save any changes before you exit the page editor. You want to start here:
When you return to this page, look for the “Online Store” tab at the bottom of the left-hand menu. Clicking on this tab will open a longer, secondary list of options. To start creating blog posts for your Shopify website, click on the “Blog posts” tab to open this screen:
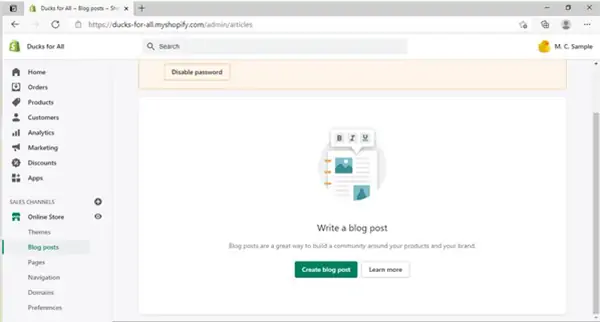
You may wonder why some of these screens show a “Disable password” button. That’s because you haven’t yet pushed your Shopify site live on a hosting plan. Once you choose your Shopify plan, you can remove the password protection from your website.
For now, click on the green “Create blog post” button to start writing your first post. Make sure you set the visibility date and add a photo to make your post stand out. When you finish your post, remember to click on the “Save” button. You’ll then see a green success box like this:
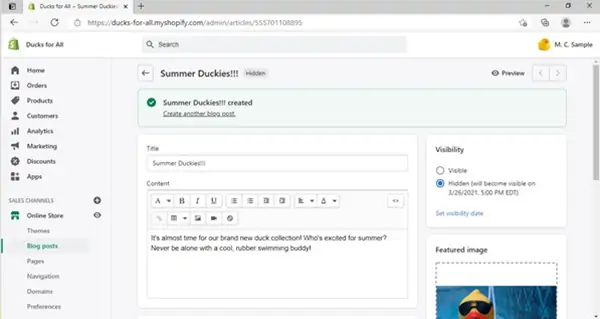
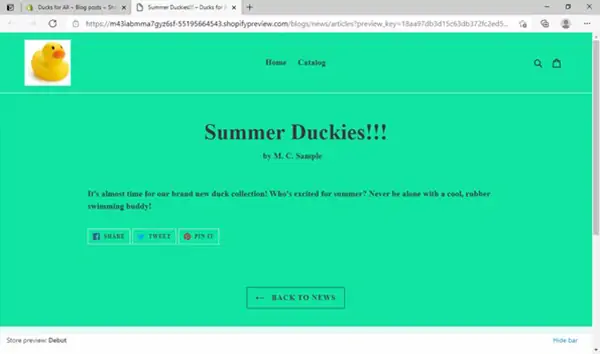
Clicking the arrow next to the blog post’s title will bring you back one screen to a list. From that screen, you can manage all of your blog posts as well as preview them on your site’s blog page:
You can then use the checkbox and drop-down menus to complete actions like publishing and deleting — all from this screen:
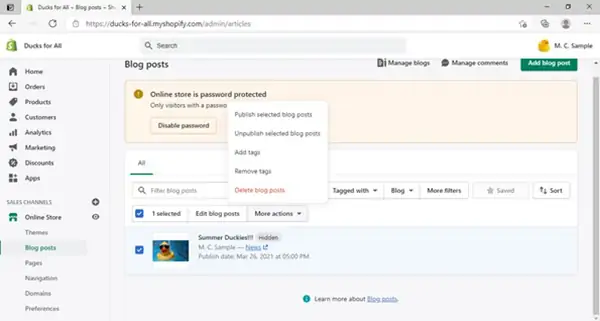
To manage existing blog posts on your Shopify site, you must follow a similar procedure as we just did to add pages. Go to the page editor, click on the drop-down menu, and then select “Blogs.” You’ll then arrive at your blog’s main page where you’ll find a menu to begin working on this section:
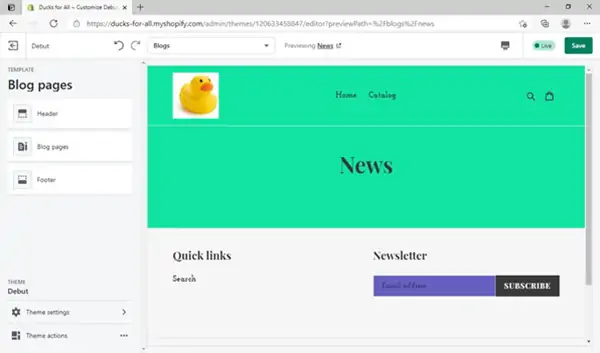
If you click on the “Blog pages” button, you’ll open a menu from which you can edit the appearance of your blog posts to match your business’s branding. You also can choose to include the date and author of each post.
When you publish, unpublish, and delete blog posts, they’ll appear on — and disappear from — this page. The ability to manage your blog posts from both the main Shopify dashboard and the page editor makes it easy to keep customers updated on all the latest news about your business.
Learn to blog like a pro, take our How to Start a Blog tutorial course.
Adding Calendars To Your Shopify Site
If you want to add an event calendar or delivery date calendar to your Shopify site, you must first visit the Shopify app store to review your options. On your main account dashboard, look for the “Apps” tab on the left-hand menu:
Clicking that tab will bring you to this screen:
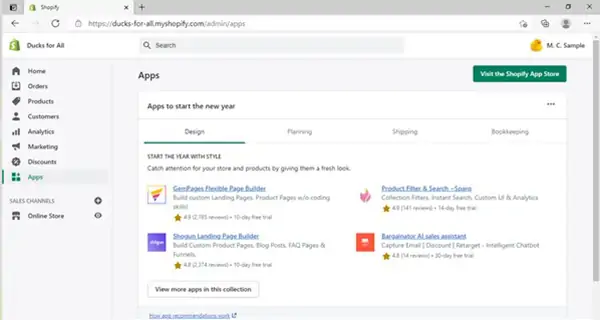
Clicking on the green “Visit the Shopify App Store” button will open a new browser tab. You can then use the search bar to browse for calendar apps. As a demonstration, we’ll add an event calendar to our sample site:
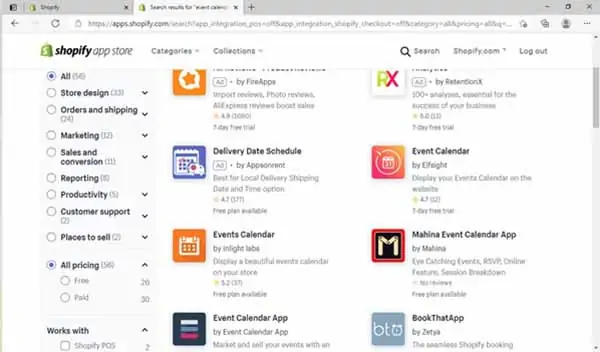
You’ll find a long list of search results, so scroll through them and review their ratings and price points. We’ll use one with a free trial to see if we like it first. Consider doing the same — especially if you haven’t chosen your Shopify hosting plan yet. We’ll select this app (it’s not an endorsement, just an example):
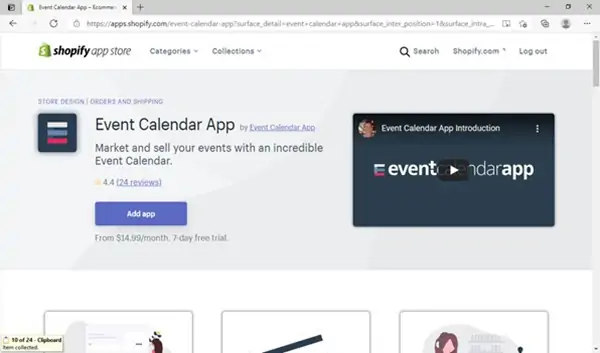
When you click the blue “Add app” button, this screen will appear:
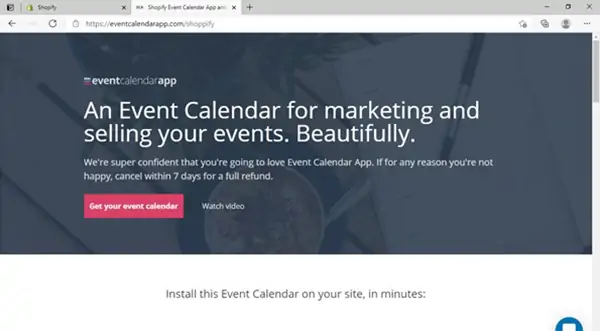
Click on the “Get your event calendar” button to open this screen:
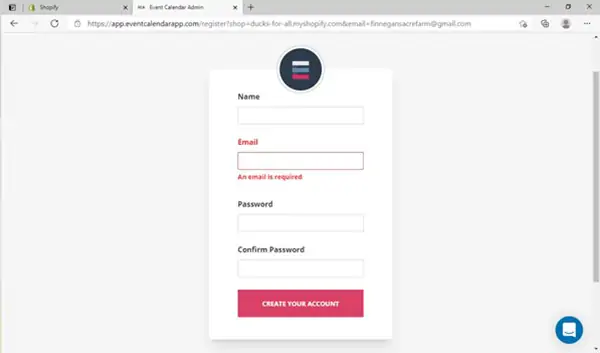
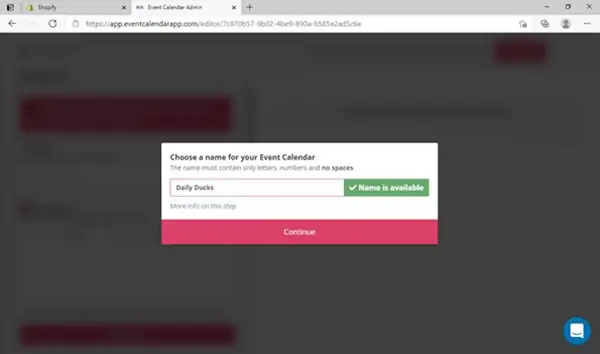
Enter your information to create your account. You’ll then encounter a prompt that asks how you want to enter your calendar events (choose the “manual” option). Next, you’ll reach a window where you must enter a name for your calendar:
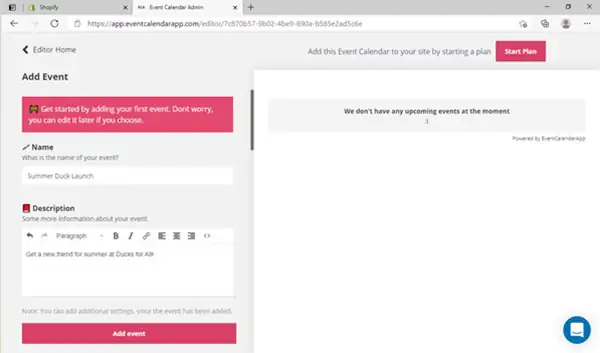
Now, type in some details to add your first event and click on the “Add event” button:
After you see a confirmation screen, close that to return to the dashboard:
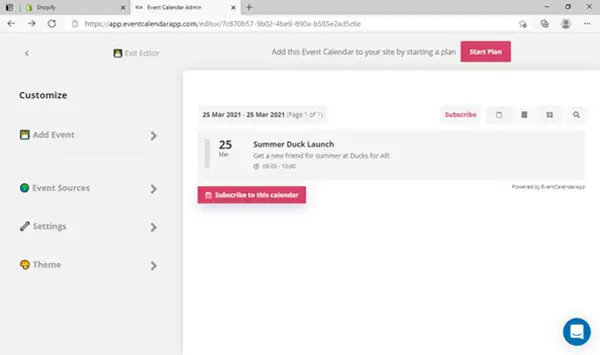
Next, click on the “Start Plan” button so you can add your calendar to your Shopify website. You’ll have several payment options, but each has a free trial so you can decide later if this calendar doesn’t work for you.
Once you choose a plan, you’ll then arrive back on your Shopify billing page. If you haven’t already entered any payment methods into your Shopify account, you can do so now to start your calendar trial.
Click on the “Events Calendar App,” which will then open this screen:
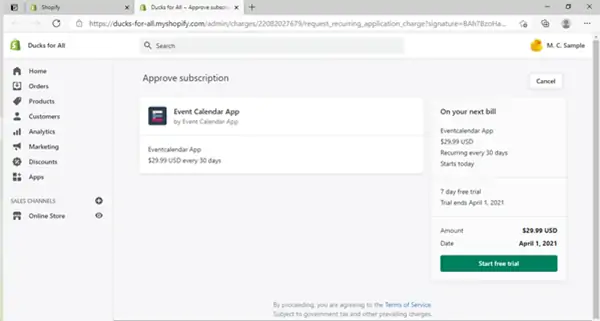
Now, click on the green “Start free trial” button to open this menu:
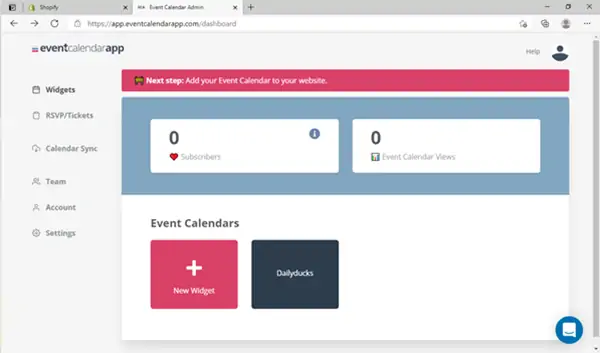
Click on your calendar name — for our sample site, it’s called “Dailyducks” — and you’ll then see this screen:
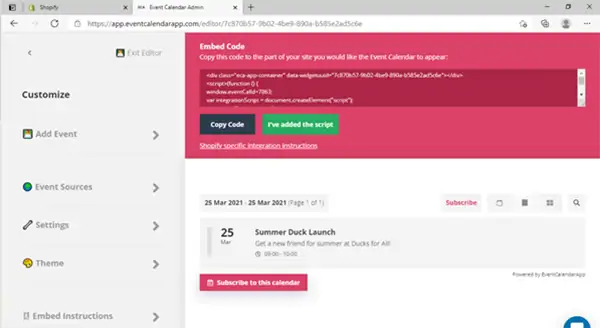
You can copy the code if you want, but there’s an easier way to install your new calendar. Click on the “Embed Instructions” tab in the left sidebar to open this submenu:
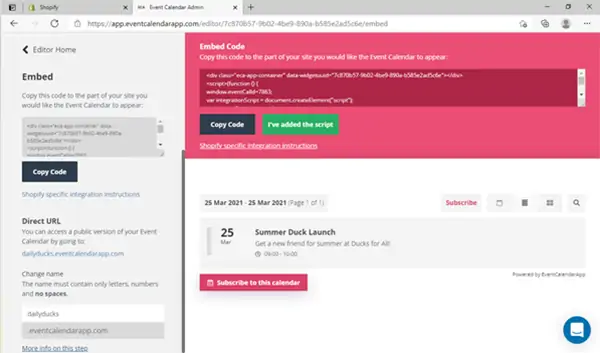
Click on the “Direct URL” link to see your calendar in the Event Calendar app, and copy the link to add it to your Shopify website.
Remember our previous discussion about adding links? It’s time to put that knowledge into action. Go to your Shopify dashboard and head to your page editor. We’ll add our calendar link to the center part of our sample site’s homepage where it displays several columns. You can choose to insert it anywhere on your Shopify website you can write text and add a link.
For our example, we’re back at this menu where we must click on the “Add a title or tagline” tab to get started:
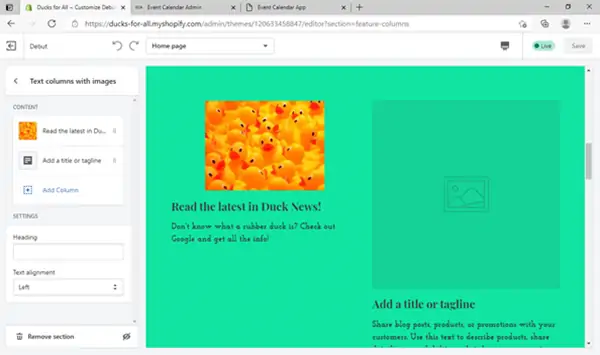
Add an engaging photo, and then link your calendar in the text. As always, remember to click on the “Save” button.
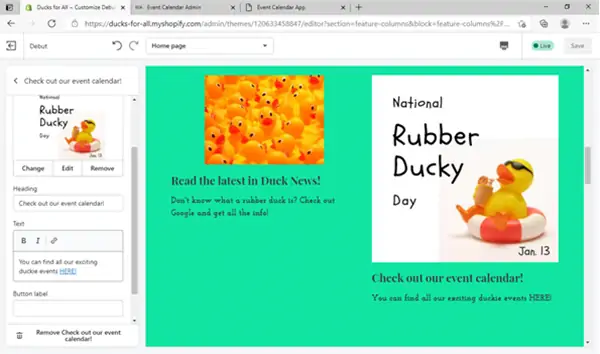
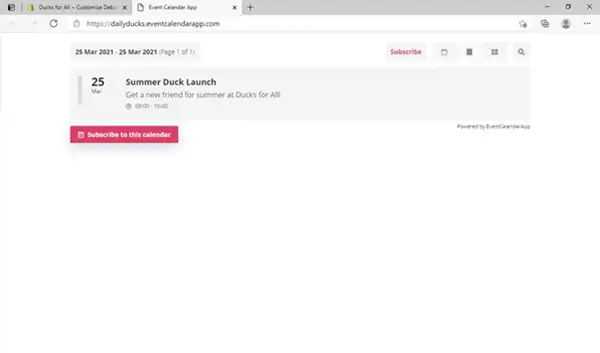
Whenever visitors to your Shopify site click on that link, they’ll see a page dedicated to your business’s event calendar.
To add events to your new calendar, simply go to your main account dashboard, click on the “Apps” tab, and then click on “Event Calendar App” to return to the calendar dashboard. Click on your calendar widget to access the calendar menu, and then click on the “Add Event” tab to open up the event screen. After you enter all the relevant event details and click on the “Add event” button, your calendar will automatically update. What could be simpler?
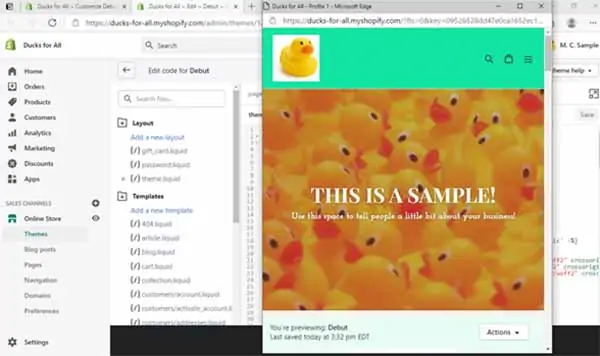
Editing Your Shopify Site in HTML
To finish our beginner’s guide, we’ll return to the Shopify page editor and scroll down the left-hand menu. When you see the very last tab — called “Theme actions” — click on the three dots to open this menu:
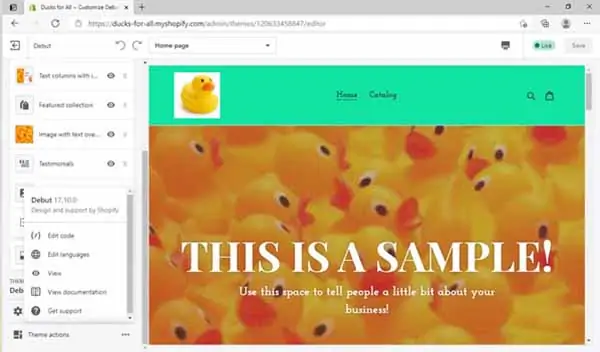
Click on the “Edit code” option here, which will direct you to a new browser tab:
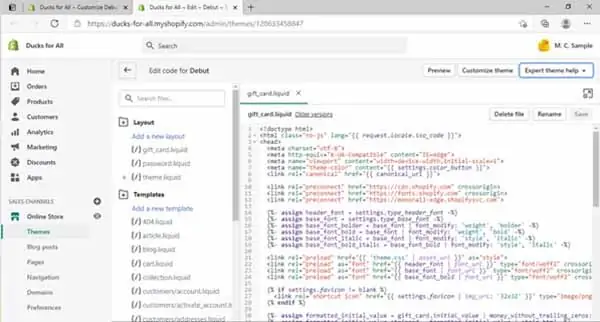
Here, you can customize your website’s code using hypertext markup language (HTML). This includes everything from your site’s layout and colors to the sections you want to include or exclude. Simply use the menu list to select the part of your site you want to edit, and then click on the “Preview” button to check your work:
If you want to return to the template-style editing page, simply click on the “Customize theme” button. That will close the HTML menu and take you back to the regular page editor. Two browser tabs will remain open so you can go back and forth while you work, if desired.
If you want some expert advice from the Shopify team, you can request assistance by clicking the “Expert theme help” button. If you’re comfortable writing code, this is how you can further customize your theme and Shopify site elements using HTML.
Final Thoughts
Shopify provides an easy-to-use interface with many design options. Hopefully, this Shopify beginner guide proved helpful as you built and customized your online store. The more you use the menus and tabs, the more intuitive it’ll become. Just remember, you can change your mind and make additional edits at any time.
Try Shopify
The best way to get a better feel for Shopify is to give it a try. Click the button below for a no-risk free trial.