How To Make a Shopify Store: A Shopify Beginner’s Guide
Getting your own online store up and running is exciting. As the preferred website builder for ecommerce businesses, Shopify enables you to build an attractive website for your online business quickly.
This Shopify tutorial covers how to start your own Shopify store in just a few steps. By the end, you’ll know how to create a Shopify store and be able to begin selling.
Recommended: Get started with a Shopify free trial to better follow along with this guide.
Before You Begin
We know you’re ready to start creating your website immediately, but it’s a good practice to take some time to plan it out first. While you can certainly begin the process without this step, a little planning will make it easier.
Along with this guide, check out these other helpful articles to help you determine if the Shopify ecommerce platform is the right tool for you and your business:
The 8 Steps to Make a Shopify Store
Now, let’s get started with our eight step guide:
- Sign up for Shopify
- Add Your Products
- Customize Your Theme
- Customize Your Homepage
- Connect Your Payment Options
- Choose Your Shipping Options
- Explore Other Features
- Publish Your Store
Step 1: Sign up for Shopify
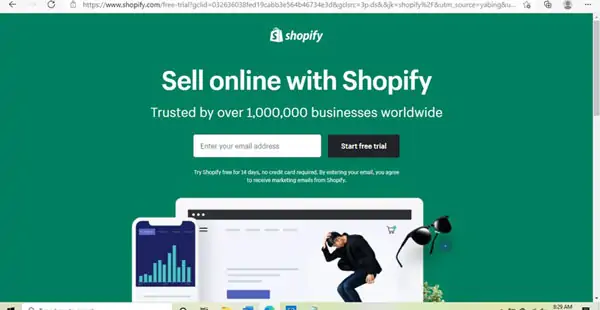
The first step involves signing up for a free Shopify account. You can even start with a 14-day trial period and then choose a paid plan later — it’s that simple. You just need to enter some basic contact information.
Visit Shopify’s homepage and enter your email to get started. Shopify will ask you a few questions about your business and then send you a verification email. In just a few clicks, you’ll be all set.
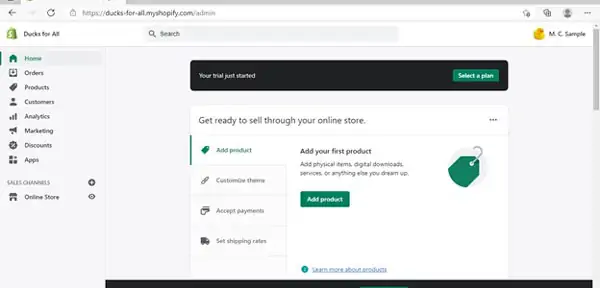
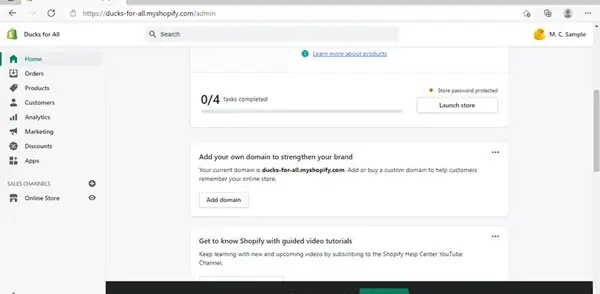
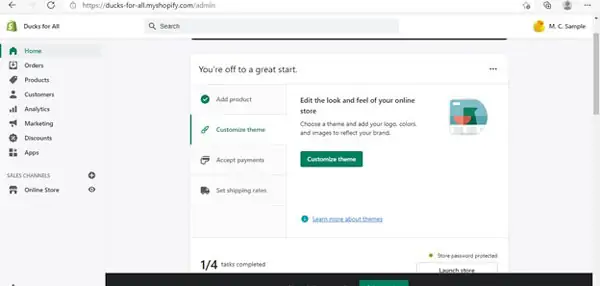
Once you sign up, the Shopify dashboard will appear. Here you’ll find all the tabs and links you need to build and maintain your website.
Scroll down until you see the section about adding your domain. (You’ll need to add this here if you didn’t already enter it on your contact information page during the sign-up process.) If you already have a domain, click on the “Add domain” button and enter that information. If not, you can purchase a custom domain with Shopify or use the free domain it assigns to you.
While it’s a matter of personal choice and budget, keep in mind that a custom domain will look more professional to your online visitors. Don’t worry if you’re not ready to purchase a custom domain right now; you’ll have the option to do so later.
When you click “Add domain”, you’ll see this screen, where you can manage all your existing domains or add or purchase a new one.
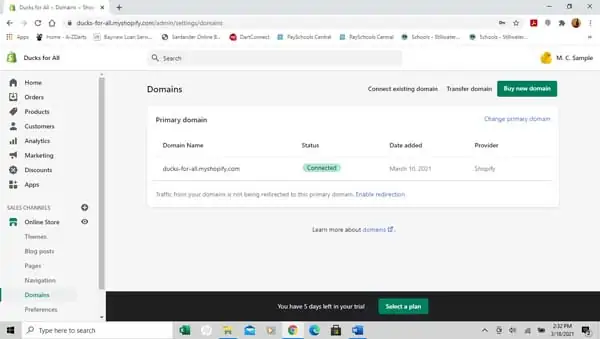
If you’d like to purchase a domain for your business, typing into the Domain box will give you buying options. Once you connect to your custom domain — or the free one provided by Shopify — you can return to the main dashboard to start building the other parts of your Shopify website.

Ready to get started with Shopify? It’s free and easy to sign up! Get started with a Shopify free trial.
Step 2: Add Your Products
Because you want your website to showcase your products or services in a way that gives customers a seamless shopping experience, you’ll need a solid understanding of how the Shopify product upload process works. You can customize each product (or service) offering to include a photo, description, and other details like price and availability.
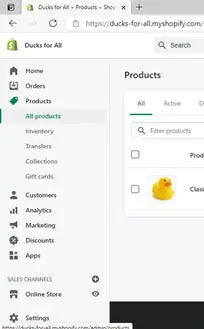
To start creating your product catalog, click the “Products” tab on the left side of the dashboard.
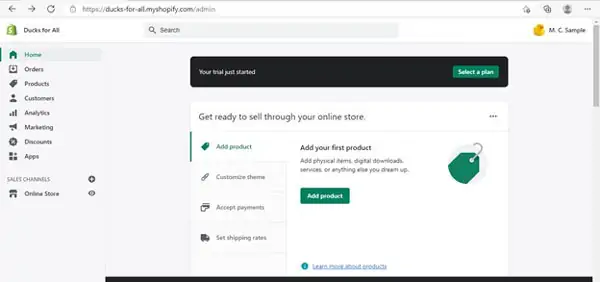
To upload your first product, click on the “Add product” button. A product description page will then appear where you can enter all the information you want customers to know about that specific product. For example, you can add the product’s weight, estimated shipping time, and comparable pricing, so visitors know you offer the best deal. You can even enter that product’s stock-keeping unit (SKU) number and/or barcode to help your business track its inventory.
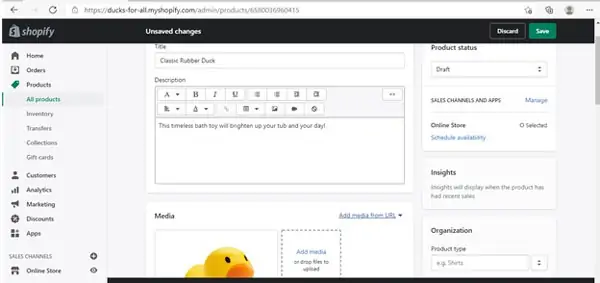
Keep scrolling down on this screen to see all the possible data fields for each product.
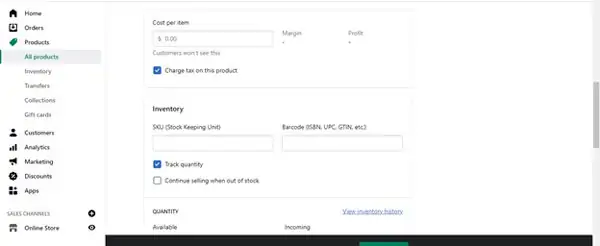
You can enter as much or as little data for each product as desired. You also can add search tags to make it easier for customers to quickly find what they need. Take some time to familiarize yourself with Shopify’s product upload process, so you’ll always know exactly what you need to consider when adding new products and services to your site.
From the menu on the left side of the dashboard, you can scroll through and review your entire inventory, add new products, update existing items, and organize products into categories and collections to suit your business’s needs. You can even save new products as “drafts” to finalize later if you haven’t yet settled on a price or color.

Once you finish adding each product’s description and other supporting information, just click the “Save” button, and Shopify will automatically update your inventory. Your product catalog won’t become active on your website until you set up your payment options. So, don’t worry if they all appear as drafts for now.
Adding product offerings to your site represents a huge step in making it not only a great place for customers to shop but also a tool for tracking your inventory and income. Your site still needs a public “face” to show the world. That’ll require some customization to ensure your website accurately showcases your business’s brand.
Looking for a more in-depth discussion about how to set up your website structure? Check out our How To Structure a Website article.
Step 3: Customize Your Theme
Your business’s branding plays a crucial role in ensuring potential customers understand its purpose and personality. As such, you should customize your website’s theme, so it closely aligns with your business’s brand.
Start by clicking the “Home” tab on the left side of the dashboard to return to the main screen. From there, click the “Customize theme” tab to begin the process of adding your business logo and some relevant banner photos.
The below screen will then appear, providing lots of options for customizing and optimizing your online store. You’ll notice your site requires visitors to access it with a password until you purchase a Shopify plan.
At this point, you can choose and buy a plan that’ll disable the password protection and open your site to the public. Alternatively, you can keep the password Shopify created for your site or set a new password for customers to use until you’re ready to make your website public.
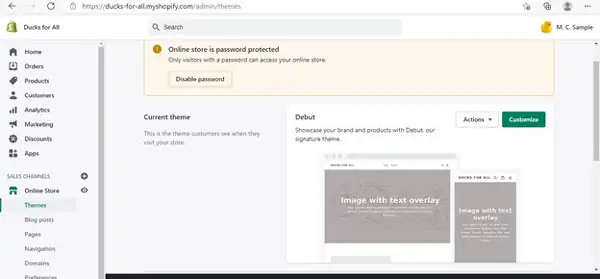
From this page, a quick scroll down will show you options for using themes other than the defaults set by Shopify. There are free themes, as well as themes that you purchase to customize your site.
Clicking on the “Free Themes” button will open a pop-up window, where you can browse Shopify’s free offerings. If you find one you like, click on it and hit “Download to theme library.” If not, simply close the window and use the default for now. Clicking the “Theme store” will open a separate browser tab for you to look over all free and paid options.
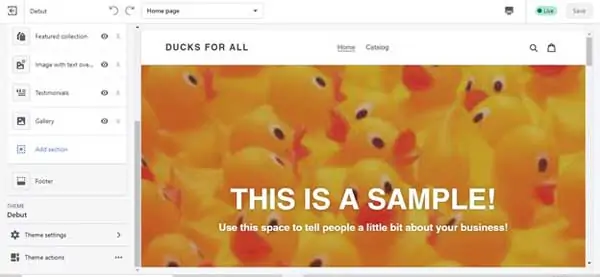
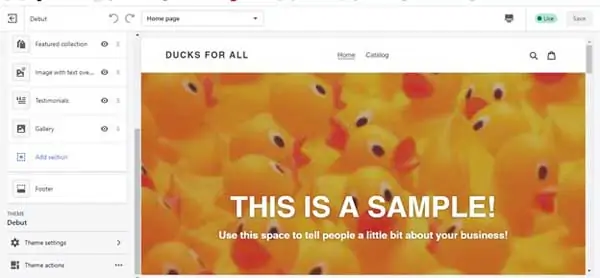
If you don’t choose a theme, your site will automatically default to Shopify’s “Debut” theme, which is what we’ll be using for this tutorial. Go ahead and click on the green “Customize” button to get started. You’ll see a screen that looks like this, with a left-hand dashboard:
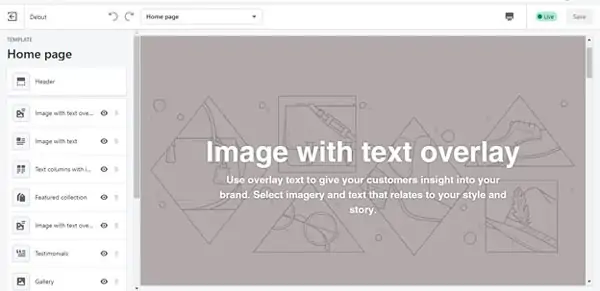
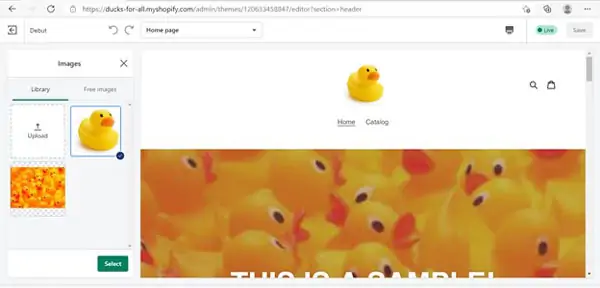
You’re going to use the tabs on the left side of the dashboard to either upload your own images or choose from Shopify’s distinctive collection of stock photos. This is the fun part of building your website, enabling you to showcase your business to the world.
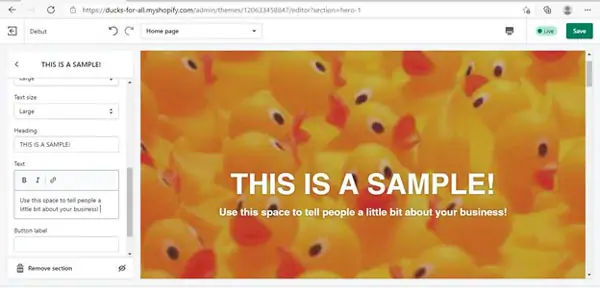
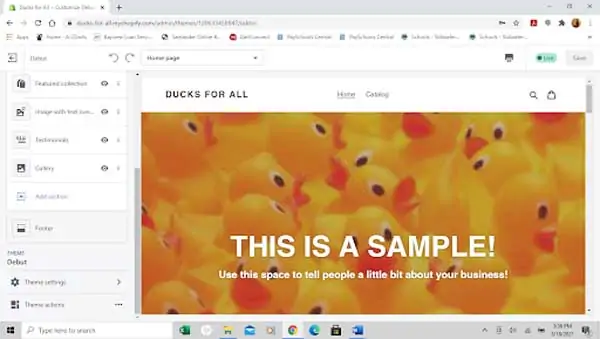
Shopify’s easy-to-use dashboard allows you to complete a wide range of tasks, but for now, we’ll focus on making customizations aligned with your branding. Use the buttons on the dashboard to add a large banner photo and short description or tagline for your business. Here’s an example:
Next, click on the “Header” tab at the very top of the dashboard to upload your business’s logo and adjust the header’s text and format.
You can choose images from Shopify’s photo collection, customize the text, and change the color and theme settings to make your site align with your business’s needs and the mood you want to convey. This will help your business make a positive first impression with online visitors.
When you click the “Header” button, the dashboard will open up a menu like this:
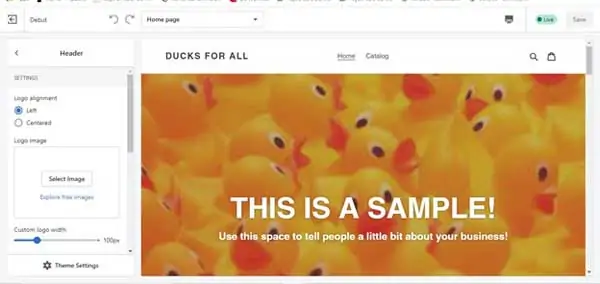
From this menu, you can upload your logo or logo photos and choose how to align them at the top of your page. If you don’t have a logo yet, use our free logo maker.
Because the header is the first thing people see when they visit your website, make sure to explore all the customizable header settings to visually communicate your brand’s distinct personality.
If you decide to use a custom photo and/or text, ensure those elements accurately represent your business.
If you want to use stock photos from around the internet, make sure you have the proper permissions to do so. To avoid potential copyright infringement issues, you can download royalty-free images from Unsplash.com, Pexels.com, or Pixabay.com.
Step 4: Customize Your Homepage
Once you’re done with your header, you’ll find other sections of your website’s homepage listed on the left-hand dashboard. These correspond with the sections on the right-hand page preview.
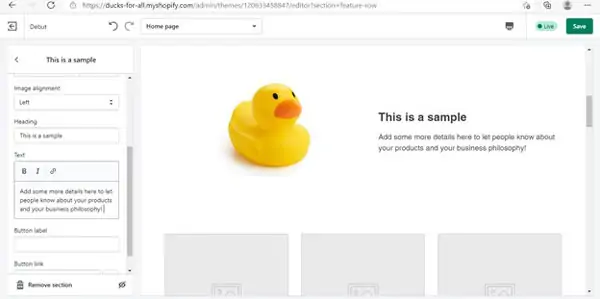
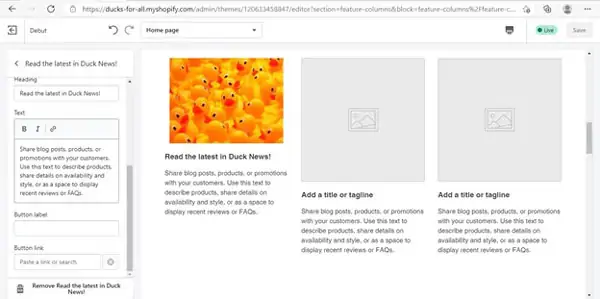
You’ll use these buttons to add photos, arrange your featured inventory, and tell people more about your business. The center section that appears below your homepage’s header and banner image provide space to add a photo and some text to introduce people to your business’s philosophy and products.
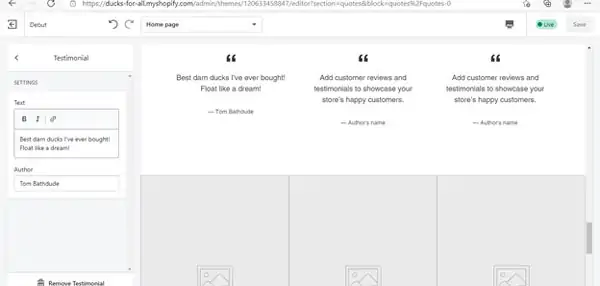
As you scroll further down your homepage, you’ll find places to add featured products and descriptions, link to your product catalog, and showcase customer testimonials.
You can choose to use all or some of the available sections on your homepage. Just delete the ones you don’t want by clicking on that section’s dashboard button.
Once the menu opens, scroll down and click on the trashcan to remove it from your website’s homepage. You can add those sections back at any time, if needed, by scrolling to the “Add Section” button. This opens a list of all available sections; just click the one you want to include on your page.
Remember to add your business’s contact information and newsletter link to the footer section so people know how to reach you and can opt in to receive your latest product information.
Even further down this page, you’ll find a “Theme Settings” gear. Clicking on this will let you customize your page even further, such as with shopping cart icons, color and theme selections, and much more. Take some time to explore these settings to see what works for you and what you can expect from your website.
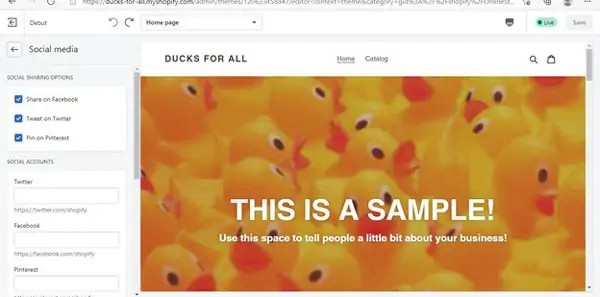
You’ll see even more options for customization in this menu, including typesetting and sales widgets to make your site pop! In this menu, you also have the ability to add links to your business’s social media accounts — important marketing channels that can help boost your brand awareness and customer engagement.
When you finish setting up your basic homepage sections and making customizations, remember to save your changes by clicking on the “Save” button before you return to the main dashboard.
Make sure your homepage has everything you need for your online store to succeed. Check out our How to Design a Homepage guide.
Step 5: Connect Your Payment Options
Now, it’s time to link the payment options your business will accept to your new website.
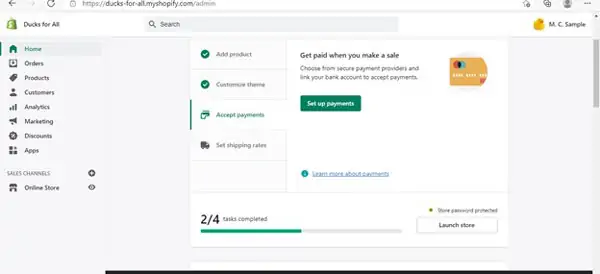
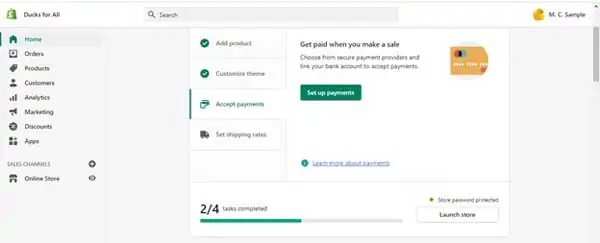
Click on the “Accept payments” tab in the main dashboard to open this screen:
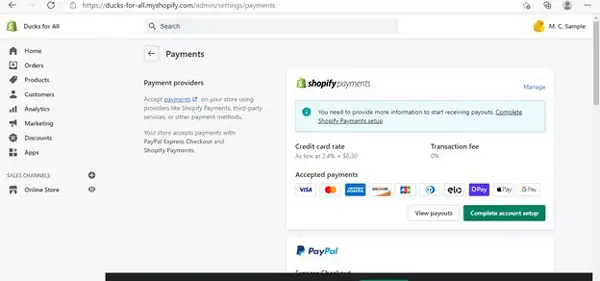
If you already operate an established business, simply enter the information requested in this section to link your site to your business credit card and bank payment plans. You also can connect your Shopify store directly to the PayPal online payments system.
Shopify websites can accept PayPal payments as well as all major credit cards and mobile payments from services like Apple Pay and Google Pay.
Shopify offers many options to make it easy for your customers to complete a purchase on your website while also ensuring the prompt transfer of that money to your business. As you scroll, you’ll see separate buttons for adding each of these payment options so that you can link your information to the ones you want to participate in.
If you want to use Shopify’s direct payment system, simply click the green “Complete account setup” button. When you click on this, it’ll open a page where you can fill out a single, secure form with your business, personal, and banking information.
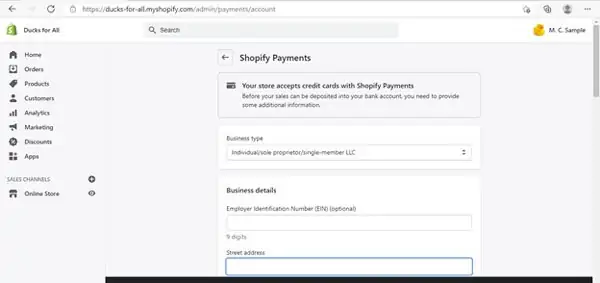
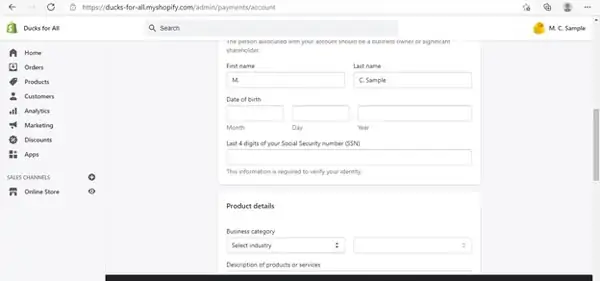
Just make sure to fill out this form completely to avoid any payment hassles when you start selling from your online store.
If you don’t have a business identity yet, check out our How To Form an LLC guide.
Step 6: Choose Your Shipping Options
Next, you must select how you’ll ship your products to your online customers. On the main dashboard, click the “Set shipping rates” button to get started.

This will open a screen where you can choose from all the major shipping options. You can even decide to offer personal local delivery and pick up for your nearby customers.
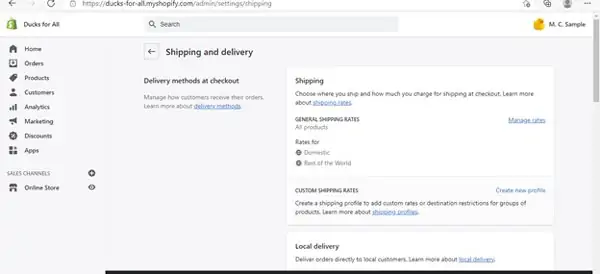
As you scroll down this screen, you’ll also find options for printing shipping labels and packing slips as well as integrating your accounts with your shipping partners.
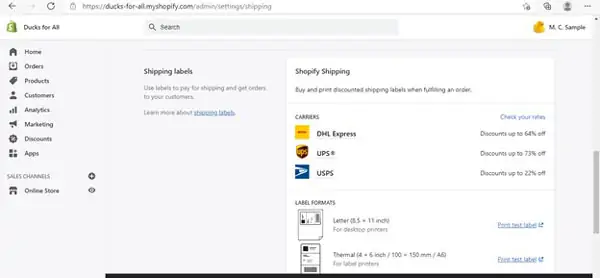
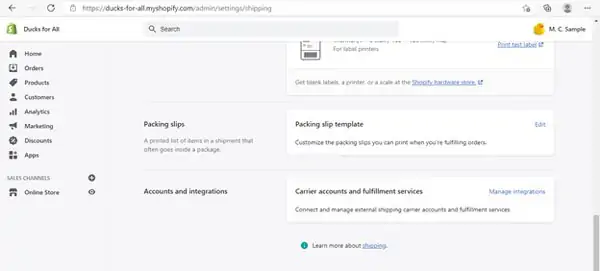
Shopify’s easy-to-follow forms and instructions make it a breeze to enter and integrate all your shipping information.
Step 7: Explore Other Features
After you finish setting up your products, payments, and shipping options, as well as customizing your theme and homepage, it’s time to check out the other features Shopify offers business owners.
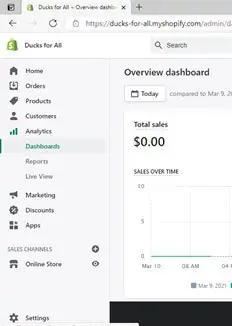
On the main dashboard, scroll down to learn how to send a test order to yourself, incorporate international shipping options, or add a “Tipping” button to your homepage, so your customers can show a little extra appreciation at checkout. This is an excellent option if you plan to offer delivery.
In the menu on the left side of the dashboard, you’ll also find ways to expand your site, manage your inventory, start a customer database, and track all your online transactions.
Clicking any of the tabs in this menu will open a drop-down menu with additional options you can use to help manage every aspect of your business’s Shopify website. Here are two examples:
Step 8: Publish Your Store
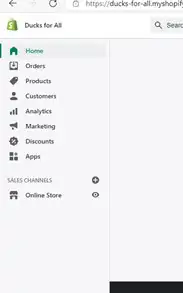
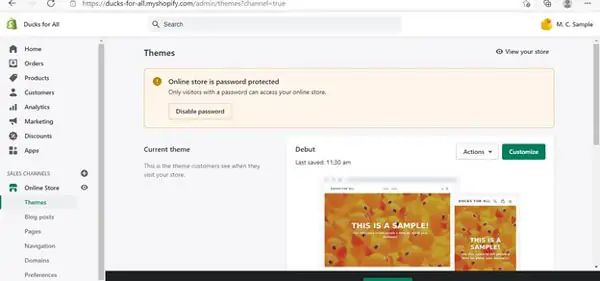
When you’re satisfied with all the settings you chose for your site, it’s time to preview your online store and then go live. From the main dashboard, click the “Online Store” tab under the “SALES CHANNELS” section of the menu to return to the “Themes” screen. Click on “Themes” and the eyeball icon at the top right with the “View your store” link to go to your website’s homepage.
If you didn’t remove your site’s password protection, you will need to provide that password to potential customers so they can access your site. Clicking on the “Disable password” button will give you the existing assigned password plus all the options you need to change it.
You can choose to purchase a Shopify plan, which will remove all passwords. If you want to maintain your site for free, you can keep the assigned password, or you can change the password that you’ll need to supply to your customers to access your store.
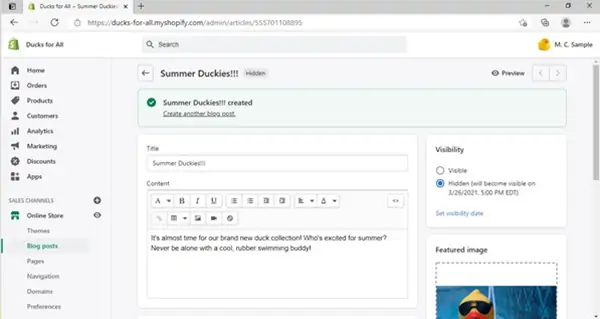
You’ll also find other options under the “Online Store” tab that’ll allow you to link to your blog posts, add new pages, and further manage and customize your e-commerce site.
Once you click that eyeball, you’ll see your website in all its glory. You did a fantastic job!

Test Your Order Page
Before you advertise your open store to the world, you should always test your ordering system. Shopify has a bogus gateway and testing option to allow you to do just that.
From the home dashboard, click on the “Set up payments” link once again to bring you to the payment management page- the one where you set up your payment methods a little while ago.
Once there, click on the “Manage” link at the top right of the Shopify payments box:

When that screen opens, you should scroll all the way to the bottom of the new page, and you’ll see a “Test mode” box. Click this to deactivate real payments, so you can run a dummy order.
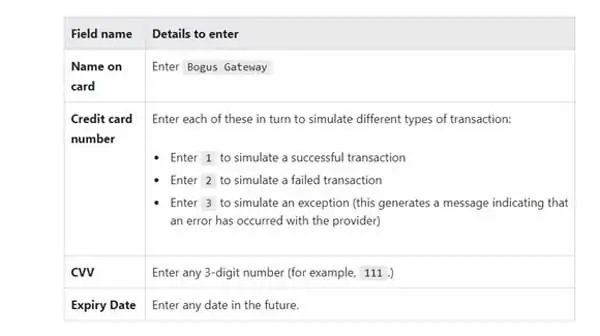
Now, head to your store, and place an order, but instead of using a real credit card, use this information instead:
When you run a test transaction, you’ll be able to see if your store is working correctly. By using these test transactions, you’ll also learn how your notifications are working and if you need to adjust your email settings so you never miss a transaction.
When you’re done, be SURE to go back to the payment management page and turn off the test mode so you can begin taking real orders and payments.
Publish Your Sales Link
Having your Shopify store is great, but how are you going to spread the word that you’re open for business? What if you have other places where you’d like to promote your items? There’s nothing to worry about because you can announce your new business and link your store to your existing websites and social media.
You’re going to do this from the Shopify dashboard, so you’ll want to head back there. On the left-hand side, you want to click the “+” to the right of SALES CHANNELS.
It will open up a menu where you can choose buttons and widgets to suit all your needs. You can link a button to eBay or Facebook applications and even link your new store to an existing Point-of-Sale service if you have one. Simply click on the green plus signs to add your account information and receive your Shopify widget for each. The more shopping channels you add, the greater your web store’s exposure will be.

Final Thoughts
Now that you’ve successfully built and launched your own Shopify store, you’re ready to focus on growing your ecommerce business. You should take pride in launching your online store. You also can rest easy, knowing that Shopify’s intuitive menus, forms, and customization options will make it easy to manage your ecommerce business as it grows.
Get Started With Shopify
Shopify makes it easy to build the best online store to support your ecommerce business. Get started with a free trial by clicking the button below.