How to Use the Weebly Website Builder in 2026
Weebly is one of the best website builders for small business owners and entrepreneurs. In fact, the Weebly website builder has one of our highest ratings based on its ease of use.
Yet, even extremely intuitive tools can sometimes seem a bit tricky in certain areas. That’s why we created this Weebly tutorial to walk you through some of common tasks when making a Weebly website for your business. Plus, our how to use Weebly guide will cover some more niche tasks every business owner should know when creating a professional website.
Ready to start your website? Visit Weebly

Signing Up with Weebly
Signing up with Weebly shouldn’t seem difficult, but it has ever since Square bought Weebly. Now, two Weebly website builders exist: one powered by Square and the other by Weebly.
We recommend using the website builder powered by Weebly unless you want to create a site strictly focused on ecommerce.
For detailed instructions on how to ensure you sign up for the Weebly website builder and not the Square version, visit our How To Make a Weebly Website guide.
Check out these other useful Weebly resources:
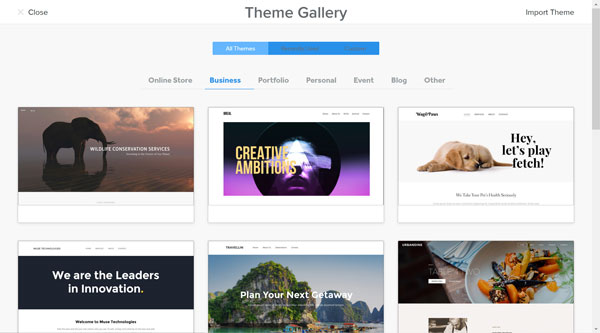
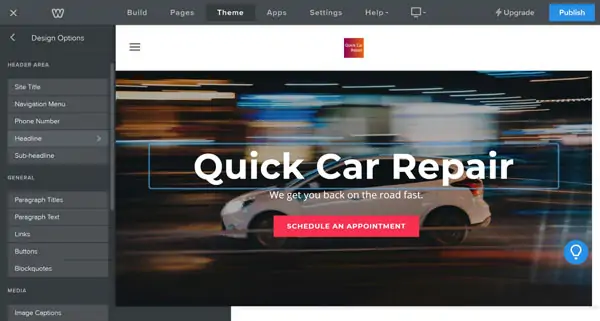
Using Weebly Themes
Weebly offers 42 different themes you can use as a starting point for your website. One key perk of using the Weebly website builder is that it allows you to switch to a different theme if you decide you don’t like your original choice.
Choosing a Weebly Theme
The first step when creating a new website involves choosing a theme. In our Weebly website guide, we recommend the Travellin theme. It’s a great option if you aren’t sure which theme to use. But, with 41 other options available, choose the theme you like best.
Here are some key questions to consider when choosing a theme:
- Where will my business logo appear?
- Where’s the menu bar?
- What happens to the menu bar when you scroll down a page?
- What fonts does it use? (You can change these, but it’s great if you like them as is.)
- Does the page layout meet your needs?
- What pages does the theme include?
Preview a theme before you select it by clicking the “Preview” button.
Once you determine which theme will work best for your business, click the “Choose” button.
Switching Themes
One major benefit of Weebly is that it allows you to change themes. If you don’t love the theme you originally chose, it’s easy to switch to another.
To switch a theme:
- Click on the “Theme” tab, and then click “Change Theme.”
- When you hover over a theme, you’ll see options to either “Preview” or “Choose” that theme. We recommend you first click “Preview” to see what the new theme will look like with your existing information.
- Once you pick a new theme, select “Choose.” The Weebly website builder will then apply that new theme to your site.

Working With Weebly Pages
For a quick overview of how to work with pages in Weebly, follow these steps:
- Click on the “Pages” tab. A list of all the pages on your website will then appear in a menu on the left side of the screen.
- Click on one of your pages to open a page-level menu.

Here’s what those menu items mean:
- Page Name: The “Page Name” is what shows up in the site’s navigation menu. In this example, the page is called “Destinations.”
- Hide in Navigation: If you don’t want a page to appear in your site’s navigation menu, check this box. Because you want to limit the number of pages within the main navigation menu, use this to hide extra pages and/or subpages.
- Header: You can choose whether or not you want your page to have a header — the large area at the top of the page. On the “Destinations” page example, the picture and the words “The Great Wall” form part of the header.
- Visibility: You can set a page’s visibility to one of three options:
- Public: This allows everyone to see the page.
- Site Password**: You can create a password for your website and designate specific pages as password-protected.
- Members or Groups**: If your site has pages that only certain members or groups may see, choose this option.
**These options require a Weebly Professional or Performance plan.
- SEO Settings: This is where you set search engine optimization (SEO) information for specific pages. For more details, check out our Weebly SEO guide.
- Copy: You can copy a page and then rename it — a helpful feature if you’ll have multiple, similar service or location pages.
- Delete: If a page won’t work for your website, you can delete it here. If you accidentally delete a page, contact Weebly customer support to see if they can restore it for you.
Adding, Deleting, and Moving Pages
Based on your specific business needs, you can add, delete, or move pages within your website.
Adding a Page
If you need additional pages, you can add them from the “Pages” tab.

Weebly offers four different types of pages:
- Standard Pages: This is the page type you’ll use most often.
- Blog Pages: This is a special page designed specifically for Weebly blog posts.
- Category Pages: Typically used for online stores, this type of page contains all products within a specific category.
- Product Pages: This type of page focuses on just one product in an online store.
Weebly also offers two extra options:
- External Pages: This type of page appears in your site’s navigation menu and takes anyone who clicks on it to an external page on another website.
- Non-Clickable Menus: Use this option if you want the top-level menu item to remain non-clickable when you create a submenu.
To add a standard page:
- Click on the “+” (plus) symbol.
- Select “Standard Page.”
- Enter the name of the new page as you want it to display in the menu.
- Select whether you want the page to have a header or no header.
- Click “Done.”
Moving a Page
To move a page, click on the page and drag it up or down in the list of pages. This will rearrange the order the pages appear in your site’s navigation menu.
Deleting a Page
To delete a page, click on a page and then click the “Delete” button.
Setting Up Weebly Site Navigation
The menu bar at the top of your website should give visitors a clear understanding of what they’ll discover on each page. It also should help them quickly find the information they seek.
As a best practice, limit your navigation menu to five or six pages. If you have more than that, create submenus. You also can put a menu in your site’s footer with links to pages that don’t appear in the main navigation bar.
Rearranging a Navigation Menu
To rearrange items within your site’s navigation menu, click on the “Pages” tab and then drag the pages up or down to move them within the menu.
Creating a Submenu or Subpage
To create a drop-down submenu, click on a page and then drag and indent it under the top-level page.
Here we created two subpages called “Air Travel” and “Hotels” and then moved them under “Services” in the navigation menu.

Hiding a Menu Item
To prevent a page from displaying in the navigation menu, click on the page and then check the “Hide in Navigation” box.
Working With Weebly Sections
Websites consist of pages and those pages often include multiple sections. Sections help you create — and more easily move — similar groups of information.
Adding a Section
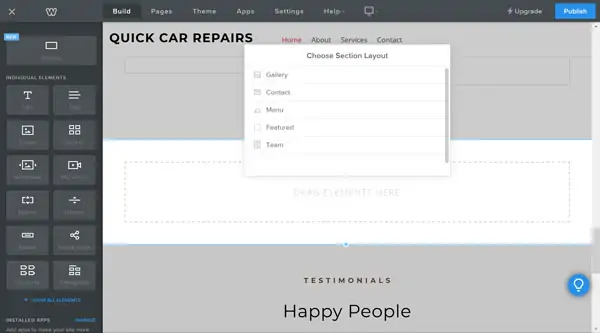
Whenever you want to feature a new type of information on your website, use a new section.
To add a section:
- From the “Build” tab, click on the “Section” block in the left-hand menu and drag it to where you want the section to display on your page. You’ll see a blue line as you drag the block.
- Drop the “Section” block when the blue line appears in your chosen location for that section.
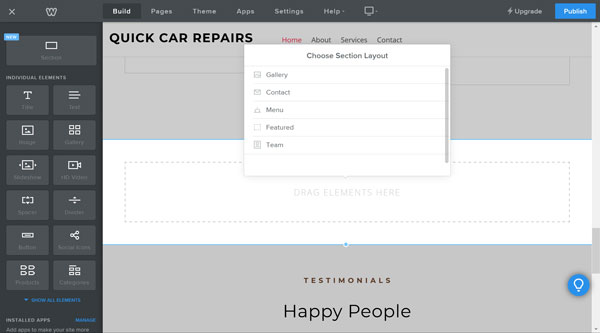
- As you click on each section layout option, you’ll see a picture of those different layouts. Pick a layout and click “Save.” (Alternatively, you can start with an empty section by clicking outside the “Choose Section Layout” box.)
Moving or Copying a Section
The “Sections” block tool makes it easy to move or copy sections across just one or many pages.
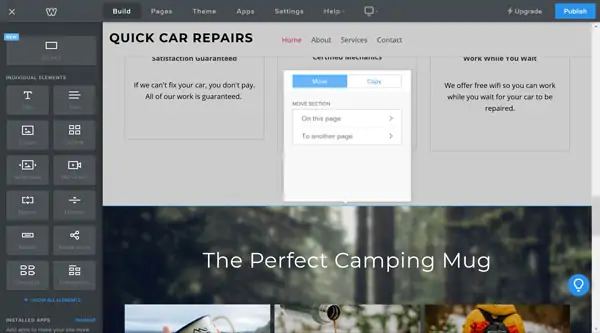
To move or copy a section:
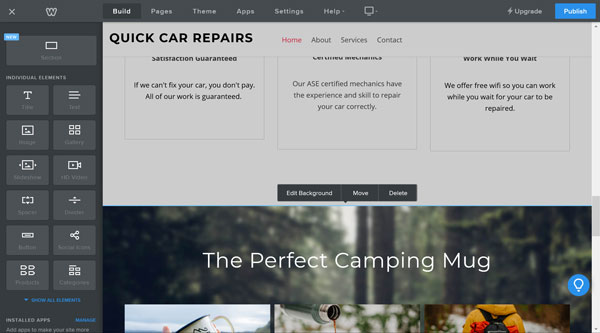
- Click near the top of the section you want to move. Three buttons will then appear: “Edit Background,” “Move,” and “Delete.”
- Click on the “Move” button.
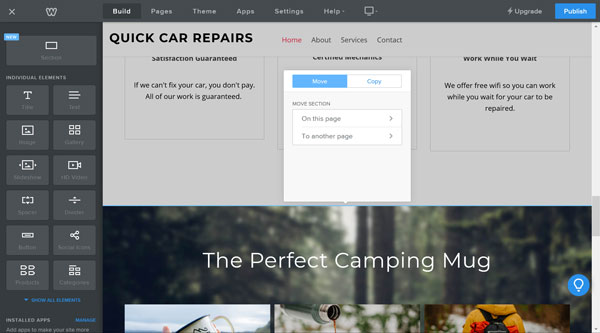
- Now, choose one of these three options:
- Move Section on This Page: Click this option and then choose whether to move the section up or down on the current page.
- Move To Another Page: Click this option and then choose the page to which you want to move the section.
- Copy: Click this option and then choose whether you want to make a copy of the section on the existing page or on a different page.

Deleting a Section
If you no longer need a section, delete it from your site. But, proceed with caution because the Weebly website builder doesn’t have an “Undo” button.
To delete a section:
- Click near the top of the section you want to delete. Three buttons will then appear: “Edit Background,” “Move,” and “Delete.”

- Click on the “Delete” button.
- Confirm you want to delete the section.

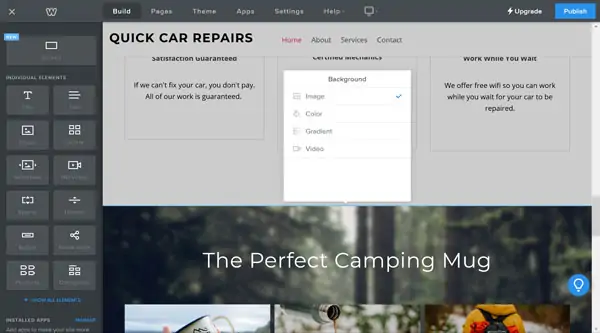
Working With Weebly Backgrounds
Weebly has four background options:
- An image
- A color (solid colors)
- A gradient (pick two colors to fade from one to the other)
- A video (for users with Professional or Performance plans only)
Changing the Background
You can easily change the background of a section to a color or image that matches your brand.
Don’t have a color scheme for your business yet? Check out our How to Choose a Great Website Color Palette guide to learn more.
To change the background:
- Click near the top of the section you want to change. Three buttons will then appear: “Edit Background,” “Move,” and “Delete.”
- Click on “Edit Background.”
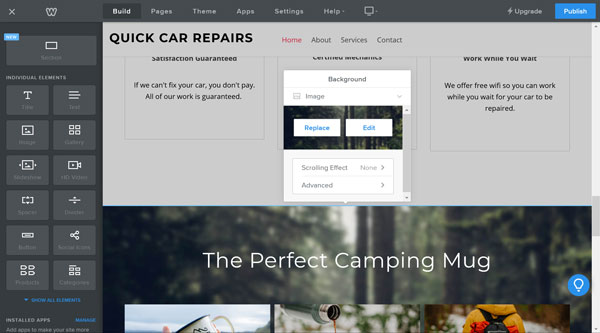
- Click on the current background type and a menu with the background options will appear.

- Choose the type of background you want and then follow the prompts to customize it for that section.

Try to make your background images at least 2,000 pixels wide by at least 1,000 pixels high to ensure they display clearly on all screen sizes.
Customizing Fonts in Weebly
In Weebly, users can only change fonts at the style level. That means you can’t change the font for an individual piece of text. Instead, if you change the font for the “Paragraph Text” style, all pieces of text that have that style will change to the new font.
But, you can change other font attributes for an individual piece of text.
To change the margins for a piece of text, see the Changing the Width of a Piece of Text section below for step-by-step instructions.
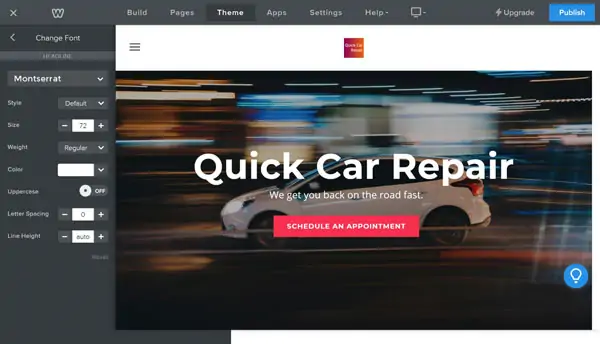
Changing a Style’s Font
In Weebly, an individual font applies to all text within a specific style. That means if you change the font assigned to the “Headline” style, for example, all headlines on your site will appear in that new font. As a result, you can’t change the font used for an individual piece of text.
To change a style’s font:
- Click the “Theme” tab.
- Click the “Change Fonts” button. The available styles will then appear on the left of the screen as in the screenshot below.
- To change a style, click on the name of the style (e.g., “Headline”).
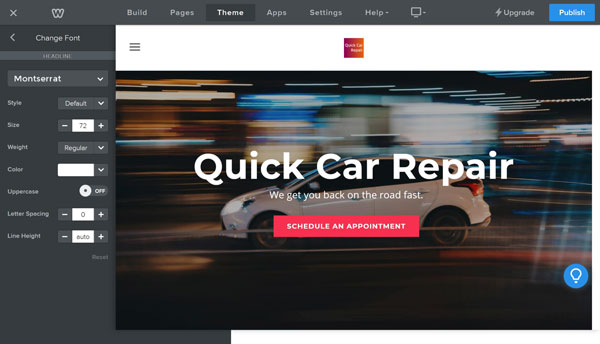
- Click on the current style’s font name to open a long list of available fonts. Choose a font that matches the look and feel of your business’s branding.
- Adjust the font size, color, spacing, etc.
- Click the back arrow to the left of “Change Font” to return to the font menu.
Changing the Appearance of a Piece of Text
While you can only change fonts at the style level, you can change the appearance of text at the style level or for an individual piece of text. By appearance, we mean the text’s:
- Color
- Format (e.g., bold, italic, or underlined)
- Size
- Alignment (e.g., left, center, or right)
The previous section explained how to change the appearance of a font at the style level. Here’s how to change the appearance of an individual piece of text.
To change the appearance of a piece of text:
- Highlight the piece of text you want to change. A toolbar will then appear above the text.
- From this toolbar, you can change:
- Whether the text is bolded, italicized, or underlined.
- The text size (by clicking on the “+” or “–” symbols).
- The text’s color.
- Where the piece of text links (see the Creating Links in Weebly section for more details).
- If the text represents part of a bulleted or numbered list.
- Any extra formatting and return the text to the original style (by clicking the “Tx” symbol).
- Any edits you make using this toolbar (by using the “undo” or “redo” arrows) before you click outside of the text box and save the changes.
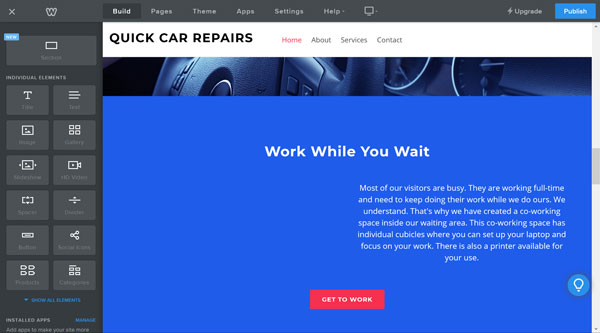
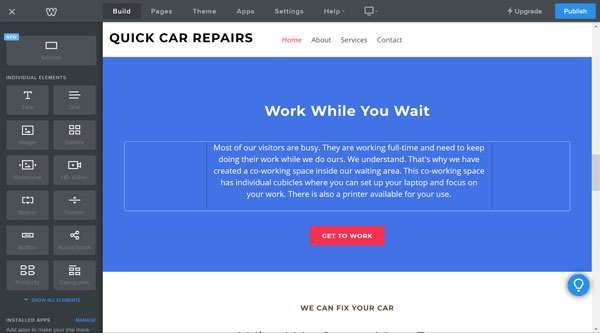
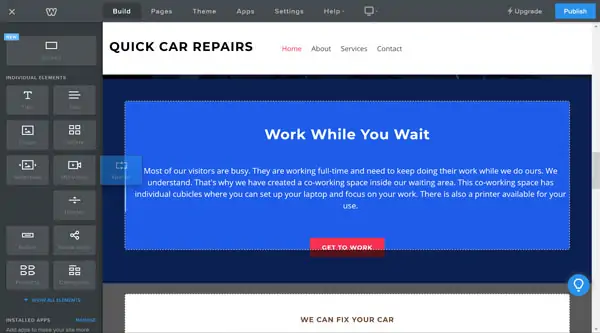
Changing the Width of a Piece of Text
To increase the readability of your website, keep the text width on each page narrow enough so visitors never have to move their heads to return to the start of the next line. In other words, don’t let text stretch all the way across the screen.
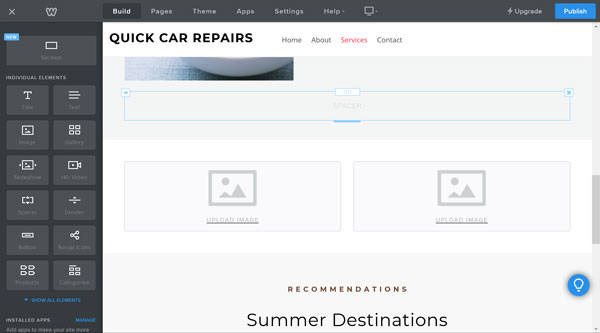
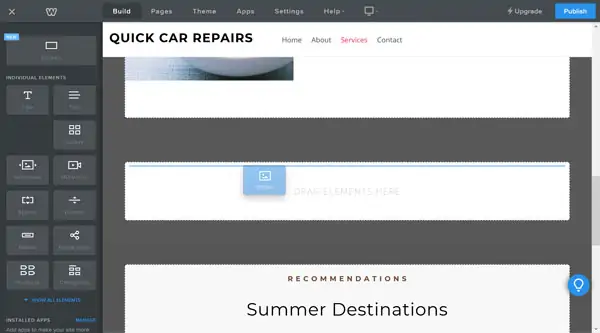
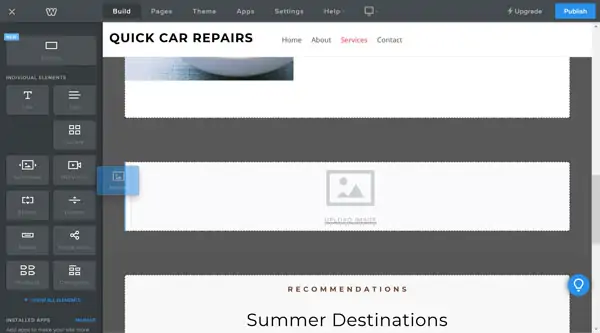
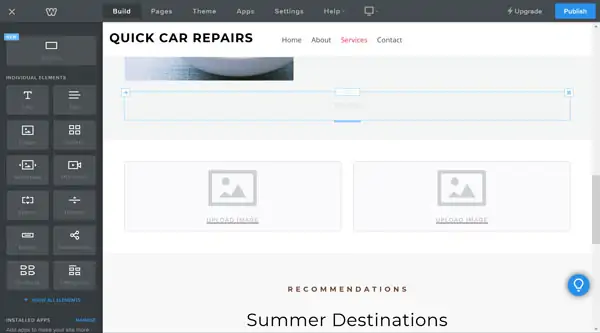
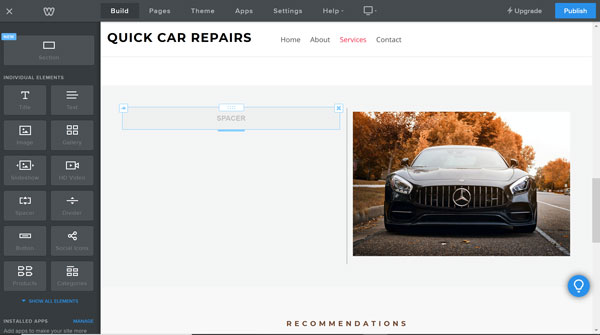
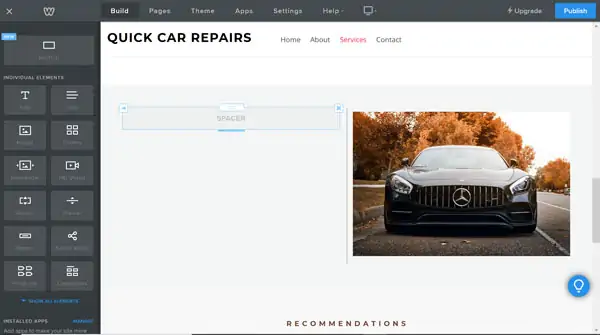
Because you must create your Weebly website with blocks, you need to add spacers on one or both sides of a text block to change the width of a piece of text,
To change the width of a piece of text:
- Click on a “Spacer” block, drag it onto the page until a blue line appears next to the text you want to adjust, and then release the block.

- This will create two equal columns.
- Click on a “Spacer” block, drag it to the other side of the text, and then release the block.
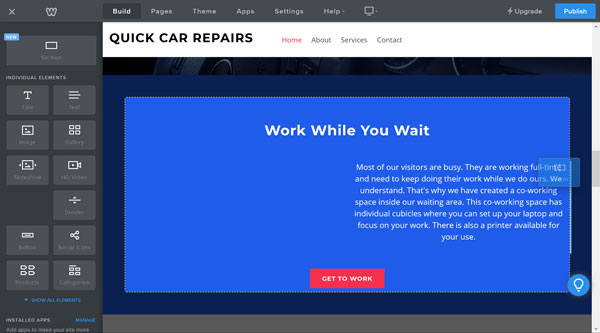
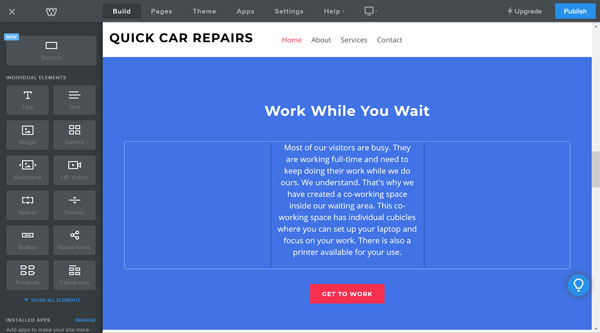
- Finally, click on the vertical bars to the left and right of the text in the middle column and drag them to adjust the width of that text block.


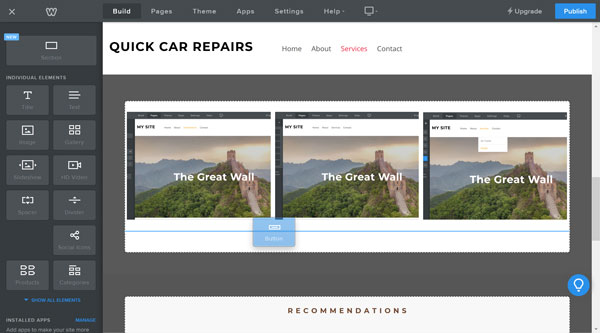
Using Columns in Weebly
As a drag-and-drop website builder, Weebly builds columns with blocks. When you first drag a block over to your website, it takes up the entire width of the screen. When you drag another block over and drop it alongside the first block, it’ll create two equal columns. Continue dragging blocks over to create the desired number of columns.
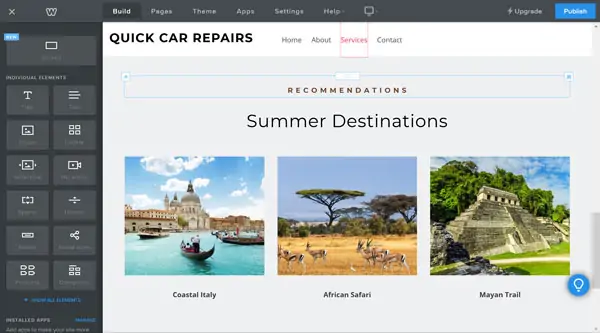
Here’s an example of a page that features three columns created with images.
Creating Columns
For this example, we’ll use “Image” blocks to create the columns. But, you can substitute any kind of block.
To create columns:
- Click on the “Image” block, drag it to a blank area of your website, and then drop it when a blue line appears across the screen.

- Grab another “Image” block and drop it when a blue line appears along the left side of the first block.

- Repeat the second step until you create however many columns you need.
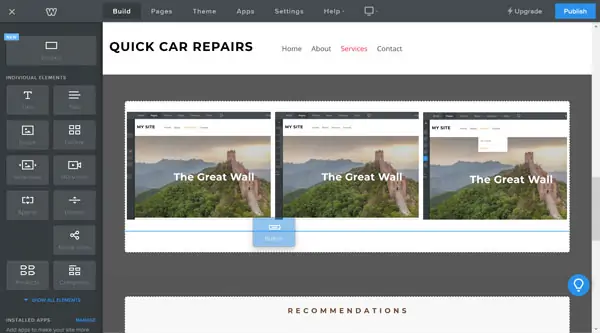
Adding Text To Columns
If the alignment looks off when you try to add text under images in your columns, that’s usually because you didn’t drop the blocks in the right space.
Regardless of the type of blocks you want to add to a column, the process remains the same. For this example, we’ll use “Text” blocks.
To add text to a column:
- Click on a “Text” block and drag it to the column where you want it to appear. Make sure the blue line appears only under the block for that column and not all the way across the screen.
- Repeat the first step for every column.
Working With Images in Weebly
Weebly makes it easy to upload images to your website, but, unfortunately, you can’t save them in an image library.
Carefully consider the following as you upload images in Weebly:
- Make sure you can legally use the image — because you own it, because it’s a royalty-free image, or because you bought a license to use it on your website.
- Make sure the image isn’t so large that it slows down your website. You can use tools like PicResize to easily resize images.
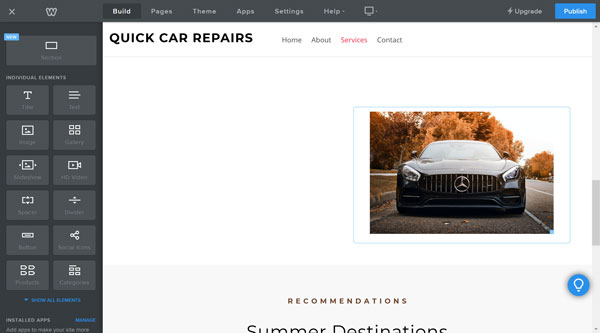
Adding Single Images
If you just want to add a single image to your website, use the “Image” block.
To add an image:
- Drag an “Image” block over to your site. A blue line will then appear to show the image’s placement on the page. Drag it to the desired location and release it there. The image will fill the entire space provided.
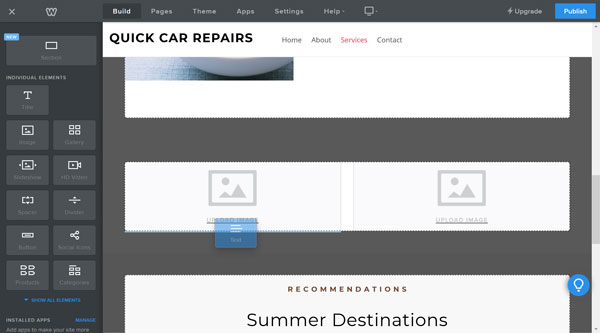
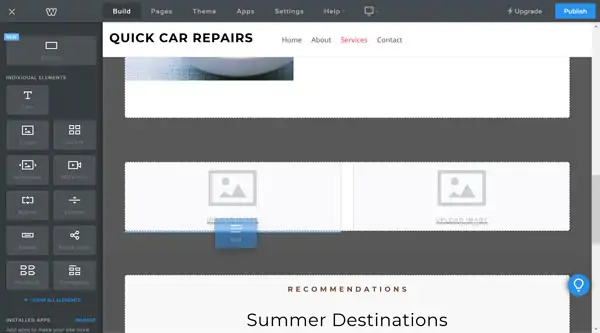
Adding an Image Slideshow
Weebly makes it easy to create a slideshow to display multiple images.
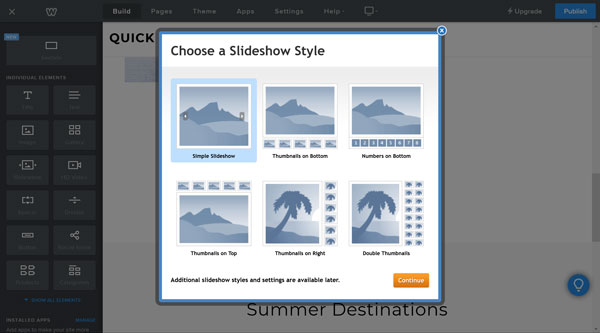
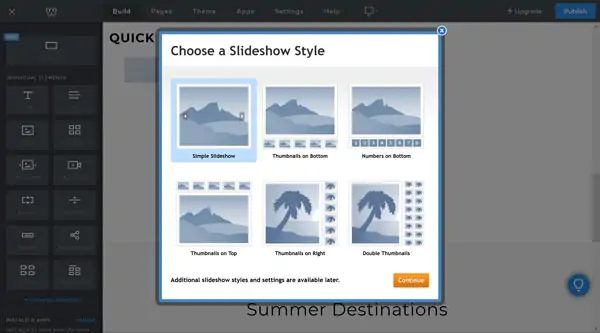
To add an image slideshow:
- Drag a “Slideshow” block over to your site and drop it when the blue line appears in the desired location. The “Choose a Slideshow Style” menu will then appear.
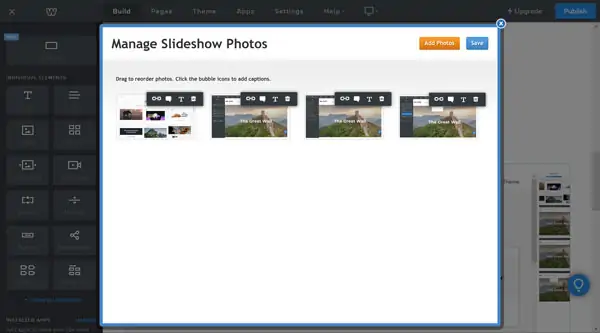
- After you choose a slideshow style, the “Manage Slideshow Photos” box will appear.

- Click the green button to choose photos to upload from your computer. The Weebly website builder will then upload your images.
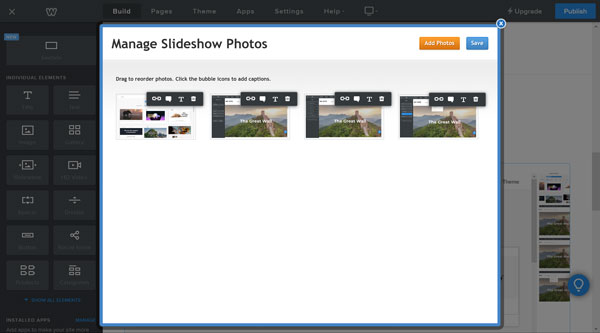
- Drag the images to move them into a different order, if desired.
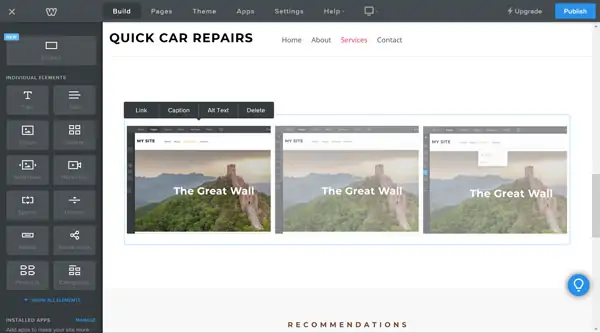
- A small toolbar will appear above each image that enables you to:
- Add a link to the image.
- Add a caption for the image, which will then appear below the image.
- Add “alt text” for the image, which a screen reader will then read to visually impaired site visitors.
- Delete the image.
- Click the “Save” button.
- To customize slideshow options, click on the slideshow. A “Slideshow” box will then appear.
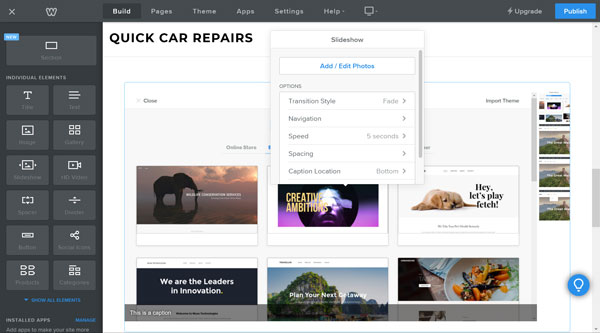
- From this box, you can:
- Add or edit photos.
- Change the transition style — the way the pictures change from one to another.
- Customize the navigation (i.e., whether the slideshow uses thumbnails or numbers to represent the additional photos).
- Adjust the speed (i.e., how fast the photos change from one to another).
- Adjust the spacing above and below the slideshow.
- Choose the caption location — either below or on top of the photo.
- Adjust advanced options, such as if you want the slideshow to play automatically, start at the beginning, or start randomly.


Adding an Image Gallery
Photographers, artists, and other types of businesses need to display multiple images at once. Weebly offers a “Gallery” block to make this easy.
To add an image gallery:
- Drag a “Gallery” block over to your site and drop it when the blue line appears in the desired location.

- Click on “Upload Images” to upload the images you want to include in the gallery.
- After Weebly uploads your chosen images, click on the gallery to make the “Gallery” box appear.
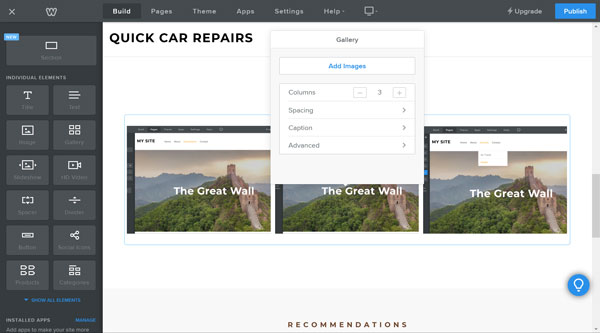
- From the “Gallery” box, you can:
- Add images.
- Adjust the number of columns.
- Adjust the spacing above and below the image gallery.
- Designate where captions should appear.
- Adjust Advanced features, such as the amount of space between images, if the images have a border, and if you want the images to appear as squares or rectangles.
- To customize images at the individual level, click on the picture and a menu will appear above that image.

- From this menu you can:
- Add a link to that image.
- Add a caption for that image.
- Add alt text for that image.
- Delete the image.


Resizing Images
Weebly is a drag-and-drop editor that uses blocks to build websites. Each block will fill the entire space provided. To reduce the size of a block, add new blocks to its left and right. The “Spacer” block makes a very handy tool for resizing other blocks, but any type of block will work.
You also can resize an image by clicking on the little blue dot in the lower right corner of the image and dragging it to increase or decrease the size. But, you can’t make an image larger than the space provided.
To resize an image using blocks:
- Click on a “Spacer” block in the menu on the left and then drag it to the right or left of the image you want to resize.

- When you hover over the block you just added, a vertical bar will appear between the two blocks. Drag that bar left or right to resize the image.
To resize an image inside its own block:
- Hover over the image you want to resize until a tiny blue square appears in the lower right corner. Click and drag the blue square to resize the image.
- Release the blue square when the image reaches the desired size. You also can increase the size of the image this way, but it can’t exceed the size of its own block.

Note: Resizing an image using either of these approaches won’t reduce the image file size. To reduce an image’s file size, compress it and resize it using a tool like PicResize.
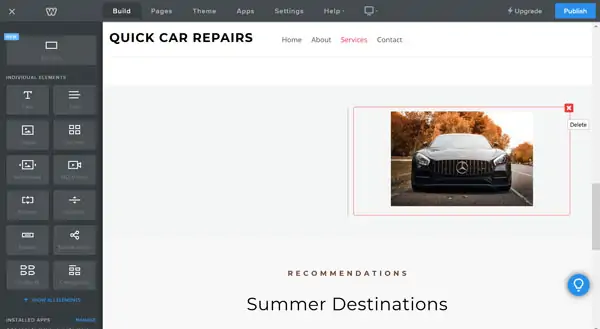
Deleting Images
It’s easy to delete an image, but proceed with caution because there’s no “Undo” function in Weebly.
To delete an image in Weebly:
- Hover over the image you want to delete and click the red “x” button that’ll appear in the upper-right corner of the image block.

- Confirm you want to delete the image.
Creating Links in Weebly
You can add a link to just about any element in a Weebly website, including buttons, text, and images. The process for creating links is similar regardless of the element to which you want to add a link.
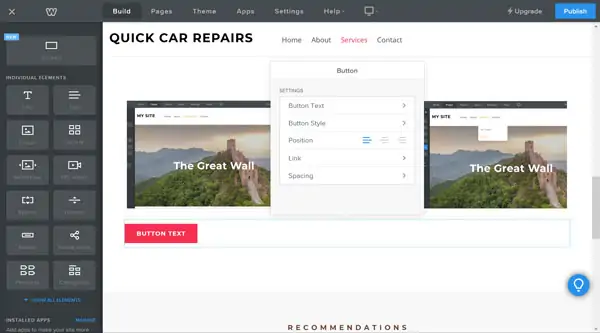
Adding Button Links
Buttons represent the most commonly used link elements on a website.
To add a button link:
- Click and drag a “Button” block over to your website, dropping it when the blue line appears in the desired location.
- Click on your new button and the “Button” box will appear.

- Click on “Button Text” to change the text that appears on the button.
- Click on “Button Style” to choose the button’s size.
- Choose your desired “Position” from the following options: left-justified, centered, or right-justified.
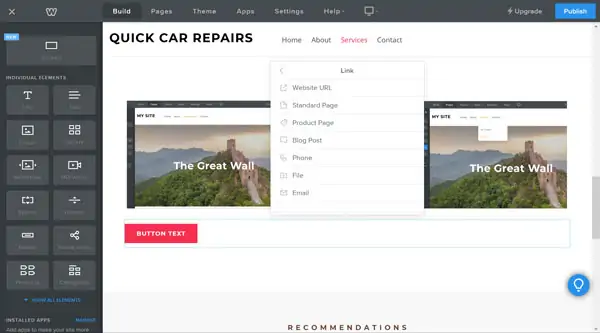
- Click on “Link” to open the “Link” box.

- In the “Link” box, choose the element to which you want your button to link. The options include:
- A Website URL: Enter the website address and check “Open in New Window.”
- A Standard Page: Select a page on your website.
- A Product Page: Select a product from a list of products.
- A Blog Post: Link to an individual blog post.
- A Phone Number: Enter a phone number so that when visitors click on the button from a mobile phone, it’ll dial that number.
- A File: Upload a file that’ll automatically download or open when anyone clicks the button.
- An Email Address: Enter an email address so that when visitors click on the button, the email program opens a new email pre-populated with this address.
- Click outside the “Link” box to save your edits.
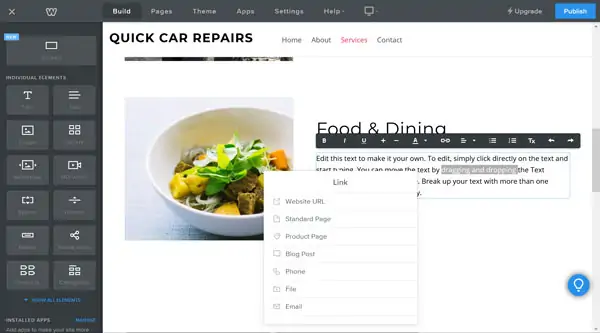
Adding Text Links
Most websites underline pieces of text to alert visitors to an embedded link.
To add a text link:
- Highlight the piece of text to which you want to add a link. A black toolbar will then appear above that text.

- Click the chain-link icon on the toolbar. This will open the same “Link” box as described in the above instructions for adding button links.

- Follow the same directions outlined for adding button links to designate the element to which you want to link your text.
- Click outside the “Link” box to save your edits.
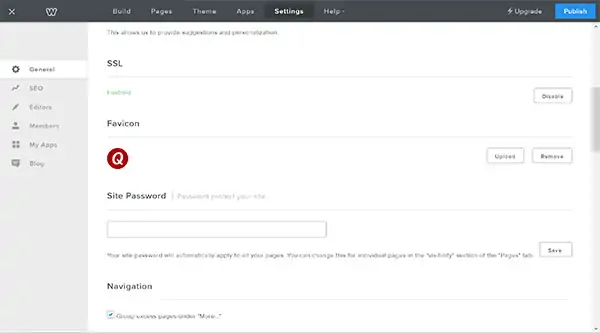
Adding Favicons and Footers in Weebly
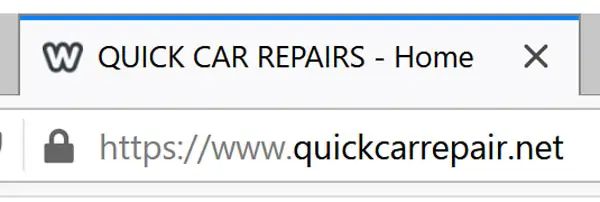
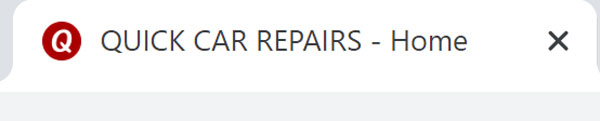
Have you noticed the little picture that appears in the left end of each browser tab? Called favicons, these tiny images help internet users quickly identify the website they’re on.
When you create a website in Weebly, it’ll feature the standard Weebly “W” favicon in the browser tab by default.
Users of Weebly’s paid plans can instead feature their own custom favicon. If you haven’t upgraded to a paid plan yet, check out the different pricing plan overviews in our Weebly Website Builder Review.
A favicon usually appears as a miniature version of a company’s logo or other graphic that aligns with its branding. Small and square, favicons typically measure about 16 by 16 pixels.
If you don’t yet have a favicon, you can create one with a tool like Favicon.io. This tool gives you a zip file to download. From that file, use the favicon.ico file as your favicon.
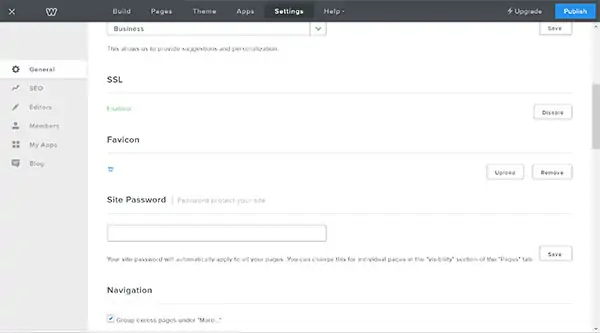
To add a favicon:
- Click on the “Settings” tab and scroll down to the “Favicon” section.
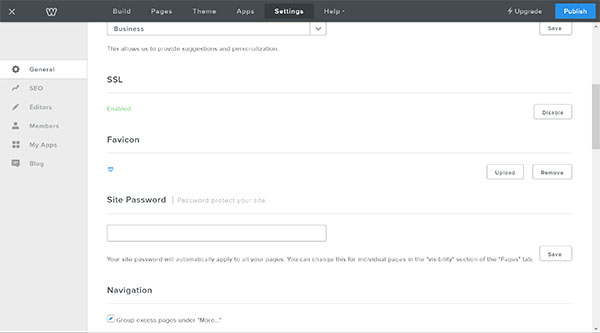
- Click the “Upload” button and then upload your favicon.ico file.

- Click the “Publish” button to publish your website with your new favicon. It can sometimes take a couple hours for the new favicon to appear.

One great benefit of upgrading to a Weebly paid plan is the ability to add a footer to your website. This block of text at the bottom of your website remains the same on every page.
To add a footer:
- Scroll to the bottom of your website and click in the footer area.
- Some themes allow you to pick a layout for your footer. If your theme already has a footer layout and you’d like to use something different, delete every element within the footer and click the “Save Footer” button.
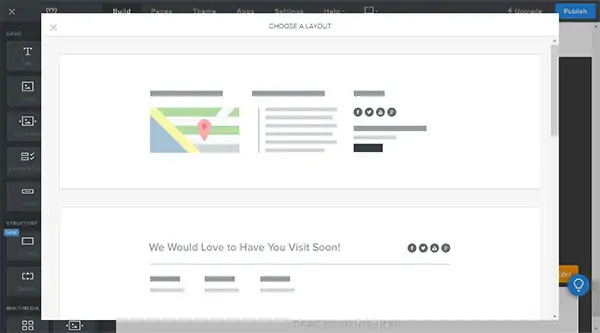
- Click in the area that says “Click to add footer” and the “Choose a Layout” window will appear.
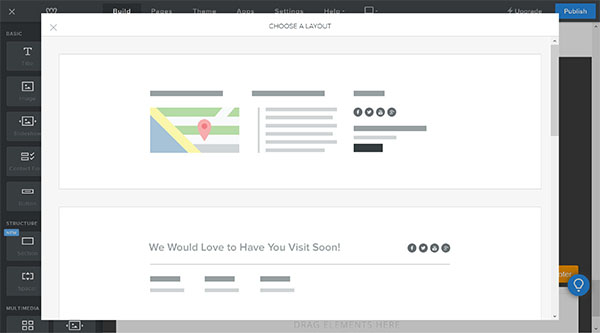
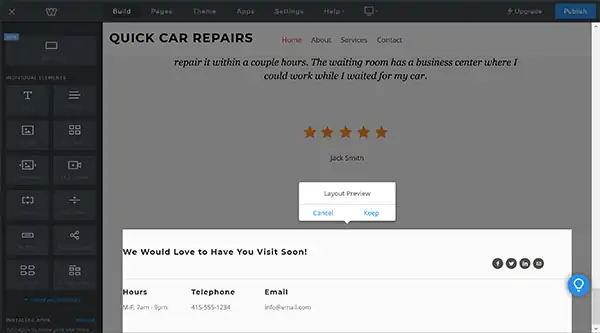
- Click on your preferred layout. Weebly will then apply it to your website so you can see how it’ll look.
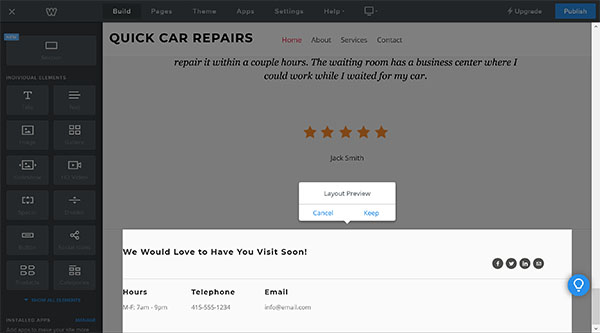
- Click “Cancel” to return to the footer layouts and choose a different option or “Keep” to save the current layout. (If you want to change the footer layout later on, you’ll need to delete all the elements again to return to an empty footer.)
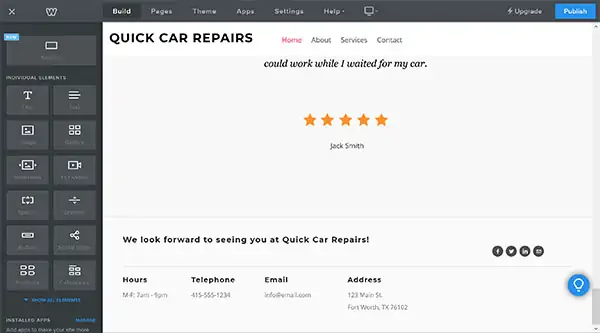
- Make the necessary changes, and then click the “Save Footer” button.
Undoing Your Edits in Weebly
One of the downsides of using the Weebly website builder is that it doesn’t have an “Undo” button. If you accidentally delete or change something, you usually can’t get it back. Yet, some exceptions do exist.
If you accidentally delete a page and need it restored, contact Weebly customer support and provide:
- The name of your website
- The name of the page you deleted
- When you deleted that page
The Weebly customer support team should be able to restore your page for you. Unfortunately, they can’t restore content you simply delete from a specific page.
If you accidentally delete your entire site, Weebly can restore that as well. Just contact Weebly customer support and provide your website’s name and the time of its deletion. Once restored, you’ll need to reassign the domain and publish it again.
If you plan to make lots of changes to your website, but aren’t sure you’ll want to keep them, create copies of each page you edit. If you decide to keep your changes, simply delete the old pages and keep the newly edited versions. Otherwise, delete the edited pages and go back to the original copies.
Final Thoughts
Hopefully, this guide proved helpful as you built your Weebly website. For additional support, visit the online Weebly Community — which typically answers questions within 24 hours.
Feel free to bookmark this page so you can return to it should you ever need a refresher on how to add extra functionality to your Weebly website.
Build Your Business Website With Weebly
See what Weebly can do for you and your business. Get started with Weebly for free by clicking the button below.