How To Make a Weebly Website: A Step-by-Step Guide
Are you ready to create a website for your small business in Weebly? Weebly is a simple, easy to use platform that can help users create a website in no time.
This in-depth Weebly user guide will walk you through each step you must take to create a simple Weebly website in just a few hours. By the end, you’ll have a four-page website that’ll suit most any small business. Keep reading and build your Weebly website today.
Recommended: It’s best to have a Weebly account ready for this tutorial. Get started with Weebly for free.

The 12 Steps to Make a Weebly Website
You may feel ready to start creating your website immediately, but it’s a best practice to take some time to plan it out first.
While you can certainly start the process without this step, a little planning will make it easier. Check out our How to Structure a Website and How to Find the Purpose of Your Website guides to learn more.
Here are the steps you need to build a great Weebly website:
- Sign up for Weebly
- Set up the Page Structure
- Add Your Business Name and Logo
- Update the Theme
- Update the Header Area
- Update the “Services” Section
- Update the “About Us” Section
- Update the “Features/Benefits” Section
- Update the “Testimonial” Section
- Update Your Pages
- Preview and Test Your Website
- Publish Your Weebly Website
Step 1: Sign up for Weebly
The first step in building a new website for your small business involves creating a Weebly account. It’s free to sign up and build your website, but we recommend upgrading so you can use all of Weebly’s features.
Square or Weebly?
When payment processor Square purchased Weebly in 2018, Square already had its own ecommerce website builder. As a result, you have two options when creating a Weebly website: build a Square ecommerce site or a Weebly website.
But, how do you know if you want a Square or Weebly website?
- If you have an ecommerce site and want to sync your inventory with a brick-and-mortar store, then you should use the Square website builder. To learn more, check out our How To Create an Ecommerce Site With the Square Website Builder article.
- If you have another type of small business or an ecommerce store you don’t need to sync with Square inventory, then you should use the Weebly website builder.
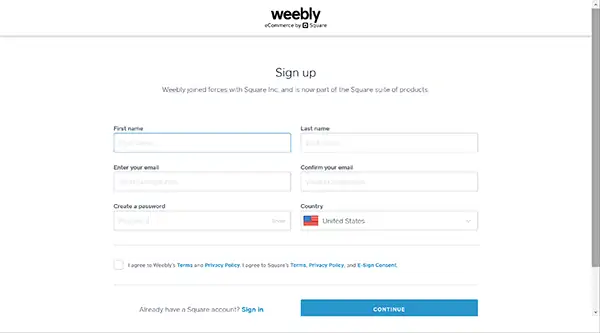
If you already have a Square account and you don’t want to use the Square ecommerce website builder, you’ll need to use a different email address when creating your Weebly account.
Once you sign up, Weebly will ask if you want to create a business or personal website.
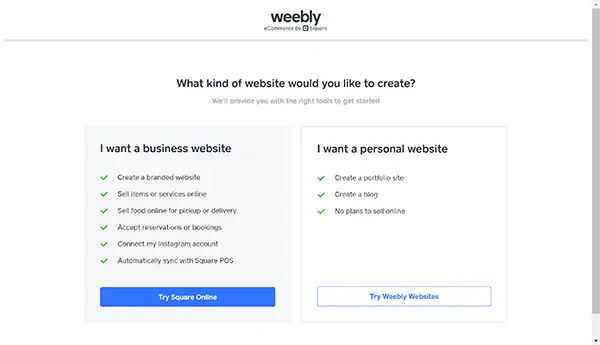
We know you want a business website, but you should select “I want a personal website” here by clicking the “Try Weebly Websites” button.
With a Weebly website, you can do everything listed on the business website side of the screen except “Automatically sync with Square POS.” The Weebly website builder also gives you greater flexibility in terms of how your pages will look. So, choose the “Try Weebly Websites” option unless ecommerce is the main purpose of your website.
If you plan to create an online store for your business, read our How To Create an Ecommerce Store in Weebly article.
Select a Theme
Now it’s time to select a theme for your new Weebly website.
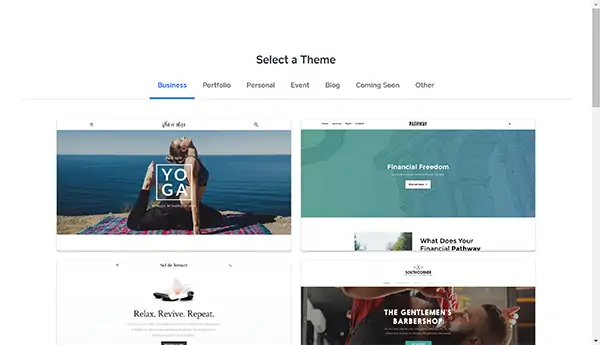
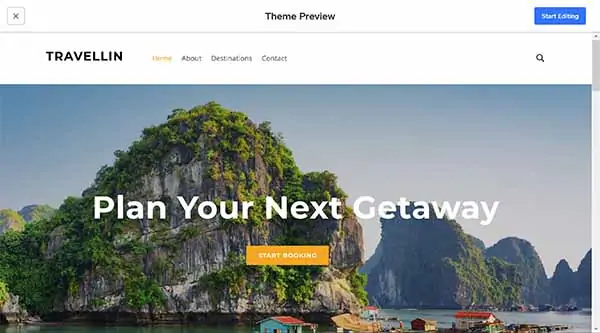
To keep this tutorial simple and ensure you have a great website at the end, choose the Travellin theme. We love the flexibility it provides, and you can always change your theme later if desired.
Select a Subdomain
Weebly will then ask about your domain. We recommend building your site on a subdomain (e.g., yoursite.weebly.com) so you can publish your site and test it before it goes live on your real domain.
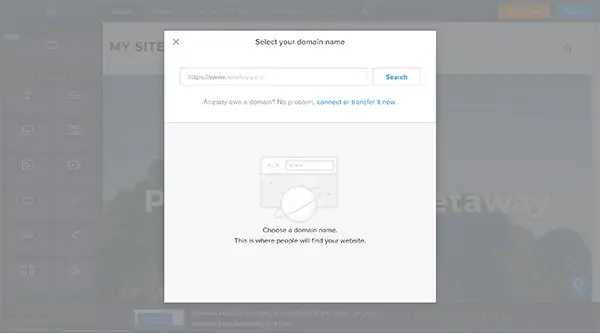
Enter your domain name and click “Search.”
A list of domains will appear, but, for now, choose the subdomain that shows up at the bottom of that list. If someone already claimed that subdomain, try a different domain until you find an available subdomain. It doesn’t matter what this domain is because you’ll connect your site to your real domain at the end of this process.
If you encounter a message at this point asking you to reconnect your apps, choose to reconnect them now.
Upgrade Your Site
It’s best to upgrade your site now so you’ll have access to all the features Weebly provides as you create your website.
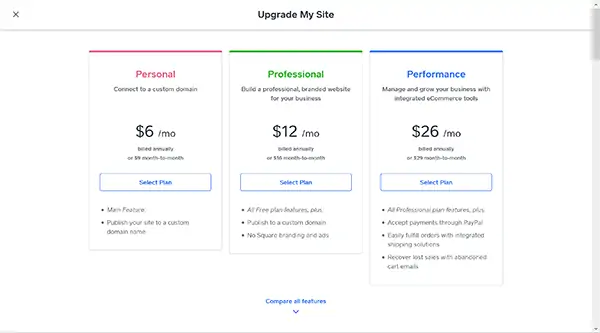
For most businesses, we recommend the Professional plan. This plan provides everything most service-based businesses will need. But, you’ll need the Performance plan if you intend to create an ecommerce store.
We recommend reviewing each Weebly pricing plan and features to determine what works for your business. On any Weebly plan, you may purchase a one- or two-year plan to save money. You’ll have 30 days to request a refund if you change your mind. Refer to our Weebly Pricing and Plans guide to learn more.
Note: After upgrading, Weebly will suggest you reserve your free domain. We recommend holding off on this so you can build your website on your subdomain first. You can then connect to your business’s real domain once your site’s ready to go live.
Ready to get started with Weebly? It’s free and easy to sign up! Just click the link below to get started.
Step 2: Set up the Page Structure
Each theme comes with its own set of pages. The next step in building a great website involves creating a page structure that best serves your specific business needs. Most small, service-based businesses need these four pages:
- Homepage: As the first page people visit on your site, it should provide an overview of your business.
- About Page: This page offers more information about you, your team, and/or your business.
- Services Page: This page describes the services your business offers.
- Contact Page: This page features your business contact information, such as your phone number, email address, physical address, and a contact form.
Click on the “Pages” tab at the top of the website builder to see the existing page structure.
For this tutorial, we want to include the following pages: “Home,” “About,” “Services,” and “Contact.” That means we need to swap the “Destinations” page for a “Services” page.
To change the “Destinations” page to a “Services” page:
- Click the “Destinations” page.
- Change the “Page Name” from “Destinations” to “Services.”
- Click the arrow at the top of the menu to return to the “Pages” menu.
Step 3: Add Your Business Name and Logo
After creating a Weebly account, choosing a theme, and adding the pages you’ll need, it’s time to customize your site to match your business. Let’s start with the basics: your business name and logo.
Add Your Business Name
Add your business’s name in the “Site Title” field. This will then appear in online visitors’ internet browser bars and on search engine results pages.
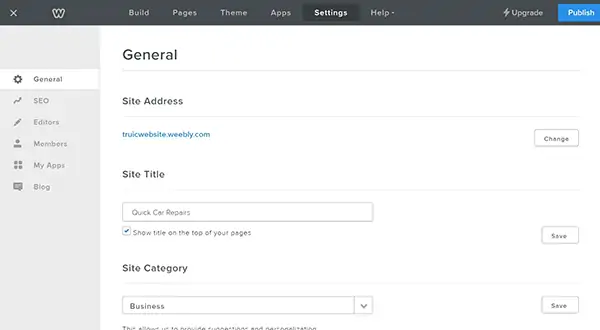
To add your business name:
- Click the “Settings” tab.
- Under “Site Title,” replace “My Site” with the name of your business.
- Click the “Save” button.
- Click the “Build” tab to return to the website builder.

Your business name will now appear at the top of your website.
Add Your Logo
Next, you’ll need to upload your logo to the site. If you don’t have a logo yet, use our free logo maker.
Because Weebly doesn’t support scalable vector graphic (SVG) files, select the “Twitter Profile Image” option to save your logo.
To add your business logo:
- Hover your cursor over your business name in the navigation bar. Three options will then appear: “Off,” “Text,” and “Logo.”
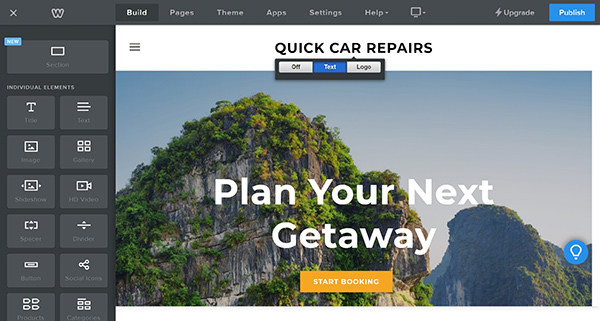
- Select “Logo.”
- Click “Upload a photo from your computer.”
- Select your logo file — preferably a transparent, portable network graphic (PNG) file. Weebly only supports PNG, joint photographic experts group (JPG or JPEG), and graphics interchange format (GIF) files.
- Click “Open.”
![]()
Your logo will now appear in your site’s navigation bar. Some logos may appear too small in the navigation bar. In this case, just leave the logo off and use text instead.
Step 4: Update the Theme
Does your business have an official brand color palette or use specific colors within its logo and social media posts? If so, it’s a best practice to feature those same colors on your business website.
If you don’t have existing brand colors yet, be sure to use our How to Choose a Great Website Color Palette guide to get started. Consistent use of color will give your site a professional look.
Pick a Color Scheme
One reason why we chose the Travellin theme is because it lets you easily change the color scheme.
To change the color scheme:
- Click the “Theme” tab.
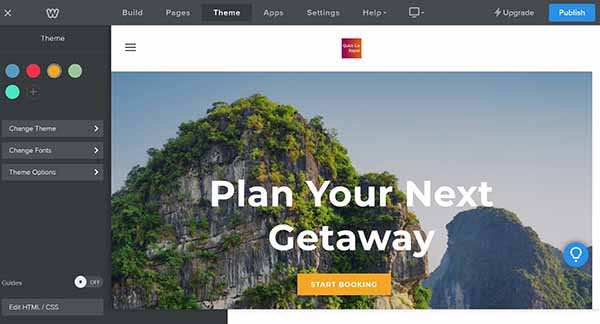
- Click one of the colored circles to change the color theme. This will alter not only the color of the buttons, but also the accent colors. If you don’t see a color that works with your business’s branding, click on the “+” symbol and pick your custom color.

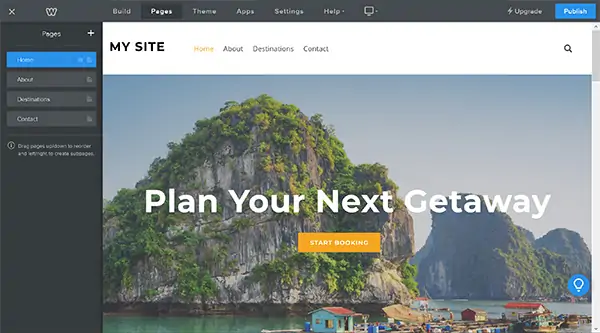
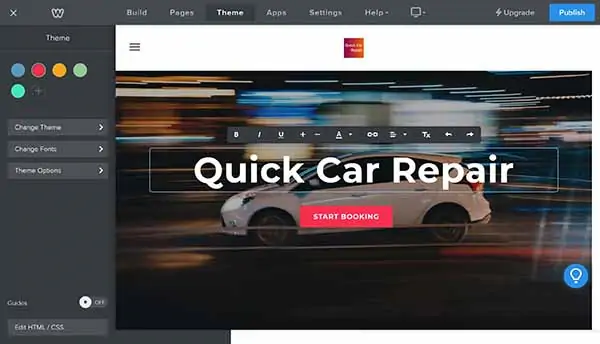
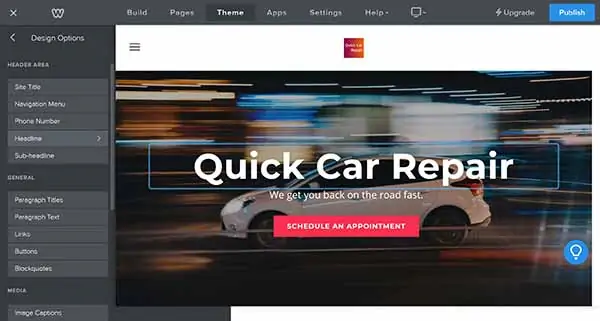
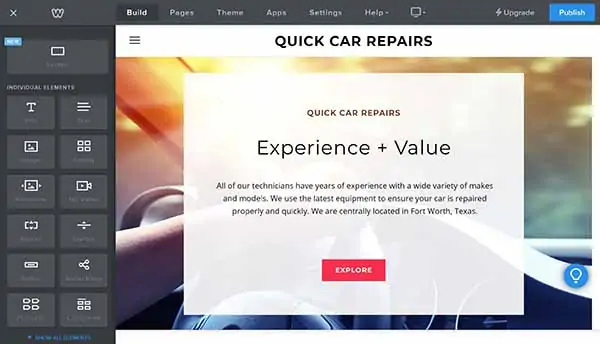
Step 5: Update the Header Area
The header area represents the most important part of your website. Site visitors will make a quick judgment about your business based on what they see when they first arrive on your website. This judgment happens before visitors start to scroll down the page so they’ll leave your site if they don’t like what they see.
The main elements of the header area include:
- A large image that covers the top of the homepage
- A headline and subheadline
- A call-to-action (CTA) button
Read on to learn how to tailor each of these elements to your business.
Change the Header Image
The header image that appears at the top of your website is the most important image on your site. It should give customers a clear picture of your business’s purpose and offerings.
Good ideas for header images include:
- An external view of your business
- A picture of your business in action
- Happy people using your product(s) or service(s)
- A picture of your product(s) or service(s)
Pick a Header Image
Ideally, you’d use one of your own high-quality photos of your business for your header image. But, many business owners don’t have such images when they first start out.
If you don’t have your own personal photo to use, you can search a website like Unsplash.com and download a royalty-free image. Just make sure the image has a horizontal orientation.
Replace the Existing Header Image
Always ensure you have the legal right to use whatever images you display on your website. Don’t just search for images via Google and use them. Make sure you have permission to use an image on a website.
To replace the existing header image:
- Click on the image and scroll down until you see two buttons appear: “Edit Background” and “Replace Header Layout.”
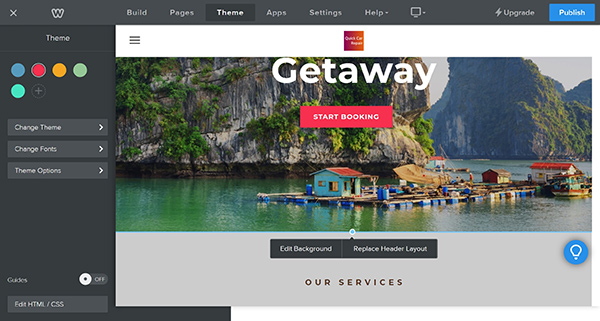
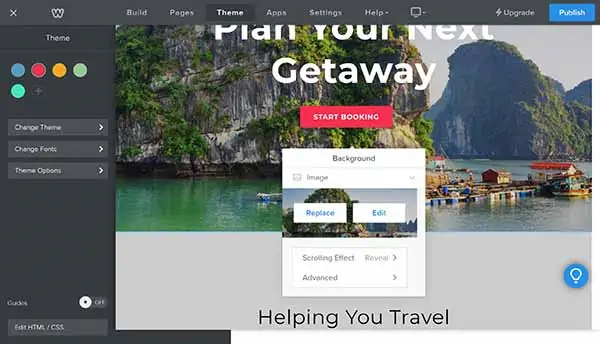
- Select “Edit Background.”

- Click “Replace.”
- Follow the prompts to upload a new image.
- In most cases, you’ll need to darken the image a bit so the words on top of it show up more clearly. Click on “Darken” and change it to 40 percent.
- Click “Save.”


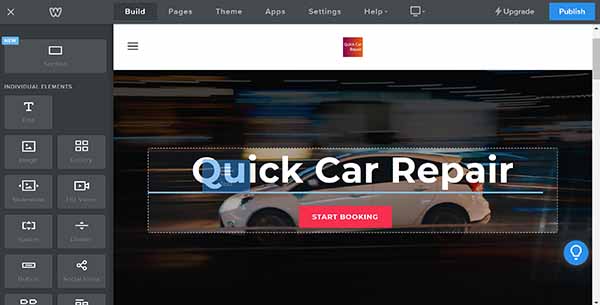
Change the Headline
You want the headline to clearly convey what your business has to offer visitors. Be descriptive, but avoid anything that sounds too cute.
To change the headline, double-click on the headline to highlight it and then type your new headline.
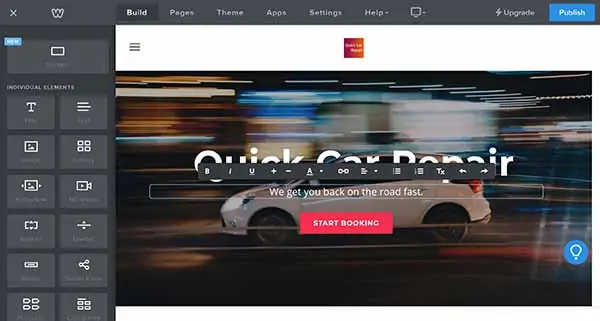
Add a Subheadline
The Travellin theme doesn’t come with a subheadline, but it’s easy to add one. Effective subheadlines should further communicate the value your business offers its customers.
To add a subheadline:
- Click the “Build” tab.
- From the menu on the left of the screen, click and drag the “Text” box over to your website so a blue line appears between the headline and the CTA button then drop the box.
- Click in that text box and type your subheadline.
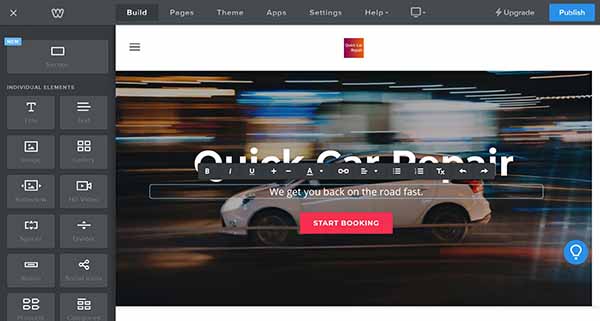
- Click anywhere outside the text box to save your new subheadline.

Update the CTA Button
The CTA button that appears in the header area of your website should take your visitors one step closer to becoming customers.
Some ideas for effective CTA buttons include:
- Call ###-###-####
- Contact Us
- Schedule Now
- Buy Now
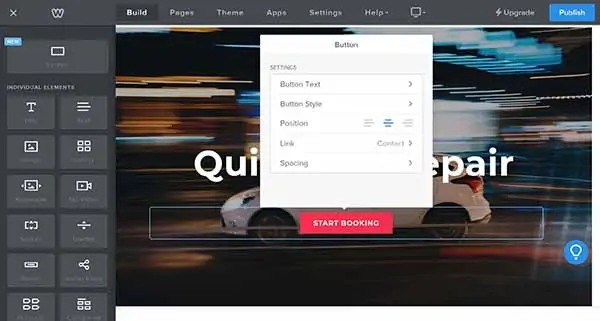
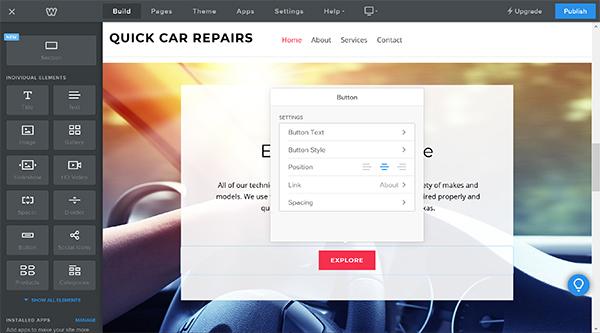
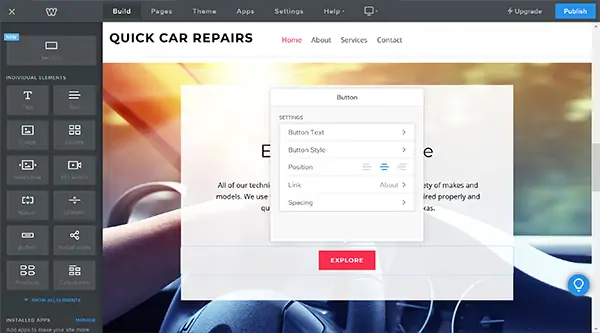
To change the CTA button:
- Click on the button to make a button menu appear.
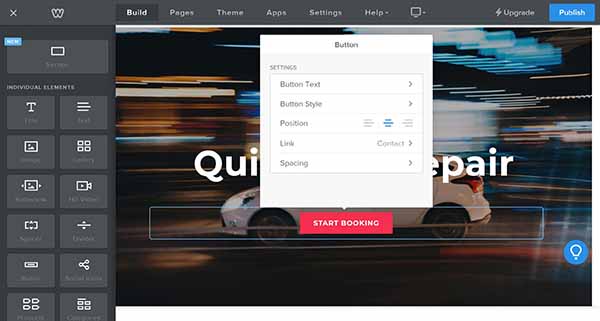
- Click on “Button Text.”
- Change the button text to whatever you want to appear on the button.
- Click on the arrow in the left corner of the button menu.
- Click on “Link.” You’ll notice the button currently links to the “Contact” page. If that’s where you want the button to go, you can skip the rest of these steps.

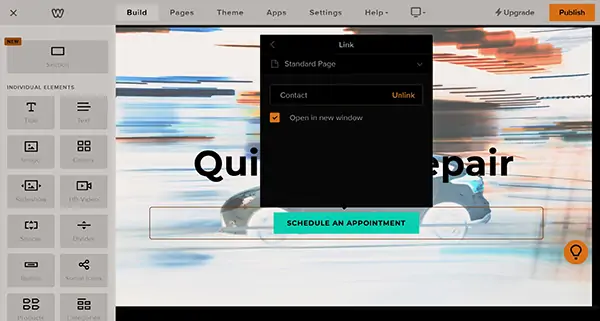
- If you want to direct visitors to a different page on your website, click “Contact” and select a different page. Uncheck “Open in a new window” if it’s currently checked.
- If you want to direct visitors to something other than a page on your website, click on “Standard Page.” A list of all the things to which your button can link will appear.
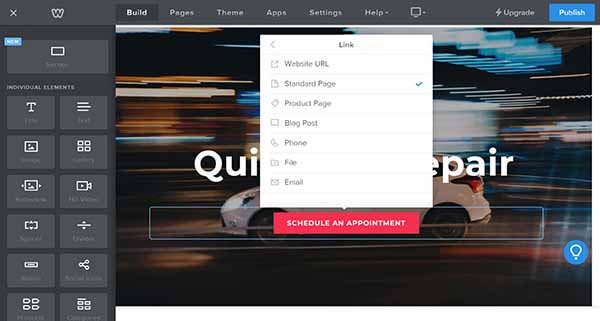
- Select the element to which you want your button linked and enter any necessary information.
- Click anywhere outside the box to close and save the updated CTA button.

Choose a Link Option
Weebly offers seven elements to which CTA buttons may link:
- Website URL: Be sure to check “Open in a new window” so visitors won’t lose your website if they click on the button.
- Standard Page: This lists all the pages on your website. Pick the page to which you want the button to redirect visitors.
- Product Page: If you have a product page set up, you can link to it from a CTA button.
- Blog Post: If you have a blog, you can link directly to a specific post.
- Phone: Enter your phone number. We also recommend including your phone number in the actual button text. When someone clicks on this button while visiting your site from their smartphone, it’ll automatically dial your business number.
- File: Click “Upload New” to upload a file that will open when someone clicks on this button.
- Email: Enter your email address. When a visitor clicks this button, it will open the email editor with a new message pre-addressed to this email address.
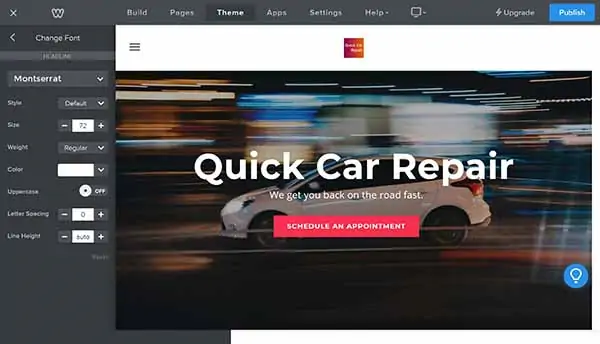
Change the Fonts
Weebly also lets you change a theme’s fonts to better match your business. Make sure you find the right font for your website and branding by reading our Best Website Fonts guide first.
To change the fonts:
- Click the “Theme” tab.
- Click the “Change Fonts” button. The available styles will then appear on the left of the screen as in the below screenshot.

- To change the header title, click on “Headline.”

- Click where it says “Montserrat” to open a long list of available fonts. Choose a font that matches the look and feel of your business and brand.
- Adjust the font size, color, spacing, etc.
- Click the back arrow to the left of “Change Font” to return to the font menu.
- Repeat these steps for the subheadline.
Don’t use more than two or three different fonts on a website. Two works best while more than three will make a site seem cluttered and chaotic.
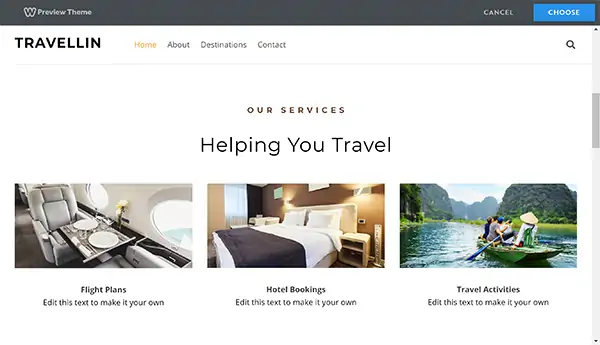
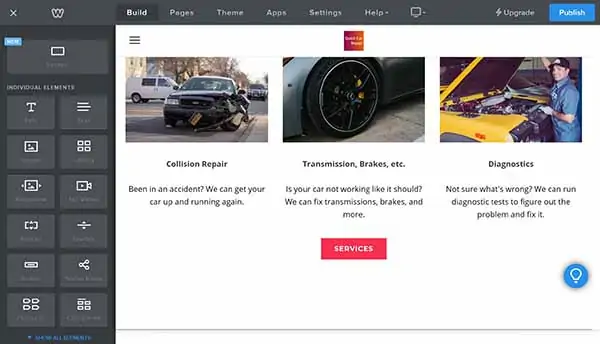
Step 6: Update the “Services” Section
The Travellin theme has a “Services” section on its homepage where you can showcase your service offerings. If you have more than three services, limit this section to just your top three.
To update the “Services” section, you’ll need:
- A section title or headline
- Three images to illustrate the three featured services
- The name of each service
- A short description of each service
Change the Text
The Travellin theme has a headline that reads, “Helping You Travel.” It’s a good description because it not only tells visitors this business provides the travel assistance they seek, but also highlights three ways it provides that help (e.g., Flight Plans, Hotel Bookings, and Travel Activities). This theme also includes room for a short description of each service.
Change the text by double-clicking on a text element and replacing it with your own text.

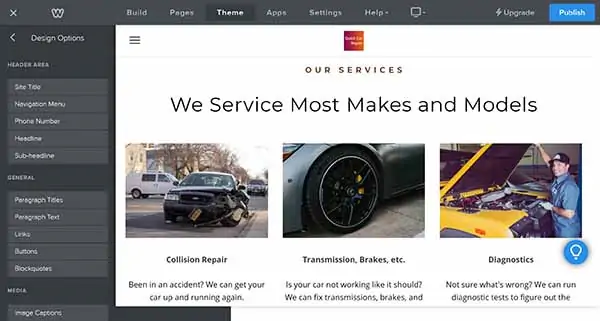
Replace the Photos
A picture is worth a thousand words so make sure the images on your website illustrate how your services help customers.
Always verify that no one holds a copyright for the images you use on your site. The best way to ensure this is to use your own photos. You also can download royalty-free photos from Unsplash.com, Pexels.com, or Pixabay.com.
Make sure your images are the same size and have the same orientation (e.g., landscape or portrait).
Replace an Existing Image
To replace an existing image:
- Click on the image.
- Click “Replace Image.”
- Follow the prompts to upload a new image.
- Repeat for all three images.
Add a Services Button
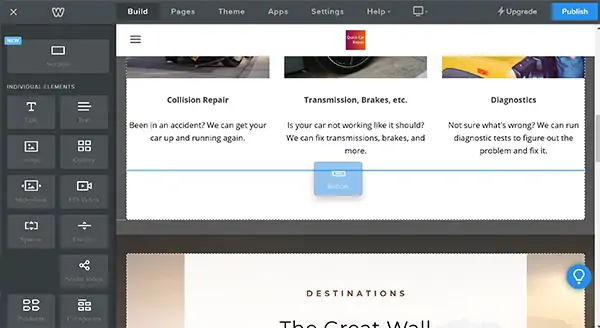
You’ll typically want to have a CTA button at the end of each section on your website. The Travellin theme doesn’t include one here, so follow these steps to add a button in the “Services” section.
To add a “Services” section CTA button:
- Click the “Build” tab.
- Scroll down just a bit so you can see the area below the three services.
- From the menu on the left side of the screen, click on the “Button” block and drag it over to your website under the three services so a blue line appears across the screen below all three services.
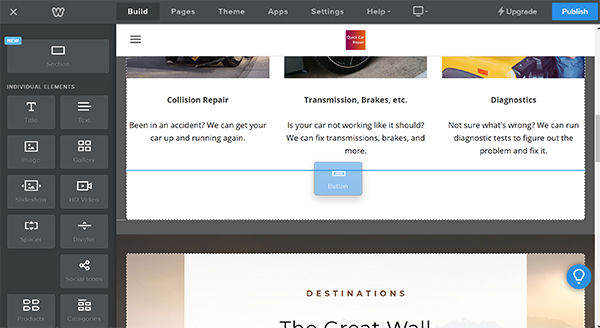
- Drop the block on your page and the button will appear.
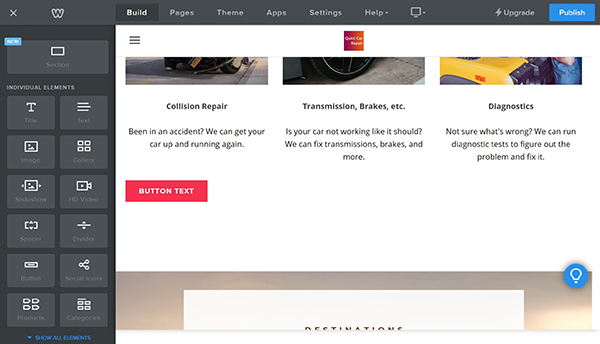
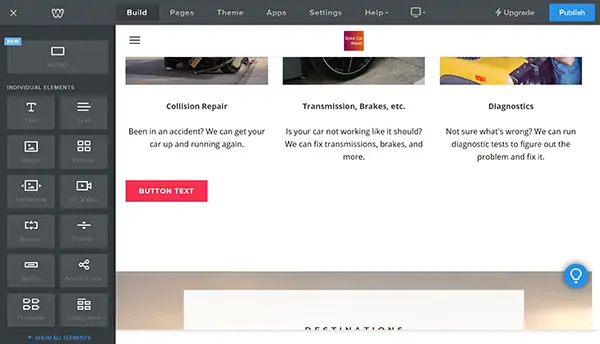
- Click on the button to reveal the button menu.
- Click on “Button Text” and change the text to “Services.” Click the arrow in the upper left corner of the box.
- Next to “Position,” click on the “Center” icon.
- Click “Link,” then “Standard Page,” and then the “Services” page.
- Click outside of the box to save your new button.
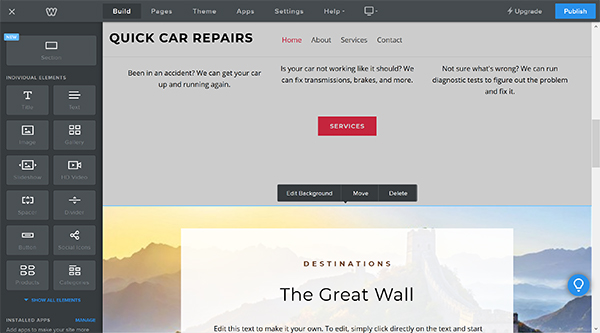
Step 7: Update the “About Us” Section
We’ll now work on changing the theme’s “Destinations” section to an “About Us” section, which will link to your site’s “About” page. The “About Us” section gives a brief overview of you and/or your business.
Change the Background Image
Start by changing the background image to something that relates to your business. You also can make the background a solid color.
- Scroll down to the next section and click near the top of that section on the background image. The “Edit Background,” “Move,” and “Delete” buttons will then appear.
- Click the “Edit Background” button.
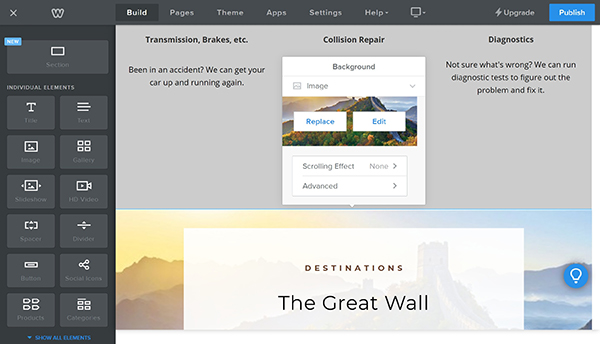
- Click the “Replace” button.
- Follow the prompts to upload your chosen image and then click “Save.”

Edit the Text
This section includes just three short bits of text so make sure they highlight what makes you and your business distinct.
- Click on the existing text to highlight it and then type your updated version.
- Click anywhere outside the text box to save your edits.
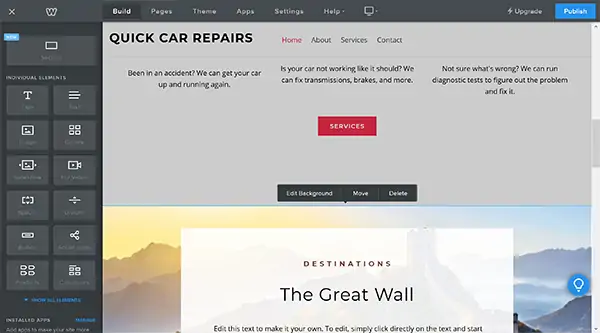
Update the Button
This button should lead site visitors to your “About” page where they can learn more about you than they did from this brief overview. Making this update involves two parts: changing the text on the button and changing where the button will take people.
To update the button:
- Click on the button to make the “Button” settings box appear.
- Click on “Button Text” and then change “Explore” to “About Us.”
- Click the back arrow in the top left corner of the “Button” settings box.
- Click on “Link” and then select the “About” page.
- Click outside the “Button” settings box to save your updated button.
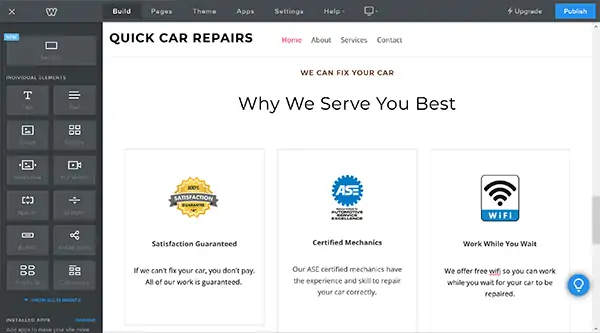
Step 8: Update the “Features/Benefits” Section
Now, we’ll change the “Smart Tools” section to a “Features/Benefits” section. Use this section to highlight three features of your product(s) and explain how each helps to solve your customers’ specific problem(s).
You’ll change this section exactly the same way you changed the “Services” section, as outlined above.
Update the Images
Pick three images that show the results customers get from working with you.
To replace an existing image:
- Click on the image.
- Click “Replace Image.”
- Follow the prompts to upload a new image.
- Repeat the above steps for all three images.
Edit the Text
This section includes four levels of text.
To edit the text:
- Click on the existing text to highlight it and then type your updated version.
- Click anywhere outside the text box to save your edits.
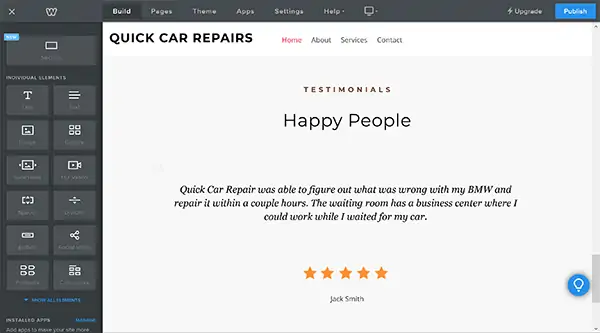
Step 9: Update the “Testimonial” Section
Testimonials or reviews from existing customers provide powerful proof that your business truly delivers the benefits you say it does. To update this section, simply replace the existing text with your own customer’s testimonial.
Step 10: Update Your Pages
Now that you have a completed homepage, it’s time to finish your site’s About, Services, and Contact pages.
You already learned how to edit text and replace pictures on your site’s homepage, so follow those same steps on these three pages to update the theme to match your business.
To edit a page, click on that page in the menu at the top of the screen and then replace the text and images.
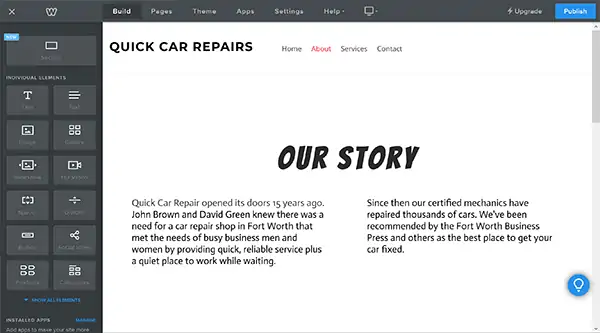
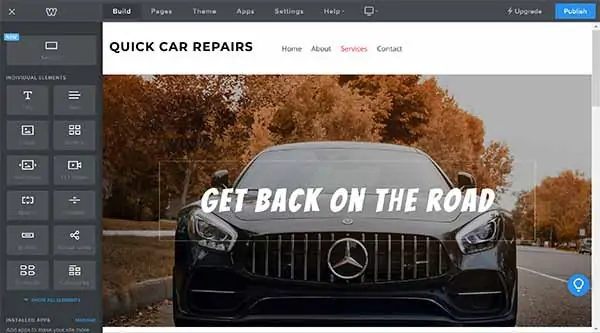
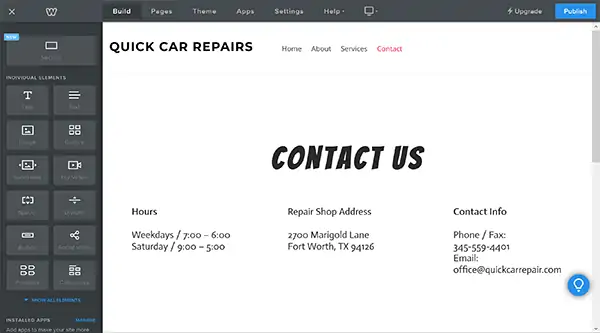
Check out the screenshots below for examples of how we created a sample website for a car repair shop.
Sample About Page
Sample Services Page
Sample Contact Page
Step 11: Preview and Test Your Website
We recommend first publishing your website on a subdomain. This will allow you to ensure it looks how you want it to look — and make any final edits — before it goes live on your real domain.
Publish To a Subdomain
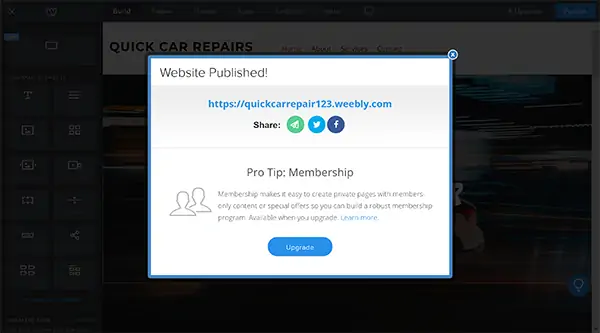
To publish your website, click on the “Publish” button in the upper-right corner of the screen.
Weebly will then publish your website to your chosen subdomain. You can now click on the link to start testing your site.
Test Your Website
Open your website on a variety of devices with varying screen sizes, such as an iPhone, an Android phone, a laptop, and a large desktop computer. See how it looks on each device and open it using different internet browsers as well.
Click on every button to ensure they all work as expected. Ask a friend to read through and test every page on your website to look for typos and broken links.
If something doesn’t work as planned, return to the Weebly website builder to make the necessary changes. Then, publish and check your site once again.
Step 12: Publish Your Weebly Website
Congratulations! You’ve finished creating a website for your business in Weebly. Now you need to publish your website to your permanent domain. You can host your domain directly on Weebly or on a domain host like GoDaddy.
If you need help choosing a domain for your business, check out our helpful Domain Name Generator.
Publish To a Domain on Weebly
If you haven’t already chosen a domain for your business, you can purchase it directly through Weebly. Weebly includes a free domain for one year with its paid plans.
To use a Weebly domain:
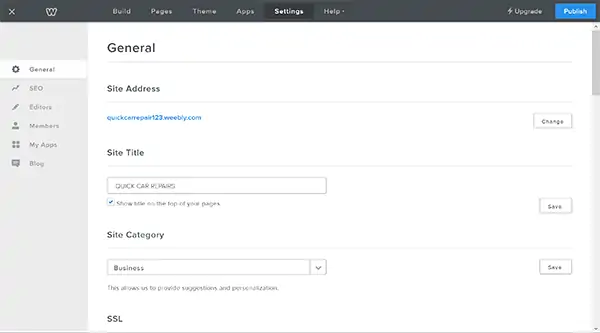
- Click the “Settings” tab.
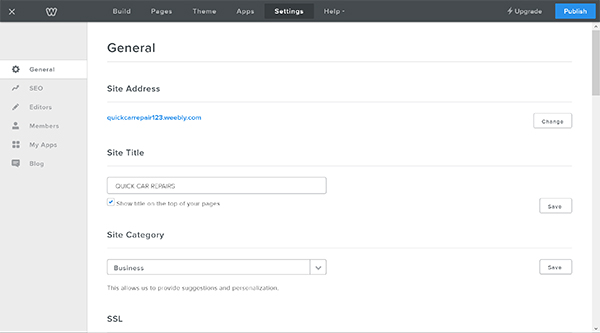
- To the right of your existing website address, click on the “Change” button.
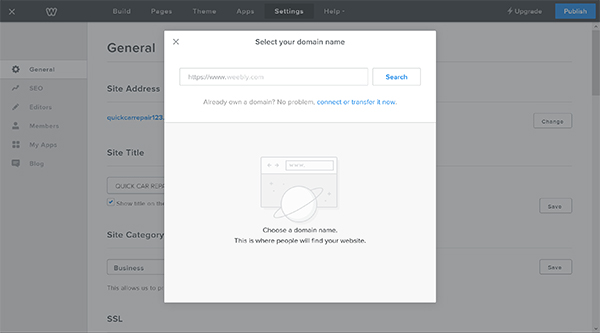
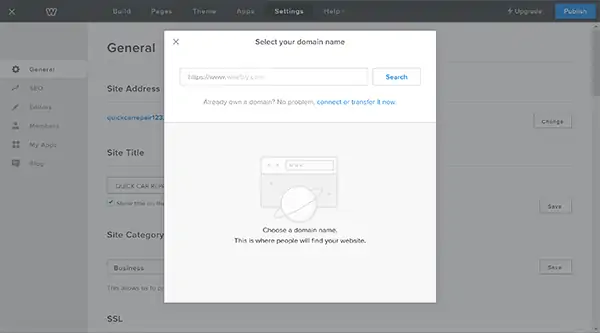
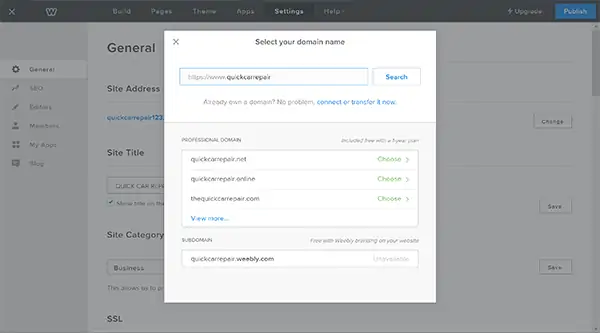
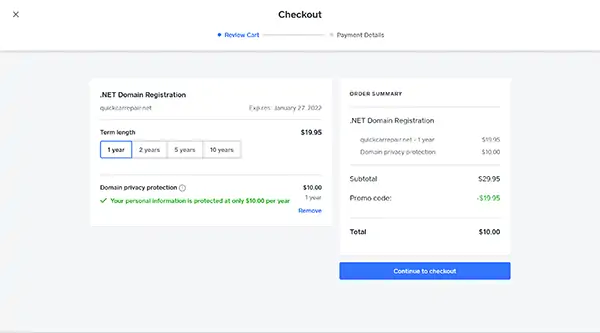
- Enter your domain and click “Search.” A list of available domains will then appear.

- Click “Choose” to select a domain.
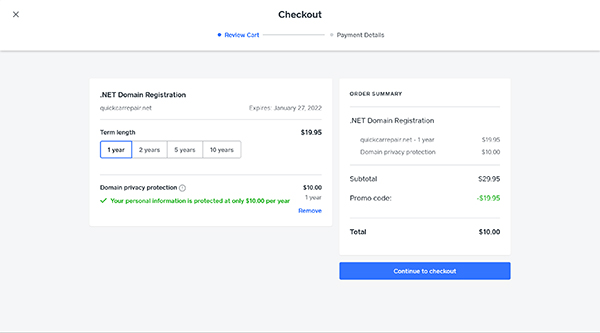
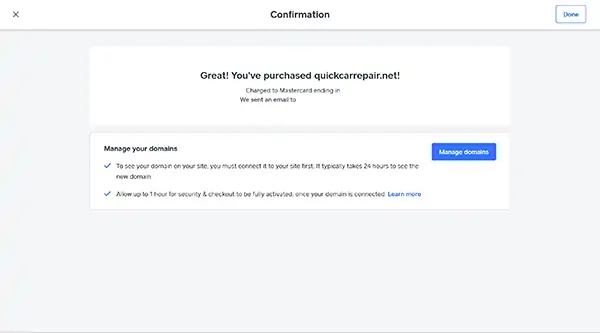
- Complete the checkout process to finish publishing your site to your new domain.
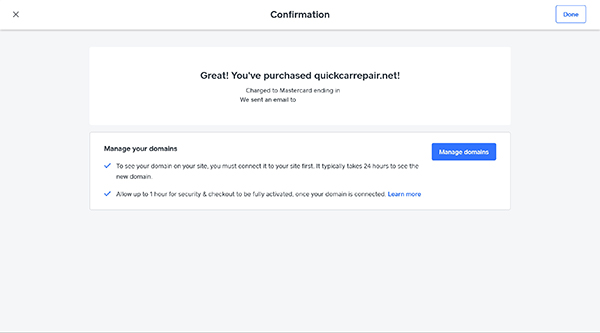
- Click “Done” and then “Publish” to make your site live. It can take a little while — typically just a few hours — for your website to show up on your new domain.
Publish To a Domain on GoDaddy
If you purchased your domain through GoDaddy, it isn’t hard to connect your domain. Here are links to instructions provided by both Weebly and GoDaddy:
Final Thoughts
Now that you’ve successfully built and launched your Weebly website, you’re ready to focus on growing your small business. Check out our other guides to take your website to the next level:
Get Started With Weebly
Now that you can see how easy it is to get a fully functioning business website up and running with Weebly, it’s time to test it out for yourself. Click the button below to get started with Weebly for free.