How To Create a Square Online Store
While Shopify is our top recommendation for ecommerce platforms, Square is still an incredibly flexible and affordable option. Creating your own online store with Square has gotten easier over the past few years, but certain aspects can still be difficult to navigate.
This article provides step-by-step instructions for setting up your ecommerce store using the Square website builder. By the end, you’ll have a fully functional business website to sell your online goods.
Have you chosen a website builder for your website? Check out our review of the Best Website Builder of 2026.
Before You Begin
Back in 2018, payment-processing giant, Square, acquired the company Weebly. Before this, the Weebly website builder only had a few limited ecommerce features as the platform was mainly used for service-based business websites and simple landing pages. Since Square has merged with Weebly, users can now choose from two website builders: the original Weebly webiste builder and the Square Online website builder.
This article will cover how to set up your ecommerce store using the Square website builder. If you prefer to use the original Weebly website builder, check out our How To Create an Ecommerce Store in Weebly guide.
Weebly vs. Square
Weebly has two different website builders: the original Weebly version and the Square version. Overall, Weebly gives you more ways to customize your business website while Square offers more features specifically for online stores.
Here’s a chart that compares the two builders:
| Weebly | Square |
|---|---|
| Moderate level of customization | Limited level of customization |
| Can’t sync inventory with in-person inventory (though they are working on this feature) | Must sync all inventory (will sync with an in-person store if you have one) |
| Platform not preferred by Square/Weebly for ecommerce | Preferred platform of Square/Weebly for ecommerce |
The biggest factor between Weebly and Square for ecommerce depends on whether you want to sync inventory.
Check out our How to Start an Ecommerce Store guide for ways to establish a successful ecommerce business.
The 6 Steps to Create an Ecommerce Store With Square
It’s easy to get started building and selling with Square. Here we will discuss the six easy steps to getting your own online store up and running.
Skip Ahead:
- Sign up for Square
- Design Your Square Website
- Add Products to Your Catalog
- Display Products on Your Website
- Update Square Settings
- Publish Your Online Store
Step 1: Sign up for Square
If you already have a Square account, sign in using your Square login information. Otherwise, follow these steps to sign up for Square.
To sign up for Square:
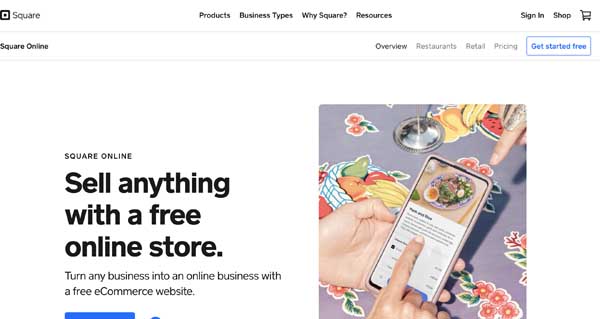
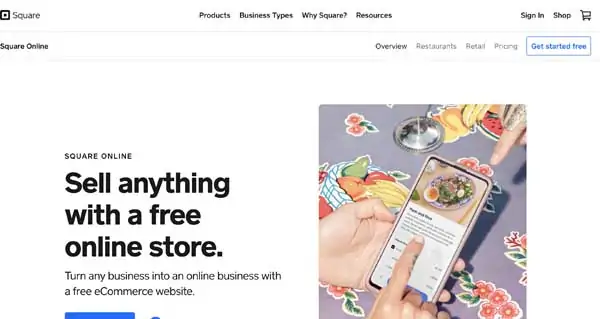
- Visit Square and click on the “Get started free” button.
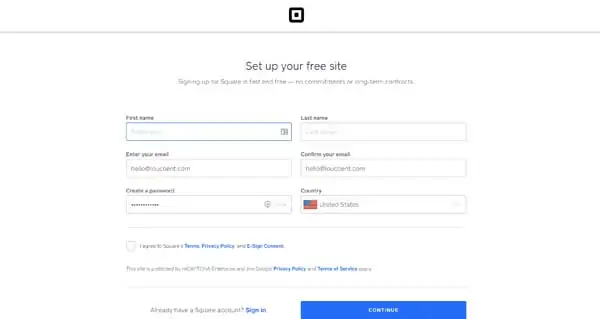
- Enter your name and email address, and then create a password.

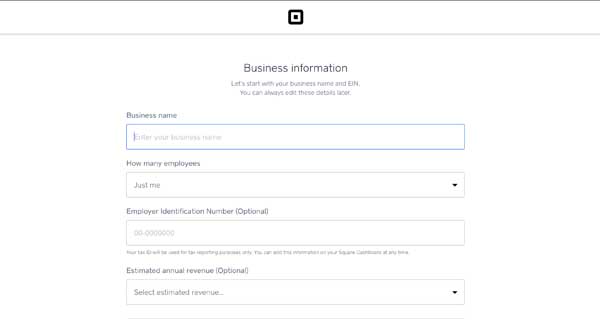
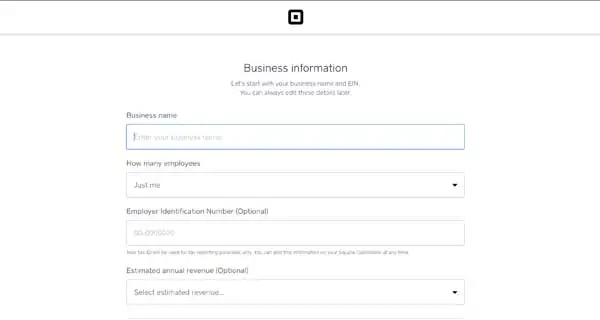
- Enter your business information.
- Pick the category of your business.
- Enter your store address.
- Square will verify your identity and then direct you to its website builder’s dashboard. (If Square can’t verify your identity now, just click on the “Continue to Dashboard” button.)

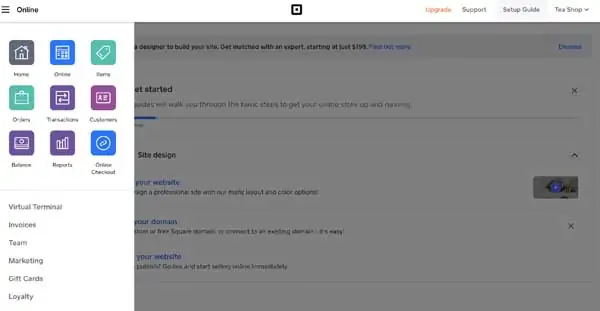
- Click on the “Online” block in the left-hand menu.
- Click on the “Get started” button. At this point, you might need to sign in again.
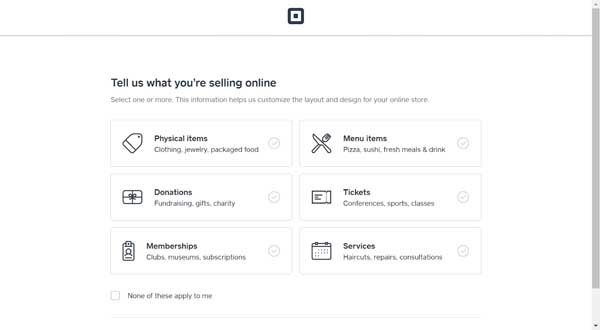
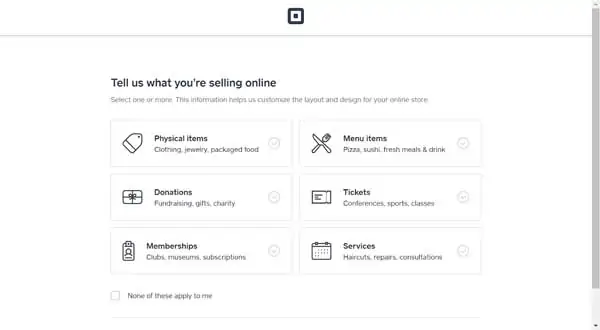
- Select which type of offering you plan to sell online, and then click on the “Continue” button. The choice(s) you make will determine what options you’ll see on the next screen, but, if you plan to sell physical items, you’ll see a screen like this:
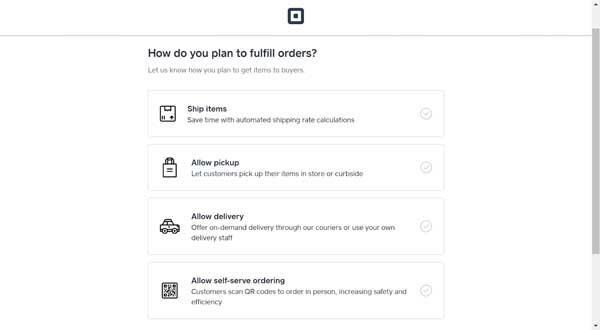
- Select how you’ll fulfill your orders, and then click on the “Continue” button. Follow and complete the prompts.

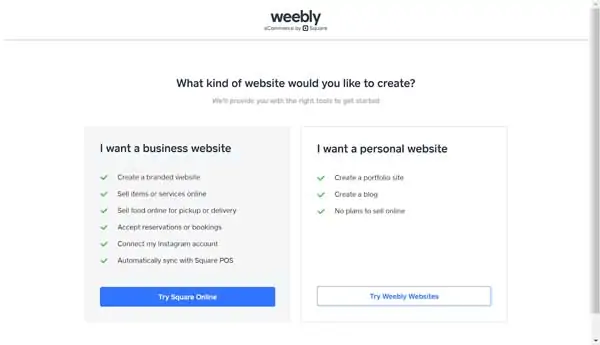
- When you sign up, make sure to click on the “Try Square Online” button to create an online store with the Square website builder.

Choose a Square Theme
Next, you’ll see a list of Square themes. None of these themes are specific to an online store, so just pick one that most closely matches your business. You can choose to switch the theme later.

Choose a Subdomain
Square will then ask about your domain. We recommend building the first draft of your website on a subdomain (e.g., yoursite.weebly.com) so you can publish and test it before it goes live on your permanent domain.
You can connect to your permanent domain when you’re ready to officially launch your site.
Use our Domain Name Generator to pick the perfect domain name.
Upgrade Your Square Website
It’s a good idea to upgrade your site now so you’ll have access to all the features Square Online offers. Ecommerce stores need either the Professional plan, which costs $12 per month when you pay on an annual basis, or the Performance plan, which costs $26 per month when you pay on an annual basis.
| Professional Plan | Performance Plan |
| Square or Stripe payments | Square, Stripe, or PayPal payments |
| No item reviews | Item reviews |
| No printable shipping labels | Printable shipping labels through Square Online |
| Standard retail shipping rates | Discounted shipping rates |
| No abandoned cart marketing | Abandoned cart emails |
| Regular insights | Advanced ecommerce insights |
| Chat, email, and phone support | Priority support |
| $12 per month when billed annually | $26 per month when billed annually |
Step 2: Design Your Square Website
Now comes the fun part! It’s time to replace the text and images that came with your chosen theme with words and photos suited to your new business.
Here are some essential tasks:
- Update the homepage header with an image that speaks to your audience and conveys your store’s focus.
- Update the name of your website and/or upload your logo. (If you don’t have a logo, use our Free Logo Generator to create one.)
- Update the “About” page.
- Add a “Shop” page if your theme didn’t include one.
Step 3: Add Products to Your Catalog
After you finish designing your website, it’s time to start adding products. As a best practice, you should set up “Categories” first and then add items to those categories as you go.
You can access your Square store from the main Weebly dashboard and not within the website builder. So, if you’re still in the website builder, click on the “X” in the upper-left corner to return to the main dashboard (shown below).

Create Product Categories
Categories organize your products and enable you to have pages that show all the products in an individual category. This can prove helpful because when you add a new product and assign it to a category, it’ll automatically appear on that category’s page.
To add a category:
- From the dashboard’s left-hand menu, click on the “Items” block and then the “Categories” option.
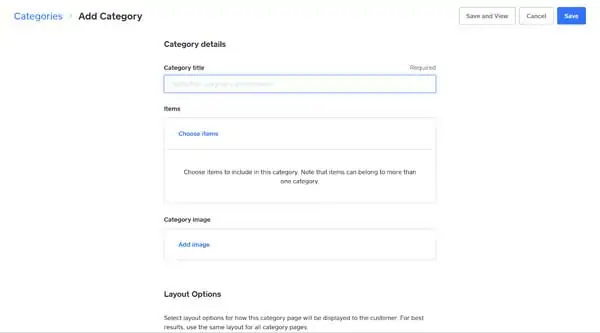
- Click on the “Add Category” button.
- Enter the name of the category in the “Category title” field. Then, click on the “Add image” link and upload an image that represents this category.
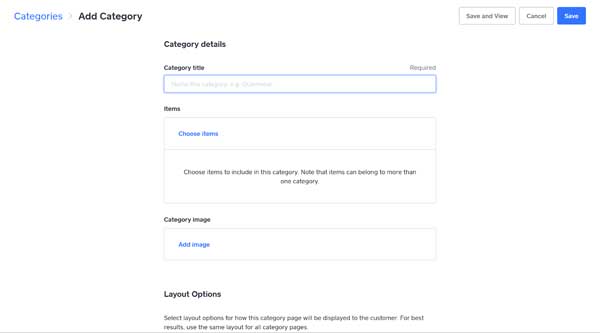
- Click on the “Save” button.
- Repeat these steps for all the categories in your online store.
Add Individual Items
With your categories all set, it’s time to start adding items. You can add items individually or import them as a batch. Let’s start with directions for adding individual items.
To add an individual item:
- From the dashboard’s left-hand menu, click on the “Items” block and then “Item Library” option.
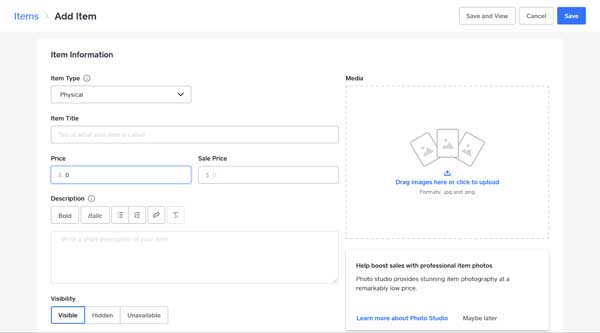
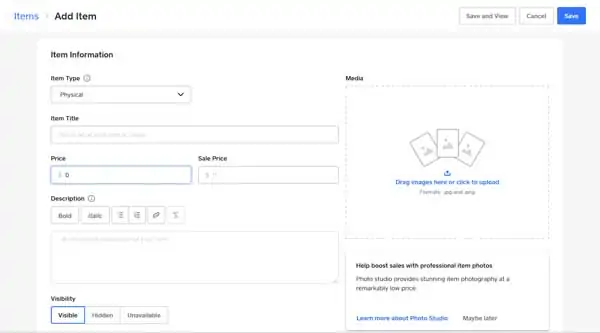
- Click on the “Add Item” button.
- Select the type of item from the “Item Type” drop-down menu. Enter the “Item Title,” “Price,” “Sale Price” (if it’s on sale), and “Description.” Then, upload one or more pictures of the item.
- Scroll down to choose whether the item is available for shipping or pickup or both. Also enter the shipping weight — especially if you plan to determine shipping costs by weight.
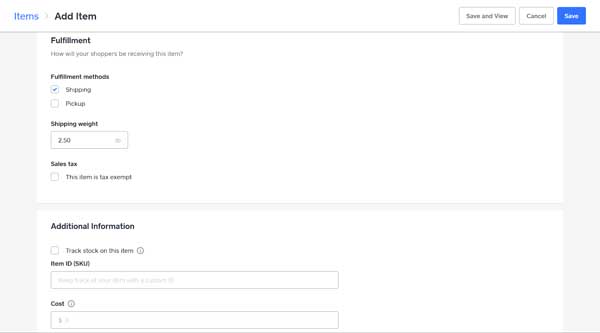
- If you want to track stock on this item, click on the checkbox next to “Track stock on this item” and enter how many you have in stock.
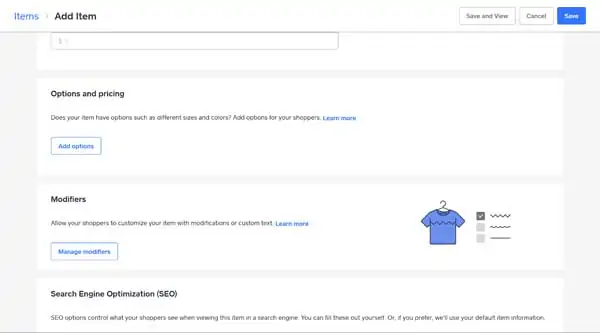
- Scroll down to the “Options and pricing” and “Modifiers” sections.

- If your product has different options, such as sizes or colors, click on the “Add options” button and follow the prompts to add the options.
- If you want to allow customers to modify an item, such as by adding personalization, click on the “Manage modifiers” button and follow the prompts to add a new modifier.
- If you’re using categories (which we recommend), click on the “+ Choose Categories” button, select the relevant category, and then click on the “Save” button.
- Next, scroll down to the “Search Engine Optimization (SEO)” section.
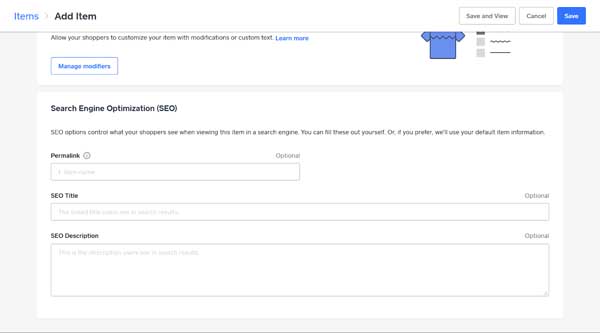
- In the “Permalink” field, enter a word or phrase (use dashes “-” instead of spaces between words) that’ll work as the URL for this item.
- In the “SEO Title” field, enter the words you want to appear as a blue hyperlink in search results.
- In the “SEO Description” field, enter the words you want to appear in the text of the search results.
- Click on the “Save” button in the upper-right corner of the screen to save your item.


Import Items From a CSV File
For larger stores, we recommend you import your products rather than adding them individually. A comma-separated values (CSV) file is a simple text file that displays as a table or spreadsheet. It’s often faster — and easier — to update many items at once in a CSV spreadsheet than individually in Weebly.
Weebly has a specific CSV format you must follow, so the best way to ensure your CSV file matches that format is to:
- Create an example of each type of item for your store.
- Export the CSV file from your store to view an example of how your product fields need to be entered.
- Update your existing CSV file to match the fields in the CSV file you exported.
- Import your updated CSV file to your Square store.
To import items from a CSV file:
- Per the above instructions, add one of each type of item you plan to sell to the sample CSV.

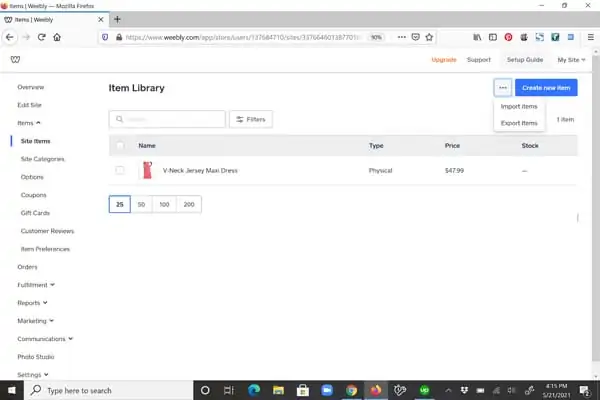
- Navigate to the “Item Library” tab (Site Items > Item Library) click on the ellipsis (“…”) button to the left of the “Create New Item” button and then click on “Export items” in the drop-down menu.
- Click on the “Confirm” button. This process can take a few minutes, depending on how many items you have in your store. When the export is done, you’ll receive an email.
- Open that email, click on the “Download CSV export” button, and then save the file to your computer.
- Open the file in a spreadsheet application, such as Google Sheets™ or Excel®.
- You can either update the Weebly CSV file with your products or you can change the column names in your existing CSV file to match Weebly’s columns. This key step will ensure you import your items correctly.
- Once you finish updating the CSV file to match Weebly’s columns, it’s time to import the items. From the “Item Library” page, click on the ellipsis (“…”) button to the left of the “Create New Item” button and then click on “Import items” in the drop-down menu.
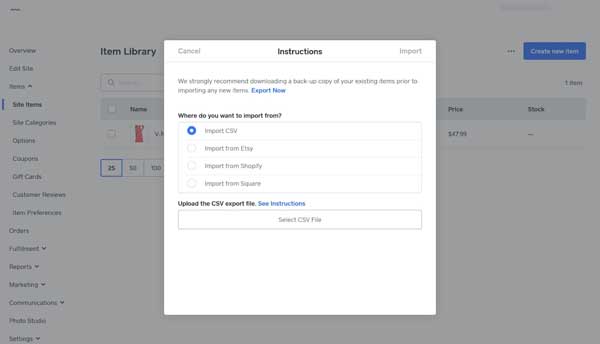
- Leave the “Import CSV” radio button selected and click on the “Select CSV File” button.
- Select the CSV file from your computer, and then click on the “Open” button.
- Once you upload the CSV file, the button will change to “Your CSV is ready to import.”
- Click on the “Import” link in the upper-right corner. Your products should then appear in the product library.

Step 4: Display Products on Your Square Website
Now that you have products added to your Square store catalog, it’s time to add them to your website. The easiest way to do this is with “Category” pages, and the first step involves adding a “Categories” block to your “Shop” page.
To add a “Categories” block to your “Shop” page:
- Open the editor by clicking on the “Overview” option from the main dashboard’s left-hand menu, and then clicking on the “Edit Website” button.
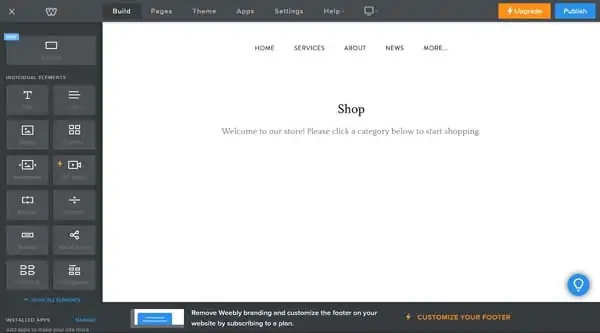
- Inside the editor, navigate to the “Shop” page. Make sure you are on the “Build” tab.

- Click on a “Categories” block from the left-hand menu, drag it over to the “Shop” page, and drop it there. A “Select Categories” pop-up window will then appear.
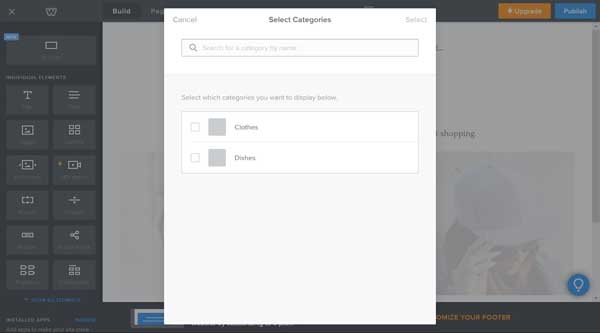
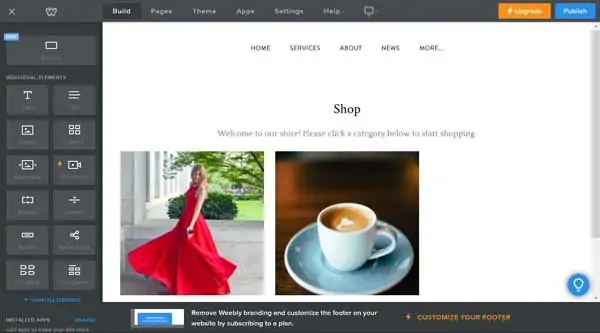
- Check the boxes next to the categories you want to include, and then click on the “Select” link in the upper-right corner. The categories will then appear on your “Shop” page. (If images don’t display, go back to where you set up your categories and add a “Category Image.”)

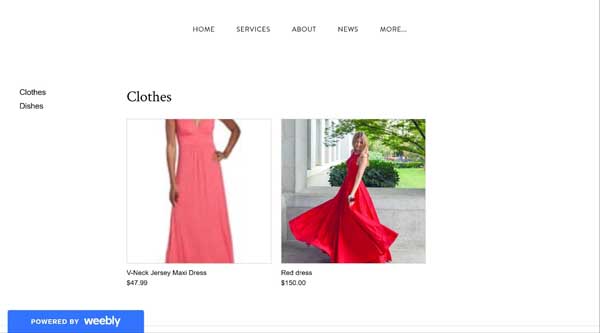
- Once you have added your products onto the page, click on the “Publish” button in the upper-right corner to publish your site and then navigate to the “Shop” page and click on one of the categories. The items currently in that category should appear.


Step 5: Update Square Settings
When you first create an ecommerce store, you must first update its main settings before you can start selling.
Edit Item Preferences
Item preferences determine how products and their availability status will display on your store pages, which social icons will appear, and the default method for getting items to customers (i.e., delivery or shipping).
To edit your store’s item preferences:
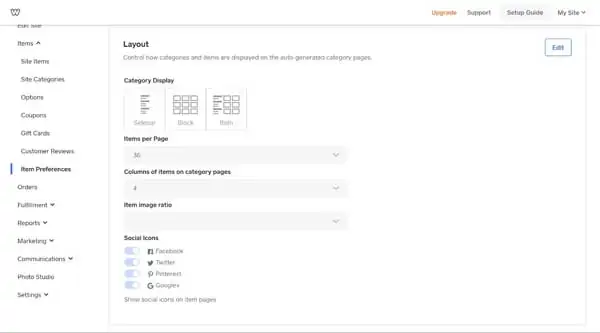
- From the dashboard’s left-hand menu, click on the “Items” option and then on “Item Preferences.” This’ll open an “Item Preferences” screen.
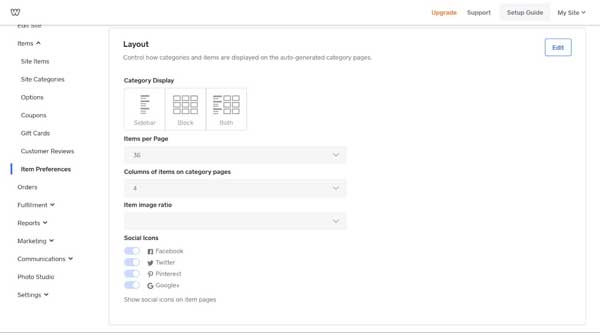
- In the “Layout” section, click on the “Edit” button and update the following fields:
- Category Display: Do you want your category list to display as a sidebar menu, a grid of blocks, or a combination of both?
- Items Per Page: How many items do you want to display on a category page?
- Columns of Items on Category Pages: How many columns of items do you want to display on a category page? Note that with more columns, the item pictures will appear smaller.
- Item Image Ratio: With what dimensions do you want the photos of your product image to appear?
- Social Icons: Customers (and you) can share products on social media platforms. Which social media icons do you want to provide to facilitate sharing?
- Click on the “Save” button when you finish editing your layout options.
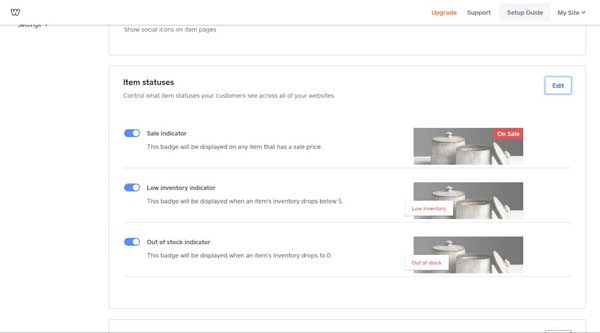
- Scroll down the “Item Preferences” screen to the “Item Statuses” section, click on the “Edit” button, and then update the following fields:
- Sale Indicator: When you put an item on sale (via the individual item page), indicate here if you want a red “On Sale” badge to appear on the item.
- Low Inventory Indicator: If you track inventory with Weebly, you can have a “Low inventory” badge appear when an item count reaches five or fewer.
- Out of Stock Indicator: Indicate here if you want an “Out of stock” badge to appear when an item count reaches zero.
- Click on the “Save” button when you finish editing the item status options.
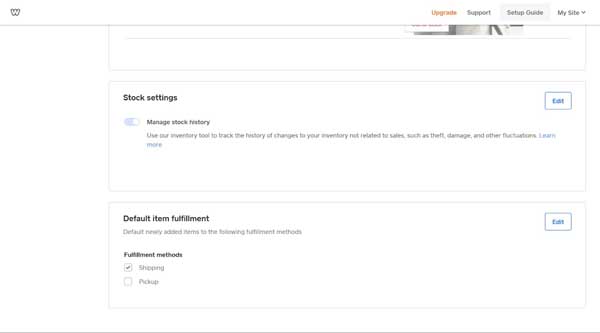
- Scroll further down the “Item Preferences” screen to the “Stock Settings” section, click on the “Edit” button, select if you want to keep track of your store’s stock history, and then click on the “Save” button.
- In the “Default Item Fulfillment” section, click on the “Edit” button, check the box next to your preferred fulfillment method(s) — shipping, pickup, or both — and then click on the “Save” button.


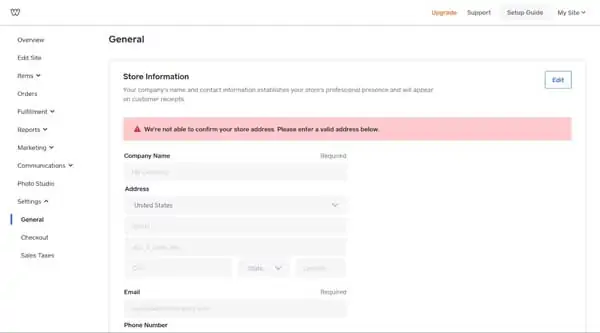
Add Contact Information
You must provide your business’s contact information before you can sell items from your website. These details will appear on emailed receipts your customers receive after making a purchase.
To add your business’s contact information:
- From the dashboard’s left-hand menu, click on the “Settings” option and then on “General.” This’ll open a “General” screen.
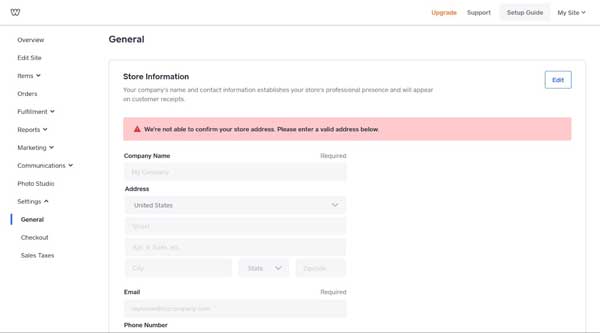
- In the “Store Information” section, click on the “Edit” button, and then enter your business’s contact information (e.g., physical address, email address, and phone number).
- Click on the “Save” button when done.
Connect a Payment Platform
Because Square owns Weebly, the Square payment platform is the preferred option. But, if desired, you can use Stripe instead. If you want to use PayPal, you must purchase the Professional plan.
To connect a payment platform:
- From the dashboard’s left-hand menu, click on the “Settings” option and then on “Checkout.” This’ll open a “Checkout” screen.

- Click on the “Connect” button next to either Square, Stripe, or PayPal and follow the prompts to connect your account.

Establish Sales Tax Settings
The Weebly Business and Performance plans both include an “Automatic Sales Tax Calculator,” which determines the correct sales tax for your customers regardless of their location.
Because sales tax laws vary by state, you must determine which of your products and/or services are taxable. You also need to know if you have to charge sales tax on shipping costs. You can opt to include the applicable sales tax in an item’s list price or add it to the price at checkout.
As you add items to your store, make sure you designate whether or not they’re taxable. If you have any questions about this, ask a tax professional in your area.
To establish sales tax settings:
- From the dashboard’s left-hand menu, click on the “Settings” option and then on “Sales Taxes.” This’ll open a “Taxes” screen.
- If you want sales tax included in an item’s list price, check the box next to “Taxes are included in item prices.”
- If your state charges tax on shipping, check the box next to “Charge taxes on shipping rates.”
We recommend using these “Automatic Sales Tax Calculator” features instead of adding individual sales tax rates for your items. But, if you prefer to add these yourself, check out the Weebly Support article on creating tax rates.
Set Up Shipping
Weebly offers real-time shipping to anyone who purchases one of its paid plans. This feature automatically calculates the shipping cost based on your chosen carrier and packaging details, and then provides that cost to your online customers at checkout.
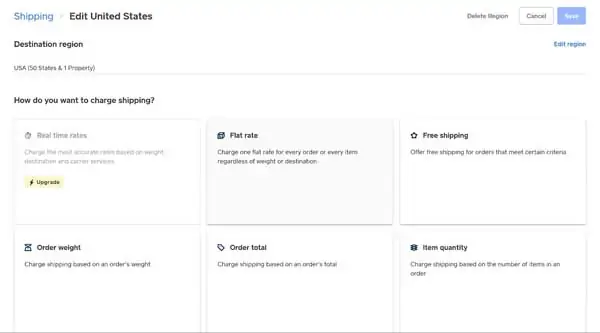
If you don’t want to use Weebly’s real-time shipping feature, you can manually set up shipping prices based on:
- A flat rate
- An order’s weight
- An order’s total cost
- An order’s total number of items
- Free shipping
To set up shipping:
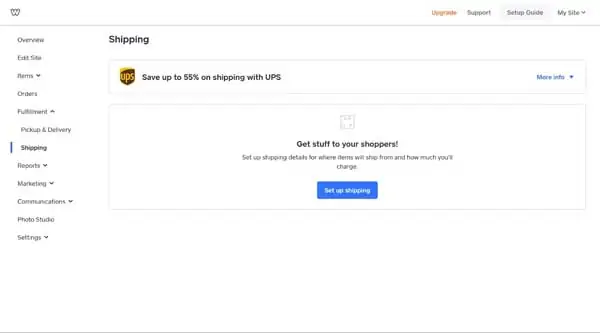
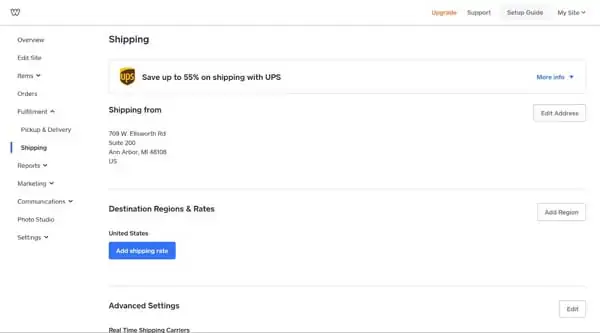
- From the dashboard’s left-hand menu, click on the “Fulfillment” option and then on “Shipping.” This’ll open a “Shipping” screen.
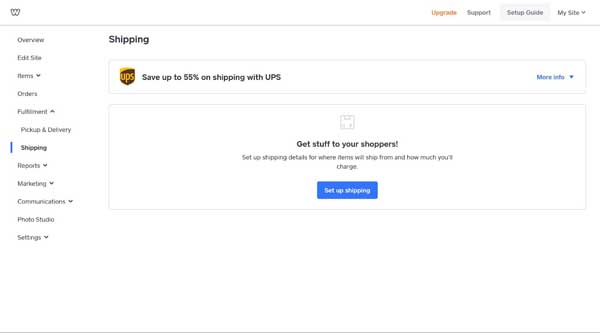
- Click on the “Set up shipping” button.
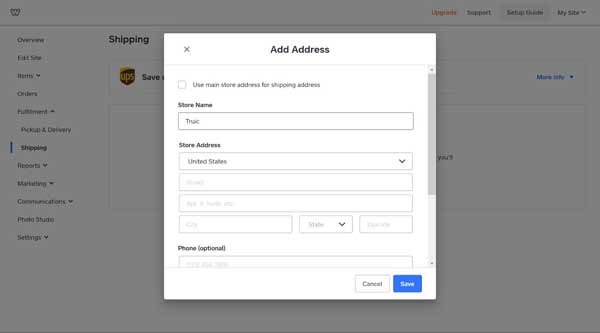
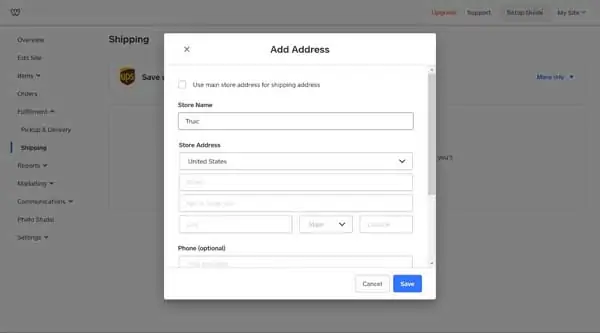
- In the pop-up window that then appears, enter the address from which you’ll ship your items. Check the “Use main store address for shipping address” box if that’s the correct origin or enter the relevant address and click on the “Save” button.
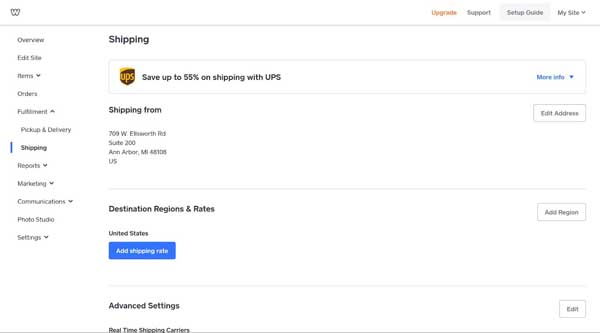
- In the “Destination Regions & Rates” section, click on the “Add shipping rate” button.
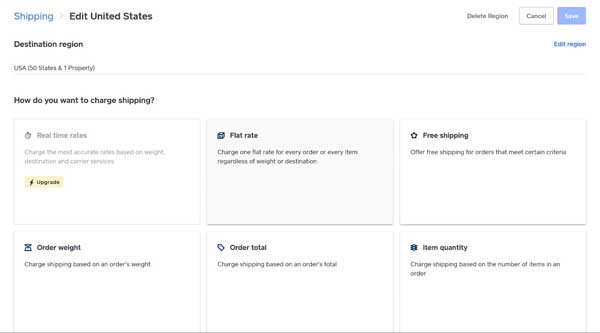
- Select the type of shipping you want to use and complete the necessary fields. For more details, check out the “All About Shipping” article from Weebly Support.
Step 6: Publish Your Online Store
After you finish designing your website, uploading your products, and setting up your store, it’s time to share it with the world.
To publish your website:
- Click the “Publish” button in the upper-right corner of the Weebly website builder.
- To connect to your permanent domain, click on the “Settings” tab in the left-hand column of the Square editor, click on the “Change” button next to the “Site Address” section, and then follow the directions.
For detailed instructions, check out our step-by-step guide on How To Make a Weebly Website.
Final Thoughts
The Square website builder can provide a powerful tool for small business owners who need to build and launch a high-functioning website quickly. Intuitive, drag-and-drop tools combined with a wide array of ecommerce capabilities make the Square website builder an ideal choice for business owners looking to create an online store.
Ready to launch your own online store? Check out these further resources to set yourself up for success: