How to Build a Content Website
As an entrepreneur providing content for your online community, having a website is important for reaching new followers. But, creating a content website can seem difficult to figure out when you factor in time, cost, and technical knowledge.
Knowing where to start, which website builder is best, and what tools to use can help you find the confidence to launch your content site, without any coding skills or having to hire designers.
This guide will take you through the process of signing up for the right website builder and publishing the best content website, in just a matter of a few steps.
Recommended: Bluehost is great for hosting and building your content website, get started with Bluehost.

Summary of This Guide
This article will take you through the necessary steps to properly get your website off the ground. The main required steps are:
- Determine the goals of your content website.
- Select a website builder. Our recommended builder for this type of website is WordPress hosted and built by Bluehost and its website builder.
- Identify the pages your website will need and begin building.
- Find any additional tools that will help you keep track of or expand your website.
We recommend bookmarking this page while you begin creating your website. Revisiting this guide while working through these steps will help you stay on track.
What Is the Goal of Your Website?
The first step of launching a successful and professional content website is finding the goals that’ll help you expand your audience.
These goals generally guide what your content aims to do and how to best go about running, sharing, and promoting a successful website. Having these intentions will help you decide the design of your website, and will also aid in measuring your overall success.
For a deeper look into how to find the goals of your business and website, check out our What Makes a Good Website guide.
Identifying Your Business’s Goals
As a content creator, your goals will most likely vary from those of an online retailer or a local service provider. For example, if you’re a blogger, your goal might be to find your target audience, keep readers updated on events, and find ways to bring in income through your blog and website traffic. Incorporating a sense of innovation and growth is important to finding both your goals and possible patrons.
Cultivating a secure base of returning readers and site visitors is an important goal. One of the best ways to boost your online presence is through word-of-mouth from an engaged and inspired audience base. This will help you reach new readers and expand your reach to help your content creation thrive.
Business goals for a content website or blog can also include ways to offer courses and digital downloads, having more than one way to interact with your content, and finding ways to expand what you do across several mediums. Maybe you started a blog to get a book deal. Maybe you want to start a podcast and offer useful videos. These can all tie right back into the main goal of securing a base of a returning target audience who will keep your website growing.
Using Your Website to Accomplish Your Business Goals
As you identify your content and business goals, it will become easier to understand how to use your website to achieve them. Even if the majority of your business is performed on another platform, having a website that accurately and effectively represents you and your content creation will make new visitors feel informed, welcomed, and engaged.
There are a variety of ways to use your website to accomplish your goals. You might consider providing interactive items like enabling comments on posts or having an online chat feature to answer questions. All of these tools are excellent ways to encourage visitors and viewers to check out and engage with your work.
Having a professional website to achieve your goals can sound like an overwhelming task. But, once you understand the mutual relationship between your site and business goals, making a website to support this will come naturally.
Which Website Builder Is Best?
| Best Website Builders | |
|---|---|
GoDaddy
4.7/5 |
Best Website Builder Overall
|
Web.com
4.5/5 |
|
Squarespace
4.4/5 |
|
|
Wix
4.4/5 |
|
Shopify 4.3/5 |
Best for Ecommerce
|
WordPress 4.1/5 |
|
There are lots of fantastic website builders available. Finding the best website builder can be a challenge. Check out our Best Website Builder Review to learn why we’ve chosen WordPress for this particular type of website.
We have opted to create this website with the easy drag-and-drop editor provided by Bluehost. The Bluehost website editor for WordPress is simple, intuitive, doesn’t require any coding, and allows you to switch back and forth between its builder and the traditional WordPress Admin. This way you have the best of both worlds, the ease of getting started with a generated template, and the precision of making your own unique edits.
Bluehost offers WordPress hosting plans for as low as $2.95 per month, plus Bluehost now has an easy to use drag-and-drop editor to help you build your WordPress site in no time. Get started with Bluehost.
How to Build Your Website with WordPress
It’s easy to get started with WordPress and Bluehost. This next section will walk you through the process of purchasing a hosting package through Bluehost and getting familiar with the basic controls of the builder.
For an in-depth look at how to get started with WordPress, check out our How to Make a WordPress Site guide.
Getting Started With WordPress
The first step to getting started with WordPress is to purchase a domain name. Having a domain name ready to go will help make this process easier. If you need help finding yours, use our domain name generator to choose one for your business.
You will then need to purchase a hosting package through Bluehost and install your WordPress website. We’ll walk you through this and then guide you on getting comfortable with this website builder.
Signing up with Bluehost
- Head over to Bluehost and click the “Get Started” button.
- This will take you to a screen where you can select from its plan options. We recommend the “Choice Plus” plan. Choose the one that’s best for you and click the “Select” button to move forward.
- From here you will be prompted to create a new domain or connect an existing one. Enter in your domain and click the “Next” button.

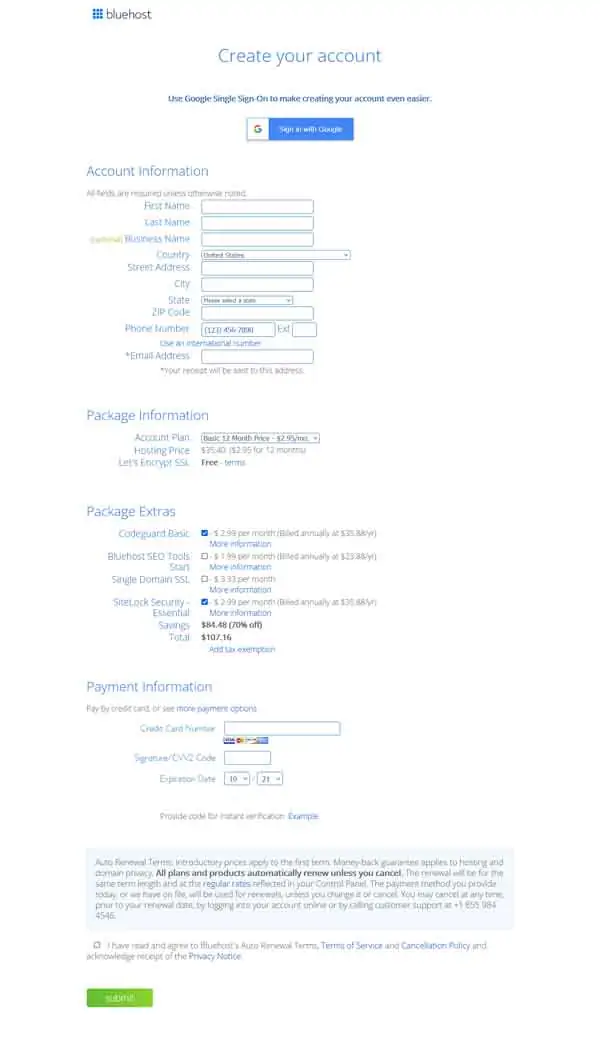
- You will then be taken to a screen prompting you to create your account. Here you will need to enter your personal and business information, confirm your package information, and select package extras.

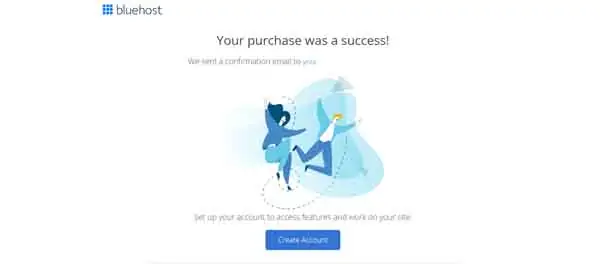
- Enter your payment information and select the “Submit” button. You will then be taken to a screen with a receipt of your purchase. Click the “Create Account” button to finish setting up your Bluehost account.

- On the next screen, enter in and confirm your password and click the “Create Account” button.


Congratulations! You now have an account with Bluehost. You will now be prompted to log in to your new account. Log in to your new account to begin installing WordPress.
Installing your WordPress website
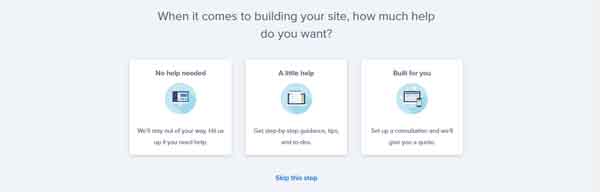
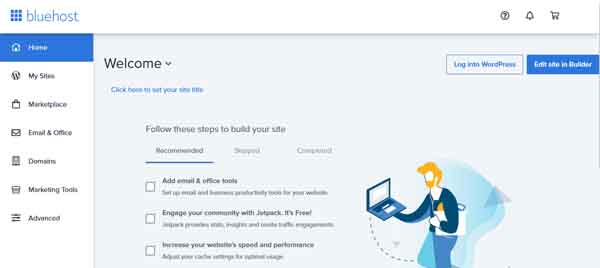
- Log in to your Bluehost account and click the “Create your website” button.

- You will then be asked how much help you would like in this process. For the sake of this tutorial, we will select “A little help”
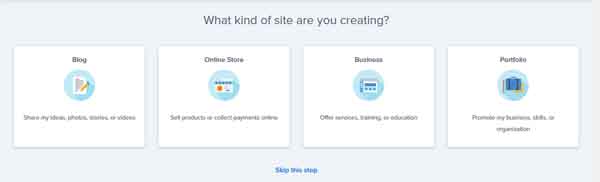
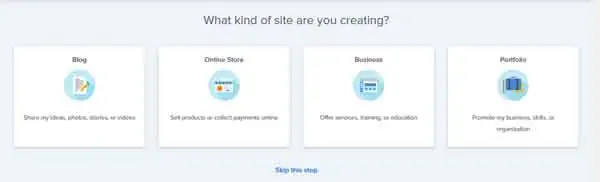
- You will then be asked what kind of site you are creating. For this guide, we will select “Blog.”
- Next, you will be asked how comfortable you are with creating your own website. Choose your personal comfort level and click the “Continue” button.
- You will then be given the option to choose between using just the WordPress website builder, or the Bluehost Website Builder for WordPress.
- For this tutorial, we are selecting the Bluehost Website Builder for WordPress. This drag-and-drop builder allows for you to have your website up in a matter of minutes, and if you ever need to directly edit or add a WordPress-only plug-in, you can switch to the WordPress builder at any point in time.
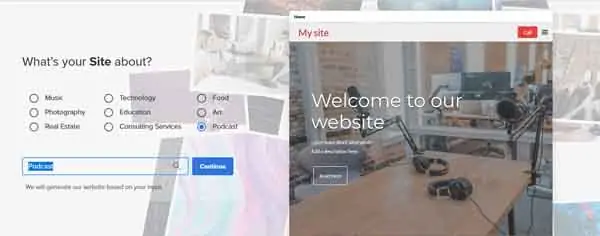
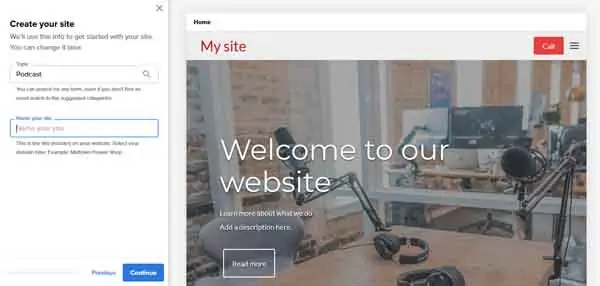
- Click the “Start building” button to be taken to a screen asking what your site is about.
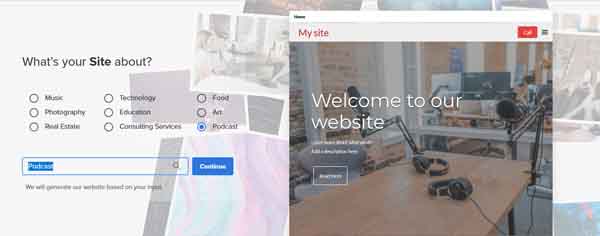
- For this tutorial, we will select “Podcast” and then click the “Continue” button to begin building.


Next, we will show you how to get comfortable using the Bluehost Website Builder for WordPress.
Using the Bluehost Website Builder for WordPress
It’s easy to update any content to match your brand, with the Bluehost site editor for WordPress. This will be a general overview; for a more detailed guide on how to get the most out of the WordPress website builder, read our How to Use WordPress article.
Using the Bluehost for WordPress website builder:
- Working with Bluehost for WordPress is easy and intuitive. One of the first things this builder will prompt you to do is name your website.
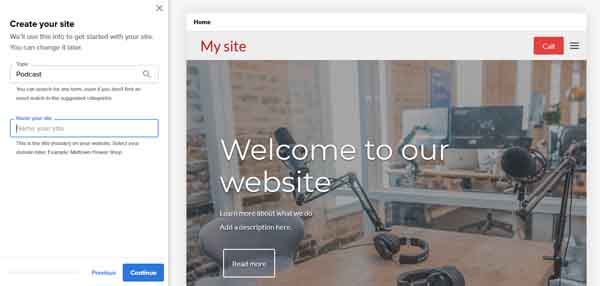
- Within the left-side column, enter the name of your website and click the “Continue” button.
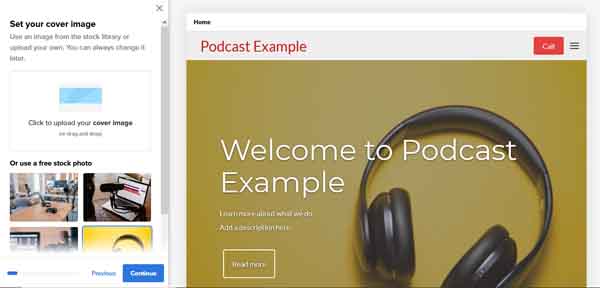
- Next, you will be prompted to set your cover image. Use the left-side column to either upload your own image, or choose from the provided stock images. Make your selection and click the “Continue” button.
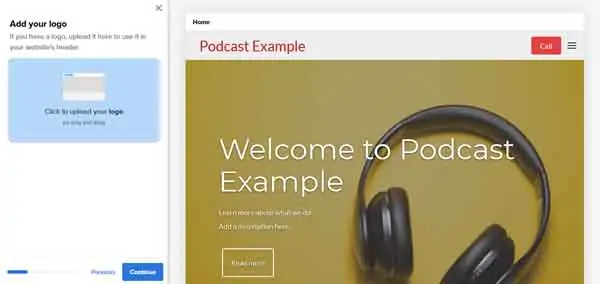
- Next, it’s time to upload your logo. Click the prompted square to upload this image from your computer. If you don’t have a logo yet, use our free logo generator to create one.
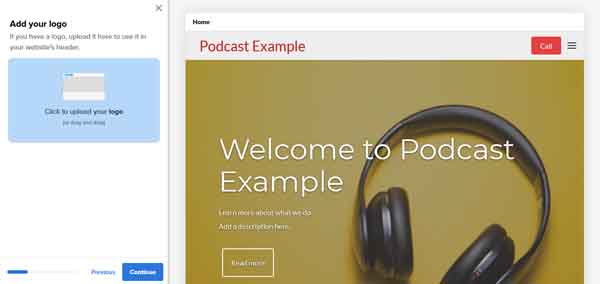
- Click the “Continue” button to move forward.
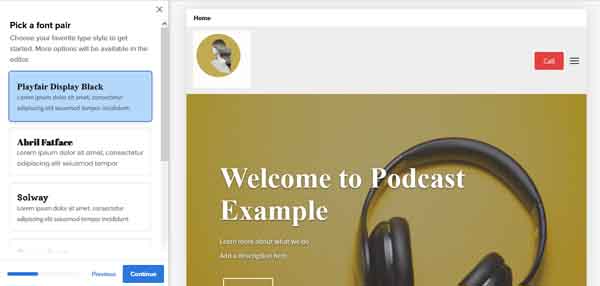
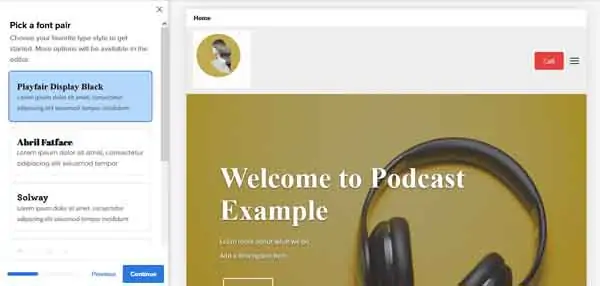
- The next bit of customization will be to choose a font pairing. Scroll through the list of options and choose one that best fits your brand. For this tutorial, we chose “Playfair Display Black.” Make your selection and click “Continue.”
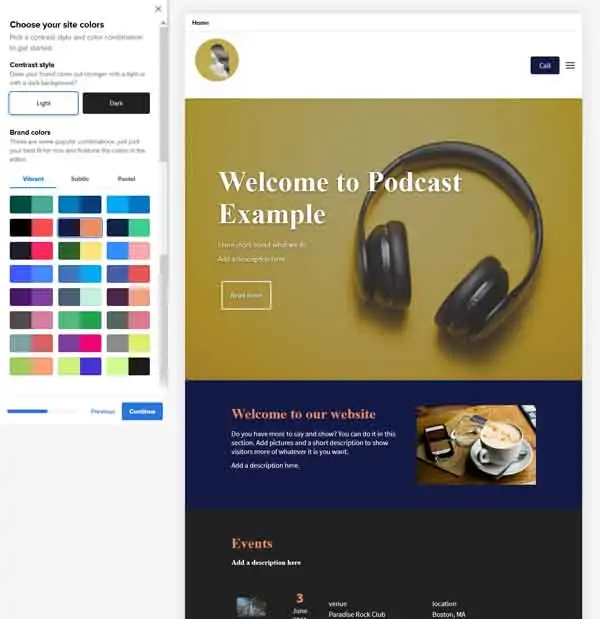
- It’s now time to choose your site colors. Use the left-side column to update the contrast style and pick from a list of selected options for color pairings. Click the “Continue” button when you’re ready to move forward.

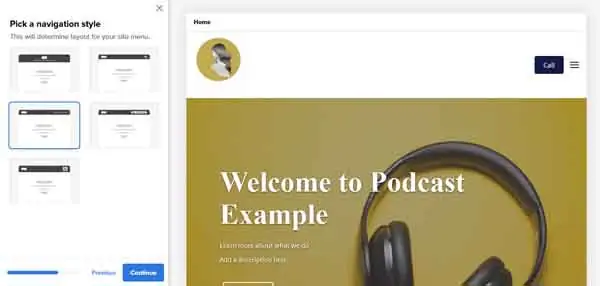
- Next, choose a navigation style. This is how your navigation menu will appear at the top of your site. Make your selection and click “Continue.”

- To add your contact information to the footer of your website, use the left-side column to enter in all the necessary information and click the “Finish” button to complete this process.
- Bluehost for WordPress will now create your site to the specifications you chose.

Now that you’re getting familiar with some of the basics of the Bluehost Website Builder for WordPress, take some time to get comfortable with it. To help you, we’ll walk you through how to add four essential pages with helpful tools to your new website.
For a deeper look at how to use the Bluehost website builder, read our How to Use Bluehost article.
What Pages Does a Professional Content Website Need?
Almost any website for a content creator will need a Homepage, Blog page, Sales page, and an About Us page to get started. This section will cover setting up these necessary pages, as well as how to find useful tools to really make them shine.
Homepage
Your Homepage is the first impression for your website and business, and it’s important to make sure it’s engaging and has everything it needs. We’ll walk you through how to create a Homepage and connect the tools needed to enhance it.
Below is an example of a successful Homepage built with WordPress for astrologer Chani Nicholas. For a deeper look on what makes this Homepage successful, and how to make yours the best it can be, read our How to Design a Successful Homepage article.

How to create a Homepage with the Bluehost for WordPress website builder:
- From your Bluehost portal, select the “Edit site in Builder” button to open the Bluehost Website Builder in another window.
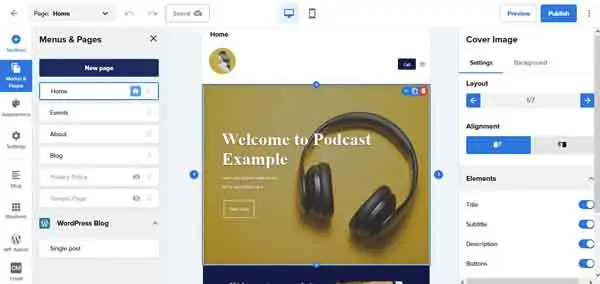
- Within the left-side column of the Bluehost Website Builder for WordPress select “Menus & Pages.” Make sure “Home” is selected to begin editing the Homepage.
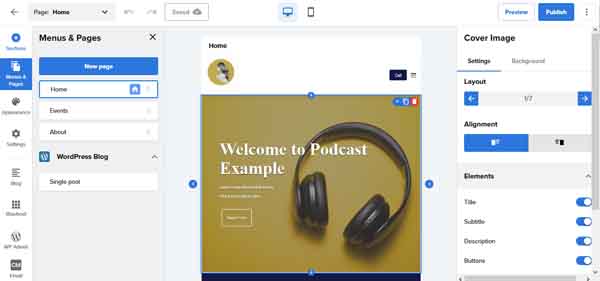
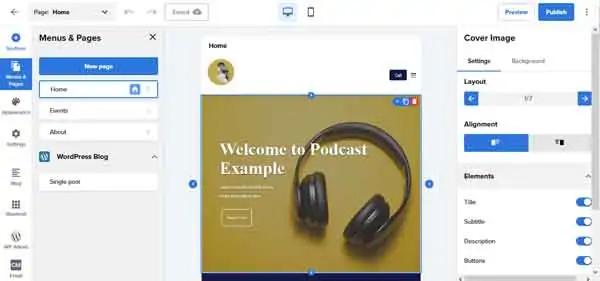
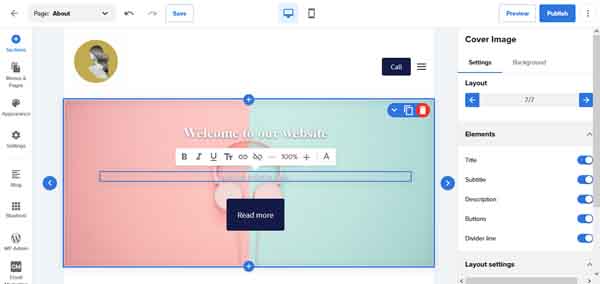
- Select the Cover Image to view all editing options. From the right-side menu, you can update the layout and alignment. Click the “Save” button in the top menu bar to update any changes.

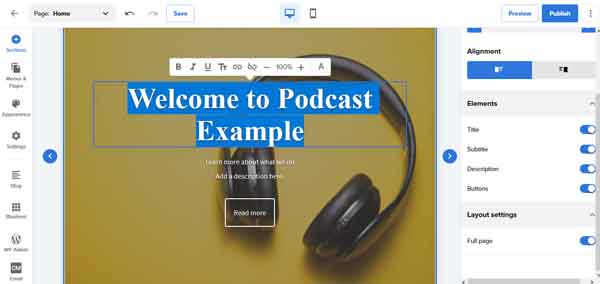
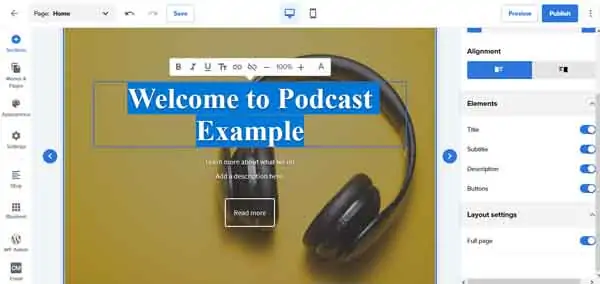
- To update your Title and Subtitle text, simply click the text you’d like to update within the section. This will open a text edit menu bar to help you update the font and style.
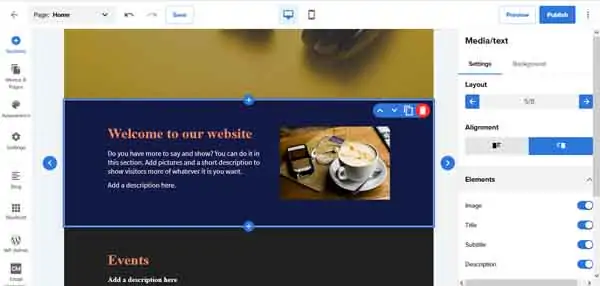
- Scrolling down this page will highlight sections to be edited as you go. If they don’t highlight automatically, simply click any section you’d like to update.

- To move, duplicate, or delete a section, highlight the section and use the icon bar in the upper right corner. The up and down arrows will move the section. The double icon will duplicate the section. And the trashcan icon will delete the section.
- To update an image within a section, hover your mouse over the image to get an icon bar to appear. From this icon bar, you can crop the image, upload another photo, add a link to the image, and explore the settings for the image.

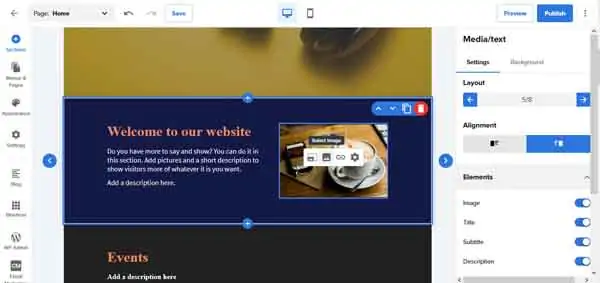
- To upload your own image, hover over and click the “Select Image” icon in the menu bar. Click this and upload an image from your own computer. Be sure you have the right to use any of the photos you put onto your site.
- Continue to scroll through and click on sections to edit them. Be sure to push the “Save” button after any changes.


Now that you’ve been introduced to the basics, we’ll walk you through adding several essential tools to your Homepage. These will include linking a video and connecting social media icons. Both of these features are great ways to keep visitors engaged, highlight what you do in a unique way, and encourage readers to follow you on several platforms.
Adding essential tools to your Homepage:
- Adding a video is a useful tool for pointing new users towards your Patreon or podcast. Be sure it’s not overwhelming and doesn’t distract from the rest of your Homepage.
- There’s a good chance your Bluehost for WordPress template came with a section for a video already placed within your Homepage. But if you need to add one, the process is simple.
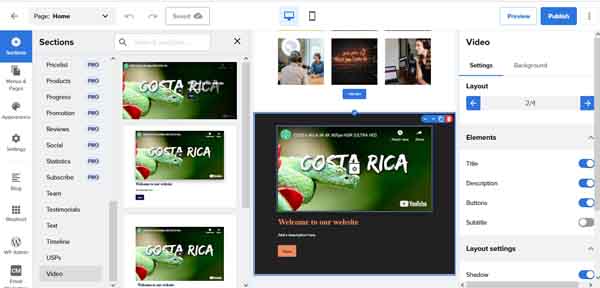
- In the left-side column of the Bluehost Website Builder, select “+ Sections” to open the “Sections” menu.
- From here, scroll down to the bottom of available sections and select “Video.” This will open a visual display of different video sections you can add. Click your selection to have it instantly placed.
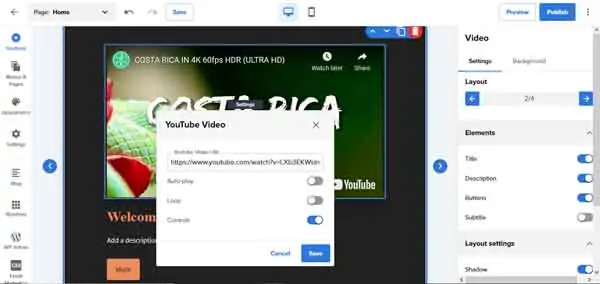
- Once placed, click the “Settings” icon in the middle of the video section. This will open a pop-up window.
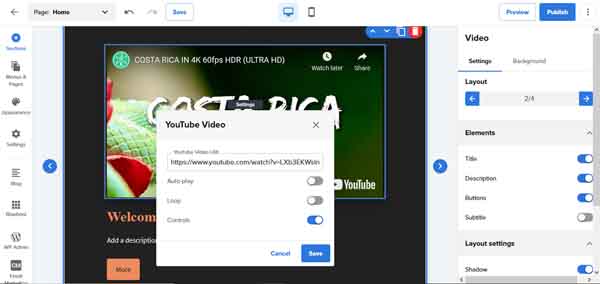
- From this pop-up window you can update the link the video connects to, adjust looping, autoplay, and other controls. Click the “Save” button to update all changes.
- Now that you’ve connected your video it’s time to set up your social media icons. These icons are easy and quick ways for site visitors to take a peek at what you do on other platforms and increase your reach.
- To edit your social icons, scroll all the way to the footer of your Homepage. Your social icons will appear in the bottom right portion.
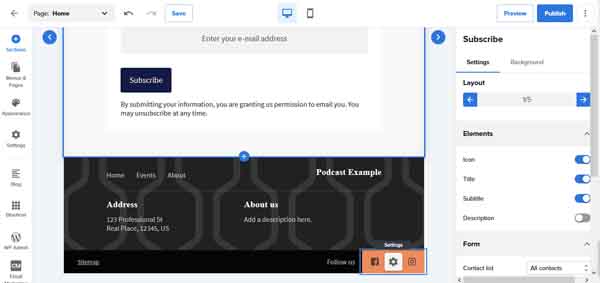
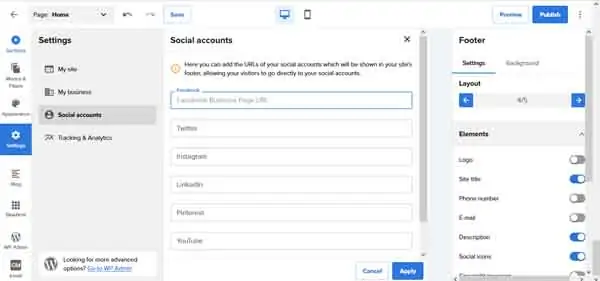
- Click on the “Settings” icon to be taken to the following screen.
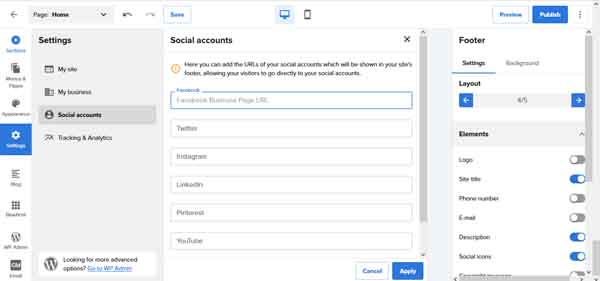
- From here you can enter the links to several popular social media platforms. If you need further customization, you can always edit this portion in the WordPress Admin — there’s even a prompt to do so, should you be ready for it.
- In the right-side menu, there are ways to adjust the layout and other elements of the footer. When you are done connecting your social media icons, click the “Apply” button to instantly update.


Nice work! You now have a functioning Homepage with interactive elements to make it complete. Next up, we will be digging into creating and fine-tuning your Blog page.
Blog Page
Your Blog page is where readers can find informative pieces on your process, what you offer, and your journey to becoming a content creator. In some cases, the Blog page will be the bulk of the content you provide and perhaps the main focus of your website. We’ll walk you through how to create a Blog page with the essential tools to invite readers to become loyal followers.
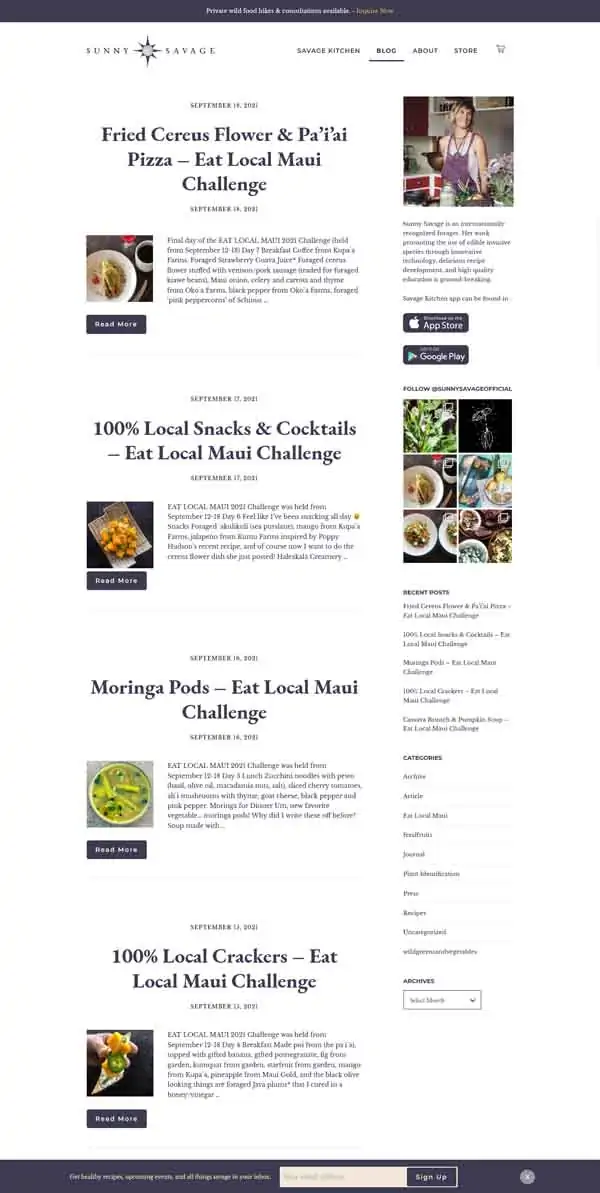
Below is an example of a successful Blog page built with WordPress for environmentalist and forager Sunny Savage. For a deeper look at what makes this page successful, and how to make your Blog page the best it can be, read our How to Design a Successful Blog Page article.
How to create a Blog page with the Bluehost for WordPress website builder:
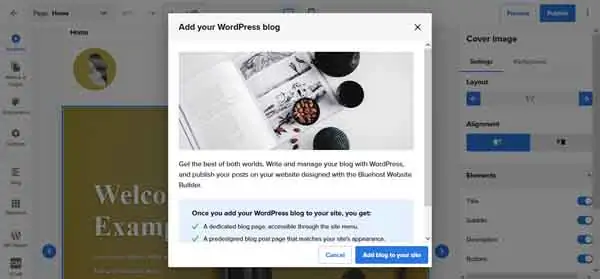
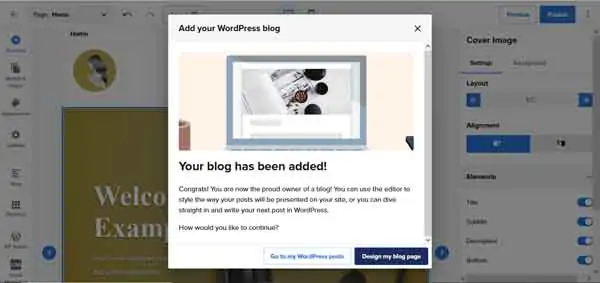
- From the left-side column, select “Blog” to open a pop-up window prompting you to add your WordPress blog to your site. Click the “Add blog to your site” button to continue.
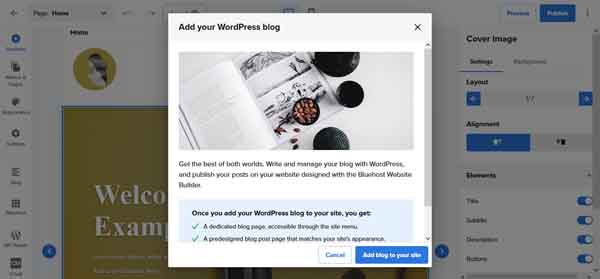
- The next pop-up window will prompt you to either go to WordPress Admin to continue or to proceed using the Bluehost Website Builder. For this tutorial, we will select “Design my blog page” to stay within the Bluehost for WordPress builder.

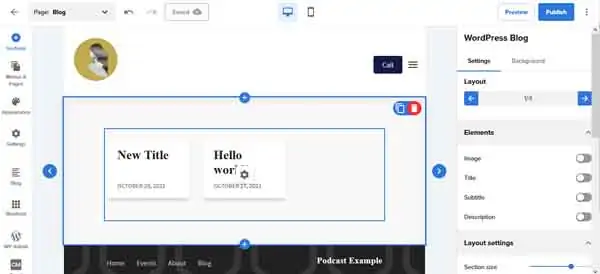
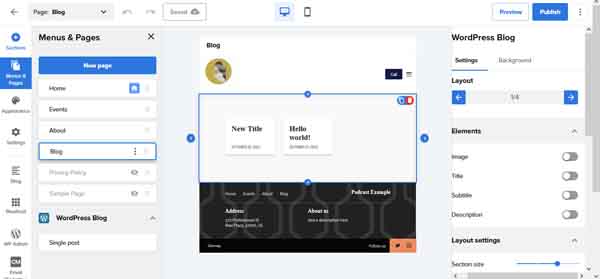
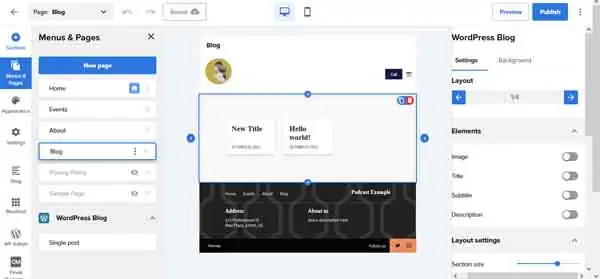
- You will now land on your editable Blog page. From here you can add sections, adjust the layout, and more.

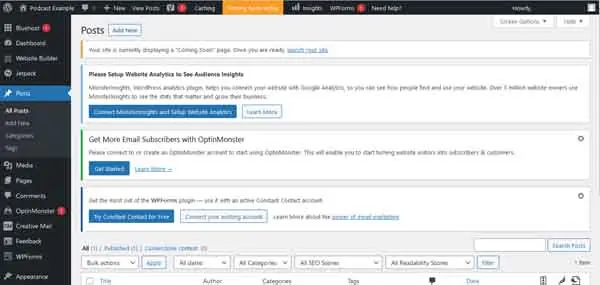
- To manage your blog posts, click on the “Settings” icon within the Blog section. This will open WordPress Admin.
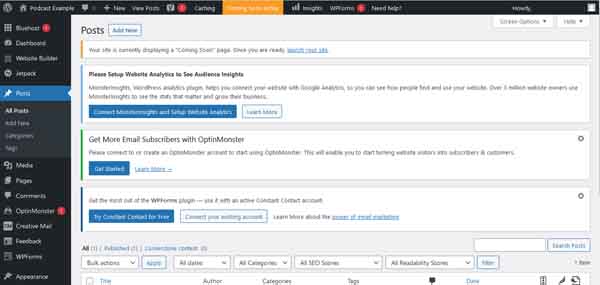
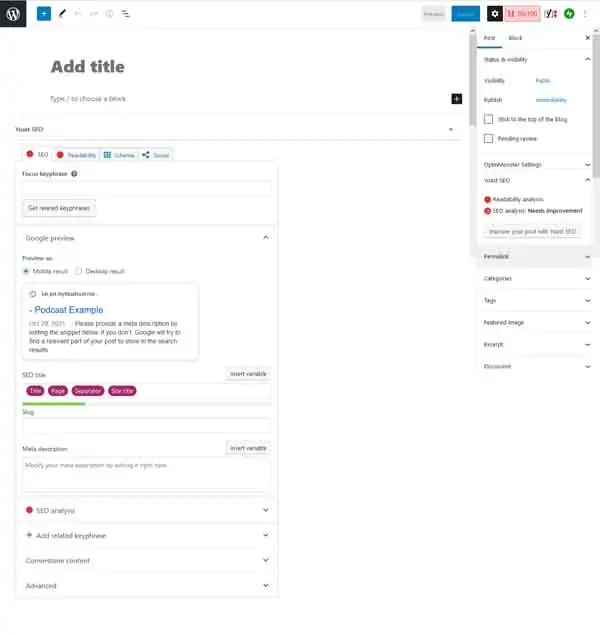
- Within the left-side column, beneath “Posts” select “Add New” to be taken to a page where you can craft a new blog post.
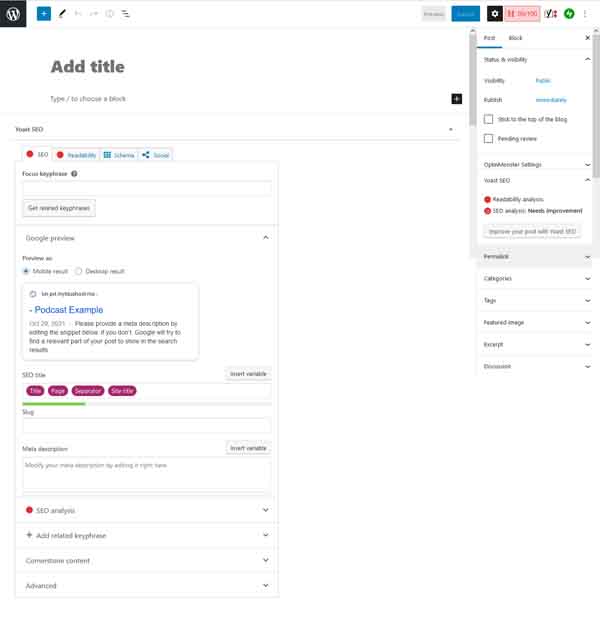
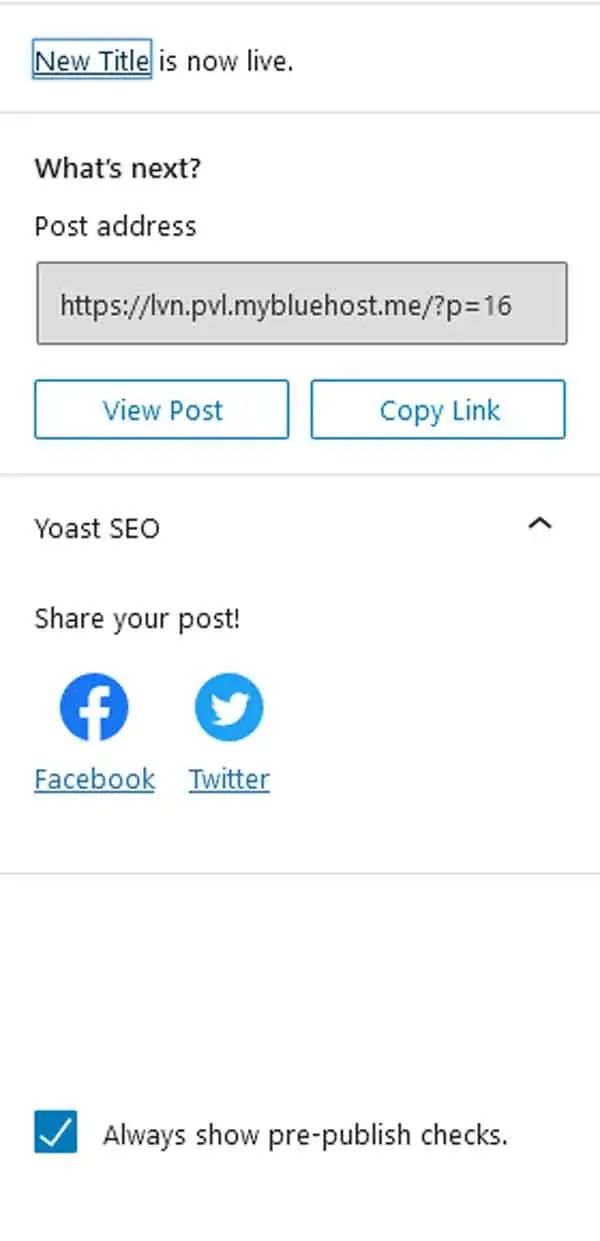
- The beauty of using WordPress Admin to create your blog posts is that it comes with built-in search engine optimization (SEO) and keyword features, helping make all your work successful. When you’re finished, click the “Publish” button at the top of the screen.
- Before returning to the Bluehost Website Builder, use the right-side menu to view your post, copy a link to share your post, or instantly share it to your connected social media accounts.
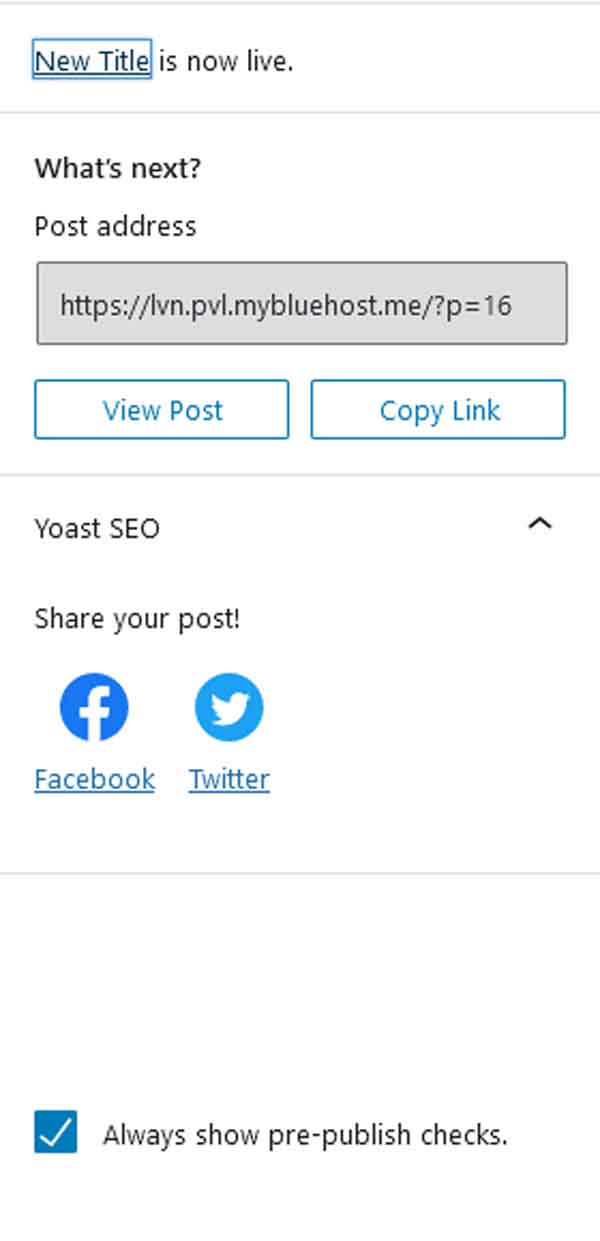
- This post is now live, and you can view it within both your WordPress Admin and your Bluehost Website Builder for WordPress. This makes it easy to manage your account with either builder.
Now that you have a Blog page you can navigate and update, it’s time to add some essential tools to truly make it vibrant. These tools will help to manage the comments section and set up a “Subscribe” section.
Adding essential tools to your Blog page:
- Return to your Bluehost Website Builder and select “Menus & Pages” from the left-side column to find your newly placed Blog page.
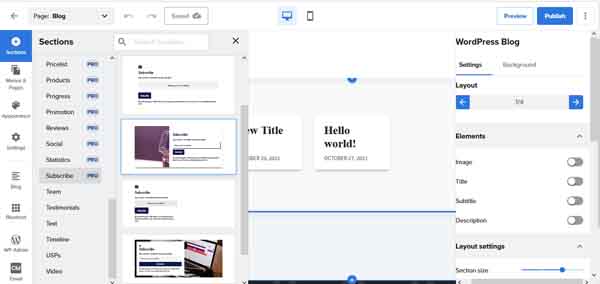
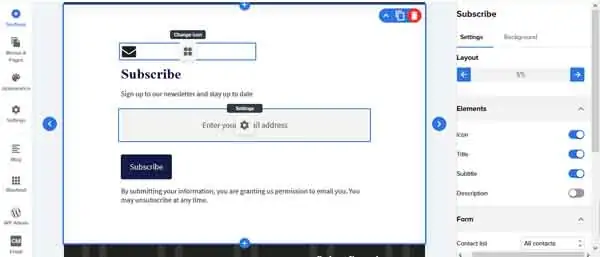
- To add a “Subscribe” section, select “+ Sections” from the left-side column and choose “Subscribe” from the list of available options. Find the section that looks like the best fit for you and your blog and select it.
- Once your “Subscribe” section is placed it’s time to set it up to work for you. By clicking within this section, you can change the icon, update the font, and more.
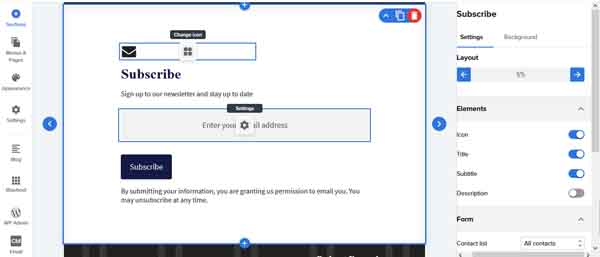
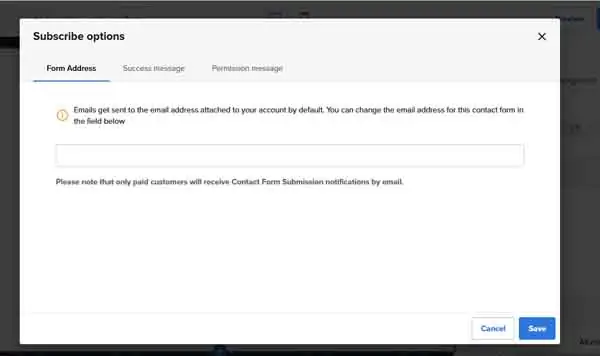
- To connect this form to your email address, click the “Settings” icon within the “Enter your email address” box. This will open a separate pop-up window.

- From this window you can update the email account subscription requests will be sent to, as well as update the “Success” and “Permission” messages. Click the “Save” button when you’re done.
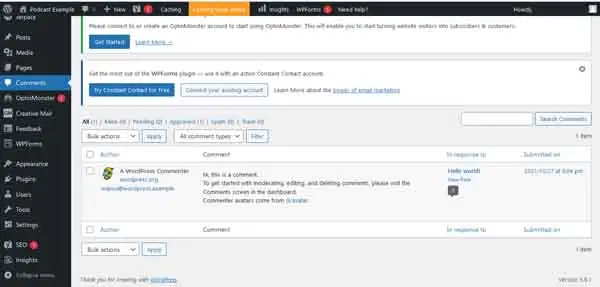
- To enable and manage comments on your posts, return to your WordPress Admin and select “Comments” from the left-side column.

- From here, you can view all your comments, search for a specific one, approve and discard comments, respond, and more. Click the “Apply” button when you are done.

Nicely done! You now have a Blog page you can manage from both your Bluehost Website Builder and your WordPress Admin. Plus, you’ve also added ways for readers to subscribe for updates and you can manage your comments section. Next, we will take you through what you’ll need to set up a successful Sales page.
Sales Page
Your Sales page is a great place to advertise where readers can find other forms of your content. If you run a podcast, this is a great place to send customers to listen, like, and subscribe. If you offer courses or online programs, your Sales page is a great place to highlight these and provide ample access to ways to sign up. This page is another great way to introduce your Patreon that readers can subscribe to, as well as access to any works you’ve published and where customers can purchase them.
Below is a successful Sales page built with WordPress for the “Freelance, and Business, and Stuff” course from design company Hoodzpah. For a deeper look at what makes this page successful and how to make your Sales page the best it can be, read our How to Design a Sales Page That Converts article.

How to create a Sales page with the Bluehost for WordPress website builder:
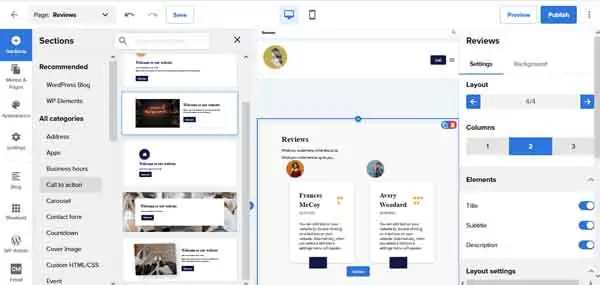
- There’s a chance the template the Bluehost Website Builder provided for you did not come with a Sales page included. To add one, click “Menus & Pages” from the left-side column. This will open the “Menu & Pages” menu.

- At the top of the menu, click the “New page” button. This will take you to a pop-up window.
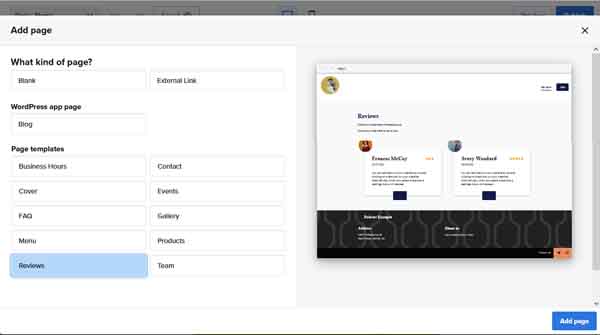
- From this pop-up window, you can select what kind of page this will be, and which page template you’d like to choose. For this guide, we will choose the “Reviews” template. Click the “Add page” button to continue.
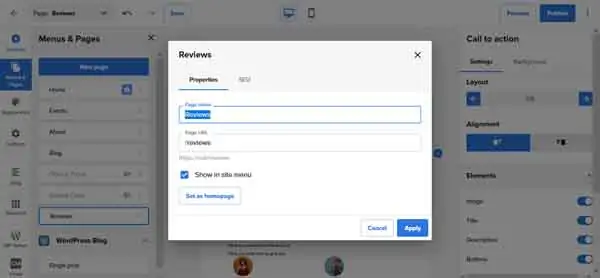
- To rename this newly placed page, select “Menus & Pages” to open the corresponding menu, then select the “Reviews” page to open a drop-down menu.
- From the drop-down menu, select “Settings” to open the following pop-up window.
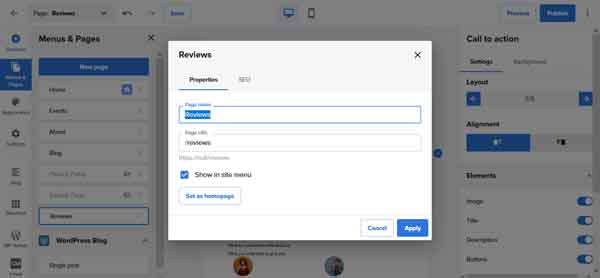
- Update the name of this page to reflect the course, book, podcast, or other content you are selling, and click the “Apply” button.
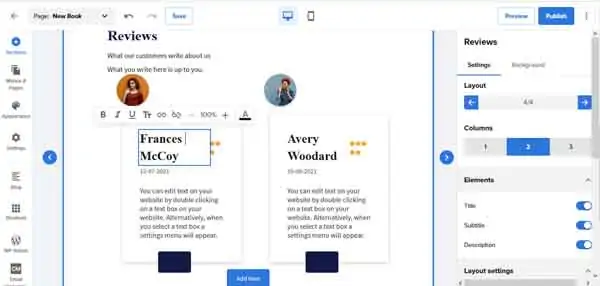
- Edit your reviews by clicking on any of the elements you’d like to update. Clicking the “Add item” button will add a new review placeholder within this section.
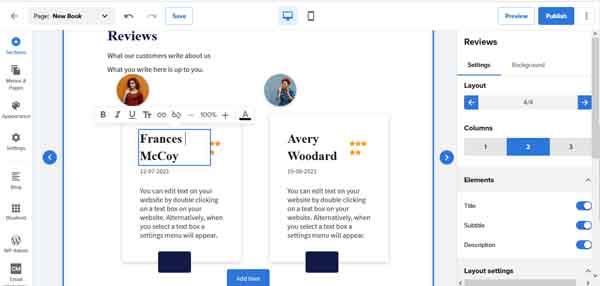
- Use the right-side menu to alter the layout, list elements, and more. Be sure to click the “Save” button when you’re happy with your changes.

Now that you have a good handle on how to update your Sales page, we’ll walk you through adding a few elements to really make it a convincing and successful page. This will include adding a “Countdown” section and a call-to-action (CTA) section.
Adding essential tools to your Sales page:
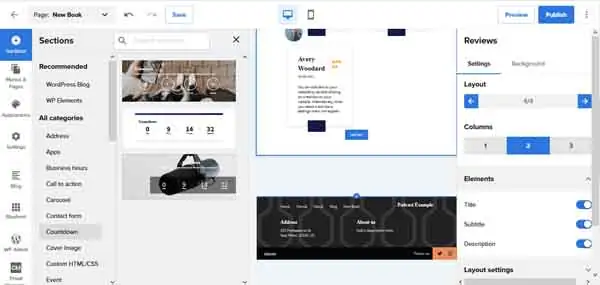
- From the left-side column, select “+ Sections” to open the “Sections” menu. From this menu, scroll down and select “Call to action.” This will open an additional menu allowing you to view available options.
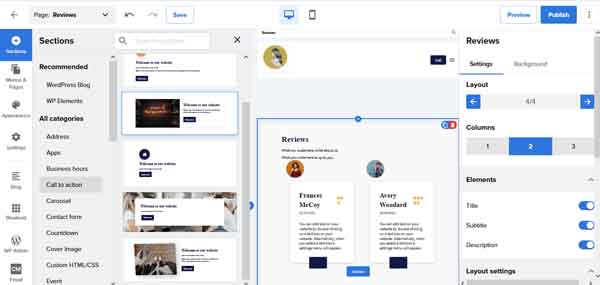
- Choose the option that’s best for you and place your CTA section at the top of your new page.
- Update this CTA section by clicking to upload a new image, or editing the text. Make this portion really encourage visitors to click the button to try what you have to offer.
- If you want to get site visitors excited for an upcoming release, adding a “Countdown” section is a great way to highlight this.
- From the left-side column select “+ Sections” to open the “Sections” menu. From this menu, scroll and click on “Countdown” to view the available options for this type of section.
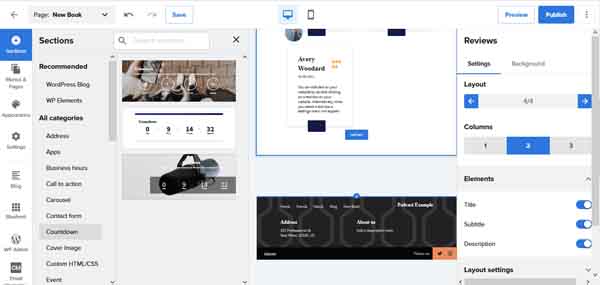
- Make your selection to have it instantly placed on your page.
- To edit the text, simply click the portion you’d like to update and begin typing.
- To edit the countdown clock, click the “Settings” icon to open a drop-down menu.
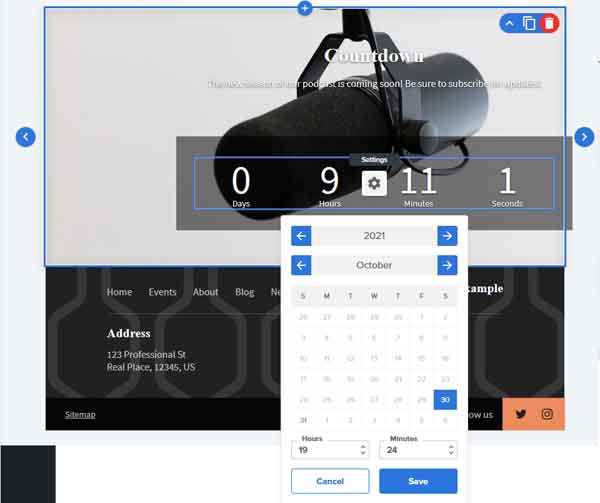
- From this menu you can select the day, hours, and minutes of your new major release. Click the “Save” button when you’ve selected the correct date and time.

You now have a functioning and impressive Sales page with added features to make it stand out and encourage readers to follow and subscribe or purchase a new release. Nice work! Next, we will dive into how to update your About Us page to help round out your four-page site.
About Us Page
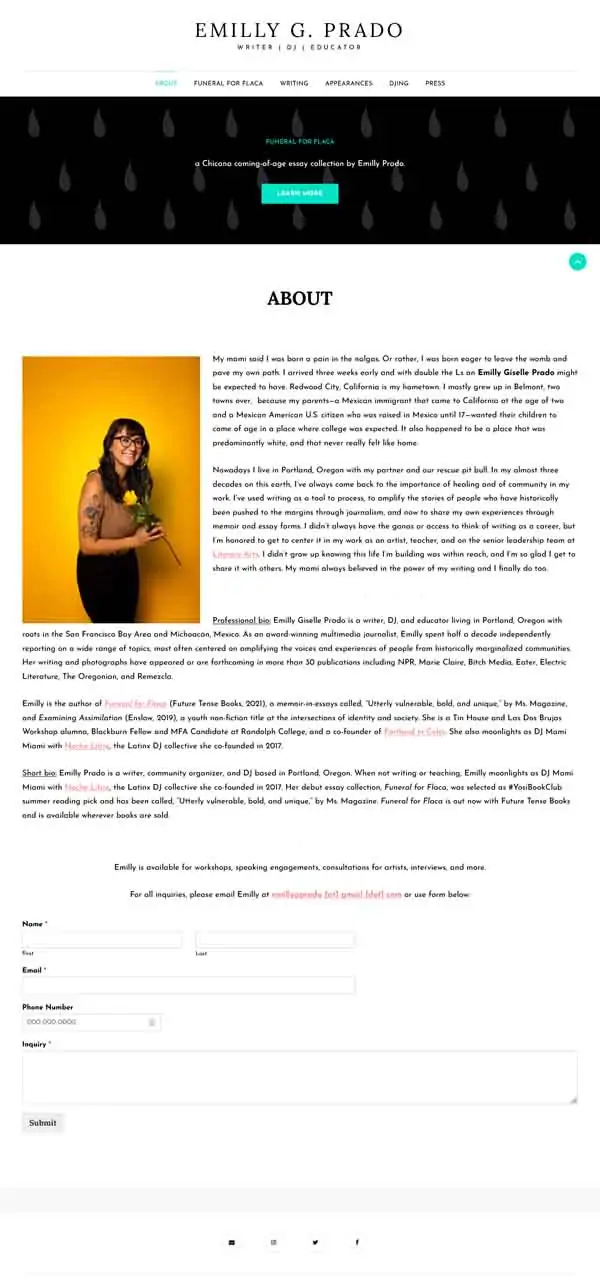
Your About Us page is where visitors can get to know you and any sponsors, publishers, or team members involved in the creation of your content. We’ll take you through how to create an About Us page and what useful tools can help encourage followers to better interact with your business.
Below is an example of a successful About Us page built with WordPress for the author, educator, and DJ Emilly Prado. For an in-depth look at what makes this page successful, and how to make your About Us page the best it can be, read our How to Design a Successful ‘About Us’ Page article.
How to create an About Us page with the Bluehost for WordPress website builder:
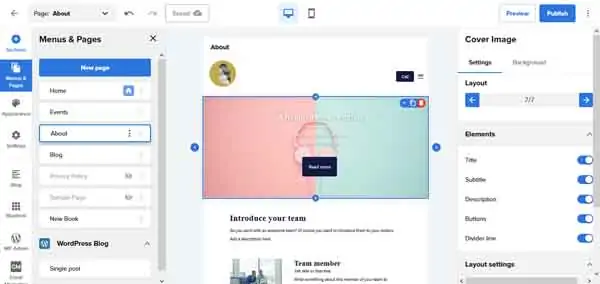
- Select “Pages & Menus” from the left-side column and select your “About” page. If your template did not come with an About page already placed, follow the above instructions for making a new page.

- At the top of this page, there should be a CTA section already placed. Simply click to update the text, image, and button.
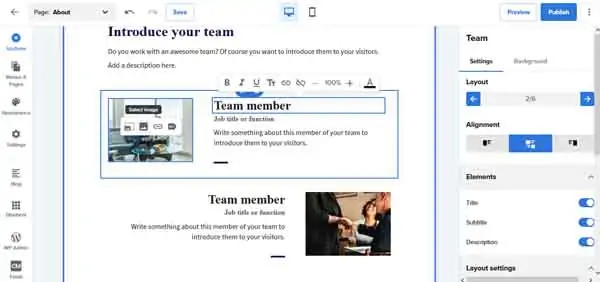
- Scroll down this page to arrive at the “Teams” section. This is where you can add photos and descriptions of your partners and sponsors.

- Click on any of the text and images to update. Be sure that any photo you use is professional and you have permission to post it on your website.

Now that you have a functioning About Us page, it’s time to add an extra element that will help boost visitor engagement and the overall success of your website. This feature will be a contact form — similar to the “Subscribe” form we placed earlier. A contact form is a way for visitors to send you messages, ask questions, and more.
Adding essential tools to your About Us page:
- Using the left-side column, select “+ Sections” to open the “Sections” menu. Scroll down the “Contact” to open a menu of available options for contact sections.

- Select your choice to have your new contact section instantly placed. To update the title and introductory text to this contact form, simply click on any of the text to begin editing.
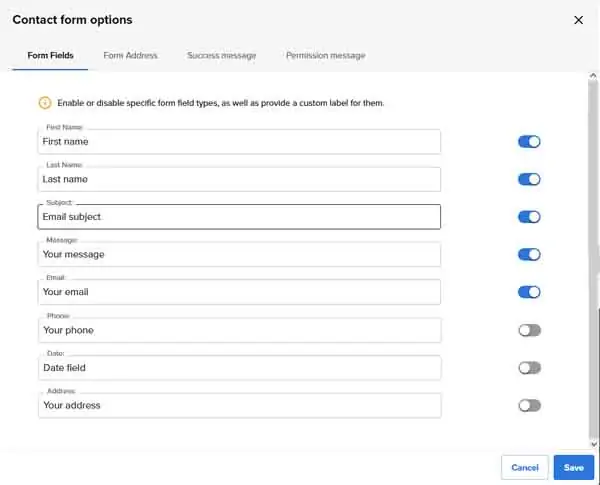
- To update the form itself, click the “Settings” icon within the form to open a separate pop-up window.

- Within this window you can adjust the form fields, the email address inquiries will get sent to, and the “Success” and “Permissions” messages. Click the “Save” button to update all changes.

Congratulate yourself — you now have a four-page professional website for your creative content. Plus, these pages have added features and tools to help you succeed.
Other Pages a Content Website Might Need
Along with the pages already discussed, your website will most likely require a few more to make it the best it can be. Read these helpful guides to learn what these pages are and what they’ll need:
What Other Tools Does Your Website Need?
Now that you have the necessary pages for your site and features to make these pages and their content shine, it’s time to dig into some sitewide tools. These tools can be used to organize and track analytics and data, create and send out email campaigns, and engage other software to boost your business and visitor experience. We’ll be going over three main areas: analytics, email campaigns, and customer relationship management (CRM) technology.
Using Analytics With WordPress
Site analytics are not to be feared, these tools are incredibly easy to use and necessary for measuring the success of your business and website. These tools can indicate where your website is performing well, and where you might need to make some adjustments.
Use these features to find out what visitors find most popular on your site by tracking sitewide clicks. You can also collect and organize information from surveys, contact forms, and other data individuals have entered while visiting your website.
One of the best options for sitewide analytics is Google Analytics. Read our article on How to Add Google Analytics to WordPress to help you better understand how to achieve the goals of your website.
Using Email Campaigns With WordPress
One of the strongest tools for a content creator trying to strengthen their brand is launching email collections and campaigns. This can be done in the form of a recurring newsletter sent to subscribers or perhaps a contact form that collects emails of individuals who would like to be alerted to a new launch, episode, or video. Having an email collecting tool on your website is a great way to help expand your reach, keep track of site visitors, and more.
It can be difficult to find the tool that’s the right fit for your professional content website, so we recommend ActiveCampaign. ActiveCampaign has specific marketing essentials geared towards creators, plus it’s already set up to work with WordPress, allowing for easy syncing and connecting.
Using CRM Technology With WordPress
CRM is another tool that can appear complicated, but it’s a truly useful feature to help small business owners better organize their analytics and data. There are several trustworthy platforms like HubSpot, Zoho, or Salesforce that can help you get started with this process.
These management systems help you stay on target with your goals, better understand complicated analytics, and increase communication between you, your partners, and your followers. For a deeper look at how to set up your WordPress site with everything it needs, read our How to Use WordPress article.
Moving Forward
Congratulations! You have officially signed up for Bluehost for WordPress and now have a professional content website with the essential pages to make it stand out.
To make your new site the most successful content website it can be, check out our Related Articles section further below.
Get Started With Bluehost For WordPress
Bluehost offers affordable pricing options for buidling and hosting your WordPress website. See what you can create by clicking the button below.