How To Make a Blog on Weebly: Weebly Blogging Tutorial
Can you create a blog with Weebly? Even though Weebly is known for being one of the best ecommerce platforms, it also has robust blogging capabilities.
This in-depth guide to Weebly blogging will provide you with all the tools you need to know how to make a Weebly blog. We’ll walk you through the Weebly signup process, show you how to design your blog, customize your site, and publish your first post.
Be sure to check out our How To Start a Blogging Business guide for more helpful information.

Before You Begin
We know you’re ready to start creating your blog posts immediately, but it’s a best practice to take some time to plan it out first.
While you can certainly start the process without this step, a little planning will make it easier. Plus, making sure you understand how to properly use Weebly will make creating your blog even more successful.
Along with this guide, check out these other useful articles to help determine if the Weebly website builder is the right tool for you and your blog:
The 6 Steps to Make a Blog on Weebly
Now that you’re prepped and ready, it’s time to dive into the six steps for making a Weebly blog:
- Sign up for Weebly
- Design Your Weebly Blog
- Update the Blog Settings in Weebly
- Customize the Weebly Blog Sidebar
- Create Your First Weebly Blog Post
- Publish Your New Weebly Site
Step 1: Sign up for Weebly
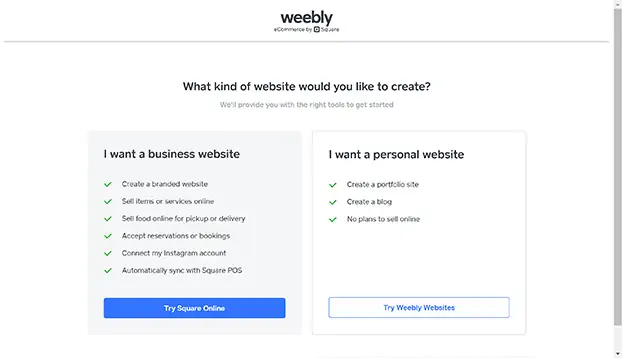
The first step in creating a blog using Weebly involves signing up for a Weebly account. When you sign up, make sure to click on the “Try Weebly Websites” button. Why? Because the “Try Square Online” option doesn’t offer a blogging feature.
Choose a Theme
Next, you’ll see a list of Weebly themes. Click on the “Blog” tab. Weebly has eight themes dedicated to blogging, but you can use any theme you prefer and then add a blog page to your site.
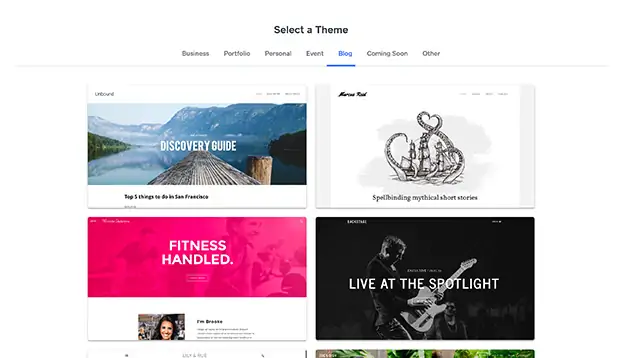
Choose the theme that best matches your blog topic and brand. You can always switch your theme later, if desired.
Choose a Subdomain
Weebly will then ask about your domain. We recommend building the draft of your site on a subdomain (e.g., yoursite.weebly.com) so you can publish your site and test it before it goes live on your real domain.
You can connect to your permanent domain when you’re ready to officially launch your site.
Need help finding a domain? Check out our How to Choose a Domain Name article.
Upgrade Your Site
It’s a good idea to upgrade your site now so you’ll have access to all the features Weebly offers. Bloggers don’t need more than the Professional plan, which costs $12 per month when you pay on an annual basis.
To learn more about which Weebly plan might be right for you, read our Weebly Pricing and Plans guide. Then, get started with Weebly for free today.
Step 2: Design Your Weebly Blog
Now comes the fun part! It’s time to replace the text and images that came with your theme with copy and photos suited to your new business.
For help navigating this process, check out our detailed guide on How To Use Weebly.
Here’s a list of three essential tasks:
- Update the homepage header with an image that speaks to your audience and conveys your blog’s focus area.
- Update the name of your website and/or upload your logo. (If you don’t have a logo, use our free logo maker to create one.)
- Update the “About” page.
For more information about building a blogging website, check out our guide on How To Design Your Blog.
Step 3: Update the Blog Settings in Weebly
The “Blog Settings” page allows you to adjust some general settings for your blog and control how you want comments to function.
To access the “Blog Settings” page, either:
- Click on the “Settings” tab, and then click “Blog”; or
- From the blog page, click on the “Blog Settings” button.
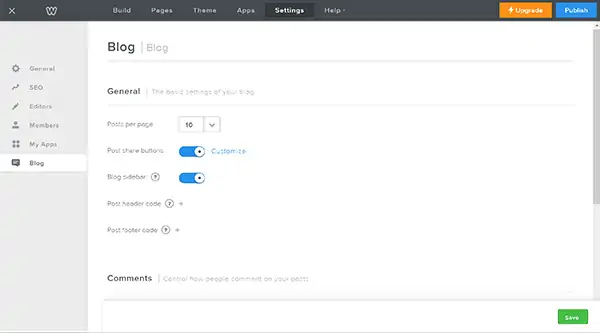
From this page, you can adjust these general settings:
- Posts Per Page: Designate how many posts you want your blog page to display.
- Post Share Buttons: Indicate if you want the Facebook® and/or Twitter sharing buttons to appear with each post.
- Blog Sidebar: Turn the blog sidebar feature on or off.
- Post Header and Footer Codes: Add specialized code to your site’s header or footer code — something you’ll likely never need to do.
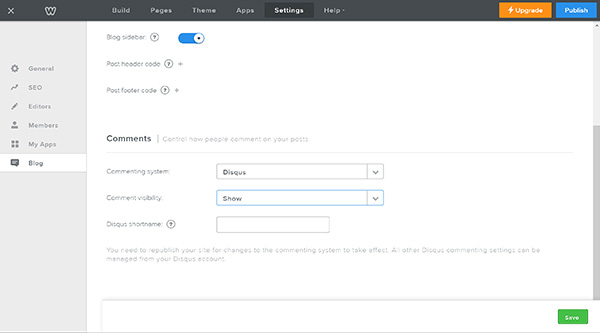
Weebly also gives you three options for managing comments:
- Default: This option uses Weebly’s built-in comment system.
- Disqus: The Disqus commenting platform offers more features than Weebly’s built-in comment system. Check out the “How To Connect Disqus Comments To a Weebly Blog” section below for detailed instructions.
- Facebook: This option requires readers to log into Facebook in order to leave a comment. But, that means they can then share their comment on their Facebook page and potentially drive traffic back to your site.
Pick your preferred comments option, enter any necessary information, click the “Save” button, and then click the “Publish” button.
How To Connect Disqus Comments To a Weebly Blog
While it’s fairly straightforward to use Weebly’s default comment system or Facebook’s plug-in, setting up the Disqus commenting platform takes a bit more work. Here’s how to do that:
- From the “Blog Settings” page, choose “Disqus” as your commenting system.
- If you already have a Disqus account, enter your shortname in the “Disqus Shortname” field and click the “Save” button. If you don’t have a Disqus account, follow the rest of these directions.
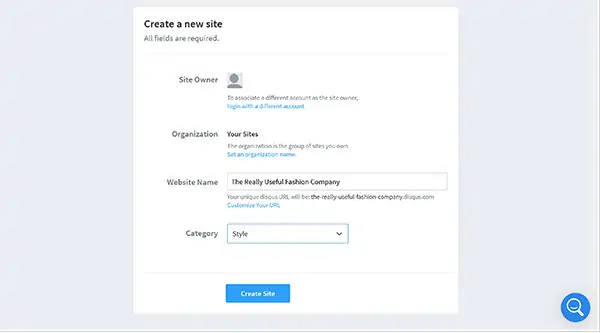
- Click on Disqus.com and follow the directions to sign up. You’ll then have two choices:
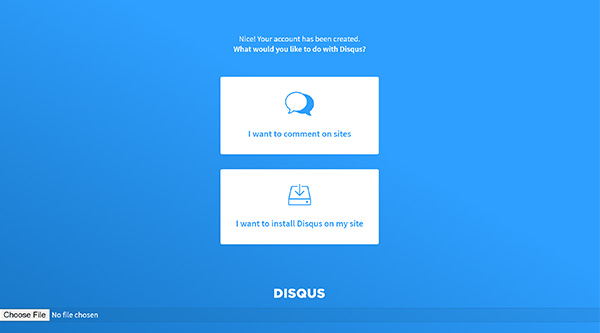
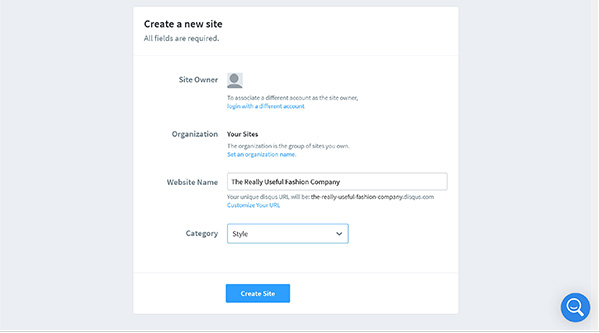
- Click on “I want to install Disqus on my site,” and then enter the name of your website and select your blog’s category.
- Next, select a Disqus plan. We recommend the Plus plan, which costs $11 per month when billed annually, because it won’t place ads on your site.
- Select Weebly as your website’s platform.

- This is where it gets a bit confusing. Disqus shows you a list of steps to configure your Weebly site, which is easy because you only need to copy and paste in your Disqus shortname, but Disqus doesn’t show you your shortname. To find your Disqus shortname, click on the “Settings” tab.
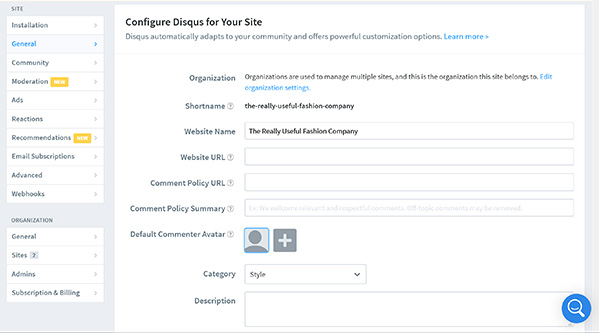
- You’ll then see your Disqus shortname listed. Copy your shortname, return to Weebly’s “Blog Settings” page, and paste it into the “Disqus Shortname” field.

-
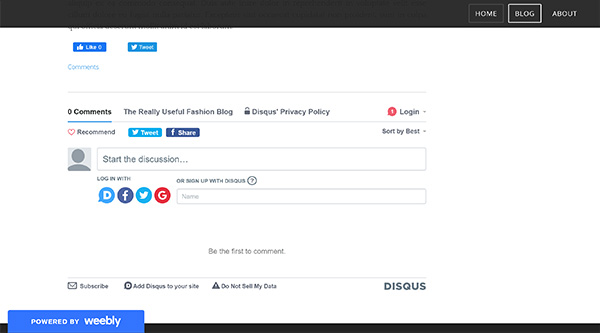
Click the “Save” button, and then click the “Publish” button.
Here’s what the Disqus commenting platform looks like on a Weebly blog:


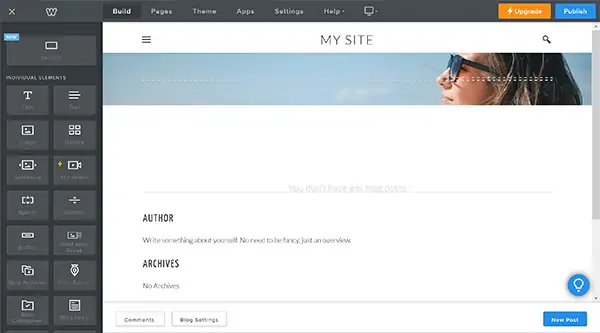
Step 4: Customize the Weebly Blog Sidebar
The blog sidebar gives readers a short snippet about the blog author, an “Archives” menu from which they can access past posts by date, and a “Categories” section that displays the topics tagged to the current post.
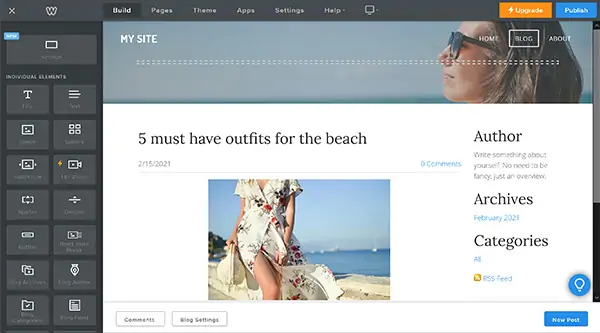
But, the blog sidebar doesn’t always appear on the side of a post. Sometimes it shows up under each post. Your chosen theme will determine its location.
You can choose whether or not you want to have a blog sidebar in the “Blog Settings” page (Settings > Blog > Blog sidebar).
To customize the blog sidebar:
- Add a short sentence or two about yourself as the author under the “Author” section. Explain why you have the authority to write for this blog.
- Consider adding an author photo by dragging an “Image” block under the “Author” section and uploading a small photo of yourself.
- Drag a “Search Box” and/or “Social Icon” block over to the blog sidebar if you want it to include those features.
- Hover over any item you don’t want, and then delete it by clicking the “x” in the upper-right corner.
Step 5: Create Your First Weebly Blog Post
The process for creating a blog post in Weebly looks similar to creating the website.
For help with writing the content of your blog post, read our guides on How To Write Your First Blog Post and 25 Tips for How To Write a Great Blog Post.
Create a New Post
Begin creating a new post by clicking on the “Blog” page from your navigation bar.
Next, click on the “New Post” button.
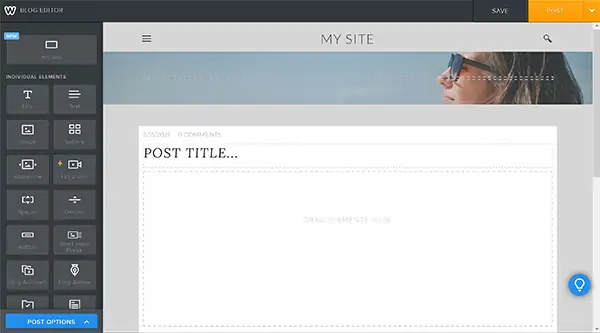
Click where it says “Post Title” and enter the title for your blog post. Make it engaging because this title will appear when you share your blog post. It should intrigue people enough to make them click and read your post.
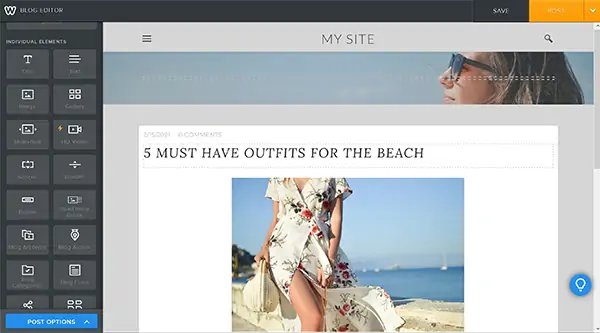
Build out the rest of your post using various blocks. For example, use the:
- Title block to organize text into subsections
- Text block for the main body of your content
- Image block to illustrate your main points
- HD Video or YouTube block to add interest
- Spacer block to break up the text and create plenty of white space
Once you finish writing your post, you still have a few more tasks to complete.
Need images for your blog posts? Check out our article on 11 Tools for Finding Images for Your Blog.
Update Your Post Options
Before you publish your new post, set your blog post options. These include publication timing, whether or not you want to enable comments, and if you plan to use categories.
To update these options, click the “Post Options” button in the lower-left corner.
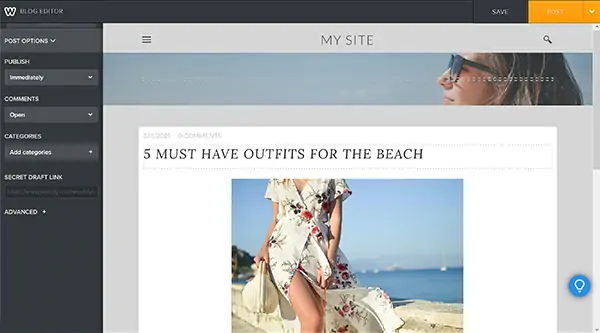
From the “Post Options” menu, you can decide if you want to:
- Publish either “Immediately” or at a “Scheduled Time” when you click the “Post” button.
- Set Comments as “Open,” “Closed” (no comments allowed), or “Require Approval.”
- Select or add Categories for this post.
Add SEO for Blog Posts
Each blog post has its own search engine optimization (SEO) post title and description.
To update these SEO fields from the “Post Options” menu, click on “Advanced.”
Complete the SEO fields by:
- Changing the “Permalink” if you want to specify the URL.
- Making the “SEO Post Title” 50 to 60 characters long.
- Making the “SEO Post Description” 155 to 160 characters long.
For more information, read our detailed guide on SEO for Bloggers.
Publish Your Post
To publish a post, click on the “Post” button.
NOTE: If you haven’t published your website yet, this message will appear:

Your post will display when you publish your website.
You’ll need to write many more blog posts to maintain your blogging business. To help you plan ahead, read our guide on How To Make a Blog Posting Schedule.
Step 6: Publish Your New Weebly Site
After you finish designing your blog and writing your first blog post, it’s time to share it with the world.
- To publish your site, click the “Publish” button in the upper-right corner.
- To connect to your permanent domain, click on the “Settings” tab. Then click “Change” next to “Site Address” and follow the directions.
For detailed instructions, check out our step-by-step guide on How To Make a Weebly Website.
With your blog up and running, you should now focus on driving traffic to your content. For tips and best practices, check out these articles:
Examples of Weebly Blogs
Still looking for some inspiration? Check out these five example blogs created on Weebly.
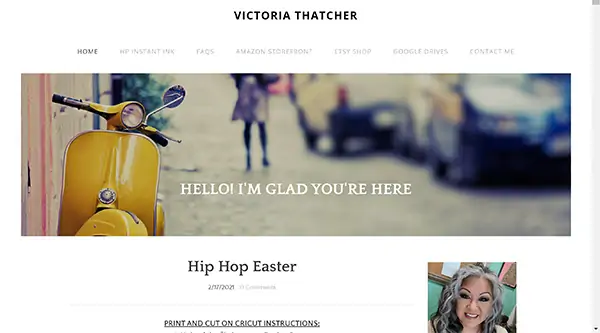
The Affiliate Marketing Blog
Victoria Thatcher runs a blog on which she gives away free images for Cricut. But, her blog also has links to Amazon and other places where she’s an affiliate. With affiliate links, Victoria earns money when someone follows a link and makes a purchase.
The Podcast Blog
The Water Quality Association creates a blog post each time it produces a new podcast. It uses the SoundCloud online audio distribution platform to embed podcasts directly on its Weebly blog.

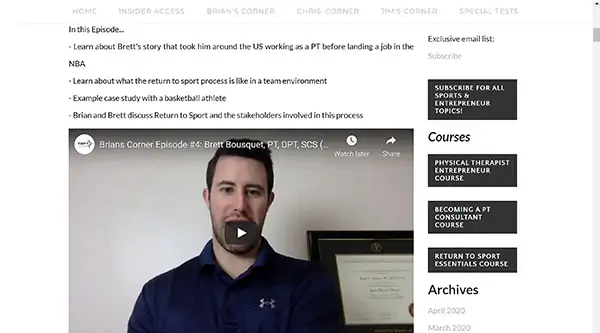
The Video-Heavy Blog
The Student Physical Therapist website includes a blog focused on sports and entrepreneurship. It often uses videos to enhance its blog posts.
The Image-Heavy Blog
The Gulf Coast Humane Society uses lots of images (as well as links) to enhance the blog posts on its website.

The Service-Focused Blog
Ready Set Go Website Design uses its blog to promote its business and the services it offers.
Moving Forward
Now that you have a good feel for what creating and managing a blog in Weebly looks like, it’s time to get started on your own. Bookmark this page so you can return to it for guidance and inspiration.
Create Your Blog With Weebly
Weebly makes it easy to run just about any type of blog or content website. Get started with Weebly for free by clicking the button below.