How to Build an Online Store in 2026: Step-By-Step Guide
If you’re a small business owner who’s looking to create an online store, you may be feeling overwhelmed at the prospect of getting started. Creating an online store for your business can be a daunting process if you’re inexperienced at using ecommerce platforms.
In this guide, we will walk you through the steps to creating a simple online store using the GoDaddy website builder. By the end of the tutorial, you should have a basic grasp of how to add products, take payments, and update tax and other essential information to build an online store from scratch.
Make sure your business website has everything it needs to stand out. Be sure to read our How to Build a Website guide for more information.

Before You Begin
We know you’re ready to start creating your website immediately, but it’s a best practice to take some time to plan it out first. While you can certainly start the process without this step, a little planning will make it easier.
Along with this guide, check out these other helpful articles to understand if GoDaddy is the right tool for you and your business.
Now, let’s dive into the six simple steps to getting your online store up and running with GoDaddy.
Skip Ahead:
Step 1: Sign Up for GoDaddy
The first step in building a new website for your small business involves creating a GoDaddy account. It’s free to sign up and build your website, but we recommend upgrading so you can use all of GoDaddy’s features.
If you’ve already created your website with GoDaddy, feel free to skip ahead to the Add an Online Store section now.
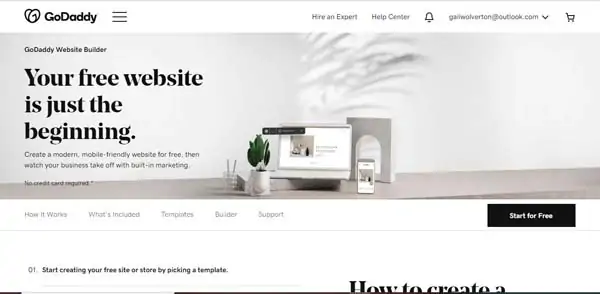
Once you’ve navigated to GoDaddy.com click on the “Start for Free” button to sign up.
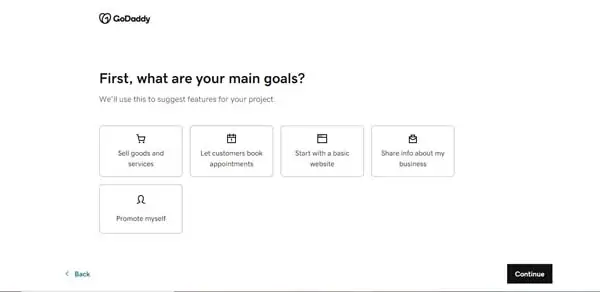
Once you sign up, GoDaddy will ask you to choose the purpose of your website. For this guide, we will be selecting “Sell goods and services.” If you choose this option, you will be asked a couple of quick questions about which platforms you intend to use and how much revenue you anticipate annually.
After this, you will be asked to choose the industry category that matches your business. Choose wisely because the industry you pick will influence the website theme GoDaddy assigns to you.
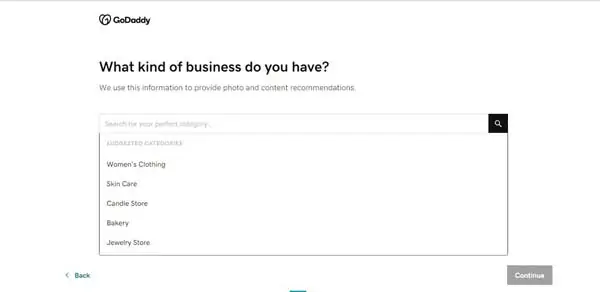
Because we’ll create an auto repair shop website for the purposes of this tutorial, we searched for that industry (and found it available). If your industry isn’t available, choose the closest category.
Next, GoDaddy will ask for your business name to serve as the name of your new website. Enter your business name and then click the “Next” button.
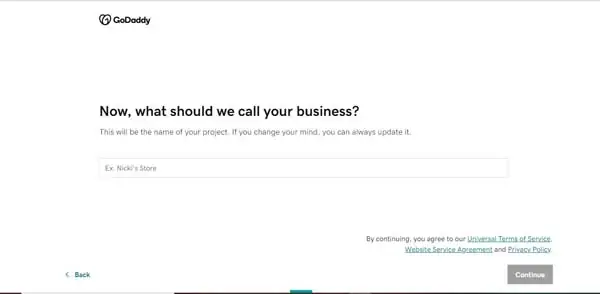
If you don’t know the name of your business yet, use our Business Name Generator to select one.
That’s all it takes to create a straightforward website in GoDaddy. But, you still need to customize the words and images to match your specific business.
Upgrade Your Site
Ideally, you’ll upgrade now so you can access the premium features GoDaddy provides as you create your website.
For most businesses, we recommend the GoDaddy Standard plan. It provides everything most service-based businesses need. This includes the search engine optimization (SEO) tools vital to ensure people find your business via an online search.
If your business needs a website capable of supporting recurring appointment scheduling, then choose the GoDaddy Premium plan. If your site will include an online store, then you need the GoDaddy Ecommerce plan.
Select a plan and complete your purchase.
To learn more about the different pricing tiers GoDaddy has to offer, be sure to read our GoDaddy Pricing and Plans article.
Change the Theme
The GoDaddy website builder automatically creates a site for you based on what it thinks works best for your industry. If you prefer a different look, you can easily change the theme.
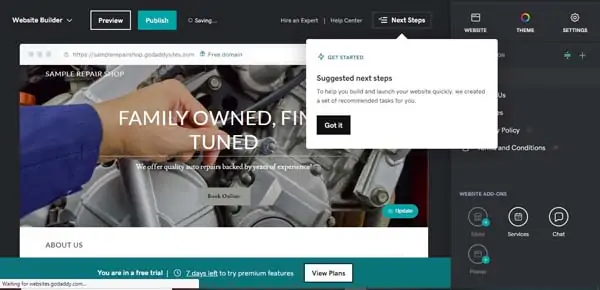
You’ll edit your website from the GoDaddy website builder dashboard.
To change your site’s theme, click on the “Theme” tab and then click the “Try a New Look” button.
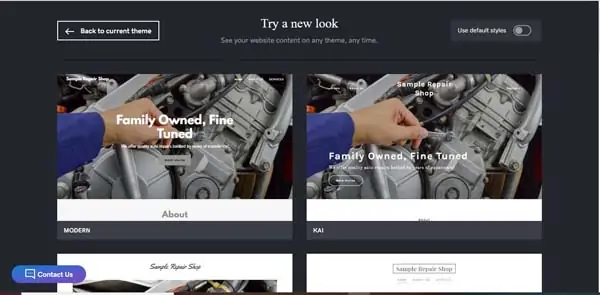
Scroll through the available themes, and then click the “Select” button when you find one you like. We chose the “Modern” theme for our example website because we like how the business name appears in the upper-left corner with the menu bar on the right.

You can click on the “Color,” “Fonts,” or “Buttons” drop-down arrows if you want to further customize your theme.
Looking for detailed instructions on how to set up your GoDaddy website? Read our How to Use GoDaddy article for more.
Step 2: Set Up the Page Structure
In the GoDaddy website builder, each industry’s website template comes with its own set of pages. The next step in building a great website involves creating a page structure that best serves your specific business needs. Most small, service-based businesses need these four pages:
- Homepage: As the first page people visit on your site, it should provide an overview of your business.
- About Page: This page offers more information about you, your team, and your business.
- Services Page: This page describes the services your business offers.
- Contact Page: This page features your business contact information, such as your phone number, email address, physical address, hours of operation, and a contact form.
If you’re looking for a more in-depth discussion about how to set up your website structure, be sure to check out our How to Structure a Website article.
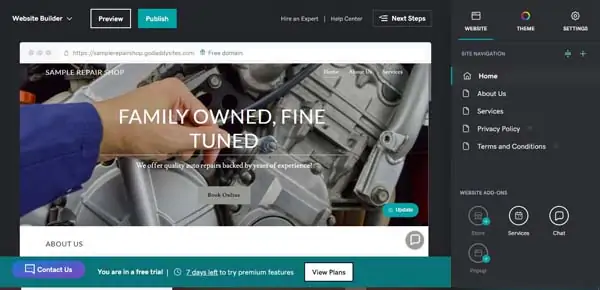
Click on the “Website” tab to see your site’s existing page structure listed under “Site Navigation.”

For this tutorial, we want our GoDaddy example website to include the following pages: “Home,” “About,” “Services,” and “Contact.” That means we need to delete the “Privacy Policy” and “Terms and Conditions” pages and rearrange the order of the remaining pages.
To add a “Contact” page:
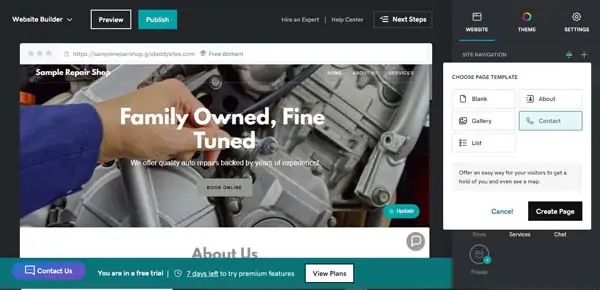
- Click the “+” icon on your Site Navigation menu.
- Click “New Page.”
- Click “Contact.”
![How to build an online store screenshot.]()
- Click “Create Page.”
- Choose a title for your page and click “Done” to add the page to your website.
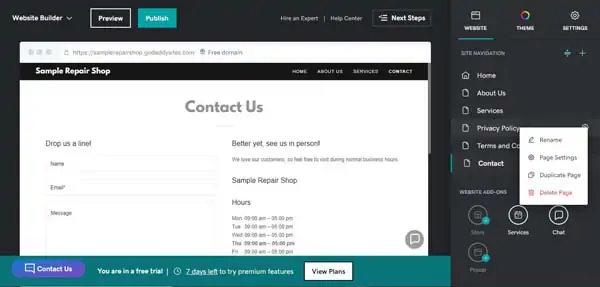
To delete pages:
- Hover over the page you wish in the right sidebar. When the gear icon appears, click on it to open a submenu.
![How to build an online store screenshot.]()
- Click on the “Delete Page” option and confirm you really want to delete this page.
To reorder the pages:
- To the right of the “Site Navigation” header, you’ll find an icon that looks like an equal (“=”) sign with an arrow above and below. Click on that icon to reorder the pages.
- Click on the “Contact Us” page, and then drag it to the bottom of the list.
- Click on the “Done” button.
Step 3: Upload Your Logo
After creating a GoDaddy account, choosing a theme, and adding the pages you’ll need, it’s time to customize your site. Let’s start with your logo.
If you don’t have a logo yet, use our free logo maker to create one.
Add Your Business Logo
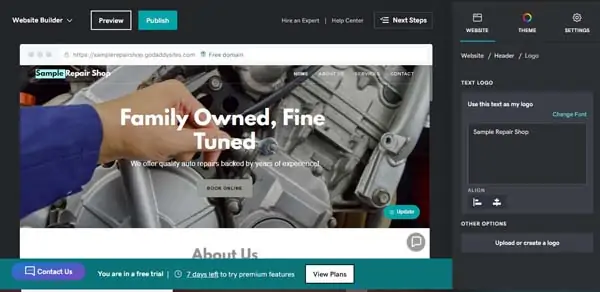
Your website’s navigation bar can either display your business name or your logo. Our chosen theme places our business name in the upper-left corner of our example website.
To add your business logo:
- Click on your business name in the upper-left corner of your website. A sidebar with logo options will then appear on the right side of the screen.
![How to build an online store screenshot.]()
- Click on the “Upload a logo” button.
- Select your logo — preferably a transparent, portable network graphics (PNG) file — from your computer.
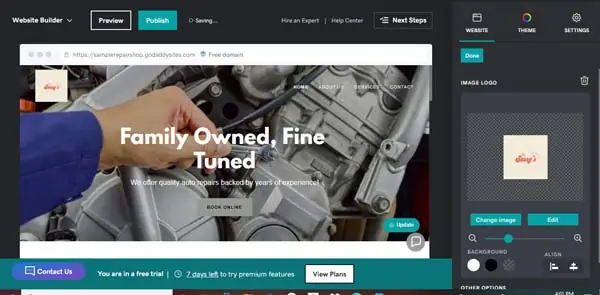
- Click on the “Insert” button. Your logo will then appear in the upper-left corner.
![How to build an online store screenshot.]()
- Click on the “Done” button.
Some logos may appear too small in the navigation bar. In this case, don’t add your logo and instead use text.
Step 4: Update the Header Area
The header area represents the most important part of your website. Site visitors will make a quick judgment about your business based on what they see when they first arrive on your website. This judgment happens before visitors start to scroll down the page so they’ll leave your site if they don’t like what they see.
The main elements of the header area include:
- A large image that covers the top of the homepage
- A headline (and subhead if your theme allows)
- A call-to-action (CTA) button
Read on to learn how to tailor each of these elements to your business.
Make sure you have cohesive branding across your business and website. Read our How to Choose a Great Website Color Palette and Best Fonts For Websites guides.
Change the Header Image
The header image that appears at the top of your website is the most important image on your site. It should give readers a clear picture of your business’s purpose and offerings.
Good ideas for header images include:
- An external view of your business
- A picture of your business in action
- Happy people using your products or services
- A picture of your products or services
Pick a Header Image
Ideally, you’ll use one of your own high-quality photos of your business for your header image. But, many business owners don’t have such images when they first start out.
If you don’t have your own personal photo to use, GoDaddy offers free images specific to your industry. You can also search a website like Unsplash.com and download a royalty-free image. Just make sure the image has a horizontal orientation.
Note: Always ensure you have the legal right to use the images you display on your website. Don’t just search for images via Google and use them. Make sure you have permission to use any image on a website.
Replace the Existing Header Image
Once you choose your preferred header image, it’s time to replace the image currently occupying that space with the new one.
To replace the existing header image:
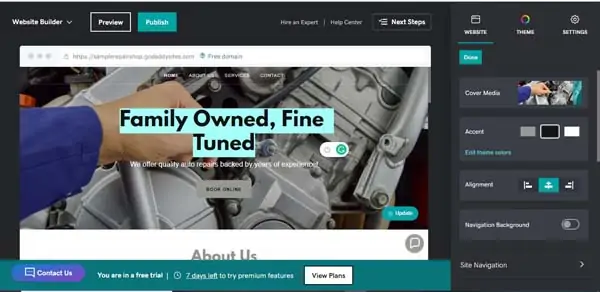
- Click on the existing image, and then click on the “Cover Media” button to open the image menu on the right side of the screen.
![How to build an online store screenshot.]()
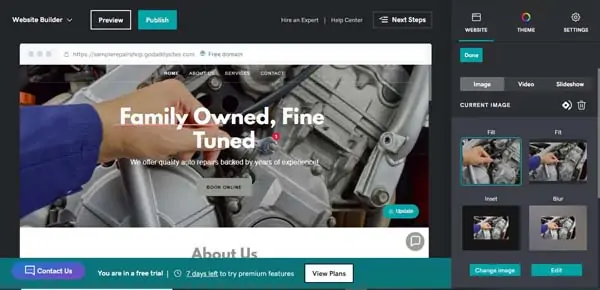
- Click the “Change image” link.
![How to build an online store screenshot.]()
- From here, you can either click the “Add images” button to upload your own image or scroll down to view stock images related to your industry.
- Follow the prompts to select a new image, and then click the “Insert” button.
- In the box below the “Describe this image” subhead within the menu, enter a description of the picture. Screen readers read this description for visually impaired users when they visit your website.
- Click on the “Done” button.
Change the Headline
You want the headline to clearly convey what your business has to offer visitors. Be descriptive, but avoid anything that sounds too cute.
To change the headline, triple-click on the headline to highlight it and then type in your new headline.
Add a Subhead
The “Modern” theme we chose for our example website doesn’t have a subhead, but, if it did, changing it would follow the same process as changing the headline. Just triple-click on the existing text and type in a new subhead.
Update the CTA Button
The CTA button that appears in the header area of your website should take your visitors one step closer to becoming customers.
Some ideas for effective CTA buttons include:
- Call ###-###-####
- Contact Us
- Schedule Now
- Buy Now
To change the CTA button:
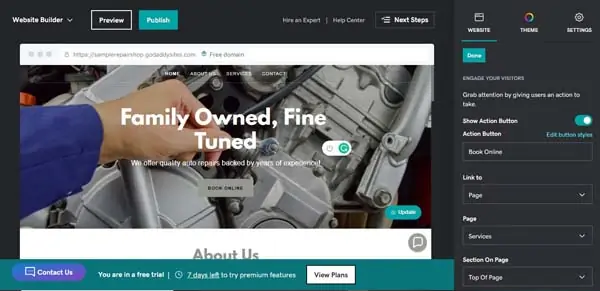
- In the menu on the right side of the screen, scroll down and click on the “Action Button” tab. This will open a submenu with several options you can edit.
![How to build an online store screenshot.]()
- In the text field under the “Action Button” subhead, change the text to whatever you want to appear on the button.
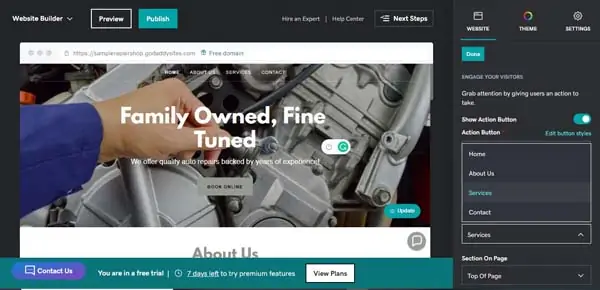
- Click on the “Link to” drop-down menu to reveal the four types of items to which you can link a CTA button: a page on your website, the website URL of a page not on your website, a phone number, or an email address.
![How to build an online store screenshot.]()
- Choose the type of item to which you want to link your CTA button, and then update the fields that appear based on your choice.
- Click on the “Done” button.
Step 5: Add an Online Store
The final thing we want to do is add an online store. This’ll let us sell any products we may wish to offer through our website. In this case, it could be a spare tire or a specialty wrench. Whatever your business is, you can easily sell your products with GoDaddy’s online store.
To add an online store, under the website tab, click “Add a Store.” This will automatically create an online store section for your website
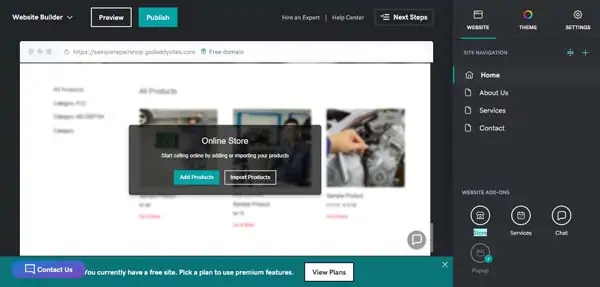
For our purposes, we will be adding products manually, but you may upload a comma-separated values (CSV) file if you wish.
To add products:
- Once you’ve added your online store section, click “Add Products.”
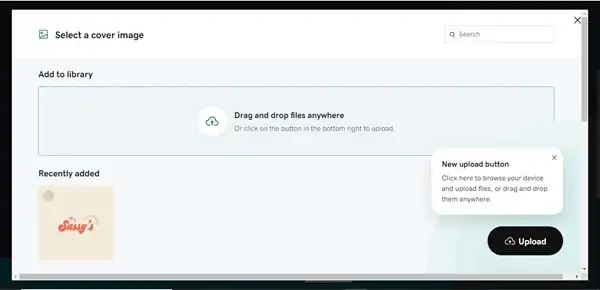
- From the popup menu that appears, click add images to add a product image.
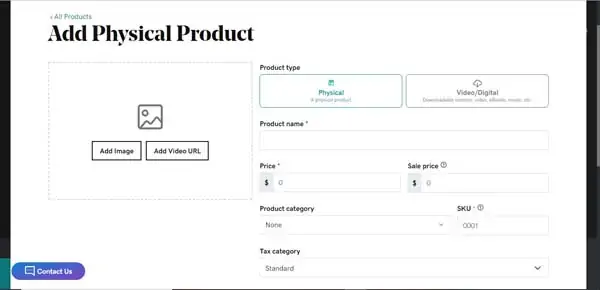
![How to build an online store screenshot.]()
- Choose a product name in the corresponding input field.
- Choose a price and sale price, if applicable.
- Choose a stock-keeping unit (SKU) number.
- Choose a product category.
- Scroll down to add a description.
![How to build an online store screenshot.]()
- Choose inventory options, e.g., number of units in stock.
- Add shipping options and create a search engine URL in the corresponding tabs.
- If your product is non-physical, like an ebook or a song, click the Video/Digital tab and follow the preceding directions to continue.
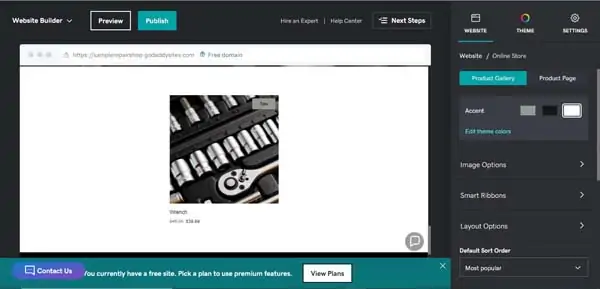
- Click “Save” and your product will be added to your website.
- Your product is now live in your online store section.
![How to build an online store screenshot.]()

Move Your Online Store Section
Chances are, you don’t want your online store to appear wherever GoDaddy automatically moves it. You can create a designated page for your products by using the directions included in the Set Up the Page Structure portion of this guide. Once you have done this,
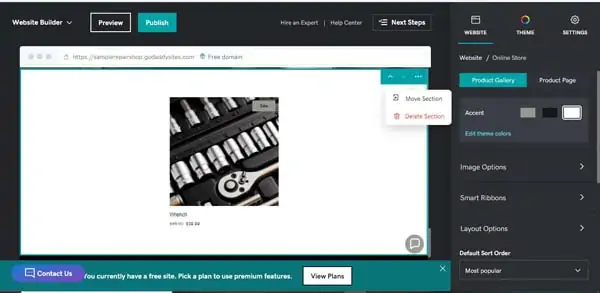
To move your online store section:
- Hover over the section until a blue toolbar appears in the upper-right corner.
- Click on the ellipsis icon, then click “Move Section.”
![How to build an online store screenshot.]()
- Choose the destination page to move your section.
Update Shipping Settings
To ensure that your customers receive their products in a timely manner, it is vital to update your store’s shipping settings.
To update shipping settings.
- From your website builder dashboard, click on your online store section.
- In the toolbar that automatically opens on the right side, scroll to find “Shipping Settings.”
![How to build an online store screenshot.]()
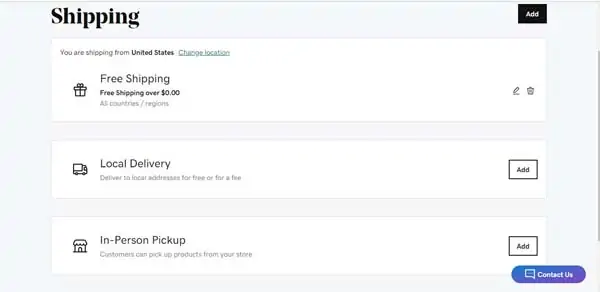
- Click to continue. A new tab will open.
- Under free shipping, click the pencil icon to change the minimum order amount for customers to qualify for free shipping.
![How to build an online store screenshot.]()
- Click the trash icon to delete this option.
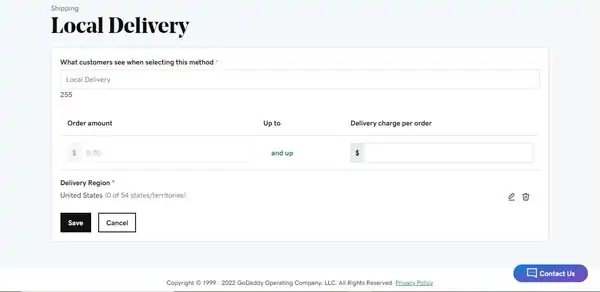
- Click “Add” next to local delivery to add this option and update settings.
![How to build an online store screenshot.]()
- Choose the name customers will see for this option, as well as the minimum order amount and delivery charge.
- Click “Save” to continue.
- To add in-person pickup, follow the preceding instructions and add a pickup location and instructions. E.g., “Please call when you arrive at the shop.”
- Click “Save” to continue.
Update Payment Settings
To ensure that you are able to smoothly process payments, be sure to update payment settings using the following directions.
To update payment settings:
- From your website builder dashboard, click on your online store section.
- In the toolbar that automatically opens on the right side, scroll to find “Payment Settings.”
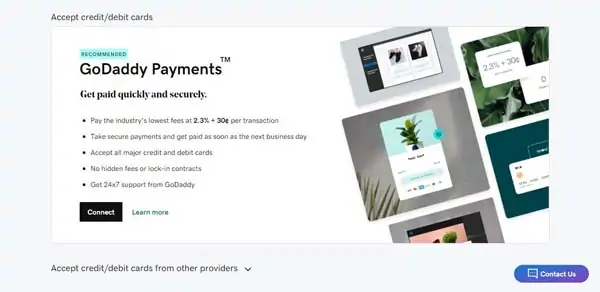
- Click to continue. A new tab will open.
- To automatically take payments through GoDaddy, click “Connect” below this option.
![How to build an online store screenshot.]()
- Enter in your personal and business details, including name, address, social security number (SSN), and employer identification number (EIN) if applicable.
- Click confirm and follow the prompts to connect to your bank account.
- You may also take payments with PayPal by finding this option on the payments menu, clicking “Connect” and following the prompts to sign in to your account
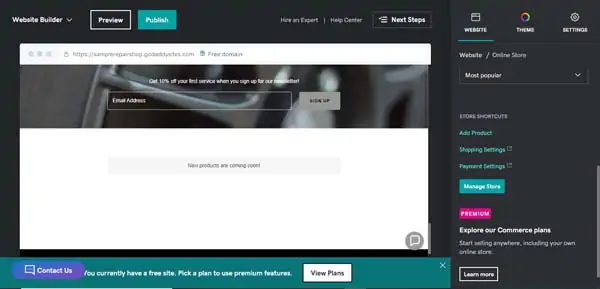
Step 6: Preview and Publish Your Online Store
Now that you’ve added some products and connected your payment and shipping info, all that’s left is to publish your website.
From the website builder dashboard, click “Preview” to be navigated to a webpage where you can view your site in both browser and mobile formats. If everything looks good, return to the website builder dashboard and click “Publish” in the upper-left corner.
If you have not chosen your domain name, you will be asked to do this now. For more information on how to publish to a subdomain or custom domain, read our How to Use GoDaddy Website Builder in 2026 guide.
If you still need to choose your domain name, use our free Domain Name Generator tool.
Final Thoughts
Congratulations! You have successfully created an online store using GoDaddy’s easy-to-use website builder. You can now sell products and take payments to boost your digital sales efforts.
For more information on whether GoDaddy is the right tool for your small business, read our in-depth GoDaddy Website Builder Review.
Get Started With GoDaddy
GoDaddy makes it easy to get your online store up and running in a short amount of time. TRUiC readers receive a discount on any GoDaddy plan by clicking the button below.