How To Use the GoDaddy Website Builder in 2026
The GoDaddy website builder is one of the best website builders for small business owners. It’s easy to use and includes all the features you need. Of course, even a simple website builder takes some getting used to if you’ve never built a website before. That’s where this guide comes in.
Keep reading to learn how to use GoDaddy to build a website for your business. We’ll take you through all the main tasks needed to create a site, including customizing themes, adding images, adding text, adding new sections, implementing social media tools, and connecting a custom domain.
Recommended: To better understand this guide we suggest already having a GoDaddy account or to try GoDaddy for free.
Before You Begin
We recommend saving this page to your bookmarks to return to it for later use. We cover quite a bit of ground in this article and pushing through all the work all at once might feel exhausting. So, take your time and circle back as needed.
Skip Ahead:
Getting Started With GoDaddy
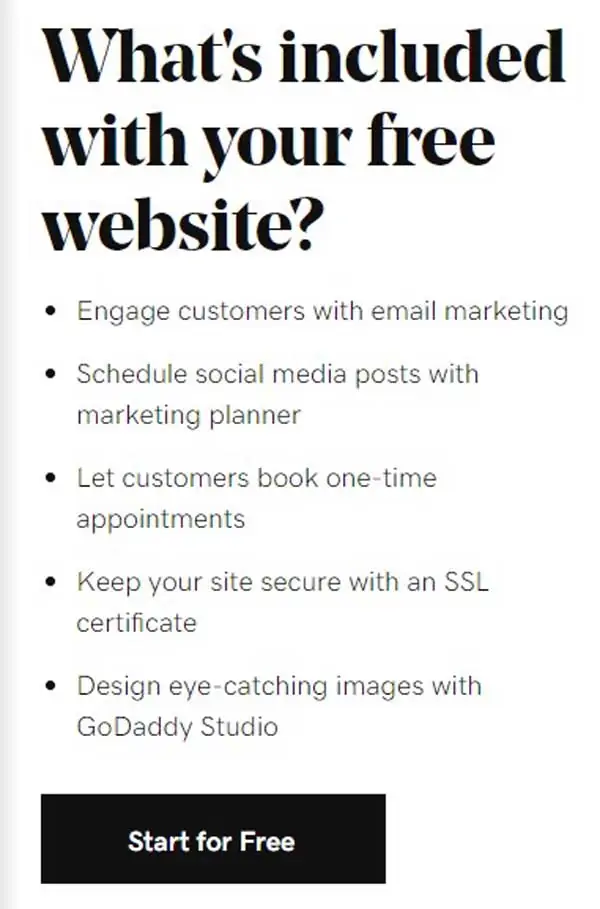
First, you need to create a GoDaddy account. Simply head over to GoDaddy.com and begin a free trial. You get seven days to use all the features of the GoDaddy website builder for free. After seven days, you can still use the builder but you’ll need to sign up for a plan to use all the features.
Already have a GoDaddy account? All you need to do is log in.
When you sign up for your free trial, GoDaddy will ask you a series of questions about your website plans.
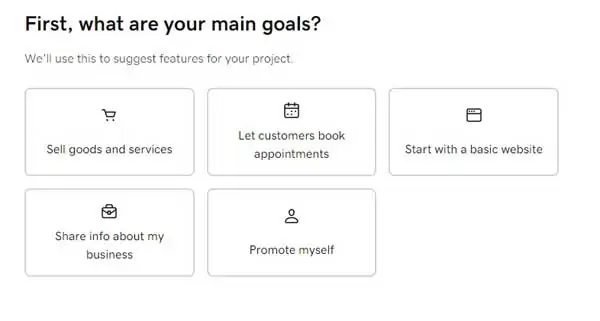
Answer the questions to the best of your ability so GoDaddy can lead you to the website theme that’s most likely to suit your business goals.
Note that GoDaddy is increasing its website builder’s online store/ecommerce capabilities. If you’re looking to build an online store and want to see how GoDaddy compares, check out our Best Ecommerce Platforms Review.
If you want more practice working with free website builders, you can find other free options that we like in our review of free site builders.
If you want a more in-depth discussion of how to sign up for a GoDaddy account, check out our How To Make a GoDaddy Website article.
Customizing Your Theme
Part of the account sign-up process helps GoDaddy find the right website theme for you. What makes using the GoDaddy website builder so easy is that it does most of the work for you. Specifically, it provides you with a theme that closely matches the industry you chose so all you have to do is casually update content.
In this example, we went with a beauty products store. The GoDaddy website builder gave us a relevant theme that we just have to customize.
Once you answer GoDaddy’s initial questions and select a theme, GoDaddy will take you to the “Website Builder” page — the main area where you’ll build and edit your site.
If you need some inspiration, check out several other GoDaddy websites in our GoDaddy Website Examples article.
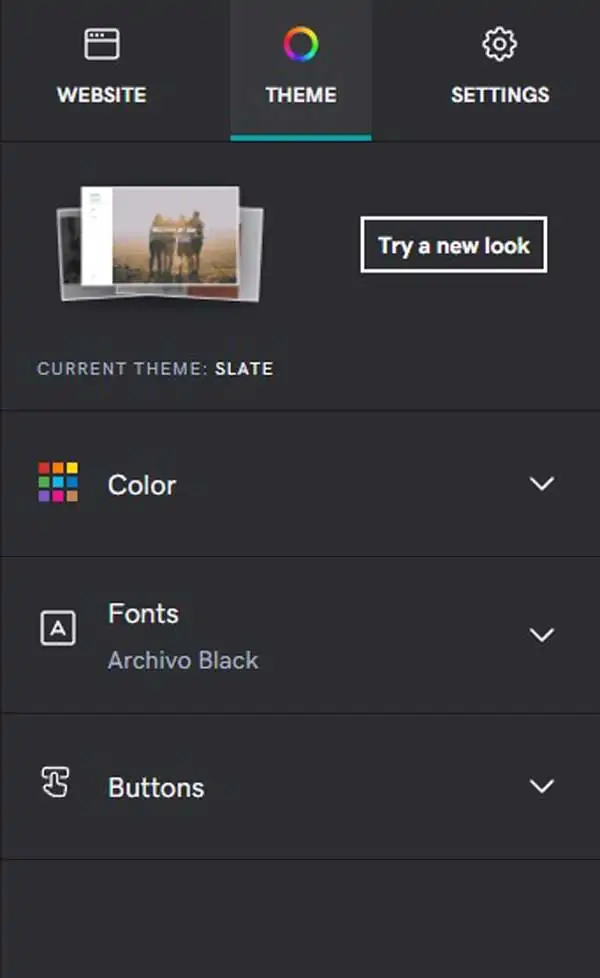
If you want to use a different theme for your site, updating or changing the theme is easy.
To change a GoDaddy theme in the Website Builder:
- Select “Theme” from the tabs in the upper-right corner of the screen.
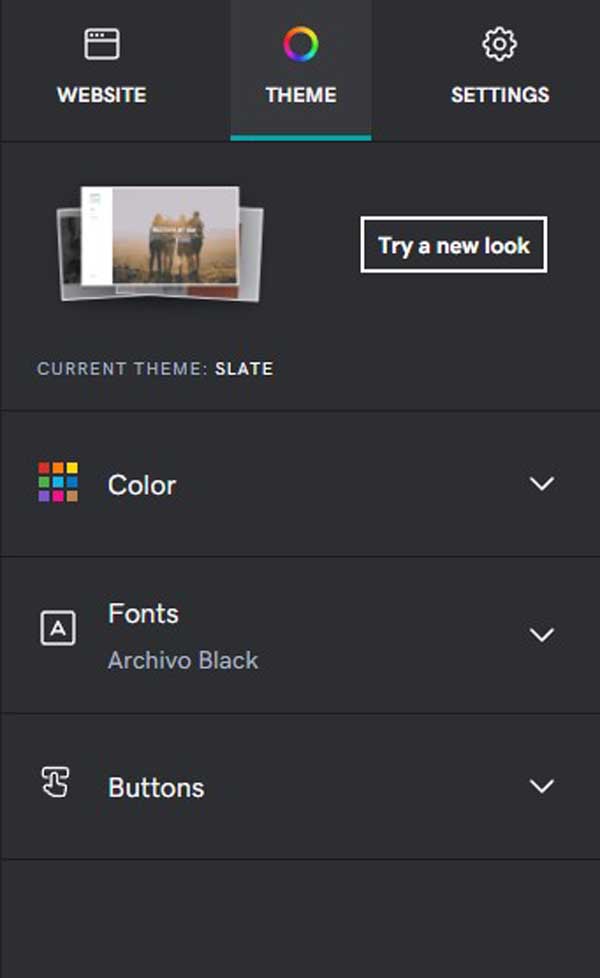
- Click on the “Try a new look” button.
- Select and click on a theme from the list provided. The GoDaddy website builder will then convert your current theme to the new theme.
To change the color of a theme:
- Select “Theme” from the tabs in the upper-right corner of the screen.
- Click on the “Color” section.
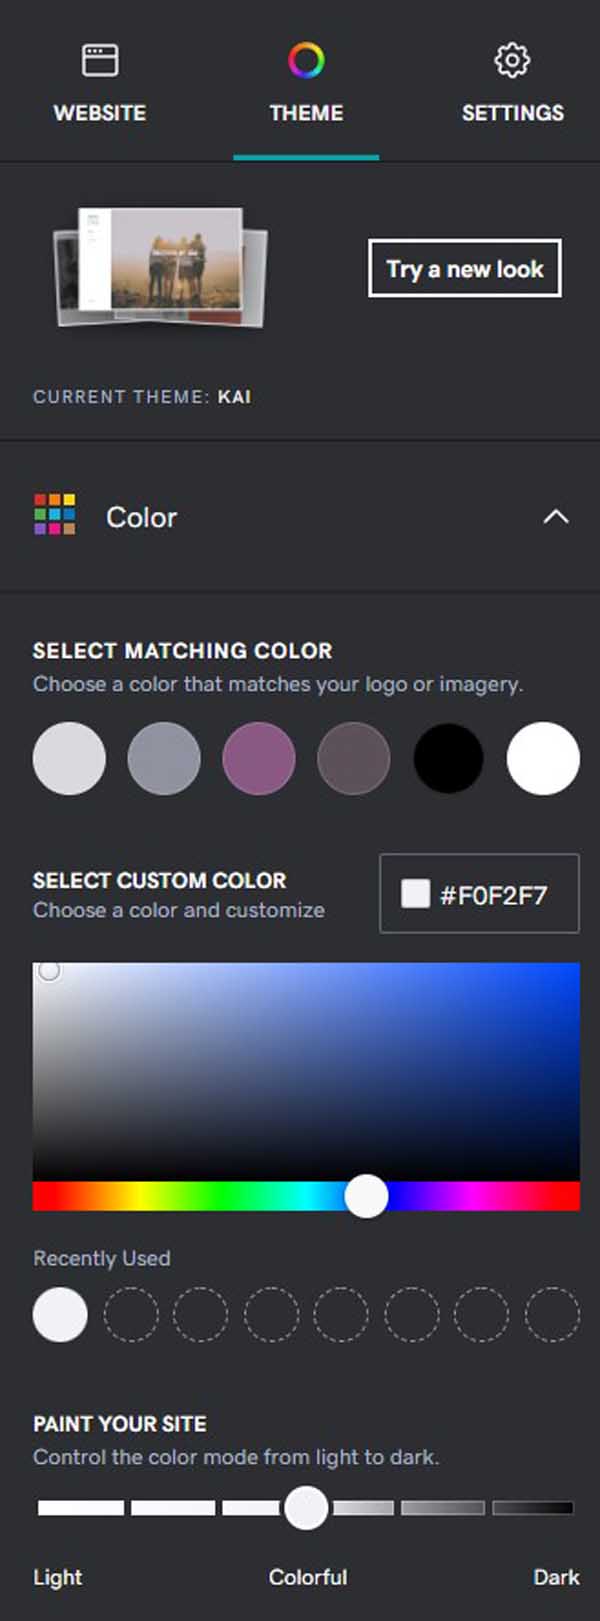
- Click on the options you want, which can include color matching, custom colors, and painting your entire site from light to dark.

Learn more about finding a color scheme for your business and branding by reading our How to Choose a Great Website Color Palette guide.
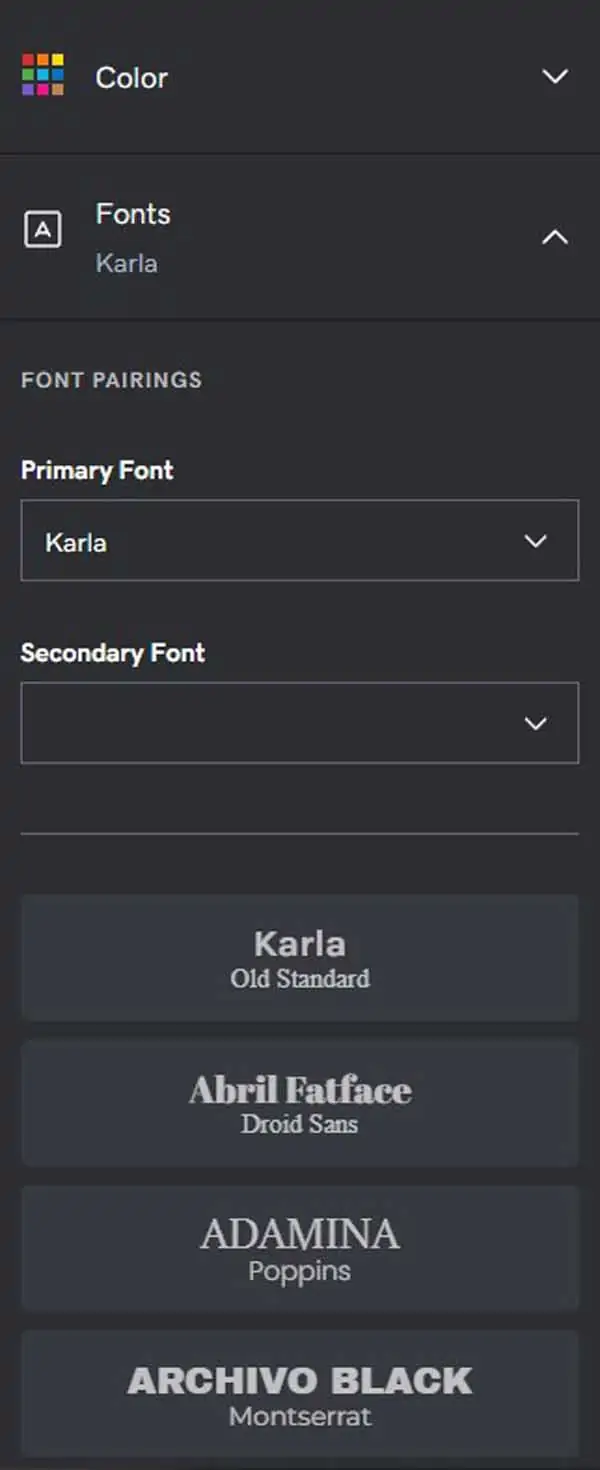
To change the font:
- Select “Theme” from the tabs in the upper-right corner of the screen.
- Click on the “Fonts” section.
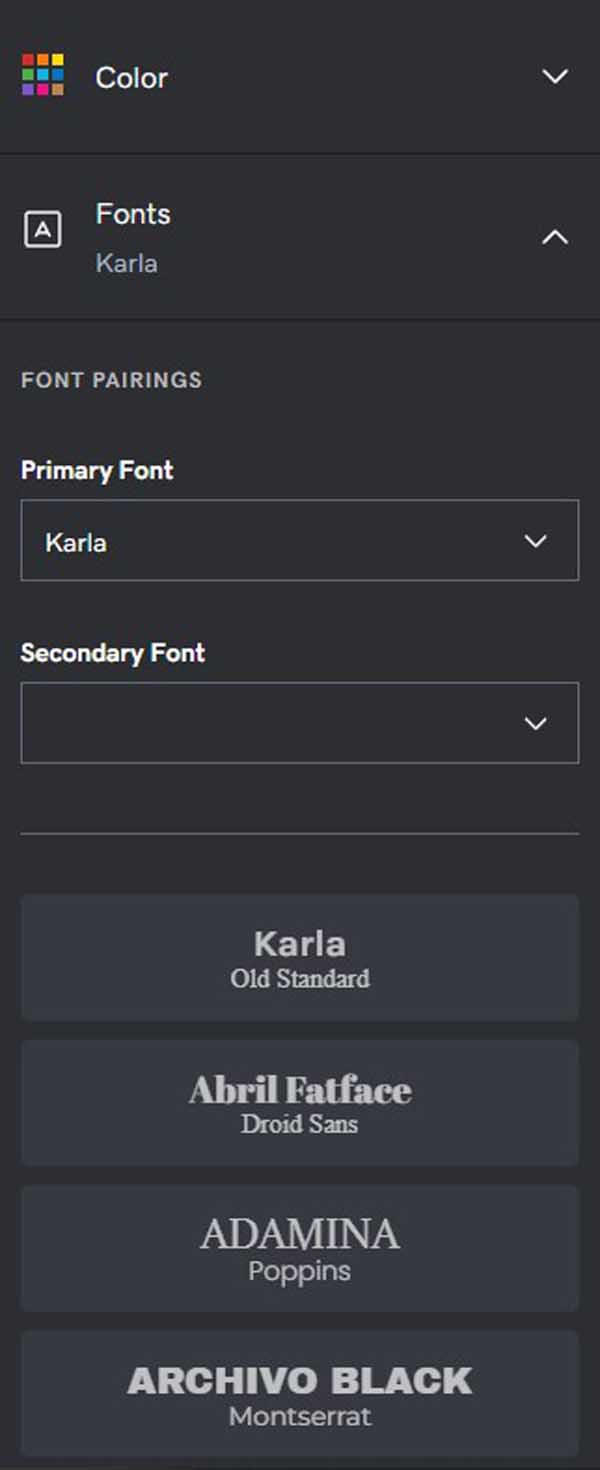
- Choose the font you prefer.
For a deeper look at how important choosing the right font is, read our Best Fonts For Websites guide.
Adding Your Own Images
The GoDaddy website builder makes uploading your own images a breeze. It also has a handy free image library.
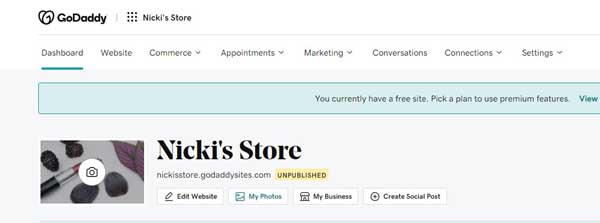
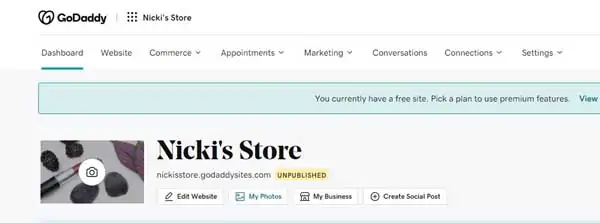
You can upload your own images to the “Media Library” for use on your website. Some sections, like the homepage header, will let you access the Media Library to change images while others won’t. However, you can always access the Media Library from the “Dashboard” — the primary area where you access all of your GoDaddy website services (e.g., the Website Builder, Commerce, Appointments, and more).
To upload images:
- Select “Dashboard” in the upper-left corner of the screen.
- Select “My Photos” in the drop-down menu that then opens.
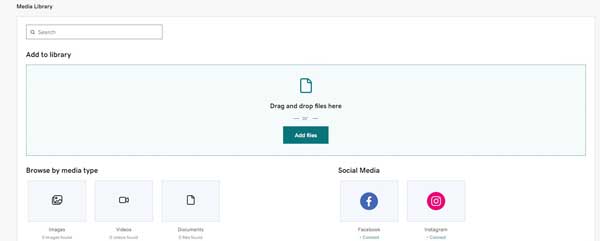
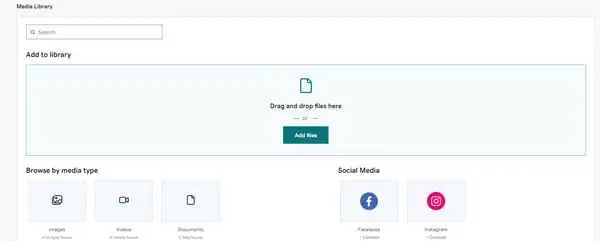
- Drag and drop your images or click on the “Add files” button and choose the images you want to upload.
Once you have the images you want in the Image Library, you can use them on your website.
To add images to your website:
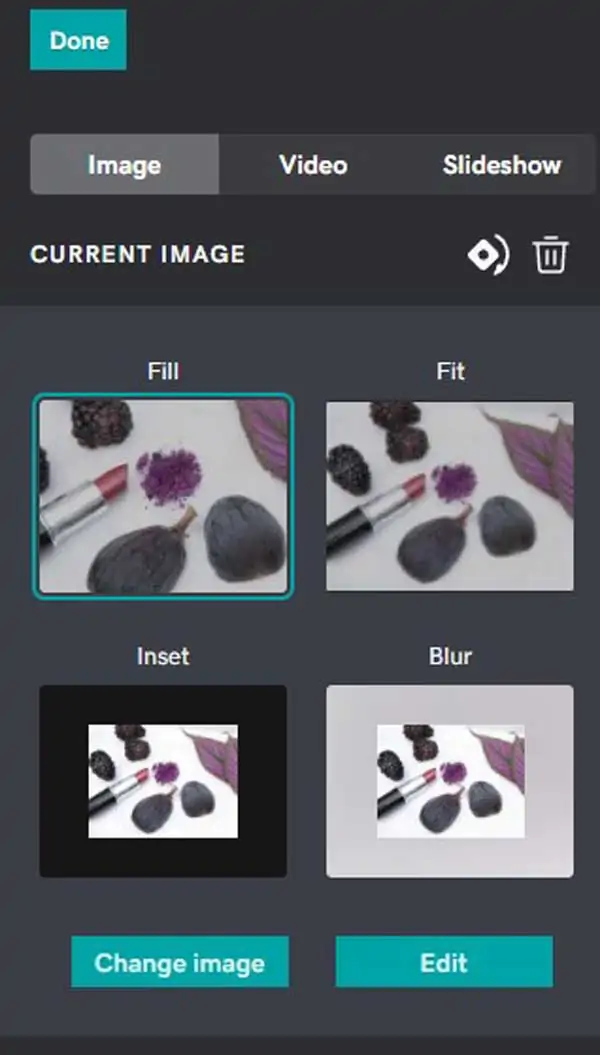
- From the Website Builder (you can access it by selecting “Edit Website” from the Dashboard), select the section to which you want to add an image. For example, you can add an image to the homepage header.
- Select “Cover Media.” (Note that the name of the option to add images may vary. Sometimes it’s called “Cover Media,” sometimes it’s called “Media,” and so on.)
- Click on the “Change image” button.

- Click on the image you want, and then a checkmark will appear in the upper-left corner of that image.
- Select “Insert.”
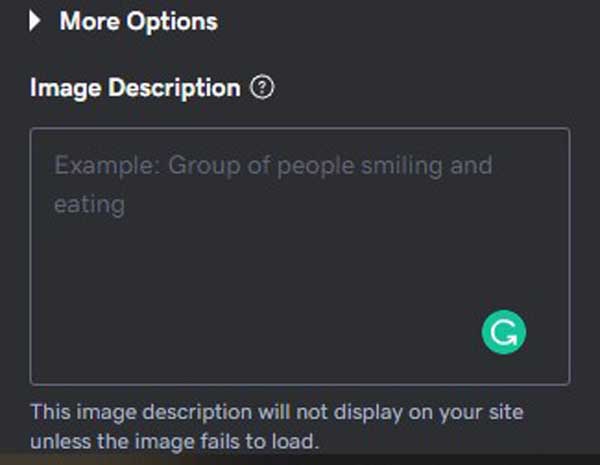
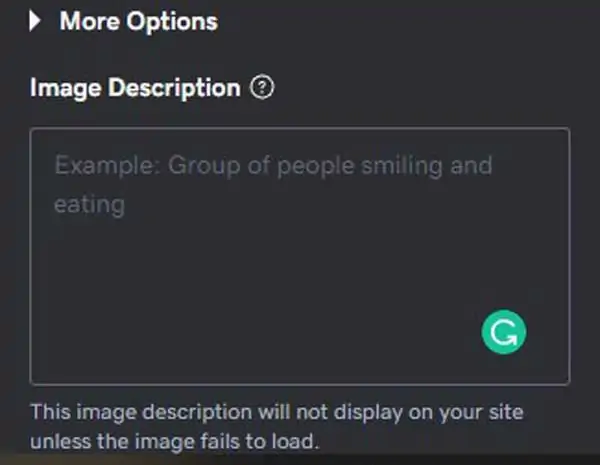
It’s always a good idea to add “alt text” to your images. Alt text is a short image description that screen-reading tools can use to describe the image to the visually impaired. Alt text also improves your website’s search engine optimization (SEO).
To add alt text:
- Select the section with the image for which you want to add alt text. In this case, we’ll select the homepage header.
- Select “Cover Media” (or “Media” depending on which section you choose).
- Add alt text to the “Image Description” section.
For more guidance on optimizing your images and website, check out our SEO 101 article.
Adding Your Own Text
Content is a big part of what makes a website successful. Content can include text, images, and video. Text is probably the easiest type of content to add, and GoDaddy makes adding content simple enough for anyone to do so. You can quickly change stock text — the text that’s already on the screen — and add a blog to your site to house more in-depth content.
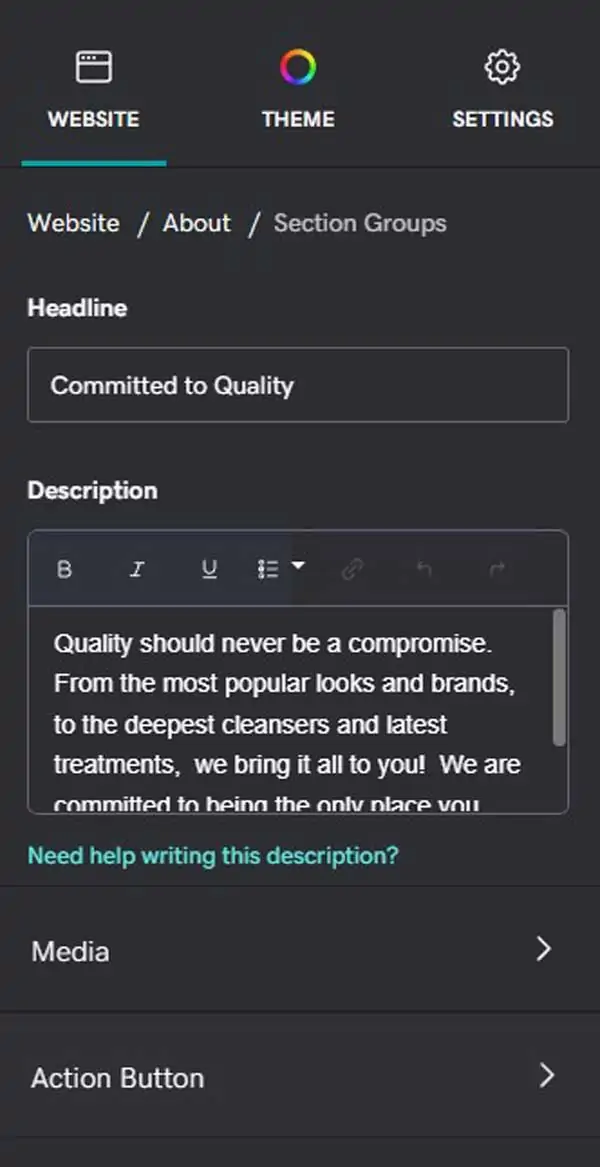
To change any placeholder text:
- Select a section of text you want to change. In this case, we’ll select the “About” section.
- A menu will then appear on the right side of the screen. From here, you can change the “Headline” or the “Description.” Select the option you want to change.
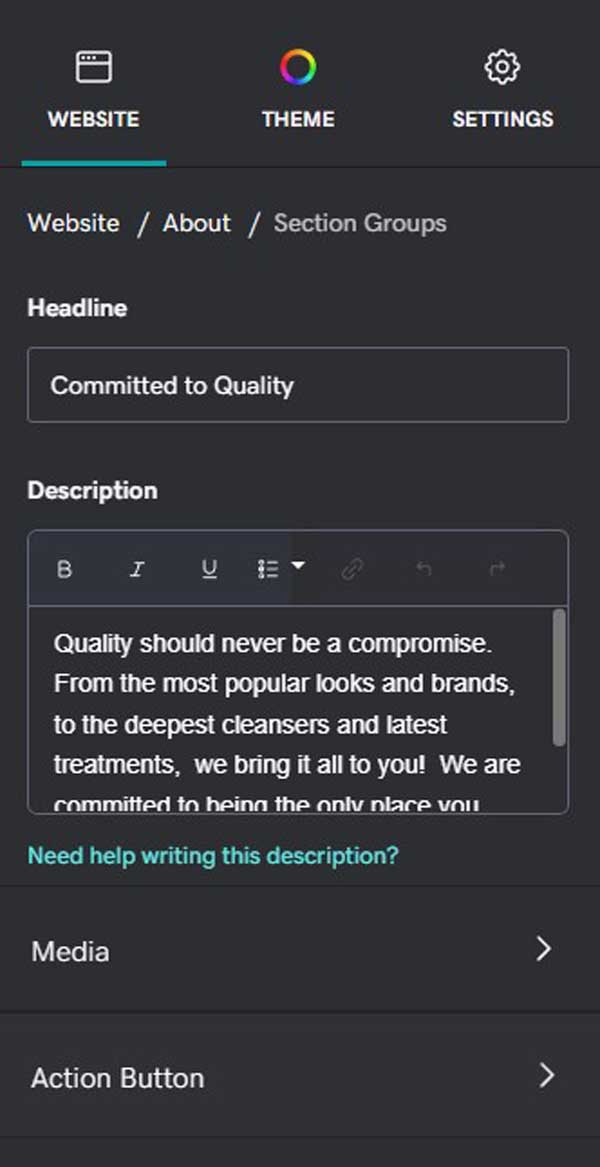
- Type in your new text. The text will change in real-time as you edit it in this menu.
To add a blog to your website:
- From the “Dashboard,” scroll down to and select the “Add a Blog” option. Or, from the “Website Builder,” you can select “Website” in the upper-left corner and click on “Blog” under the “Website Add-Ons” section in the lower-right corner of the screen.
- Select the type of blog layout you want from the available options on the right side of the screen.
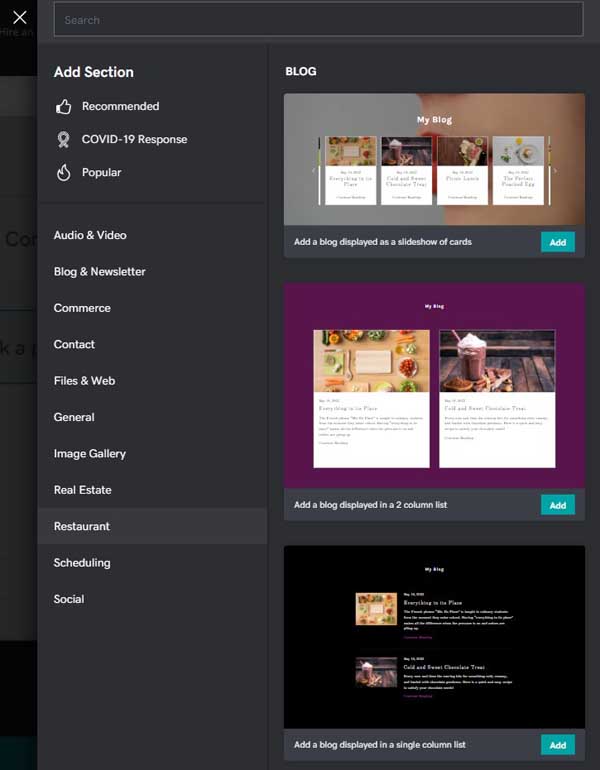
- Now you have a blog section on your website. To start blogging, click on the “Start Writing” button.
Looking to start your own blog? Check out our article on How To Create the Best Blog Page Design.
Adding New Sections
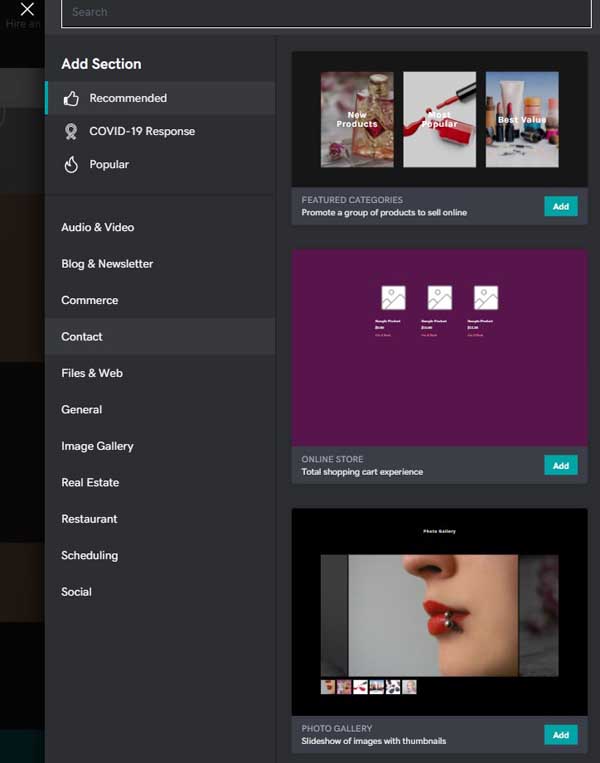
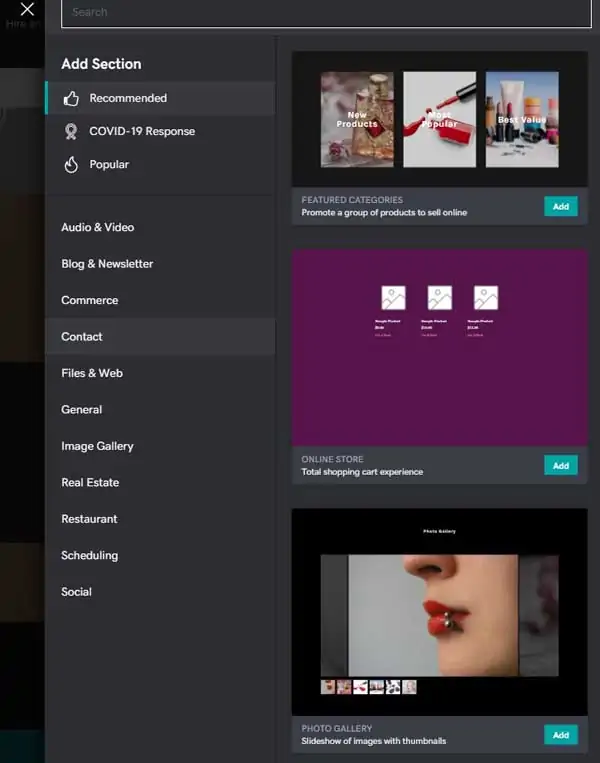
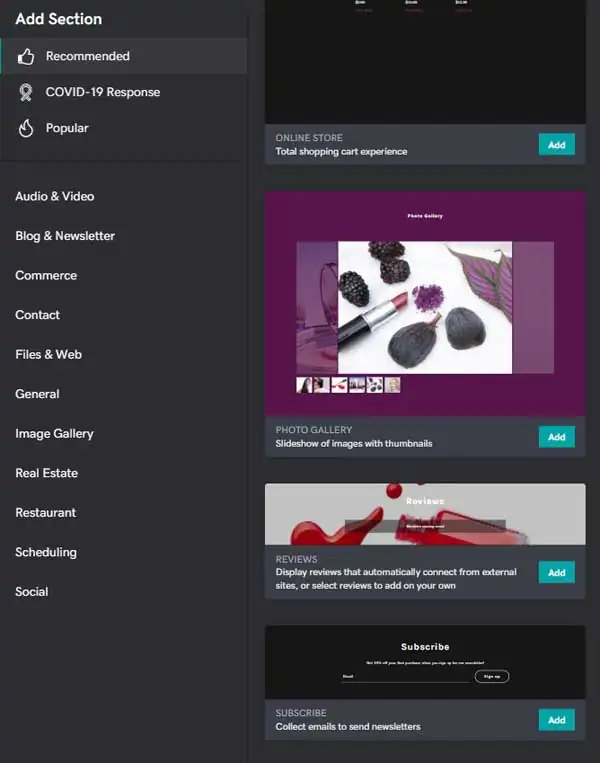
Sections are how you can add new content to your site using the GoDaddy website builder. You can add a variety of sections for different purposes, such as the blog we just added above. There are a lot of options here, including “Featured Categories,” “Online Store,” “Photo Gallery,” and more.
To help you narrow your options down, GoDaddy organizes the different types of sections you can add into categories. These include things like “Audio & Video,” “Commerce,” and “Scheduling.” It also has helpful categories like “Recommended” and “Popular.”
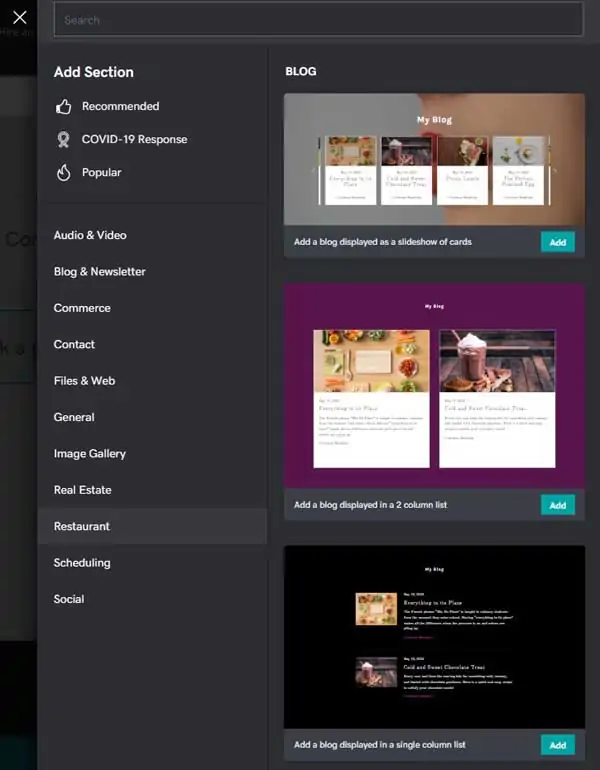
To add a section:
- You can add sections to different areas of your website. To identify possible locations, look for the large plus sign (“+”) symbols at the edges of different sections. Click on a plus sign (“+”) symbol to add a section.
- The “Add Section” menu will then slide out from the right side of the screen. Find the section you want to add and click on it to automatically add that new section to your website.
To add an audio or video section:
- Click on a plus sign (“+”) symbol where you want to insert this new section to open the “Add Section” menu.
- Select “Audio & Video” from the list of section types.
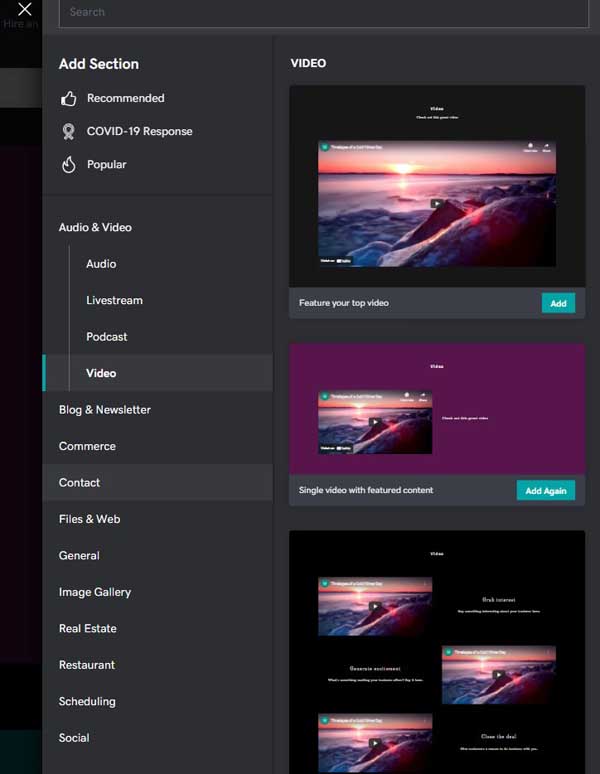
- Choose the type of audio/video section you want to add, and then click on it to automatically add that new section to your site.

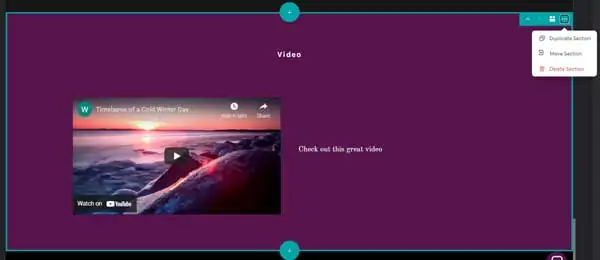
You may need to delete a section as you build and manage your website.
To delete a section:
- Hover your mouse over the section you want to delete. In this case, we’ll delete the video section we just added. Once you hover over the section, a menu will appear in the upper-right corner of that section.
- Select the three dots (“…”) symbol on the far right of this menu.
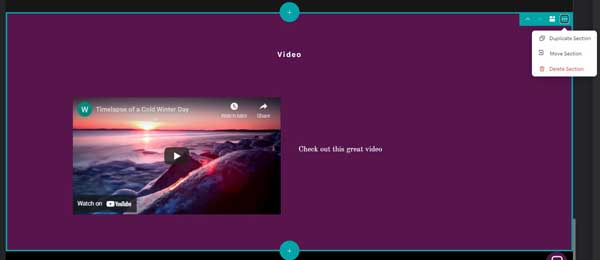
- Select “Delete Section” from the drop-down menu that then appears.
Adding New Pages
There are some pages that every professional website needs, which we cover in our How To Structure a Website article. To quickly summarize, you need at least the following pages:
Fortunately, the GoDaddy website builder automatically includes some of these pages (depending on which theme you choose) and makes it easy to add the rest.
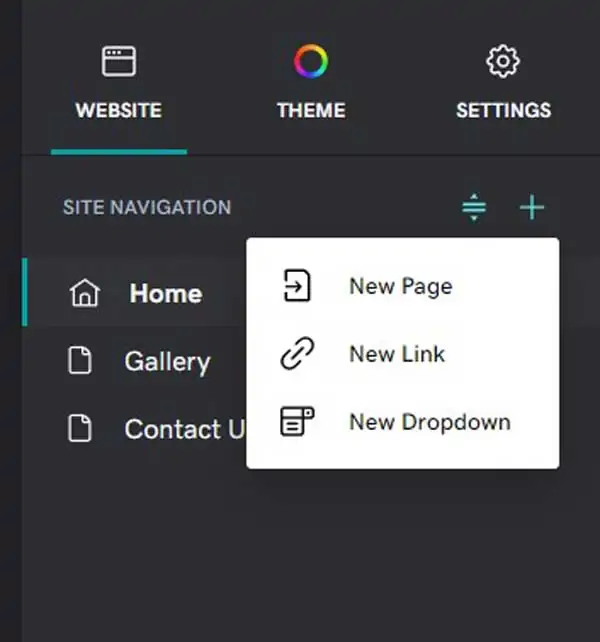
To add a new page:
- Select “Website” from the menu on the right side of the screen.
- Click on the plus sign (“+”) symbol on the right.
- Select “New Page” from the drop-down menu that then appears.
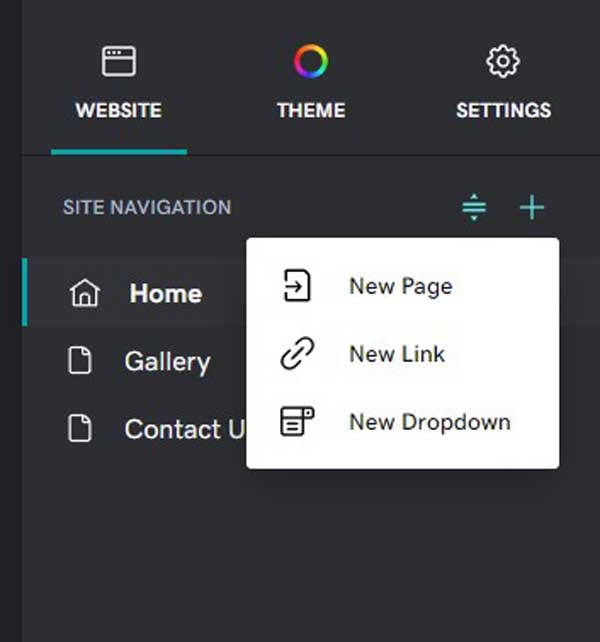
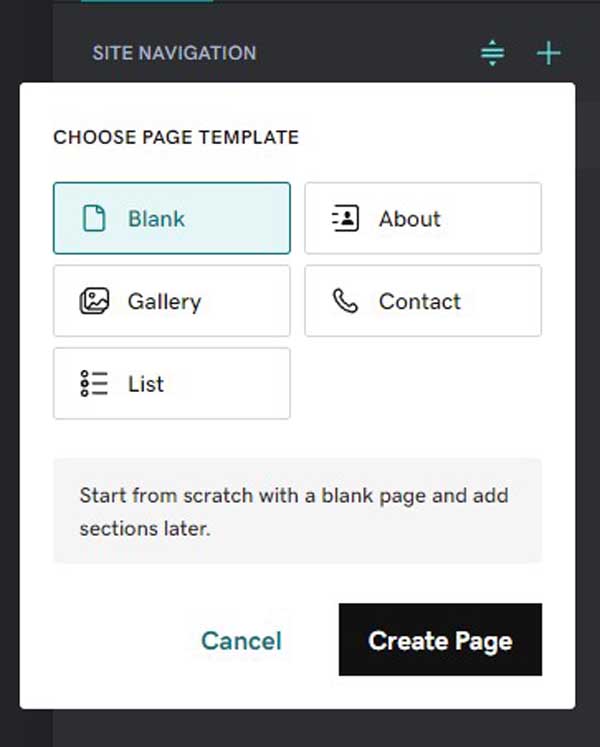
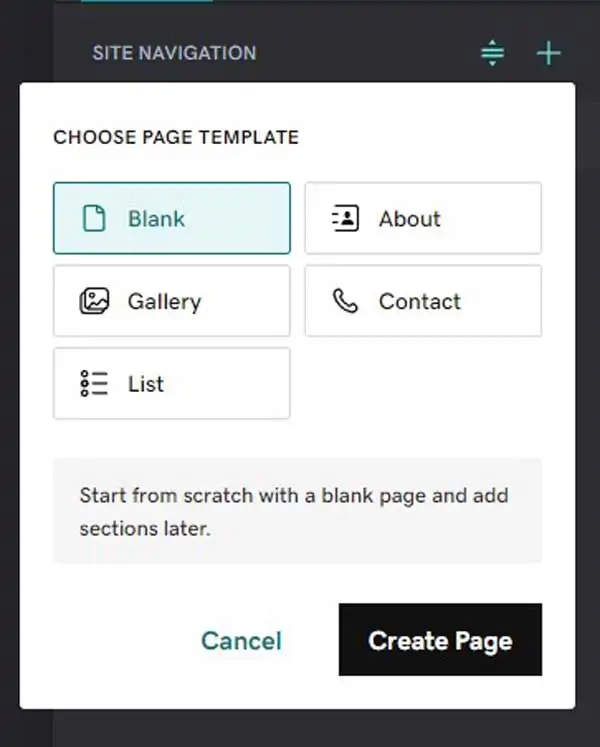
- Pick the page template you want from the available options.
You’ll want most pages you create to be visible on your site’s navigation menus, such as from the main menu on your homepage.
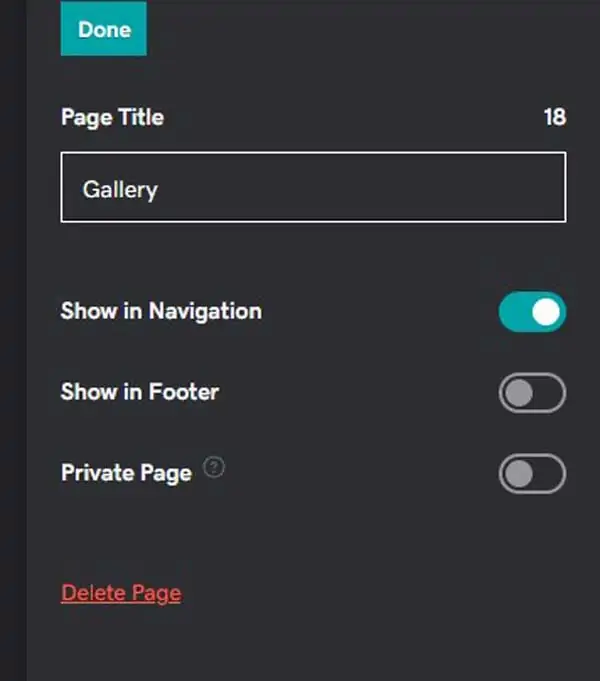
To ensure a page is visible in your site’s navigation menu:
- When you create a new page, make sure the “Show in Navigation” toggle is selected.
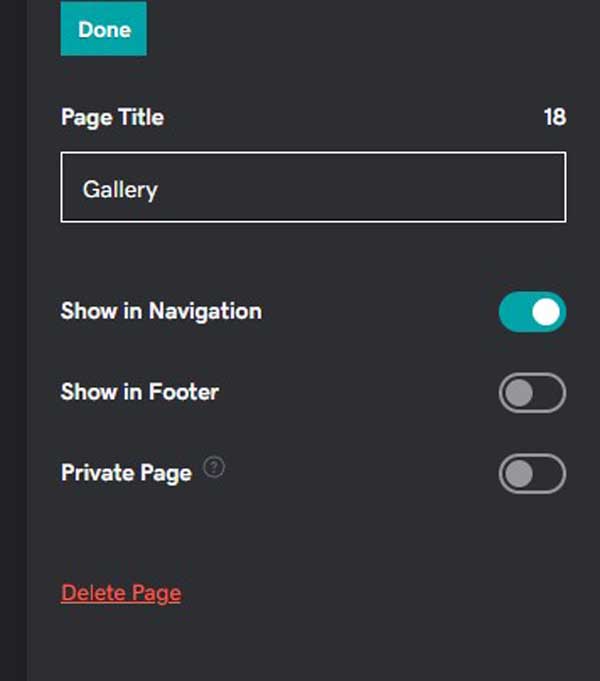
- For an existing page, select “Website” on the right side of the screen.
- Hover over the page you want to ensure appears in navigation. Click on the “Gear” icon that’ll then appear to the right.
- Select “Page Settings” from the drop-down menu.
- Make sure the “Show in Navigation” toggle is selected.
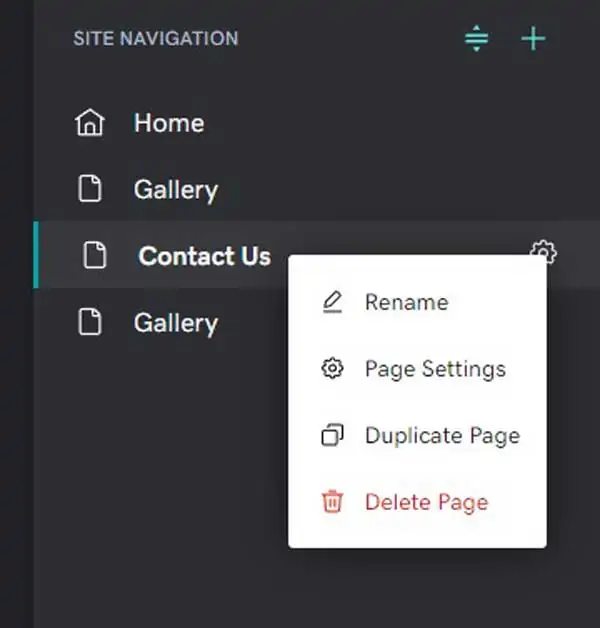
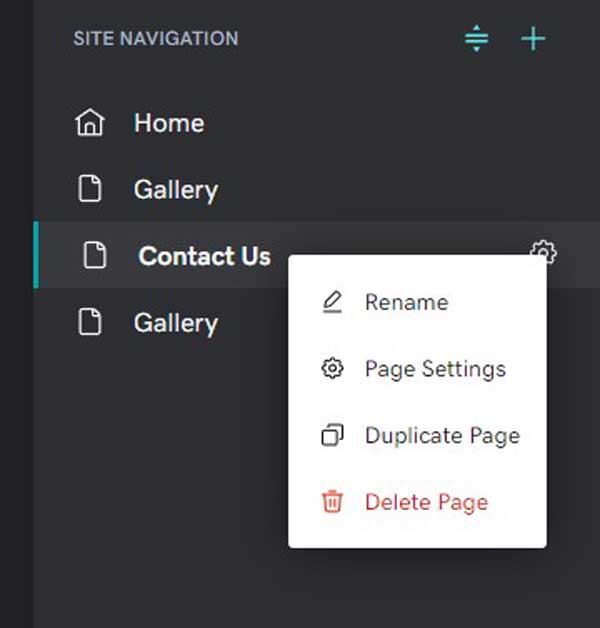
You’ll probably also need to delete a page from time to time.
To delete a page:
- Select “Website” in the upper-left corner of the screen.
- Hover your cursor over the page you want to delete. Click on the “Gear” icon that’ll then appear.
- Select “Delete Page” from the drop-down menu.
You can now add sections and content to your new pages, helping to make your website truly shine.
Implementing Social Media Tools
In today’s competitive market, it’s incredibly important for your business website to connect with multiple social platforms. GoDaddy gives you a simple way to add all the social media platforms you like to your website.
You can add social media icons to your site’s footer — a common location for them on most websites. Because the footer stays the same on all of your website’s pages, making this change will apply to your whole site.
To add social media icons to the footer:
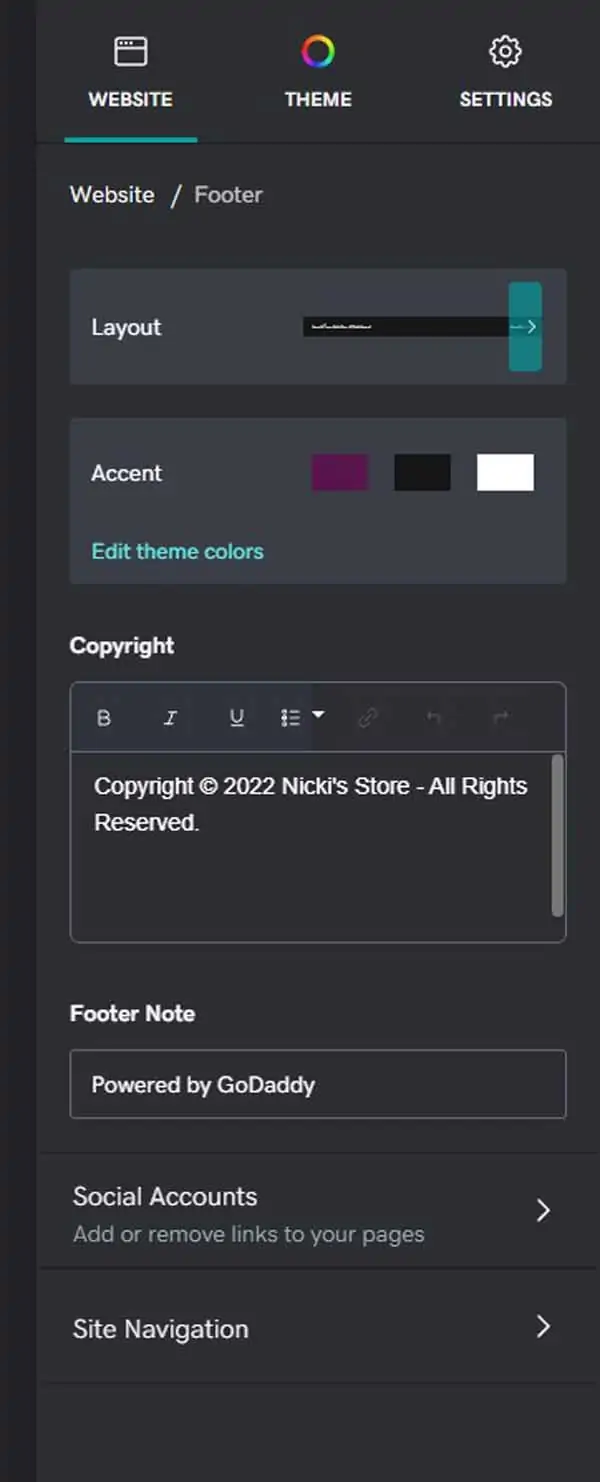
- Scroll down to the bottom of the page and select the “Footer” section.
- The menu for the “Footer” will then appear on the right side of the screen. At the bottom of this menu, select “Social Accounts.”
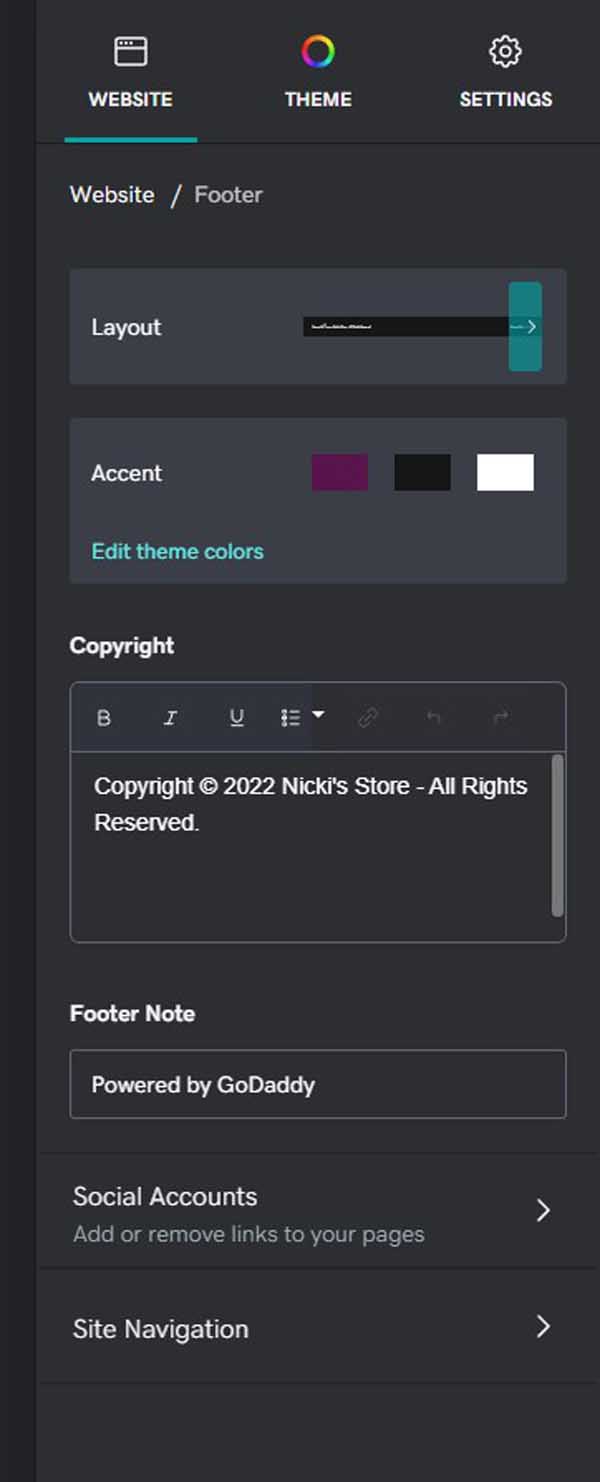
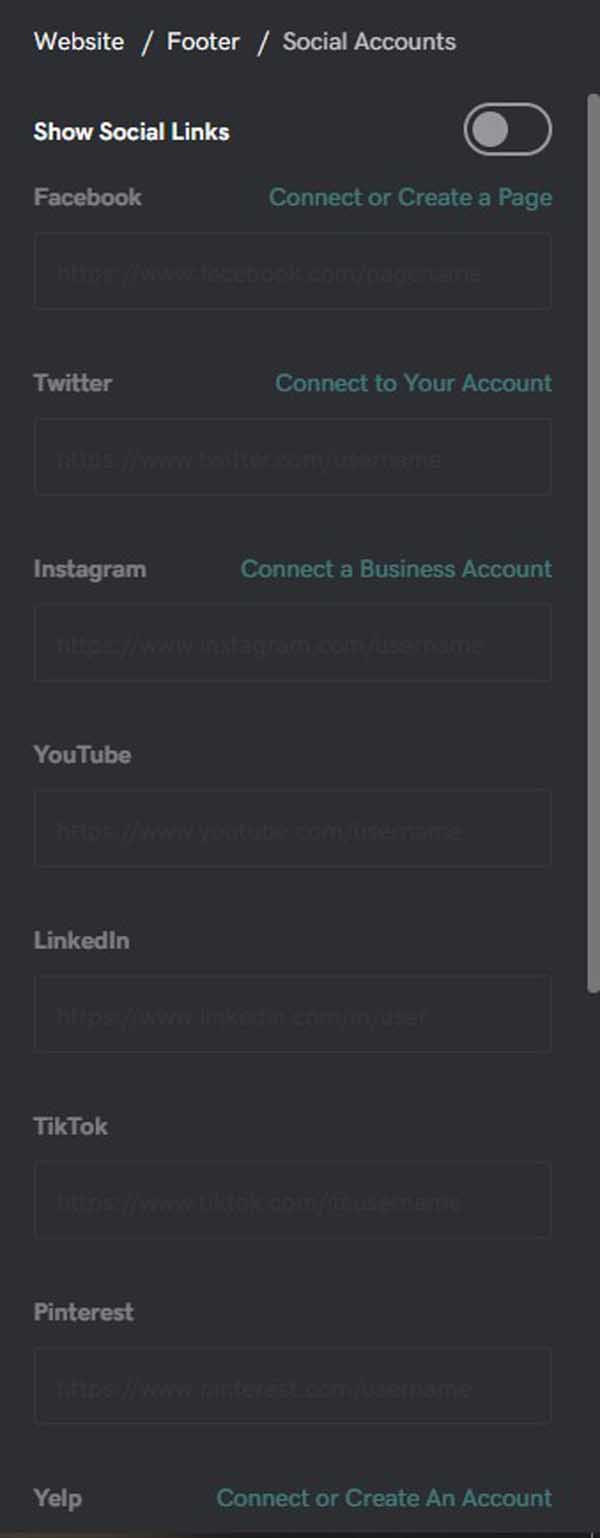
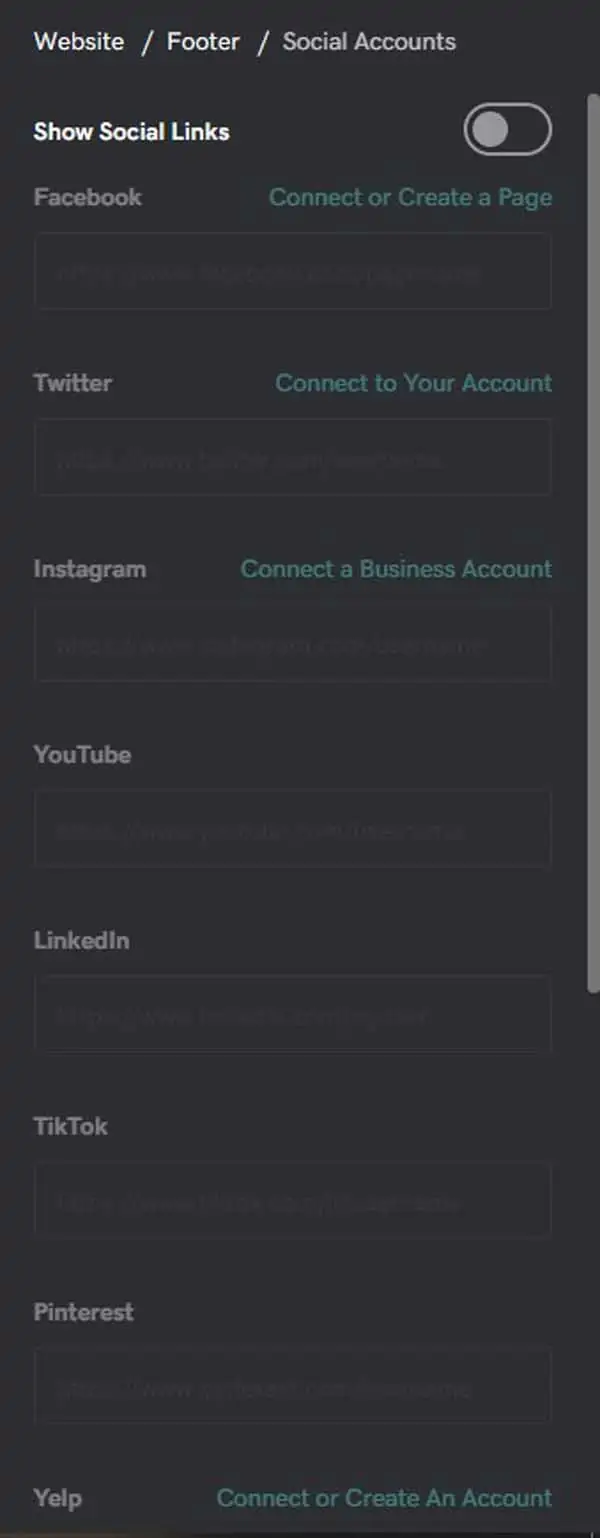
- All of your social media options will then appear. Make sure the toggle for “Show Social Links” is selected.
- Once you ensure your site will show social links, you can then access each type of social media account. Connect the accounts you want to add to your website.
Want to shift the hard work of planning and crafting social media posts off your plate? GoDaddy has a service for that. Read our GoDaddy Social Review for more details.
Adding Online Appointments
This feature is only available at certain plan tiers. Read our GoDaddy Pricing and Plans article to learn more. However, you can still give it a whirl when you check out GoDaddy’s free trial.
If your business requires making appointments with clients and/or customers, adding an online appointments feature to your website can prove extremely helpful. Instead of having to answer phone calls and emails, and then regularly update your schedule, you can use GoDaddy’s online scheduler. When your clients select an available time, you’ll receive a notification and they’ll receive a reminder. This feature is a huge time saver.
Online appointments can be useful for local businesses that require in-person scheduling, such as a local store where customers pick up products. It also can prove helpful for any business offering virtual services, such as mentoring or instruction.
To add online appointments to your website:
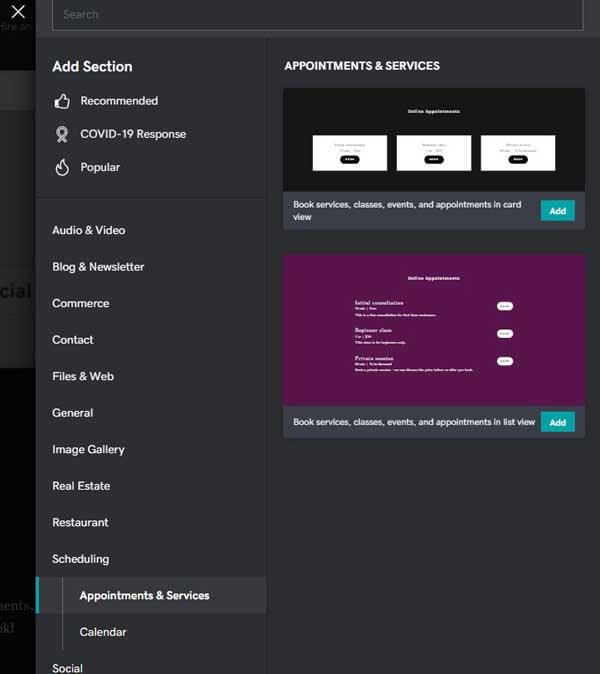
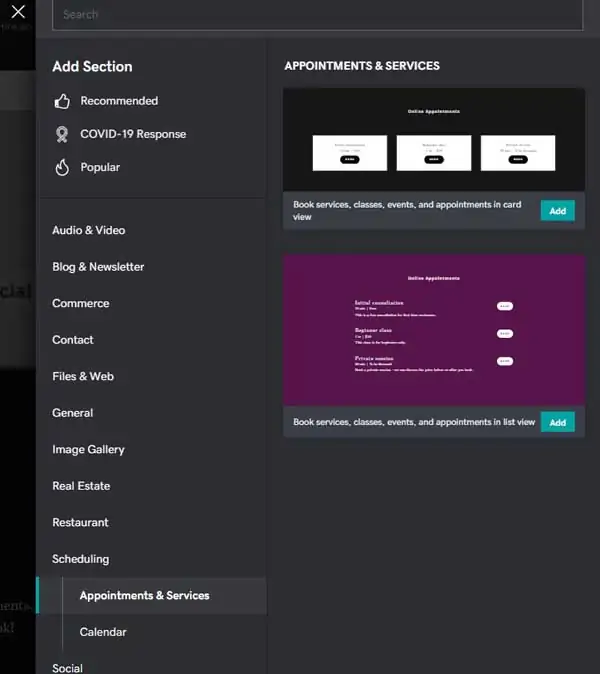
- Click on a plus sign (“+”) icon to add a section.
- Select “Scheduling” from the list of section types.
- Select “Appointments & Services.”
- Click on the type of view you want for your calendar.
- The calendar section will then appear on your website. Click on the “Get Started” button to open the “Dashboard” where you can add a service.
To add a service:
- From the “Dashboard,” click on the “Add Service” button.
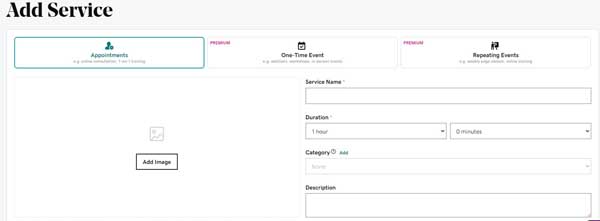
- Fill in all the required information for the service, including its pricing and location (e.g., in-person or virtual.)
- Click on the “Save” button.

Managing Your Site Settings
There are a wide variety of settings you can adjust on your website, using the GoDaddy website builder, as well as other useful features like analytics and tracking tools.
To manage your site settings:
- Select “Settings” in the upper-left corner of the screen.
- Choose the setting you want to adjust from the three main categories: “My Domain,” “Site Profile,” and “Analytics & Tracking.”
Site Profile
Under the “Site Profile” category, you’ll find options like “Basic Information,” “Social Media Links,” and “Favicon.”
When you select “Basic Information,” you can update things like your website’s name and your business’s email address, physical address, and phone number. Be sure to add all relevant information here so your website appears professional to online visitors. These key details also will ensure potential customers can contact you.
We already discussed social media links above so refer back to that section, if needed.
A Favicon is the little symbol you see in your internet browser window when you visit some websites. You can add your own image here by selecting the “Favicon” option.
Search Engine Optimization
Search engine optimization (SEO) is the process of making your website more attractive to search engines. The better your SEO, the higher your site should rank in search engine results. That means searchers are more likely to click on your site.
GoDaddy offers an SEO Wizard for premium plan subscribers. You can find it under “Settings.” Just click on the “Start Optimizing” button and you can start usingGoDaddy’s SEO Wizard tool. It’ll ask you important questions that, when answered, will improve your website’s SEO. This tool is great for beginners.
Learn more about SEO and how it can help your business website succeed by reading our SEO 101 guide.
Google Analytics
Google Analytics is a tool that every successful website uses. It gives you valuable information about your website’s performance and the ways in which users interact with your site. By paying attention to the analytics, you can identify problem areas and make changes that should improve your site’s overall performance and customer experience.
Signing up for Google Analytics is easy. Just enter your information and you can gain valuable insights to guide you in your website management.
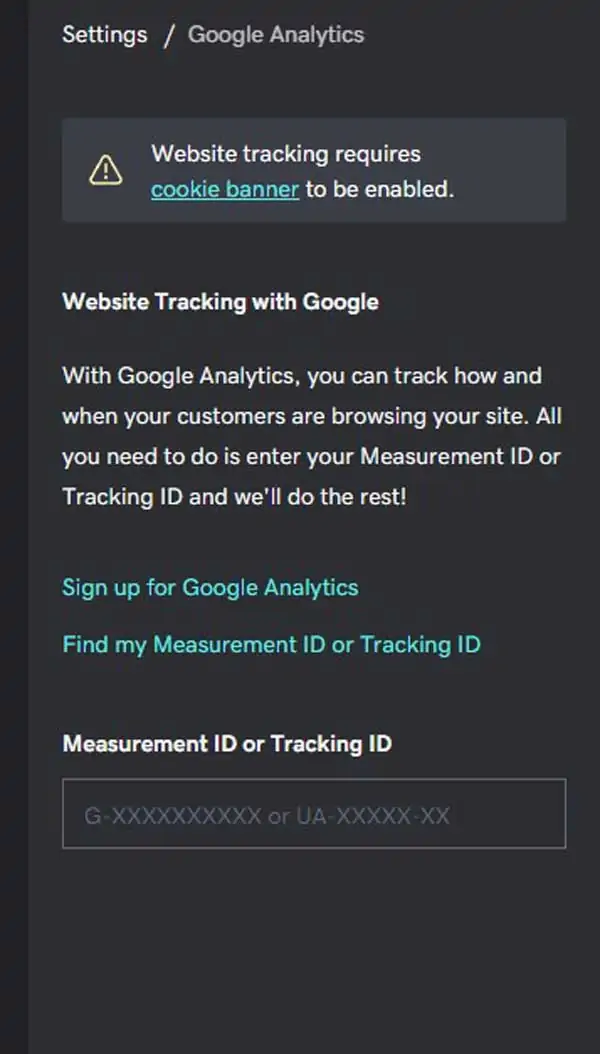
To connect Google Analytics to your GoDaddy website, go to “Settings” and find the menu tab labeled “Google Analytics.” Enter your “Tracking ID” number into the appropriate box, and then let GoDaddy do the rest for you.
For more detailed instructions, be sure to read our How to Add Google Analytics to GoDaddy article.
Cookies and Privacy Policy
Websites use cookies to learn how their visitors use their content. Some regional laws require website owners to notify visitors that they’re using cookies. The GoDaddy website builder provides a standardized banner to notify your website visitors that you use cookies.
You can find the “Cookie Banner” under “Settings.” To display this banner, make sure the “Show cookie notification” toggle is selected.
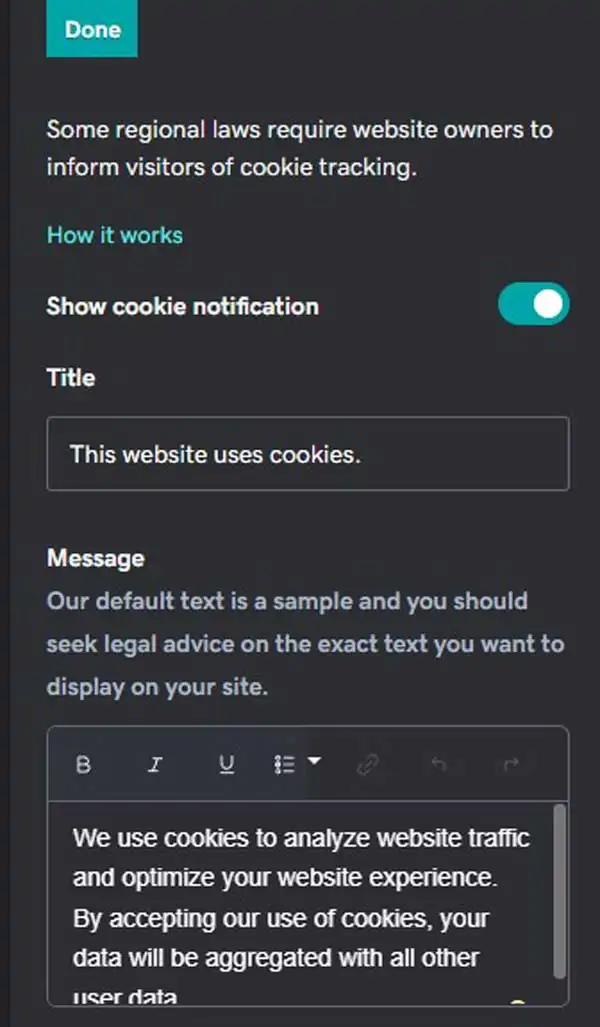
Depending on what type of site you have or your business’s industry, you might need to edit this message to be more specific and airtight.
If you need a more detailed privacy policy, check out our guide on How To Design a Privacy Policy Page.
Connecting a Custom Domain
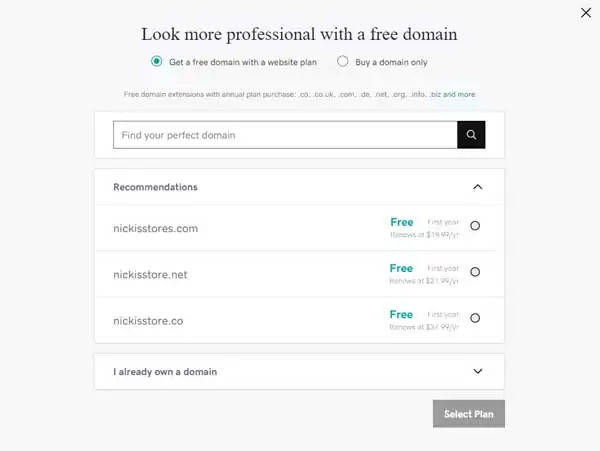
You’re doing great! The last thing that’s needed before you can publish your site is to connect it to your own domain name. Having your own domain is important because it makes your website look more professional. It also improves your SEO.
You can connect an existing domain if you already have one, or you can purchase a new domain from GoDaddy. To connect an existing domain name, click on the “Connect Domain” option under “Settings.” The GoDaddy website builder will then take you through some prompts to see if you need to buy a domain or if you want to use your own.
Still need a domain name for your site? Check out our free Domain Name Generator.
Previewing and Publishing Your Site
You’re now ready to share your site with the world!
But first, you need to preview it to make sure everything is in its right place. To preview your website, just click on the “Preview” button in the upper-left corner of the GoDaddy website builder.
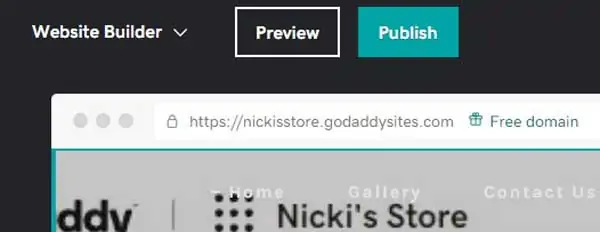
If it looks good to you, take a minute to run it by a trusted friend or business partner before publishing it online. Test all links, buttons, etc. Make sure everything works as expected before the big debut.
Once everything looks perfect, hit that “Publish” button and your site will go live online!
Promoting Your Website
Now that your site is live, it’s time to encourage them to visit it again and again.
You can add a “Subscribe” section to your site. Just find a plus sign (“+”) icon to add a section and click on it. The “Add Section” menu will slide out from the left. You can type “Subscribe” in the menu’s search bar to find the section and add it to the page.
Check out our article on How To Design a Successful Newsletter Sign-Up Page for more tips and tricks on perfecting your opt-in marketing efforts.
GoDaddy also offers email marketing campaign tools. You can manage these from your GoDaddy dashboard. Read our How To Use GoDaddy Email guide for more information.
You can also create a Google Business Profile if you purchase certain GoDaddy plans (see our GoDaddy Pricing and Plans article for details). This’ll help boost your site’s visibility and allow customers to quickly see your location, contact information, and hours of operation. You can do all of this via the GoDaddy dashboard.
Final Thoughts
Good job! We covered a lot here, and it takes some time to get through all of it. By now, you should know a lot more about how to create a site using the GoDaddy website builder, including customizing themes, adding images, adding text, adding new sections, implementing social media tools, and connecting a custom domain.
This should get you off to a strong start when building your website with GoDaddy. Read our What Makes a Good Website guide for even more tips and tricks.
Try GoDaddy
TRUiC readers receive an automatic discount when they choose any GoDaddy plan. Get started by clicking the button below.