How To Use the Simvoly Website Builder: A Beginner’s Guide
Every small business needs a website, but creating one from scratch can seem overwhelming — especially if you lack coding experience. Luckily, the Simvoly website builder can help.
This intuitive, drag-and-drop platform enables users to create websites without any previous website-building experience. Simvoly can help you build a website for your small business in just a few hours.
This guide explains how to use the Simvoly website builder, key features to create a site that not only reflects your business branding, but also attracts customers and establishes a robust online presence.
Still looking for the right website builder for you? Check out our Best Website Builder of 2026 guide for more insights.
Signing up With Simvoly

The first step in building a Simvoly website involves creating an account.
To sign up with Simvoly:
- Go to Simolvy.com.
- Click on the “Get Started” button in the upper-right corner.
- On the next screen, enter your name, email address, and a password.
- Check the boxes next to “I am not a robot” and “I agree with the Terms and Conditions and the Privacy Policy.”
- Click on the “Get Started” button at the bottom of the screen.
For a more detailed view of signing up for Simvoly, use our How to Make a Simvoly Website guide.
Using Simvoly Templates
Simvoly templates — predesigned website layouts — provide a basic structure for your site. You can then customize them to fit your company’s specific needs.
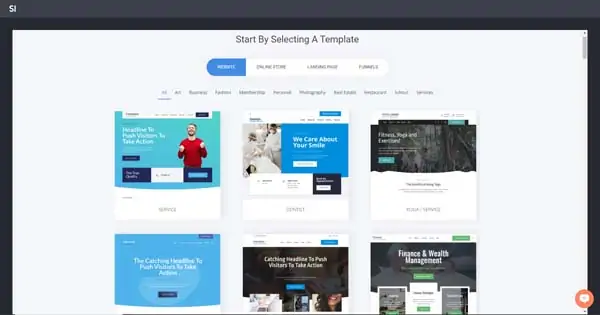
When you finish creating your Simvoly account, you’ll reach a page with a selection of Simvoly templates. Simvoly divides its templates into four categories: “Website,” “Online Store,” “Landing Page,” and “Funnels.” Within each of these, you’ll find subcategories grouped by industry or purpose.
To see what you can create using Simvoly templates, check out our Best Simvoly Website Examples article.
To select a template:
- Browse through the available template categories until you find one that best suits your business.
- Hover over your chosen template, and then click on the “View” button that then appears to open a preview of that template.
- Next, click on the “Start With This Theme” button at the top of your screen.
- Enter a name for your new website in the provided field. (It’s for your use only and invisible to visitors.)
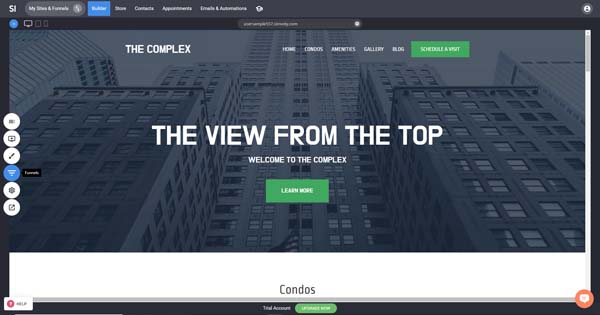
- Watch the five-minute, tutorial video that then appears and close the video window at the end. You’ll then see the Simvoly content management system (CMS) — also known as the “Builder” dashboard. From this dashboard, you can adjust and customize your website to fit your specific business needs.
Changing a Simvoly Template
Choose your template wisely because you can’t change it after you make your initial selection. But, the Simvoly website builder does allow you to create another website with a different template. You can then copy all of your text, media, and other elements over to the new template.
To choose a new template:
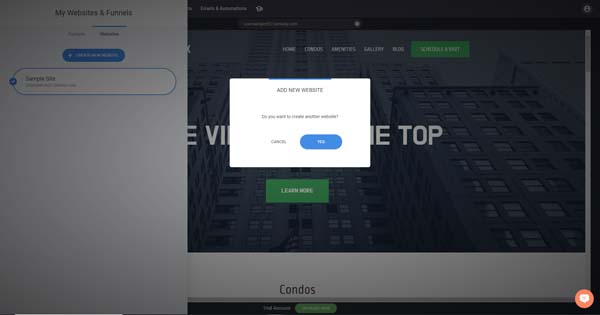
- Click on the “Funnels” button in the dashboard’s left-hand toolbar to open the “My Websites and Funnels” menu.
- Click on the “Websites” tab.
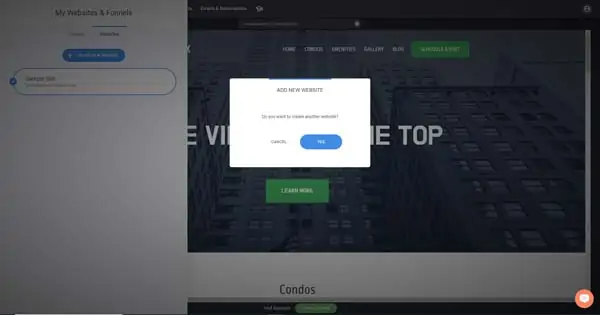
- Click on the “+ Create New Website” button.
- Click on the “Yes” button when a pop-up window asks, “Do you want to create another website?”
- You’ll then return to the page with Simvoly’s available templates where you can choose the new template you want to use.
- Enter a name for this new website in the provided field. (Again, it’s for your use only and invisible to visitors.)
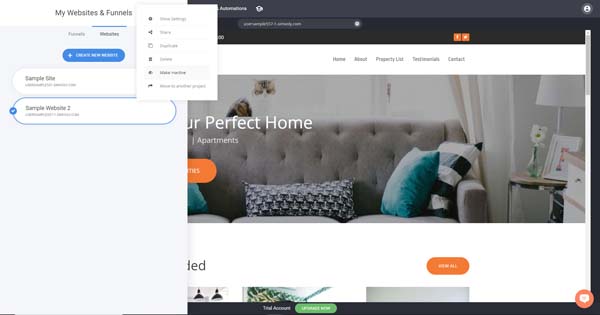
- When the dashboard automatically opens with your new template, click on the “Funnels” button again.
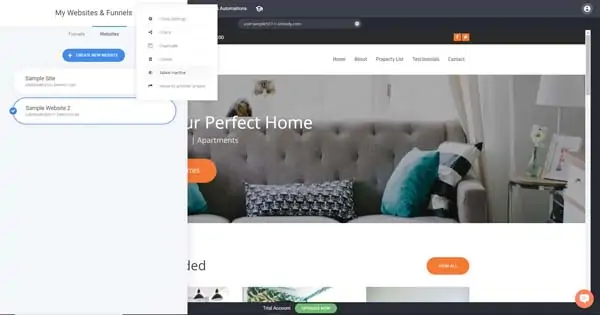
- Hover over the button with the name of your original website, and then click on the vertical ellipsis (“⋮”) icon that appears on the far right.
- Choose the “Make Inactive” option on the menu that then appears.
- Click on the “Yes” button when a pop-up window asks, “Are you sure you want to deactivate this website?”
- Hover over the button with the name of your new website, and then click on the vertical ellipsis (“⋮”) icon that appears on the far right.
- Choose the “Make Active” option on the menu that then appears.
- Click on the “Yes” button when a pop-up window asks, “Are you sure you want to activate this website?”
- You can now transfer all of your content over to the new website.

Changing a Template’s Color Scheme
If the color palette of your chosen template doesn’t align with your business’s branding, it’s easy to adjust that.
Don’t have a color scheme for your business branding yet? Refer to our How to Choose a Great Website Color Palette guide to learn more.
To change a template’s color scheme:
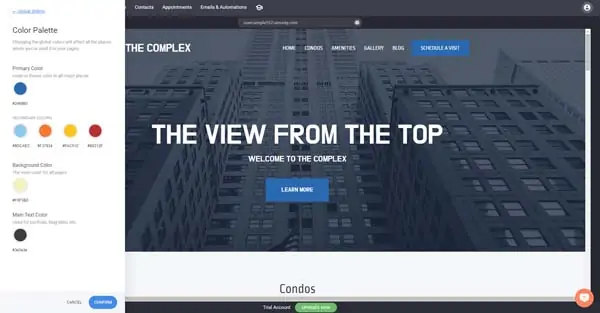
- Click on the “Paintbrush” button in the dashboard’s left-hand toolbar to open the “Global Styling” menu.

- Click on the “Color Palette” link in that menu.
- Choose the “Primary,” “Secondary,” “Background,” and “Main Text” colors you want to use.
- Click on the “Confirm” button at the bottom of the “Color Palette” submenu.


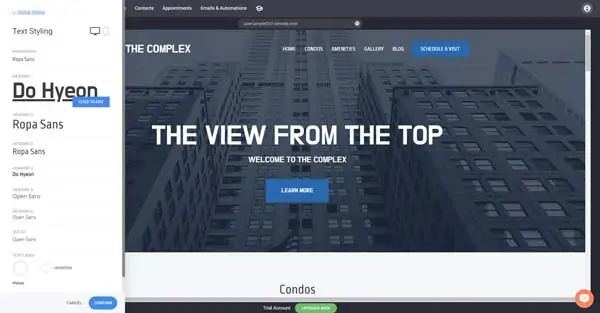
Changing the Fonts
You also can use the “Global Styling” menu to change the fonts used throughout your website. Make sure you choose a successful font for your website and branding, read our Best Website Fonts guide first.
To change fonts:
- Click on the “Paintbrush” button in the dashboard’s left-hand toolbar to open the “Global Styling” menu.
- Click on the “Text Styling” link in that menu.
- Click on the current font for each heading level (one through six) and for quotes, and then choose your desired font for each.
- Click on the “Confirm” button at the bottom of the “Text Styling” submenu.
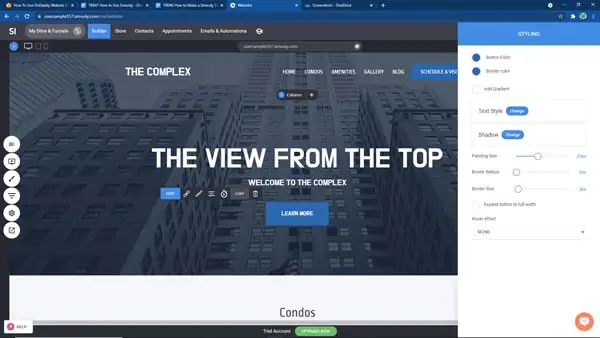
Changing the Buttons
The Simvoly website builder also enables you to adjust the appearance of the buttons on your site.
To change a button:
- Click on the button you want to adjust. An “Edit” toolbar will then appear above the button.
- Click on the “Paintbrush” icon in that toolbar to open the “Styling” menu on the right side of the dashboard.
- Use the “Styling” menu to change the following elements of the button:
- Button color
- Border Color
- Text Style
- Shadow
- Padding Size
- Border Radius
- Border Size
You also can expand the button’s width or add a hover effect.
Customizing the Homepage Header in Simvoly
This header appears at the top of your website’s homepage. It usually contains a logo and a navigation bar. Sometimes, it may include call-to-action (CTA) buttons, social media icons, or additional information.
Make sure your homepage has everything it needs to shine. Use our handy How to Design a Homepage guide to learn more.
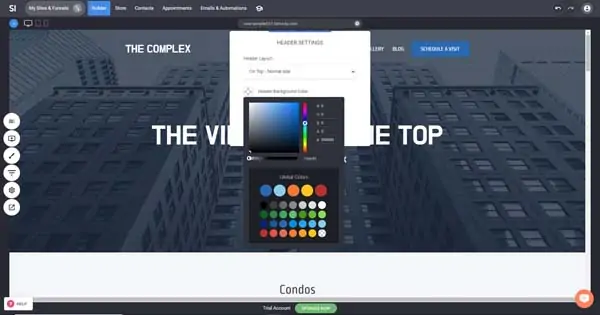
Changing the Background Color
First, you’ll likely want to adjust the background color of your homepage header to reflect your business’s branding.
To change the header background color:
- Hover your cursor over the homepage header.
- Click on the “Gear” icon that appears on the left side of the header. This’ll open the “Header Settings” menu.
- Click on the icon next to “Header Background Color” to open a color palette window.
- Choose the color you want to use from within that color palette.
Making Other Header Adjustments
With the Simvoly website builder, it’s easy to adjust other elements within your homepage header to suit your business.
Changing the Logo
A logo is the text or image that represents your company visually.
To change the header logo:
- Hover your cursor over the logo.
- Click on the “Gear” icon that appears above the logo. This’ll open the “Edit Settings” menu on the right side of the dashboard.
- To add a photo as your logo, click on the box next to “Image Logo.”
- Click on the plus sign (“+”) icon.
- Click on the “+ Upload a File” button, and then select the photo file you want to use as your logo.

- To instead create a text logo, click on the box next to “Text Logo.”
- Enter the text you want to use as your logo in the box under the “Edit Your Text Logo” section.

Changing the Headline
Headlines are brief lines of text that stand out and separate sections of your website.
To change the header headline:
- Click on the headline to open the toolbar above it, and then click on the “Edit” button in that toolbar
- Delete the existing text, and then enter the text you want to use as your headline.
- You also can adjust the font, style, color, and size of the lettering in your header headline from this “Edit” toolbar.
Adding a Subhead
A subhead is similar to a headline, only smaller. It often follows a headline to clarify it or provide more information.
To add a subhead to the header:
- Click on the “Add Widget” button near the top of the dashboard’s left-hand toolbar. It looks like a computer monitor with a plus sign (“+”) on the screen.
- Click on the “Heading” box in the “Add Widget” menu, drag it over to your site, and drop it into your header.
- Type in the text you want to appear in your subhead.
- A toolbar will automatically appear above the new subhead when you drop it on your page. Use that toolbar to adjust the font, style, color, and size of the lettering in your subhead.

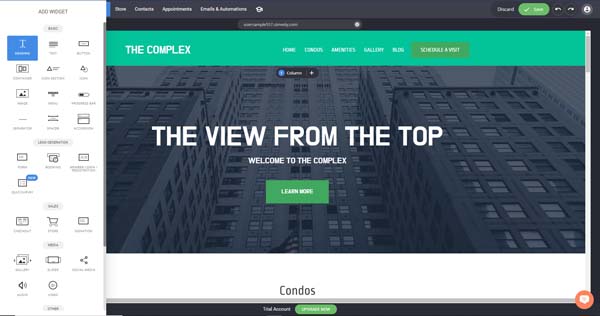
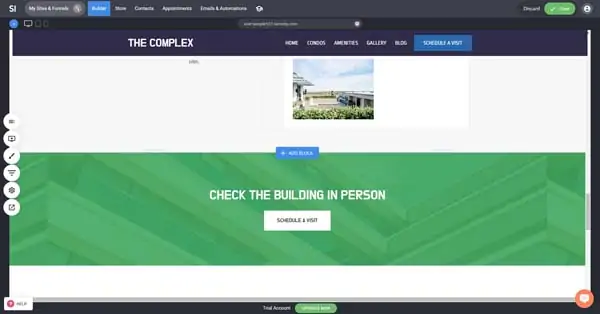
Updating the CTA Button
CTA buttons invite site visitors to take specific actions, such as “Learn More,” “Make an Appointment,” or “Subscribe.”
To update the header’s CTA button:
- Hover your cursor over the existing CTA button. A toolbar will automatically appear above that button.
- To change the button’s text, add a second line of text, or add an icon, click on the “Gear” icon. This’ll open the “Edit Settings” menu.
- To change the CTA button text color, text font family, font size, letter spacing, and font style, click on the “Text Styles” tab within the “Edit Settings” menu.
- To change the CTA button or border color, text style, shadow, padding size, border radius, border size, hover effect, or to add a gradient, click on the “Paintbrush” icon to open the “Edit Styling” menu.
- To delete the CTA button, click on the “Trash Can” icon.
Setting up Pages and Site Navigation in Simvoly
The Simvoly website builder allows you to easily add, delete, and reorder pages on your website. You also have the ability to create as many — or as few — pages as your business needs.
Adding a Page
If your chosen Simvoly template doesn’t include all the pages your site needs, you’ll need to add any missing pages.
To add a page:
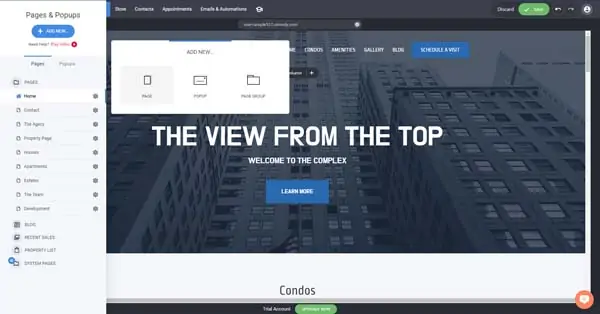
- Click on the “Pages” button at the top of the dashboard’s left-hand toolbar to open the “Pages & Popups” menu.
- Click on the “+ Add New” button at the top of that menu.
- Click on the “Page” option in the “Add New” window that then appears.
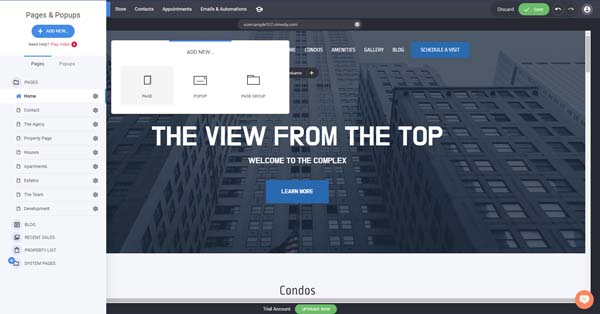
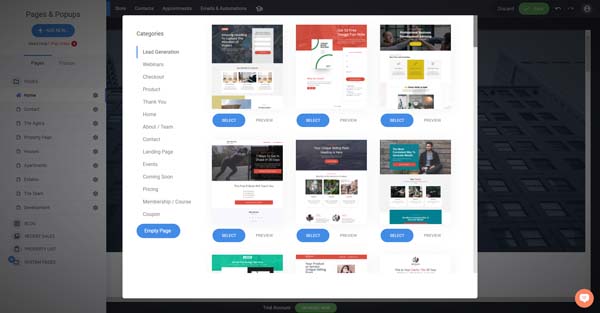
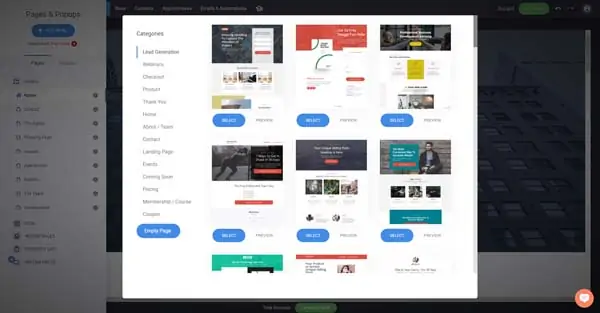
- Another window will open, presenting you with a selection of premade page layouts. You can either add a blank page or choose from the following page types:
- Choose the type of page you want to add, and then click on the “Select” button.
- Enter a name for your new page.
- Click on the “Add” button.
Reordering the Navigation Menu
You can choose the order in which your website’s pages appear in its main navigation menu.
To reorder the navigation menu:
- Hover your cursor over the navigation menu.
- Click the “Edit Menu” button in the toolbar that then appears above the navigation menu. This’ll open the “Edit” menu on the right side of the dashboard in which you’ll find a list of your website’s pages with a series of six dots to the left of each page name. This list mirrors the current order of those pages in the navigation menu.
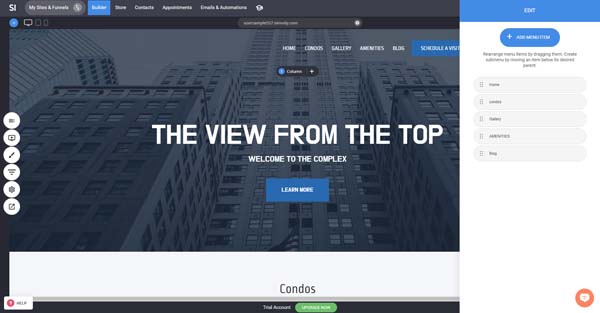
- Click and hold on the dots next to the page you want to move, and then drag and drop it into your preferred order.

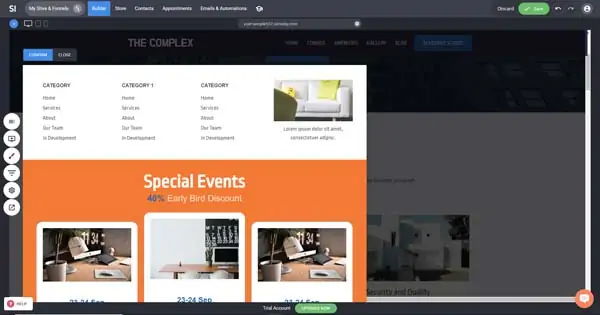
Adding Pages to a Drop-Down Menu
You can add a drop-down menu to any item on your website’s navigation menu. The Simvoly website builder refers to these drop-down menus as “mega-menus.”
To add a mega-menu to a page in your navigation menu:
- Hover your cursor over the navigation menu.
- Click the “Edit Menu” button in the toolbar that then appears above the navigation menu. This’ll open the “Edit” menu on the right side of the dashboard in which you’ll find a list of your website’s pages.
- Hover your cursor over the name of the page to which you want to add the mega-menu.
- Click the plus sign (“+”) icon that appears beside that menu item.
- Next to the new item that’ll then appear below that page, click on the “Pencil” icon.
- Click on the “+ Add Block” button in the window that then opens.
- Choose the type of page you want to add to the mega-menu.
- Click on the “Confirm” button at the top of that window.
Deleting Pages
Removing a page from your Simvoly website is easy as well.
To delete a page:
- Click on the “Pages” button at the top of the dashboard’s left-hand toolbar to open the “Pages & Popups” menu.
- Hover your cursor over the page you want to delete.
- Click on the “Trash Can” icon to delete that page.
- A pop-up window will then appear to ask, “Are you sure you want to delete this page?” Click on the “Yes” button.
Working With Simvoly Blocks
The Simvoly website builder refers to sections of a website as “Blocks.” These blocks can contain text, media, and other elements.
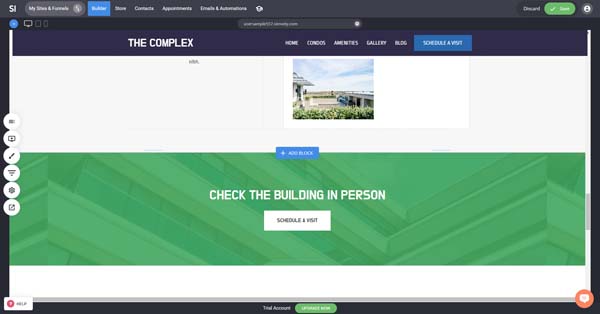
Adding a Block
Depending on the sections your chosen template already includes, you may need to add blocks to your Simvoly website.
To add a block:
- Hover your cursor over the border between the two existing blocks where you want to insert a new block.
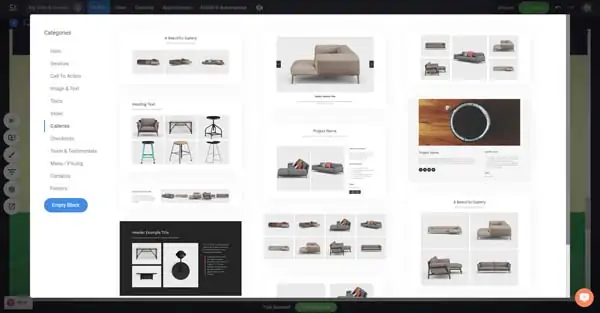
- Click on the “+ Add Block” button that then appears to open a window, which lists the available block types.
- Choose the type of block you want to add from the following options:
- Hero
- Services
- Call To Action
- Image and Text
- Texts
- Video
- Galleries
- Checkouts
- Team & Testimonials
- Menu/Pricing
- Contacts
- Footers
- Empty Block
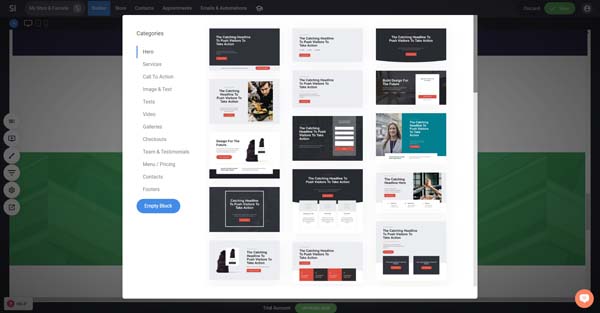
- Select and click on the layout you want to use from the available options for that block type.
- The new block will automatically appear on your web page.

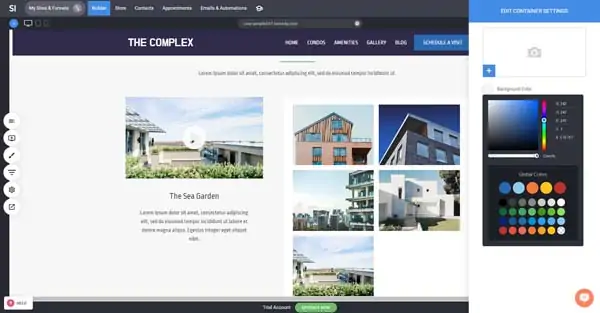
Changing a Block’s Background Color
With Simvoly, you can easily adjust the background color of any block on your website.
To change a block’s background color:
- Hover your cursor over the block you want to edit.
- Click on the “Gear” icon that appears in the upper-left corner of that block. This’ll open the “Edit Container Settings” menu on the right side of the dashboard.
- Click on the radio button next to “Background Color.”

- Choose the color you prefer for the block’s background.
Working With Images and Other Media in Simvoly
You can add various forms of multimedia to your Simvoly website, including static images, videos, and photo galleries. These elements add visual appeal and/or movement to your site to help engage visitors.
Adjusting Images
If the images built into your chosen Simvoly template don’t meet your business’s needs, you can modify or replace them with a few simple steps.
To adjust an image:
- Click on the photo you want to modify.
- Click on the “Edit Image” button in the toolbar that then appears above the photo. This’ll open the “Image Settings” menu on the right side of the dashboard.
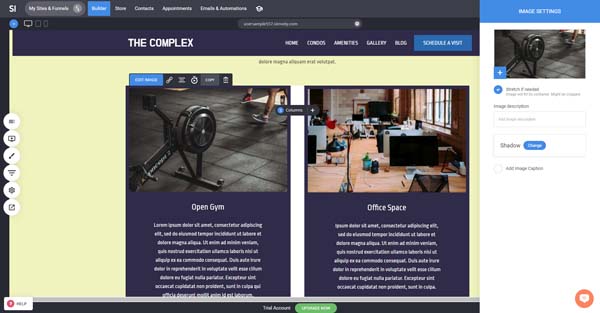
- To choose a new photo, click on the plus sign (“+”) icon in the lower-left corner of the picture at the top of the “Image Settings” menu.
- A window will then open into which you can drag and drop a new photo or search for one on your computer.
- Use the “Image Settings” menu to also stretch an image to fit the block, add an image description and/or caption, and change an image’s shadow effect.

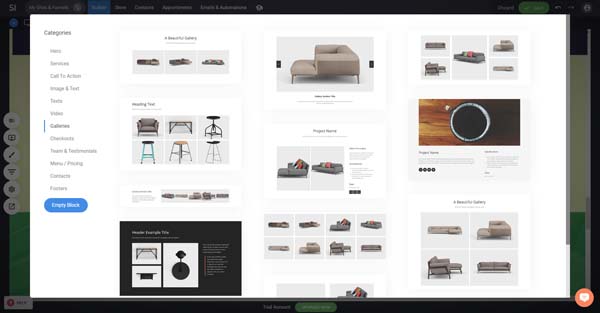
Adding a Photo Gallery
A gallery block features a collection of photos. They come with several layout options, such as a grid or a slider.
To add a photo gallery:
- Hover your cursor over the border between the two existing blocks where you want to insert the photo gallery.
- Click on the “+ Add Block” button that then appears to open a window, which lists the available block types.
- Choose the “Galleries” option from the list of block types.
- Click on your preferred gallery layout from the available options. Your new gallery will automatically appear on your web page.
- To add your photos to the gallery, click on the image you want to adjust.
- Click on the “Edit Image” button in the toolbar that then appears above that photo. This’ll open the “Image Settings” menu on the right side of the dashboard.
- Click on the plus sign (“+”) icon in the lower-left corner of the picture at the top of the “Image Settings” menu.
- A window will then open into which you can drag and drop a new photo or search for one on your computer.
Uploading Videos
Videos add motion and visual depth to your website, helping it capture and hold your visitors’ attention.
To upload a video:
- Hover your cursor over the border between the two existing blocks where you want to insert the video.
- Click on the “+ Add Block” button that then appears to open a window, which lists the available block types.
- Choose the “Video” option from the list of block types.
- Click on your preferred video layout from the available options. Your new video block will automatically appear on your web page.

- Click on the video space within that block to make a toolbar appear above the video.
- Click on the “Edit Video” button in that toolbar to open the “Video Settings” menu on the right side of the dashboard.
- Under the “Video Source” section, enter the URL for the video you want to use.
- Alternatively, you can add a video file from your computer by clicking on the plus sign (“+”) icon in the lower-left corner of the block under the “Thumbnail” section.
- Drag and drop the video you want to use into the window that’ll then open or click on the “+ Upload File” button to find a video file on your computer.

Connecting With Visitors Using Simvoly
The Simvoly website builder gives you several ways to connect with your online visitors, such as via social media links, Instagram feeds, email subscriptions, and contact forms.
Adding these elements to your website can help you engage customers and build brand loyalty.
Adding Social Media Icons
Social media icons link visitors to your business’s Facebook®, Instagram, Twitter®, and other social media accounts.
To add social media icons:
- Click on the “Add Widget” button near the top of the dashboard’s left-hand toolbar. It looks like a computer monitor with a plus sign (“+”) on the screen. This’ll open the “Add Widget” menu.
- Under the “Media” section of the “Add Widget” menu, click on the “Social Media” box, drag it over to your site, and drop it onto your web page.
- The “Social Media” menu will then appear on the right side of the dashboard.
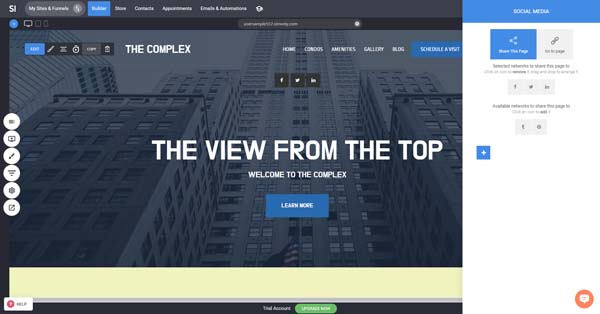
- Use this menu to choose what’ll happen when visitors click on each of your social media icons (e.g., share or visit your social media page) and which social media icons will appear on your site.

Embedding an Instagram Feed
A popular social media platform for visually oriented users, Instagram gives you an opportunity to post images of the more photogenic elements of your business. By embedding your Instagram feed on your website, you can help increase your social media presence and draw more attention to your brand.
To embed an Instagram feed:
- Click on the “Add Widget” button near the top of the dashboard’s left-hand toolbar. It looks like a computer monitor with a plus sign (“+”) on the screen. This’ll open the “Add Widget” menu.
- Under the “Media” section of the “Add Widget” menu, click on the “Social Media” box, drag it over to your site, and drop it onto your web page.
- The “Social Media” menu will then appear on the right side of the dashboard.
- Under the “Selected networks to share this page to” section of this menu, click on all three icons to remove them.
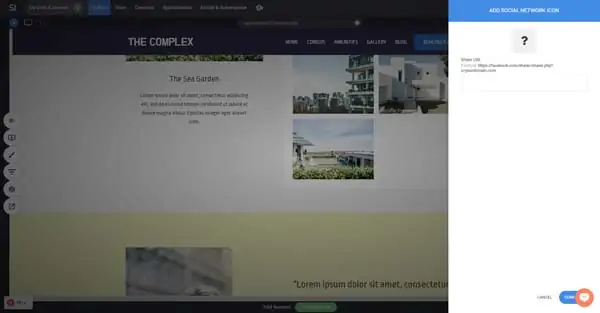
- Next, click on the plus sign (“+”) icon at the bottom of the “Social Media” menu.
- Enter the URL for your business’s Instagram feed.
- Click on the “Confirm” button at the bottom of this “Add Social Network Icon” submenu.
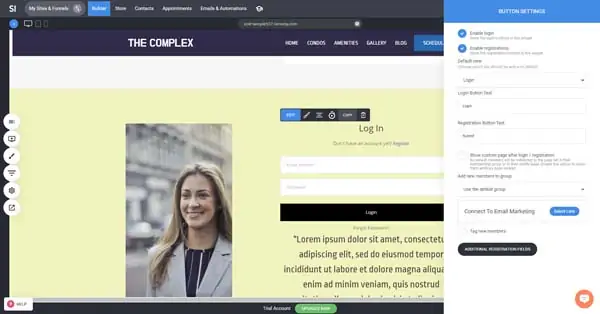
Adding an Email Subscription Form
Email subscription forms allow you to collect your online visitors’ email addresses, which you can then use for future promotions and announcements.
To add an email subscription form:
- Click on the “Add Widget” button near the top of the dashboard’s left-hand toolbar. It looks like a computer monitor with a plus sign (“+”) on the screen. This’ll open the “Add Widget” menu.
- Under the “Lead Generation” section of the “Add Widget” menu, click on the “Member Login/Registration” box, drag it over to your site, and drop it onto your web page.
- The “Button Settings” menu will then appear on the right side of the dashboard.
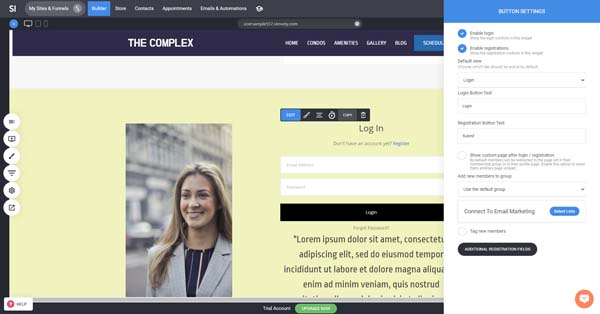
- From this menu, you can adjust the appearance and contents of your email subscription form.
Adding a Contact Form
Contact forms allow you to collect your online visitors’ personal information, such as their names, phone numbers, and email addresses. You can then use this information to communicate with them about your business’s promotions, discounts, specials, and other announcements.
To add a contact form:
- Click on the “Add Widget” button near the top of the dashboard’s left-hand toolbar. It looks like a computer monitor with a plus sign (“+”) on the screen. This’ll open the “Add Widget” menu.
- Under the “Lead Generation” section of the “Add Widget” menu, click on the “Form” box, drag it over to your site, and drop it onto your web page.
- The “Form Fields” menu will then appear on the right side of the dashboard.
- From this menu, you can adjust the appearance and contents of your new contact form.
Adding Reviews or Testimonials in Simvoly
Testimonial sections enable you to publicly showcase positive comments from your business’s customers. Because great reviews can influence potential customers, you never want to miss a chance to highlight how much your existing customers love your company.
To add a testimonial section:
- Hover your cursor over the border between the two existing blocks where you want to insert the new block.
- Click on the “+ Add Block” button that then appears to open a window, which lists the available block types.
- Choose the “Team & Testimonials” option from the list of block types.
- Click on your preferred layout from the available options. Your new testimonial block will automatically appear on your web page.
- To update the wording of the testimonials, click on the existing placeholder text to open an “Editing” toolbar above the text.
- Click on the “Edit” button in this toolbar.
- Highlight the existing placeholder text, delete it, and then type in the wording you want to use.
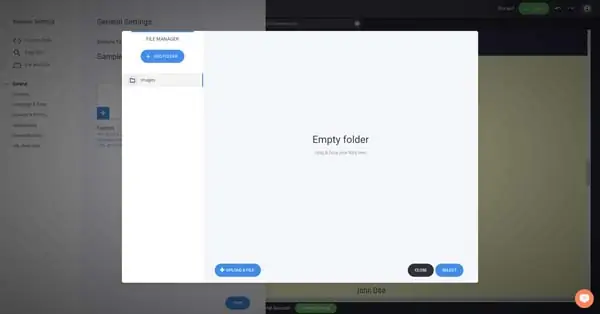
Adding a Favicon to a Simvoly Website
A favicon is an icon that appears next to your website’s URL in browser address bars and bookmark lists. Adding a custom favicon to your business’s Simvoly website will help create a distinctive, professional appearance.
To add a favicon:
- Click on the “Gear” button near the bottom of the dashboard’s left-hand toolbar. This’ll open the “Website Settings” menu.
- Click on the plus sign (“+”) icon in the lower-left corner of the photo block above the word “Favicon.”
- Drag and drop your favicon file into the window that then opens or click on the “+ Upload File” button to search your computer for your favicon file.
- When done, click on the “Select” button in the lower-right corner of this window.
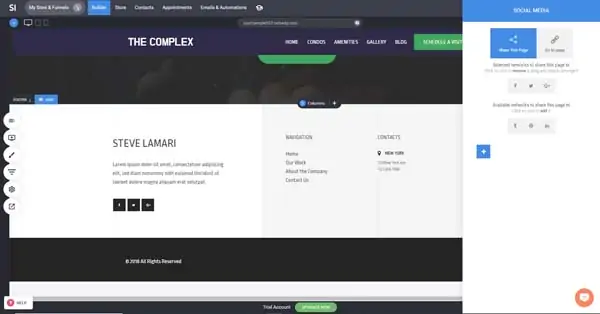
Editing the Footer in Simvoly
You’ll find the footer section at the very bottom of every page in your website. It typically includes information like a business’s copyright year, physical address, and social media icons.
To update the footer:
- Click on a text box within the existing footer that you want to edit.
- An “Editing” toolbar will then appear above that text box.
- Click on the “Edit” button in that toolbar.
- Delete the existing placeholder text and enter the wording you want to use.
- You also can change the lettering’s style, font, size, and color from the “Editing” toolbar.
- Next, click on the social media icons in the footer.
- An “Editing” toolbar will then appear above the social icon box.
- Click on the “Edit” button in that toolbar to open the “Social Media” menu on the left side of the dashboard.

- Choose the icons you want to appear in your site’s footer, drag them over to your page, and then drop them into your desired order.
- Click on the “Go to Page” option at the top of the “Social Media” menu.
- Enter the appropriate URL for each of your social media icons.
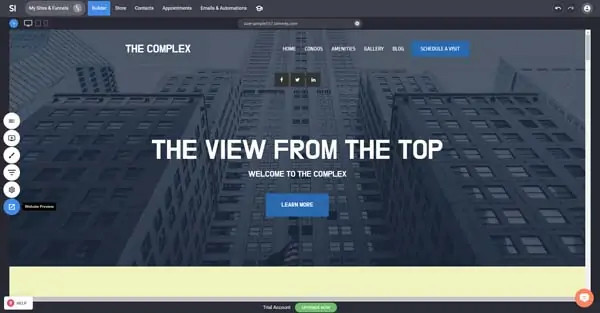
Previewing Your Site in Simvoly
Once you finish customizing your Simvoly website to your satisfaction, you should preview it so you can see precisely how it’ll appear to online visitors. This preview also will enable you to find and then fix any typos as well as buttons or links that don’t work as expected.
To preview your site:
- Click on the “Website Preview” button at the bottom of the dashboard’s left-hand toolbar.

- The preview will open in “Desktop View,” which shows you how your site will appear on a desktop computer.
- Scroll through your site and carefully review each page and section.
- Scroll back to the top of the homepage.
- Click on the “Tablet View” button located at the top of the preview pane near the center. This view shows how your website will appear on a tablet computer.
- Scroll through your website again, reviewing each page and section carefully, and then scroll back to the top of the homepage.
- Click on the “Phone View” button located at the top of the preview pane to the right of the “Tablet View” button.
- Scroll through your website yet again, reviewing each page and section carefully, and then scroll back to the top of the homepage.
- Close the preview pane by clicking on the “X” in the upper-right corner.
- Use the dashboard to make any necessary changes to your site based on what you found during the preview.
Publishing Your Simvoly Website
Your Simvoly website automatically goes live as soon as you choose your template and begin editing it, which means there’s no extra step involved in publishing Simvoly websites.
Final Thoughts
Hopefully, this guide proved helpful as you built and customized your Simvoly website. Be sure to bookmark this page so you can return to it, should you ever need to troubleshoot your business website in the future.
For additional guidance on building your Simvoly business site, be sure to read our How to Make a Simvoly Website guide.
Looking for more information on Simvoly? Check out these articles: